Table of Contents
Advertisement
Advertisement
Table of Contents

Related Manuals for Delta Amplon RT Series 5-10kVA


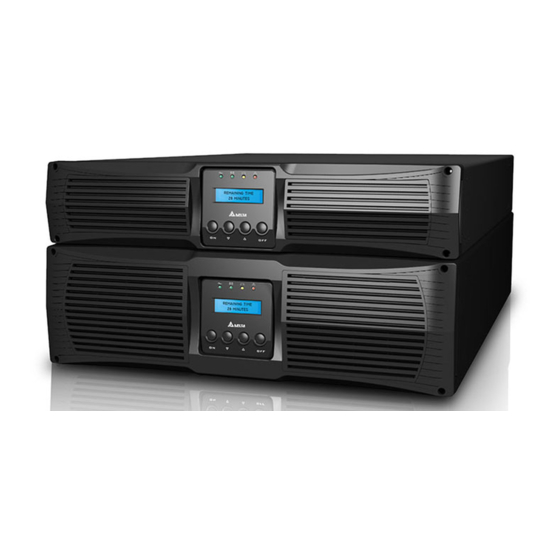
Summary of Contents for Delta Amplon RT Series 5-10kVA
- Page 2 Copyright© by Delta Electronics Inc. All rights reserved. The content in this manual belongs to Delta Electronics Inc., hereafter referred to as Delta. No part of this manual can be quoted or reproduced in any form or by any means without the prior written permission of Delta. To continuously improve and develop the product, Delta will make all possible efforts to secure the accuracy and the integrity of this manual.
-
Page 3: Table Of Contents
User Manual Table of Contents Table of Contents Chapter 1: Important Safety Instructions ------------------------------------------------- 1 Placement Warnings ----------------------------------------------------------------------------------------- 1 Connection Warnings ---------------------------------------------------------------------------------------- 1 Usage Warnings ---------------------------------------------------------------------------------------------- 1 Glossary of Symbols ----------------------------------------------------------------------------------------- 2 Standard Compliance ---------------------------------------------------------------------------------------- 2 Chapter 2: Introduction ------------------------------------------------------------------------- 3 General Overview -------------------------------------------------------------------------------------------- 3 Package Contents -------------------------------------------------------------------------------------------- 3 Features --------------------------------------------------------------------------------------------------------- 4... - Page 4 User Manual Table of Contents Chapter 6: Optional Accessories ----------------------------------------------------------23 Optional Accessory List ----------------------------------------------------------------------------------- 23 Optional Accessory Installation-------------------------------------------------------------------------- 24 Chapter 7: Maintenance ------------------------------------------------------------------------26 UPS ------------------------------------------------------------------------------------------------------------ 26 Battery --------------------------------------------------------------------------------------------------------- 26 Fan ------------------------------------------------------------------------------------------------------------- 26 Chapter 8: Troubleshooting ------------------------------------------------------------------27 Chapter 9: Specifi cations ---------------------------------------------------------------------28 Chapter 10: Warranty ---------------------------------------------------------------------------29...
-
Page 5: Chapter 1: Important Safety Instructions
User Manual Important Safety Instructions Chapter 1: Important Safety Instructions Placement Warnings Install the UPS in a well ventilated area, away from excess moisture, heat, dust, fl ammable gas or explosives. Leave adequate space (at least 15cm) around all sides of the UPS for proper ventilation. ... -
Page 6: Glossary Of Symbols
User Manual Important Safety Instructions and eyes and may be toxic. Do not dispose of the battery or batteries in a fi re. The batteries may explode. All maintenance services must be performed by qualifi ed service personnel. Forbid opening or ... -
Page 7: Chapter 2: Introduction
User Manual Introduction Chapter 2: Introduction General Overview This RT series UPS, available in 5kVA, 6kVA, and 10kVA, is a true on-line double-conversion UPS pro- viding reliable and consistent sine-wave quality power to your sensitive electronic equipment. It adopts the latest technology and the highest quality components providing output power factor up to 0.9, and its effi... -
Page 8: Features
User Manual Introduction Features True on-line design UPS protects your sensitive electronic equipment from power interruption. Wide AC input voltage range (100Vac~300Vac) reduces frequent transfer from AC mode to DC mode to save battery consumption and prolong battery life. ... -
Page 9: Storage
User Manual Introduction Normal start-up function even when the UPS is not connected to the batteries. WARNING: Please note that when the UPS is not connected to the batteries, it will not protect your equipment if the utility power is lost. Enables set up of “1+1”... -
Page 10: Front Panel
User Manual Introduction Front Panel (Figure 2-a) Front Panel Item Description On-line LED Indicates that the UPS is in on-line mode. Battery LED Indicates that the UPS is currently in battery mode and the exter- nal battery is discharging now. Fault LED Indicates that the UPS has an internal fault. -
Page 11: Rear Panel
User Manual Introduction Rear Panel (Figure 2-b) 5kVA/ 6kVA Rear Panel (Figure 2-c) 10kVA Rear Panel Item Description Input Breaker Protects the utility power from further damage when the UPS fails. Input Terminal Block Connects the UPS to the mains. Output Terminal Block Connects to the load. -
Page 12: Chapter 3: Installation
Attach the included bracket ears to the lateral mounting holes of the UPS. See Figure 3-a. Follow steps 1 to 4 to install the UPS in Delta’s rail kit (optional). See Figure 3-b. Step: Adjust the length of the rail according to the rack. - Page 13 User Manual Installation (Figure 3-c) Assemble the Tower Stands (Figure 3-d) Rotate the UPS Control Panel (Figure 3-e) Place the UPS Upright (Figure 3-f) Place the UPS inside the Tower Stands...
-
Page 14: Connection
User Manual Installation Connection UPS Connection Warnings: When connecting the UPS to the mains and the load, it is highly recommended that you in- stall the protective devices. The protective devices must use approved components that meet safety certifi cations. Please refer to the table and diagram below. UPS Power Suggested Suggested Supplier... - Page 15 User Manual Installation Cable selection: Rating Temperature 5kVA 6kVA 10kVA 60°C 13mm or #6AWG (Cu) 75°C 13mm or #6AWG (Cu) (In accordance with National Electrical Code (NEC), please install the suit- able conduit and bushing.) When connecting the input/ output power cord, please observe the following rules. 1) Turn off the UPS and cut off not only the AC source but also the battery source before connection.
-
Page 16: Chapter 4: Operation
User Manual Operation Chapter 4: Operation UPS Start-up UPS Start-up with AC Input: Press the ‘ON’ button for 3~5 seconds to start up the UPS. After the button is pressed for 3~5 seconds, the system will beep. Release the button and the UPS will start up. The UPS per- forms self-diagnosis and the LCD automatically shows the following messages in order. - Page 17 User Manual Operation UPS Start-up with Battery: Press the ‘ON’ button for 3~5 seconds to start up the UPS. When you press the ‘ON’ button, the LCD will show the message below. After the ‘ON’ button is pressed for 3~5 seconds, the system will beep. Release the button and the UPS will start up.
-
Page 18: Ups Turn-Off
User Manual Operation UPS Turn-off In online mode, press the ‘OFF’ button for 3 seconds to shut down the inverter (the system will beep) and the UPS will transfer to bypass mode. At this moment, the bypass LED illuminates (yellow) and the LCD shows ‘BYPASS MODE’. -
Page 19: Firmware Version Look-Up
User Manual Operation LCD Dispaly Messages: LCD Message Meaning ONLINE MODE Indicates the UPS is in online mode. STANDBY MODE Indicates the UPS is in standby mode ECO MODE Indicates the UPS is in ECO mode. BATTERY MODE Indicates the UPS is in battery mode. -
Page 20: Operation Modes
User Manual Operation Operation Modes Online Mode: During on-line mode, the on-line LED illuminates (green). The critical load is supplied by the inverter, which derives its power from the utility AC power, and the UPS charges the bat- teries as needed and provides power protection to the equipment. -
Page 21: Chapter 5: Communication Interface
User Manual Communication Interface Chapter 5: Communication Interface NOTE: The UPS can still function properly without making the connections below. RS232 Port RS232 port (9-pin female connector) is built into the UPS rear panel. You can use the provided RS232 cable to connect the UPS with a computer and use the included CD to install the SMART2000 software to check and monitor the UPS status via a computer. -
Page 22: Snmp Slot
User Manual Communication Interface (Figure 5-a) User-Supplied Switch NOTE: This remote control port can also be used for the ROO application, which lets you remotely turn on/ off the inverter. If you need detailed ROO information or ROO setup service, please contact your local dealer or customer service. -
Page 23: Smart Slot
User Manual Communication Interface SMART Slot This SMART slot is for mini-size cards. You can install the Mini SNMP, Mini Relay I/O, Mini USB, Mini ModBus, or Mini TVSS card in this slot to give the system network communication, dry contact, USB communication, ModBus communication, and surge protection functions respectively. - Page 24 Non-Delta external battery pack: When connecting a non-Delta external battery pack with the UPS, please install the fuse or DC breaker fi rst. Do not use an AC breaker. Please follow the actual discharge current to decide the breaker’s current capacity.
-
Page 25: Parallel Connector
User Manual Communication Interface Battery/ Battery Pack Connection Warnings: Only use the same type of batteries from the same supplier. Never use old, new and different Ah batteries at the same time. The number of batteries must meet UPS requirements. Do not connect the batteries in reverse. - Page 26 User Manual Communication Interface (Figure 5-f) Rack Style Input Power Cord Output Power Cord Parallel Cable Battery Cable External Battery Pack (Figure 5-g) Tower Style Parallel Cable Battery Cable Input Power Cord Output Power Cord External Battery Pack Tower Stand NOTE: If you need UPS parallel service, please contact your local dealer or customer service.
-
Page 27: Chapter 6: Optional Accessories
User Manual Optional Accessory Chapter 6: Optional Accessories Optional Accessory List There are several optional accessories available for this RT series UPS. Please refer to the table below for the optional accessories and their part numbers. Item Part No. Manual Bypass Box 3915100706-S35 (for single UPS) -
Page 28: Optional Accessory Installation
User Manual Optional Accessory Optional Accessory Installation This User Manual only presents installation guidelines for the Mini SNMP/ Mini Relay I/O/ Mini USB/ Mini ModBus/ Mini TVSS cards installation. For detailed installation and operation of any other optional acces- sory, please refer to the Quick Guide, User Guide, or Installation & Operation Guide included in the pack- age of the relevant optional accessory. - Page 29 User Manual Optional Accessory 4) Insert the Mini SNMP/ Mini Relay I/O/ Mini USB/ Mini ModBus card into the slot and tighten the screws. (Picture 4) 5) Insert the other end of the fl at cable into CNG3. (Picture 5) 6) Replace the top cover and tighten the screws.
-
Page 30: Chapter 7: Maintenance
User Manual Maintenance Chapter 7: Maintenance UPS Cleaning: Regularly clean the UPS, especially the slits and openings, to ensure that the air freely flows into the UPS to avoid overheating. If necessary, use an air-gun to clean the slits and openings to prevent any object from blocking or covering these areas. -
Page 31: Chapter 8: Troubleshooting
User Manual Troubleshooting Chapter 8: Troubleshooting When you see the following problems appear on the LCD, please follow the solutions shown below. Problem Possible Cause Solution +DC BUS HIGH Output has capacitive load or Decrease the load. +DC BUS LOW inductive load. -
Page 32: Chapter 9: Specifi Cations
User Manual Specifications Chapter 9: Specifications Model RT5K RT6K RT10K 1. POWER (VA/ W) 5000VA/ 4500W * 6000VA/ 5400W *1 10000VA/ 9000W *1 2. WAVE PURE SINE WAVE 3. INPUT 100~155V (50%~100% LOAD) 100~180V (50%~100% LOAD) 3.1 INPUT VOLTAGE (SINGLE) 156V~280V (100% LOAD) / 180V~ 280V(100% LOAD) / 281V~300V (90% LOAD) -
Page 33: Chapter 10: Warranty
User Manual Warranty Chapter 10: Warranty Seller warrants this product, if used in accordance with all applicable instructions, to be free from original defects in material and workmanship within the warranty period. If the product has any failure problem within the warranty period, Seller will repair or replace the product at its sole discretion according to the situation.
Need help?
Do you have a question about the Amplon RT Series 5-10kVA and is the answer not in the manual?
Questions and answers