Table of Contents
Advertisement
Quick Links
Owner's Operation and Instruction Manual
THIS MANUAL WILL HELP YOU TO OBTAIN EFFICIENT, DEPENDABLE SERVICE FROM THE HEATER, AND ENABLE YOU
TO ORDER REPAIR PARTS CORRECTLY. KEEP IN A SAFE PLACE FOR FUTURE REFERENCE.
• Please read this entire manual before installation and use of
this appliance. Failure to follow these instructions could result
in property damage, bodily injury, or even death.
• Contact your local building or fire officials about obtaining
permits, restrictions and installation inspection requirements in
your area.
• Save these instructions.
• If your heater is not properly installed, a house fire may result.
For everyone's safety, follow all Installation and Operating
Directions. Never use makeshift compromises during the
installation of this appliance. Contact your local building
or fire officials about restrictions and installation inspection
requirements in your area. These Pellet Stove Room Heaters
have been designed for use in the US and Canada and are
suitable for mobile homes.
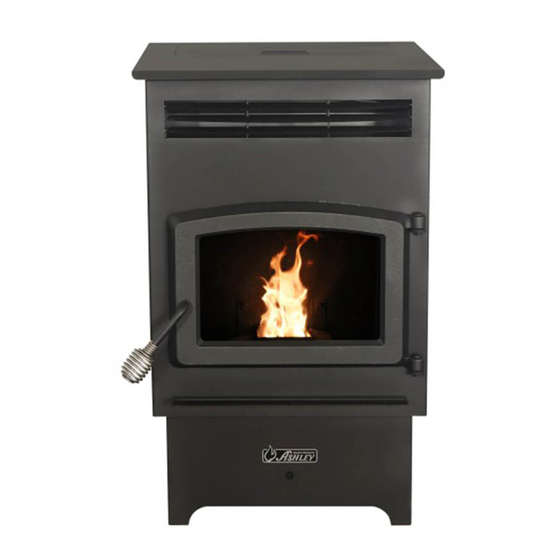
MODEL: AP60
SAVE THESE INSTRUCTIONS
Ce produit peut vous exposer à des produits chimiques, y compris le
monoxyde de carbone, qui est connu dans l'État de Californie pour causer
le cancer, des malformations congénitales et / ou d'autres problèmes de
reproduction. Pour plus d'informations, visitez www.P65warnings.ca.gov
CALIFORNIA PROPOSITION 65 WARNING:
This product can expose you to chemicals including carbon monoxide, which
is known to the State of California to cause cancer, birth defects and/or other
reproductive harm. For more information, go to www.P65warnings.ca.gov
United States Stove Company
227 Industrial Park Road
South Pittsburg, TN 37380
0215PS086S
Certified to ASTM E 1509, (R2017), and
Certified to ULC S627, 2000, and(UM) 84-HUD
This unit is not intended to be used as a
primary source of heat.
U.S. Environmental Protection Agency
Certified to comply with 2015
particulate emissions standards.
853240D-1404i
Advertisement
Table of Contents

Related Manuals for United States Stove Company Ashley AP60


Summary of Contents for United States Stove Company Ashley AP60
- Page 1 This product can expose you to chemicals including carbon monoxide, which is known to the State of California to cause cancer, birth defects and/or other reproductive harm. For more information, go to www.P65warnings.ca.gov United States Stove Company 227 Industrial Park Road South Pittsburg, TN 37380...
-
Page 2: Safety Precautions
Safety Precautions • IMPORTANT: Read this entire manual before • Allow the stove to cool before performing any installing and operating this product. Failure to do maintenance or cleaning. Ashes must be disposed so may result in property damage, bodily injury, or in a metal container with a tight fitting lid. -
Page 3: Specifications
Specifications Heating Specifications Fuel Burn Rate* (lowest setting) 1.5 lbs./hr. Burn Time (lowest setting) 32 hrs. (approximate) Hopper Capacity 60 lbs. * Pellet size may effect the actual rate of fuel feed and burn times. Fuel feed rates may vary by as much as 20%. -
Page 4: Installation Options
Installation Attention: DO NOT vent under any porch, deck, awning, or in any semi enclosed or roofed area. Doing so may result in unpredictable airflow at the vent cap under certain conditions and can affect the performance of your stove, as well as, other unforeseeable issues. INSTALLATION OPTIONS Read this entire manual before you install and use your pellet stove. - Page 5 1/2"(12.5mm) or 1"(25mm) Thick/Épais Non-Combustible Floor Protection / Un Protecteur de sol Non-Combustible FLOOR PROTECTION (if needed) Clearance To Combustible A Side Wall To Appliance B Side Wall To Flue C Back wall To Appliance D Back wall To Flue...
-
Page 6: Venting Requirements
VENTING REQUIREMENTS • Install vent at clearances specified by the vent manufacturer. • Do not connect the pellet vent to a vent serving any other appliance or stove. • Do not install a flue damper in the exhaust venting system of this unit. The following installation guidelines must be followed to ensure conformity with both the safety listing of this stove and to local building codes. - Page 7 E. Minimum 2-foot (0.61m) clearance above any grass, plants, or other combustible materials. F. Minimum 3-foot (0.91m) clearance from an forced air intake of any appliance. G. Minimum 2-foot (0.61m) clearance below eves or overhang. H. Minimum 1-foot (0.3m) clearance horizontally from combustible wall.
-
Page 8: Through The Wall Installation
THROUGH THE WALL INSTALLATION (RECOMMENDED INSTALLATION) Canadian installations must conform to CAN/CSA-B365. To vent the unit through the wall, connect the pipe adapter to the exhaust motor adapter. If the exhaust adapter is at least 18 in.(457mm) above ground level, a straight section of pellet vent pipe can be used through the wall. -
Page 9: Mobile Home Installation
OUTSIDE AIR SUPPLY (OPTIONAL, UNLESS INSTALLING IN A MOBILE HOME) Depending on your location and home construction, outside air may be necessary for optimal performance. Metal pipe (solid or flexible) must be used for the outside air installation. PVC pipe is NOT approved and should NEVER be used. -
Page 10: Appliance Controls
Appliance Controls HOW YOUR STOVE WORKS Digital Control Panel 4 Digit Display Your pellet stove utilizes a inclined auger fuel feed system that is operated by microprocessor controlled digital circuit board. Up / Down digital circuit board allows Buttons : the inclined auger fuel feed Heat Range system to run in a timer-based,... -
Page 11: Control Panel Overview
Control Panel Overview Turning the heater ON/OFF, as well as adjustments for the fuel feed rate and room fan speed are performed by pressing the appropriate button(s) on the control panel which is located on the lower left-hand side of your heater. -
Page 12: Thermostat Hook-Up
Thermostat Hook-Up The Jumper Must Be Removed First 1. Put female terminals on the lead wires to your low voltage thermostat. 2. Plug one thermostat lead onto each of the terminal posts on the circuit board. IMPORTANT NOTE: The purpose of the T’Stat is make stove cycle... -
Page 13: Operation
Operation • DO NOT USE CHEMICALS OR FLUIDS TO START THE FIRE - Never use gasoline, gasoline-type lantern fuel, kerosene, charcoal lighter fluid, or similar liquids to start or “freshen up” a fire in this stove. Keep all such liquids well away from the stove while it is in use. •... -
Page 14: Opening Door
OPENING DOOR If the door is opened while the stove is in operation it must be closed within 30 seconds or the stove will shut down. If the stove shuts down push the “On/Off” button to re-start your stove. The stove will have to fully shut down and turn off before you will be able to restart the stove. -
Page 15: Maintenance
Maintenance • Failure to clean and maintain this unit as indicated can result in poor performance and safety hazards. • Unplug your stove’s electrical cord prior to removing the back panel or opening the exhaust system for any inspection, cleaning, or maintenance work. •... -
Page 16: Ash Disposal
ASH DISPOSAL Remove ashes when the unit has cooled. Ashes should be placed in a metal container with a tight fitting lid. The closed container of ashes should be placed on a noncombustible floor or on the ground, well away from all combustible materials, pending final disposal. -
Page 17: Troubleshooting
Daily Weekly Monthly or as needed Burn Pot Stirred Empty Combustion Chamber Brushed Ashes Check Empty Interior Chambers Vacuumed Combustion Blower Blades Vacuumed / Brushed Convection Blower Impeller Vacuumed / Brushed Vent System Cleaned Gaskets Inspected Glass Wiped/Cleaned Hopper (end of season) Emptied and vacuumed Heat Exchanger Tubes Bi-Weekly... -
Page 18: Display Indicators
Error Code Error Description Possible Causes • Inadequate ventilation. Err1 The high limit temperature sensor has tripped. • Room fan failure. • Exhaust Blockage. • Electrical Open in wiring. • Hopper Empty. Err2 Stove ran out of fuel during normal operation. -
Page 19: Wiring Diagram
Wiring Diagram... -
Page 20: Repair Parts
Repair Parts... -
Page 21: Parts List
Parts List Part No. Description 28844 Hearth 28855 Left Liner 28839 Center Liner 69762 Burn Pot 28838 Right Liner 80798 IR Sensor 28603 Pedestal 610860 Right Cabinet Side 80778 Assy, Circuit Board (4-Digit) IR Compatible 28837 Left Cabinet Side 610861 Top Plate Assembly 80491 Micro-switch... - Page 22 Repair Parts Part No. Description 893011 Handle 86895 Handle Rod AC09185 Roller Ball Kit 40868 Feed Door 83575 Hinge Pin (.370 DIA X 1.00) 892194 Bottom Glass Retainer 892195 Top Glass Retainer 893013 Door Glass 88082 Door Gasket In order to maintain warranty, components must be replaced using original manufacturers parts purchased through your dealer or directly from the appliance manufacturer.
-
Page 23: Service Provider
Service Record It is recommended that your heating system is serviced regularly and that the appropriate Service Interval Record is completed. SERVICE PROVIDER Before completing the appropriate Service Record below, please ensure you have carried out the service as described in the manufacturer’s instructions. Always use the manufacturer's specified spare part when replacement is necessary. - Page 24 How To Order Repair Parts / Comment Commander Des Pièces Détachées This manual will help you obtain efficient, dependable service from your pellet stove, and enable you to order repair parts correctly. Keep this manual in a safe place for future reference. When writing, always give the full model number which is on the nameplate attached to the heater.
Need help?
Do you have a question about the Ashley AP60 and is the answer not in the manual?
Questions and answers