
Related Manuals for UTStarcom SideKick 3


Summary of Contents for UTStarcom SideKick 3
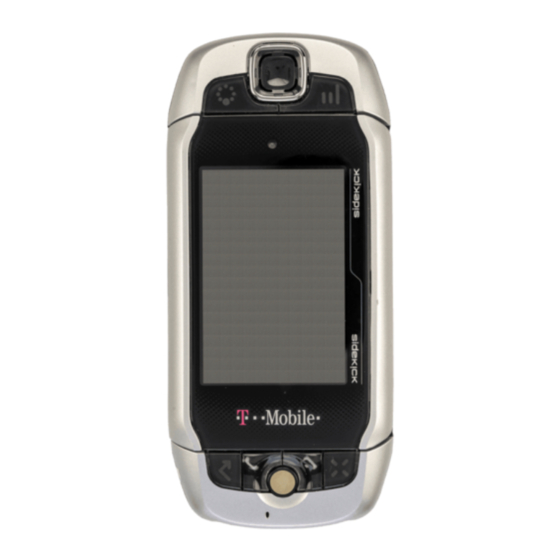
- Page 1 Sidekick ® Reference Guide 27-3003-01 Rev. F - R3.0 - May 30, 2006 Copyright © 2006 Danger, Inc. All rights reserved.
-
Page 2: Table Of Contents
Contents Welcome! 6 I. Device Basics 8 Opening and Closing the Display 8 Phone Controls 9 Control Buttons 11 Sound Controls 13 Mini Music Player 13 Volume Controls 14 Wireless On/Off Control 14 Display Controls 15 Battery Charger 15 Removable Battery 17 SIM Card Slot 18 Memory Card Slot 18 USB 1.1 Port 19... - Page 3 Key Guard Mode 26 Enter Key Guard Mode 26 Change Default Key Guard Idle Time 26 Device Privacy Code Sound Profiles 27 Application Customization 28 Default Locale (Language) Setting 28 IV. The Device Interface 29 The Jump Screen 29 Menus 30 Title Bar and Indicators 31 Type and Edit Text 33 Navigate in Text Boxes 33...
- Page 4 Set Up Your Voice Mail 40 Check Your Voice Mail 40 Change Your Phone Ringtone 41 Import Contacts from Your SIM Card 41 Text Messages Send a Text Message 42 Web Browser Browse the Web 43 Bookmark a Web Page 43 Email Send an Email Message 44 Fetch Email from External Accounts 44...
- Page 5 To Do Add a Task 54 Camera Take a Photo 54 Send Photos by Email 55 Music Player Copy Music to the Memory Card 56 Play Songs 57 Create a Playlist 58 Download Catalog Download Items from the Catalog 59 Manage Your Downloaded Items 60 Instant Messaging Sign On 61...
-
Page 6: Welcome
Welcome! Thank you for buying a Sidekick 3 device. Your Sidekick will change the way you communicate, get organized, and stay connected. Your Sidekick connects seamlessly to wireless networks, allowing you to browse the Internet, exchange instant messages*, and send and receive email with image attachments. - Page 7 Here’s what you’ll find in the box: Sidekick 3 device ® SIM card Removable battery miniSD card ™ USB cable Battery charger (wall adapter) Hands-free stereo headset Wrist strap Carrying case Sidekick Start Guide Sidekick Reference Guide If any of these items are missing, please contact your T-Mobile Customer Care department.
-
Page 8: Device Basics
Device Basics Opening and Closing the Display To open the display, press your left thumb on the lower-left corner of the display and gently push up in a clockwise direction. The display will spring smoothly into the open position. Alternatively, use your right index finger to push down gently on the upper-right corner of the display. -
Page 9: Phone Controls
Phone Controls MUTE BUTTON (while on phone) SPEAKER VOLUME BUTTONS + DIAL PAD Use the keyboard dial pad to dial a number with one hand. END CALL and SEND CALL buttons or to clear the screen of a number you’ve typed. Press you’ve typed or highlighted in a list. - Page 10 BLUETOOTH HANDS-FREE HEADSET OR CAR KIT headset or car kit, do the following: Press select Bluetooth to open the submenu. Make sure Bluetooth features are “on”. (There should be a Turn Bluetooth Off menu item.) When you are in your car, make sure your hands-free headset or car kit is ready to pair by following the manufacturer’s instructions.
-
Page 11: Control Buttons
Control Buttons MENU JUMP TRACKBALL Pressing the trackball selects a highlighted item or opens a pop- up menu. Roll the trackball up/down/left/right to reverse/advance the current selection through the “selectable” items on a screen or Web page. Rolling the trackball right/left with a folder highlighted will open/collapse the folder contents. Adjust the vertical and horizontal speed of the trackball from the Jump Menu >... - Page 12 DIRECTIONAL DIRECTIONAL PAD (D-Pad) fields, and navigate in games. The D-Pad “rocks” in four different directions and generally mirrors the behavior of the trackball. LEFT AND RIGHT on which application you’re using. For example, while using the Camera, the right shoulder button captures a photo.
-
Page 13: Sound Controls
Sound Controls Mini Music Player To open the mini music player from anywhere on the device, press Use the trackball to highlight a control, then press to perform the action: Play previous song Pause song now playing, or resume play if paused Play next song To scroll through the songs in the Play Queue, roll the trackball down and select the Play Queue pane. -
Page 14: Volume Controls
Volume Controls There are two ways you can open the volume controls: Press MENU profiles. Left is louder, right is softer. (Read more in “Sound Profiles” on page 27.) Press the pressing the buttons to step through your sound profiles: If you are playing a song or on the phone, the volume control panel includes separate volume controls for the music or phone call. -
Page 15: Display Controls
Your device is now offline. You should confirm offline status by looking next to the radio tower icon in the title bar; it should read OFF. To turn wireless back on, from the Jump screen, press Airplane Mode > Turn Wireless On. Note that after you select the Turn Wireless On/Off menu item, it takes a few seconds for the radio to actually turn on or off. - Page 16 (the small round hole located on the upper right side of your device) and plug the power cord into a standard electrical wall outlet. The orange charge indicator light will go on and a lightning bolt icon will appear over the battery icon in the title bar, indicating the charger is connected and the battery is charging.
-
Page 17: Removable Battery
Removable Battery If you need to replace your rechargeable battery, or if you need to insert or remove your SIM card, first you will need to remove the installed battery. Begin by powering down your device: Press and hold the power button three seconds to power down. Turn the device over. -
Page 18: Sim Card Slot
SIM Card Slot To insert or remove your SIM card, you must first remove the battery. Remove the battery cover and battery by following “Removable Battery”, steps 1-3, on page 17. Notice the SIM card slot, which is shaped like a SIM card and is located just to the left of center. -
Page 19: Usb 1.1 Port
To insert the memory card, hold the card with the gold contacts facing down and the card notch facing toward the device. Insert the card into the slot and push to lock into place. To remove the memory card, push the card in slightly and release; the card should spring partly out of the slot. -
Page 20: Registration
Registration Before you can start using your Sidekick, you must complete the registration steps, as explained in step 3 in the Start Guide. This section of the Reference Guide takes you through the registration process in more detail. Note that these instructions are for new users, not returning users. - Page 21 Type your first and last names. Use the keyboard to type your First name, then roll the trackball down to highlight the Last name field. Type your last name, scroll down to highlight the Next button, then press the trackball to advance to the next screen. Select a username.
- Page 22 Select a password. Select a secure password that follows the rules below: Passwords cannot be the same as your username. Passwords must contain 4-15 characters, can include both letters and numbers, but no spaces, single quotes ('), semicolons (;), backslashes (\), or percent signs (%).
- Page 23 Read and agree to the end-user agreement. Before you can finish registration, you must read and agree to the end-user agreement. You can read it by selecting the on-screen View Agreement link or from the Desktop Interface. Once you read the end-user agreement, select the Next button to indicate your acceptance and transmit your registration data.
-
Page 24: Setting Up Your Device
III. Setting Up Your Device Bluetooth Your device supports the Bluetooth wireless technology Specification 1.2 so you can connect to hands-free devices (headset and car kit) and any device that can receive a vCard via Bluetooth (PCs, phones). To turn on Bluetooth features and open the Bluetooth settings, do the following: Press JUMP select Bluetooth. -
Page 25: Backgrounds
Send My vCard - If you have set “My vCard” in the Address Book, you can send your vCard quickly to another Bluetooth device by selecting this option or by using the shortcut MENU page 51. With Bluetooth features on, you can also use a hands-free headset or car kit to place and receive phone calls from your device. -
Page 26: Key Guard Mode
Key Guard Mode You can effectively lock the controls by entering key guard mode. By default, your device is set to enter key guard mode after one minute of idle time. Enter Key Guard Mode Press to highlight Key Guard, then press the trackball. You can also enter key guard mode quickly by pressing and holding Your device control buttons lock and the key guard screen appears. -
Page 27: Device Privacy Code
Device Privacy Code If you want to secure your device from unauthorized access once your device has gone into key guard mode, you will first need to set up a privacy code: Press JUMP Settings > Key Guard & Security. Scroll down to the Privacy Lock group box. -
Page 28: Application Customization
Application Customization Set application-specific preferences using the Settings screens found within the applications. Some of application settings you can customize include: Set your favorite Web home page (Web Browser) Select individual Caller ID icons or photos (Phone/Address Book) Create your own categories and labels for identifying contact information ... -
Page 29: The Device Interface
The Device Interface The Jump Screen The Jump screen is your entry point to all device applications. Applications are arranged on the left-side of the screen in a “ring”. Some applications are grouped into a second-level folder. The Jump screen menu provides device-wide settings and controls: Go to the Jump screen from any screen by pressing screen is selected by default. -
Page 30: Menus
To select an application, scroll through the “ring” of application icons. When the application or application folder you want is highlighted, simply press the trackball once to open that application or to enter the second-level application ring. Menus Almost every screen on your device has a set of actions you can take while on that screen. -
Page 31: Title Bar And Indicators
Title Bar and Indicators The device display indicators appear at the top of your screen at all times. The Device Interface... - Page 32 Phone call indicators A timer appears when you have a call in progress; in the example, call time elapsed is 3 mins, 40 secs. Note that the phone icon blinks. If you have two calls active, the time displayed is for the foreground call. Call forwarding is turned on.
-
Page 33: Type And Edit Text
Type and Edit Text It’s easy to type and edit text in any text box using the keyboard and the advanced text editing features described below. Navigate in Text Boxes Use the control buttons and keyboard to navigate within a text box: To move character-by-character, press the D-pad or roll the trackball left/right. -
Page 34: Cut, Copy, Paste, Undo
Cut, Copy, Paste, Undo To cut, copy, or paste text you have typed, follow these instructions: Position your text cursor next to the text you want to cut or copy. (Use the D-pad or trackball to position the text cursor.) Hold down the Shift key while pressing the D-pad or trackball in a direction. -
Page 35: Type Special Unicode Characters
Type Special Unicode Characters To type special Unicode characters in any text box, press the Character selector opens, displaying special characters alphabetically. Use the D-pad or trackball to navigate through the list: left-right to flip through the Favorites, Recent, alphabet, and symbol sets; up-down to select specific characters. Press the trackball to insert a highlighted character. -
Page 36: The Desktop Interface
The Desktop Interface The data you store in your device’s Email, To Do, Calendar, Address Book, Notes, and Camera applications are also available for viewing or editing on the Web from any computer connected to the Internet. Information in your account is stored on servers in a data center with enhanced security and firewall features. - Page 37 Desktop Interface Jump Page Remember! When you’ve finished using the Web applications, always click the Sign Out link to exit the Web site securely. The Desktop Interface...
-
Page 38: Using The Applications
Using the Applications Phone Make a Phone Call Type the number you want to call by using any of these dialing methods: To dial using your list of speed dials and recently-dialed numbers: From the Jump or Phone screen, press the call by pressing To dial with numbers: From the Jump screen or Phone screen, open the ... -
Page 39: Use Bluetooth Hands-Free Headset Or Car Kit
To end your call, select the on-screen button Use Bluetooth Hands-Free Headset or Car Kit You can use a Bluetooth device to make or receive phone calls. To pair and set your hands-free headset car kit for use with the phone, read “Bluetooth Hands-Free Headset or Car Kit”... -
Page 40: Add A Number To Your Speed Dial List
Add a Number to Your Speed Dial List Press JUMP Phone application. Press MENU Speed Dial Entry dialog box. You can create 8 speed dial shortcuts. Select a Shortcut Key from the pop-up menu. Only the numbers available will appear in the pop-up menu. Type the speed dial Name and Number, then select To dial using the shortcut, from either the Phone application or the Jump screen, simply press and hold the number on the keyboard. -
Page 41: Change Your Phone Ringtone
Change Your Phone Ringtone Press to go to the Jump screen, then press the trackball to open the JUMP Phone application. Press MENU Highlight the Incoming phone call ring pop-up menu, then press the trackball. The menu reveals the ringtone categories. First highlight a category, then press the trackball to open the ringtones submenu. -
Page 42: Text Messages
Text Messages Send a Text Message Press JUMP press the trackball to open the application. Press MENU the trackball to open the Compose screen Address your message using the recipient’s phone number, or start typing their name to bring up Address Book matches. Add more recipients by typing a comma (,) or semicolon (;) in the To field. -
Page 43: Web Browser
Web Browser Browse the Web Press to go to the Jump screen. Scroll to highlight Web Browser, then JUMP press the trackball to open the application. Start typing the address of the Web page you wish to visit. The Go To dialog box opens automatically, showing the address you are typing. -
Page 44: Email
Email Send an Email Message Press JUMP trackball to open the application. Press MENU the trackball to go to the Compose screen. The text cursor is in the To field; type the name or email address of the person to whom you wish to send an email. If you type a name, the Address Book will try to pull the correct email address from your contact data. - Page 45 The instructions below explain how to use your device to fetch email from external accounts. Note that you can also set up accounts from the Email application on the Desktop Interface. Press to go to the Jump screen. Scroll to highlight Email, then press the JUMP trackball to open the application.
- Page 46 Mail Server field - If the mail server name is not provided automatically after you have selected the account protocol, then you must provide the name of the mail server in this field. Many people don’t know the name of their mail server. If you don’t, your email provider will be able to tell you, or you can refer to the following table for samples.
- Page 47 In the General group box, the Collect email from this account check box is selected by default. If at any time you want to stop fetching messages from this account, simply clear this check box. If you want to Remove retrieved email from server after it is fetched to your device, select this check box.
-
Page 48: Fetch Email Using Your Device's Web Browser
Fetch Email Using Your Device’s Web Browser If there is a Web interface to your email account, you can use your device’s Web Browser application to sign in to those accounts and check your email. A couple popular email Web sites are listed below: Yahoo! ®... -
Page 49: Address Book
Address Book Add a Contact to the Address Book You can store up to 2000 contacts in your Address Book. Press to go to the Jump screen. Scroll to highlight Address Book, then JUMP press the trackball to open the application. Press to open the menu. -
Page 50: Import Address Book Contacts
When finished with the Identity screen, select next New Contact screen, in which you can type or select additional contact information. Scroll through the New Contact fields (Personal Info, Phone, Email, and so on), selecting Add or Edit to open screens in which you can add contact information. -
Page 51: Set And Send "My Vcard
Microsoft Outlook for PC (.txt file) Microsoft Outlook Express for Mac (.txt file) Microsoft Entourage for Mac (.txt file) Palm Desktop for PC (.txt/.tab file) Palm Desktop for Mac (.txt/.tab file) After you click the Import button, your contacts are imported to your Web Address Book then sent to your device via the network. -
Page 52: Send Any Contact's Vcard
Send any Contact’s vCard Press JUMP press the trackball to open the application. Scroll to highlight the contact whose vCard you want to send, then press MENU For Email and Text, a compose screen opens. For Bluetooth, a dialog opens that allows you to select the receiving device. -
Page 53: Notes
Notes Create a Note You can create and store up to 50 notes. Each note can be up to 8000 characters, which is about four pages in a paperback. Press to go to the Jump screen. Scroll to highlight Organizer, then JUMP press the trackball to open the second-level ring of applications. -
Page 54: To Do
To Do Add a Task You can create and store up to 50 To Do tasks. Press JUMP press the trackball to open the second-level ring of applications. Highlight To Do, then press the trackball. Press MENU Press the trackball to open a blank task screen. Fill in your task information. -
Page 55: Send Photos By Email
To set the flash, exposure, and sharpness of the image you capture, open pop-up menu. From this menu you can also set the exposure and sharpness. When finished, press By default, the photo will be saved to the Memory Card Album. To save to your device, press MENU Album, or another album you created on the memory card. -
Page 56: Music Player
Music Player Use the Music Player application to play MP3 sound files that you have stored on your miniSD card. You can use a memory card of any capacity. Remember that you might be sharing the card’s capacity with Camera photos. The Music Player will only play MP3 files;... -
Page 57: Play Songs
Play Songs Listen to your songs using either the device speaker or the stereo headphones included in the box. To play a song, start at the Browse Music screen: Press to go to the Jump screen. Scroll to highlight Music Player, then JUMP press the trackball to open the application. -
Page 58: Create A Playlist
Songs playing in a list will not repeat, but you can change this setting by pressing No Repeat, Repeat 1, or Loop. To control song play, press open. Read more in “Mini Music Player” on page 13. Create a Playlist You can create as many playlists as you wish and edit them at any time. -
Page 59: Download Catalog
Download Catalog Download Items from the Catalog Download ringtones, applications, games, and more from the Catalog! You’ll find that browsing the Catalog and purchasing items is easy and fun: Press to go to the Jump screen. Scroll to highlight Download Catalog, JUMP then press the trackball to open the application. -
Page 60: Manage Your Downloaded Items
Once purchased, your item will be downloaded to your device, network con- nectivity permitting. You’ll be notified once the download is complete. Note that applications require “installation”, an automatic process that does involve a restart of your device. If your item is not delivered immediately, you can check the download process from the Downloads screen, described below. -
Page 61: Instant Messaging
Instant Messaging Sign On Press to go to the Jump screen. Scroll to highlight Instant Messaging, JUMP then press the trackball to open the second-level ring of applications. Highlight your instant messaging application, then press the trackball. The Sign On screen appears. -
Page 62: Switch Between Im Conversations
Switch Between IM Conversations You can have up to 10 IM conversations open at the same time. If you do have more than one IM conversation open, you can switch between conversations quickly by doing one of the following: Menu - Press ... -
Page 63: Keyboard Shortcuts
Keyboard Shortcuts VII. Call a speed dial number Redial last number Answer an incoming call Ignore an incoming call (call will forward) Hang up active call Mute your device when ringing Create a new note, message, event, task, to do, or contact Insert special Unicode character Discard item Send a composed email, text,... -
Page 64: Troubleshooting
Troubleshooting VIII. How do I know when my account has been activated? Once your account has been activated by T-Mobile, you will see a “Welcome” message on your screen. If the Welcome message doesn’t appear on your device within 48 hours after registering, contact T-Mobile’s Customer Care department. In order to comply with airline regulations, how can I temporarily disable wireless connectivity when traveling? Remember to power off your device during aircraft takeoffs and landings. - Page 65 I needed to remove my battery, so I did. After I put the battery back in my device, it powered up, but all my messages and other data were gone. Is it all gone for good? No, all your data is regularly saved to the Danger service so it is safe. If you wait a few minutes, all your data will be restored to your device.
- Page 66 My device has not connected to the service for quite a while. Is there anything I can do myself before calling Customer Care? Yes, try powering your device off and on. After your device boots, you’ll know you’ve connected to the service when you see the What Web browsers do you support on the Desktop Interface? Web browsers IE 5+ are supported on both the Windows and Macintosh operating systems.
- Page 67 Once you have all this information, set up your external account by following the instructions in “Fetch Email from External Accounts” on page 44 of this guide. Once set up, your remote email account will be checked periodically and a copy of all new, unread messages will be placed in the Email mailbox on your device.
-
Page 68: Handling And Safety Precautions
Handling and Safety Precautions The Sidekick is a mobile computing device that may break if dropped, subjected to severe shock, or exposed to water. Please handle the device carefully and read the precautions listed below. These precautions provide essential information for the safe handling of the product and for the protection of the users and others from possible harm. -
Page 69: Device Handling And Use
Device Handling and Use • Never attempt to disassemble, repair, or modify your device. Such action may result in bodily injury, or damage to the unit or other property. • Never touch liquid that might leak from a broken liquid crystal display (LCD), because do- ing so may cause a skin rash. -
Page 70: Battery Charger Handling
Battery Charger Handling • The device is intended for use when supplied with power from the battery charger included in the box with your device. Other usage will invalidate any approval given to this device and may be dangerous. • Charge the device within the temperature range of 0 to 40 degrees Celsius, or 32 to 104 degrees Fahrenheit, for the fastest charging time. -
Page 71: Regulatory And Compliance Information
Regulatory and Compliance Information Regulatory Compliance Information for North America FCC Declaration of Conformity Model PV200, manufactured by Sharp Corporation, complies with part 15 of the FCC Rules. Operation is subject to the following two conditions: (1) This device may not cause harmful interference, and (2) this device must accept any interference received, including interference that may cause undesired operation. -
Page 72: Fcc Notice
FCC Notice This equipment has been tested and found to comply with the limits for a Class B digital device, pursuant to Part 15 of the FCC Rules. These limits are designed to provide reasonable protection against harmful interference in a residential installation. This equipment generates, uses and can radiate radio frequency energy and, if not installed and used in accordance with the instructions, may cause harmful interference to radio communications. -
Page 73: Eu Declaration Of Conformity
The exposure standard for wireless mobile phones employs a unit of measurement known as the Specific Absorption Rate, or SAR. In the United States and Canada, the SAR limit for mobile devices used by the public is 1.6 watts/kg (W/kg) averaged over one gram of tissue. The FCC has granted an Equipment Authorization for this wireless device with all reported SAR levels evaluated as in compliance with the FCC RF emission guidelines. -
Page 74: Recycling Information
Recycling Information The RBRC™ Battery Recycling Seal on the Lithium-ion (Li-ion) battery/battery pack indicates UTStarcom is voluntarily participating in an industry program to collect and recycle these battery/battery packs at the end of their useful life, when taken out of service in the United States or Canada. The RBRC™ program provides a convenient alternative to placing Li-ion batteries into the trash or municipal waste stream, which is illegal in some area. -
Page 75: Xi. Legal Information
XI. Legal Information ® Danger Service and End-User License Agreement IMPORTANT: PLEASE CAREFULLY READ THIS SERVICE AND END-USER LICENSE AGREEMENT (THE “AGREEMENT”) BETWEEN YOU AND DANGER, INC. (“DANGER”) BEFORE YOU USE YOUR WIRELESS DEVICE (THE “DEVICE”). YOUR USE OF THE DEVICE OR THE SERVICE FOR THE DEVICE SHALL CONSTITUTE YOUR BINDING ACCEPTANCE OF ALL OF THE TERMS AND CONDITIONS OF THIS AGREEMENT. - Page 76 Ownership. proprietary rights, including all patent, copyright, trade secret, trademark and other intellectual property rights worldwide, in and to the Service and the Software (including any corrections, bug fixes, enhancements, updates or other modifications thereto). There are no implied licenses under this Agreement, and all rights not expressly granted are hereby reserved.
- Page 77 terms of use that apply to third party Web sites you visit or to third party content and services you access. In no event will Danger be liable to you in connection with any Web sites, content, products, services, materials, or practices of a third party.
- Page 78 NO WARRANTIES. ITS SUPPLIERS AND SERVICE PROVIDERS HEREBY DISCLAIM ALL REPRESENTATIONS OR WARRANTIES OF ANY KIND, WHETHER EXPRESS, IMPLIED, OR STATUTORY, RELATING TO THE SERVICE OR THE SOFTWARE (INCLUDING ANY INFORMATION, CONTENT, MATERIALS OR PRODUCTS THAT YOU MAY ACCESS THROUGH THE SERVICE), INCLUDING WITHOUT LIMITATION ANY IMPLIED WARRANTY OF MERCHANTABILITY, FITNESS FOR A PARTICULAR PURPOSE, QUIET ENJOYMENT, NON-INFRINGEMENT OF THIRD PARTY RIGHTS, ACCU- RACY OF INFORMATIONAL CONTENT, AND ANY WARRANTIES ARISING FROM A COURSE OF DEALING OR US-...
- Page 79 Applicable Law and Jurisdiction. Software will be governed by the laws of the State of California, without giving effect to any principles of conflicts of laws that would require the application of the laws of a different state. You also consent to the exclusive jurisdic- tion and venue of the Superior Court of Santa Clara County for state claims and the Northern District of California for federal claims in all disputes arising out of or relating to the Software or the Service.
- Page 80 Danger ® Service Privacy Notice Danger, Inc. (“Danger”) operates a service on behalf of your wireless carrier that enables certain features on your wireless device, including email, Internet access, instant messaging, address book, and calendar functions (the “Danger Service”). The Danger Service also includes a Web site operated by Danger (the “Danger Service Web Site”) that subscribers may use to access these features, as described more fully in the Reference Guide accompanying your wireless device.
- Page 81 Personal Information may also be collected at other times by specifically requesting it from you, such as when you order premium services, when you request other promotional material, when we ask you to complete customer surveys, and in other circumstances when you interact with the Danger Service or our employees, agents and contractors working to provide the Danger Service to you.
- Page 82 Private Data and Online Communications Danger honors the confidentiality of your private communications and other private data, whether it is through instant messaging conversations, email messages, or other data stored at your request, such as addresses and calendar infor- mation. Danger will not read or disclose to third parties private communications that are transmitted using the Danger Service or private data stored at your request, except as required to operate the service or as otherwise provided in the “Special Circumstances”...
- Page 83 HOW CAN YOU UPDATE OR CORRECT YOUR INFORMATION? Danger believes in and supports your right to access and edit the Personal Information you have provided us. You may make such changes at the Danger Service Web Site. DOES DANGER COLLECT INFORMATION FROM CHILDREN UNDER 13? Danger currently does not knowingly collect or use Personal Information from children under 13, and Danger will not do so in the future without first obtaining verifiable consent from their parents.
- Page 84 HOW CAN I FIND OUT ABOUT CHANGES TO THIS PRIVACY NOTICE? Danger may make changes to this Notice from time to time. We will post changes to our Privacy Notice to www.danger.com/legal/site_privacy.php, so be sure to check periodically. We may also notify you of significant changes by email or in other ways.
- Page 85 When sending your wireless device to UTStarcom Personal Communications for repair or service, please note that any personal data or software stored on the device may be inadvertently erased or altered. Therefore, we strongly recom- mend you make a back up copy of all data and software contained on your device before submitting it for repair or service.
-
Page 86: Additional Information
$35/line activation fee and minimum one-year service agreement, with $200/line early termination fee. Ability to use some or all phone features depends on connection to our network. Sidekick 3 images simulated. You will be charged for all data sent by or to you through the network, whether or not received, and for all music, ringtones, wallpapers, and games (and certain other content) purchased and/or downloaded to your phone (all prices subject to change). - Page 87 Copyright (c) 1985, 1986, 1988, 1992, 1993, 1999 The Regents of the University of California. Redistribution and use in source and binary forms, with or without modification, are permitted provided that the follow- ing conditions are met: 1. Redistributions of source code must retain the above copyright notice, this list of conditions and the following disclaimer.
Need help?
Do you have a question about the SideKick 3 and is the answer not in the manual?
Questions and answers