Table of Contents
Advertisement
Quick Links
Advertisement
Table of Contents
Troubleshooting

Related Manuals for Gozney Dome S1


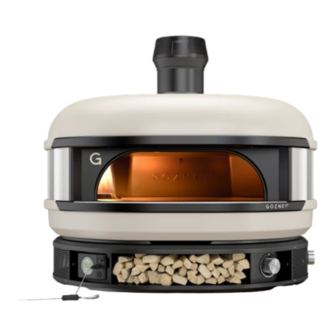
Summary of Contents for Gozney Dome S1
- Page 1 Technical Manual...
- Page 3 Live-Fire cooking made easy.
- Page 4 Introduction WARNING: If the information in these instructions is not followed exactly, a fire or explosion may result causing property damage, personal injury or death. - Do not store or use gasoline or other flammable vapors and liquids in the vicinity of this or any other appliance. An L.P. cylinder not connected for use must not be stored in the vicinity of this or any other appliance.
- Page 5 This instruction manual contains important information necessary for the proper assembly and safe use of the appliance. Read and follow all warnings and instructions before assembling and using the appliance. Follow all warnings and instructions when using the appliance. Keep this manual for future reference.
-
Page 6: Table Of Contents
SET UP DIGITAL TEMPERATURE DISPLAY TROUBLESHOOTING E1 ERROR CODE E3 ERROR CODE OPTIONAL ACCESSORIES ROPE SEALED DOOR FLUE EXTENSION DOME S1 MANTLE NEAPOLITAN ARCH DOME STAND 3 FIRING UP GAS CONNECTING TO GAS GAS SAFETY INDOOR USE SAFETY CONSIDERATIONS INSTALLING THE... - Page 7 TROUBLESHOOTING GAS BURNER DISCONNECTING GAS CLOCKWISE REGULATOR 4 GENERAL MAINTENANCE MAINTENANCE CLEANING THE VENTURI CLEANING THE OVEN INTERNAL EXTERNAL REPLACING THE PROBE...
-
Page 8: General Advice
GENERAL ADVICE Dome S1 gets extremely hot and should Do not over fill Dome S1 or cover the not be used by children. Do not allow burner. children near the device during or after operation. Dome S1 can stay hot for a Do not move Dome S1 whilst in operation. - Page 9 Gozney. Ensure the oven is placed on a flat surface. Do not block perforations provide for ventilation and heat dissipation. For replacement parts go to Gozney. com.
-
Page 10: Product Overview
Product Overview - What's in the Box Oven Dock Wrench & Screwdriver Gas Control Dial Gas Hose & Regulator Flue Top Flue Cap Flue Pipe... - Page 11 Flue Outlet Ø127mm Gas Inlet Stone Adjustment Tool Burner Guard Thermometer...
-
Page 12: Gas Specification
GAS SPECIFICATION Gozney Limited, Units 18 & 19, Radar Way, Christchurch, Dorset, BH23 4FL UK. Appliance Name: Gozney Dome S1 Model/Type No.: 4555-S1-02 Trade name: Gozney Dome S1 LPG Configuration Total nominal heat output for the gas burner 28000 BTU/HR Injector Size 1.52mm... - Page 14 This section details the correct operation and install of a Gozney Dome S1.
-
Page 16: Safety Considerations
Do not use the oven in enclosed areas. WARNING: Contact your local municipality The Dome S1 unit and the burner must always be well ventilated. for any building codes applicable to the use, installation and operation of outdoor Do not use plastic or glass utensils inside barbecue appliances. -
Page 17: Fire
When spraying water on the If the exposure has been severe it may Dome S1 itself, do not use a strong jet cause death. of water, as this may cause splashing of burning grease, resulting in a further Please follow local regulations and install spreading of the fire. - Page 18 This section details the set up of the oven and the accessories included with your Dome S1.
-
Page 20: Adjusting The Stones
Adjusting The Stones Before using Dome S1 it is important that the four blue stone retention wedges and other packaging inside of the oven are removed. The removable stone design of the Dome S1 means that they are not fixed inside the oven and as such can shift backwards during transport. -
Page 21: Moving The Oven
Please remove them once the oven is located to its final location and use hand holds below. Do not move Dome S1 whilst in operation or when it is still hot. Never attempt to move the oven on your own. -
Page 22: Oven Placement
2” (50mm) 24.7" around the base of the dock for air intake. It is important nothing is blocking the meshed panels as this will affect the performance of Dome S1. 24.9" 18.2" 7.9" WARNING When placing your oven it is important... - Page 23 We recommend the height of the floor to be around the level of the bottom of the users elbow (usually around 3ft 11” from the ground) Ensure the surface the oven is being placed on is completely level, stable and capable of easily holding the weight of the oven - 130lb.
-
Page 24: Flue Assembly
The flue is designed to have a rain guard which has a 1/4 inch gap from the Dome S1. FLUE ASSEMBLY The rain cap prevents moisture from getting into the oven and should only be used when the oven is cooled and not in use. -
Page 25: Digital Temperature Display
Digital Temperature Display... -
Page 26: Set Up
SET UP After installing the batteries hold the power button down until the display turns on. Find the sensors jack by removing the plastic cap and plug it into the rear of the display, the screen will then show SECONDS the temperature from within the oven. -
Page 27: Digital Temperature Display Troubleshooting
Digital Temperature Display Troubleshooting OVEN T OVEN T °F °F PROBE T ll PROBE T ll E1 ERROR CODE E3 ERROR CODE If the thermometer is displaying an If the thermometer is displaying an error code E1. This is caused by either: error code E3. -
Page 28: Optional Accessories
With its adjustable vents you’ll be able to control the temperature in the oven. For more details visit the Gozney website. www.gozney.com. WARNING Never use the door when the gas burner is lit. -
Page 29: Dome S1 Mantle
DOME S1 MANTLE Whether you’re cooking Neapolitan pizza, roasting vegetables or smoking meat, the Dome S1 Mantle makes moving food in or out of the oven simple. Easily bolting onto the oven, the Mantle is made from ceramic coated, food grade aluminum alloy for extra heat and scratch resistance. -
Page 30: Dome Stand
Making it easy to add your Dome to any backyard setup. The Dome S1 is a perfect fit for a standard outdoor kitchen countertop. For a more flexible free-standing setup, the Dome Stand is for you. - Page 31 F010 F009 F008 F007 F006 F005 F004 F003 F002 F001...
-
Page 32: Firing Up Gas
Your guide to burning gas. -
Page 34: Connecting To Gas
Check that the gas you are using is spec- ified on the data plate page. Shut off the gas from the cylinder, turn off the switch on Dome S1 and The gas cylinder used must have a safety extinguish any open flames. -
Page 35: Gas Safety
Damage caused by fat and each use. If there is excessive abrasion grease fires is not covered by warranty. or wear it just be replaced with a Gozney If a grease or fat fire should occur, approved hose assembly before use. - Page 36 The deck/stone cooking surface of the Do not connect multiple gas canisters oven is intended for cooking pizza and to Dome S1 or store a spare within the bread products only. same vicinity. The installation of your oven must...
-
Page 37: Indoor Use
Contact your and local codes. local professional ventilation company for more details. These appliances are to be installed Contact Gozney for more information on with sufficient ventilation to prevent ventilation and installation the occurrence of unacceptable concentrations of substances harmful to health in the room in which they are installed. -
Page 38: Safety Considerations
Please use caution. WARNING: Contact your local municipality Do not use the oven in enclosed areas. The Dome S1 unit and the burner must for any building codes applicable to the always be well ventilated. use, installation and operation of outdoor barbecue appliances. -
Page 39: Installing The Igniter Battery
INSTALLING THE IGNITOR BATTERY Before using the gas burner for the first time you’ll need to install an AAA battery into the ignition module. To do this open the front hatch, the module will be inside and to the left. The module is held in place by a magnet, detach the module and pull it to the front hatch before unnscrewing the cap and placing the... -
Page 41: Connecting The Gas Hose
CONNECTING THE GAS HOSE To attach the gas hose to your Dome S1 take the end of the hose and begin screw it onto the gas connector at the back of the oven. Use the spanner found in the front hatch to tighten. This connection must be tested for leaks before using the oven. -
Page 42: Clockwise Regulator
CLOCKWISE REGULATOR Ensure the gas bottle is turned off. Align the regulator and the gas bottle threads and carefully begin to tighten ensuring the threads aren’t crossed. Continue to tighten until a tight fit has been made. This connection must be tested for leaks before using the oven. -
Page 43: Testing For Leaks
Testing For Leaks If there is a leak at the hose to oven WARNING connection, re-tighten the fitting with a spanner and check for leaks by apply- You should always check for gas leaks ing a soap-and-water solution to the every time you disconnect and recon- highlighted areas with a brush. -
Page 44: Ignition
Ignition Remove the door and the stone retention wedges before lighting the oven. Do not use the door with gas burner. To light the gas burner press the control knob in and turn the knob 90˚ until you hear a clicking sound and the burner ignites. The flame should be yellow in colour and roll along the top of the oven. -
Page 45: First Firing
First Firing On your first firing we highly recommend to put the burner on a medium to low flame for 30 minutes to help cure the oven before moving to a high flame. Minutes Approx On subsequent firings after curing, you can bring the oven up to the desired temperature from ignition. -
Page 46: Troubleshooting Gas Burner
5 minutes and retry ignititing it. If the problem persists still review the cleaning and maintenance instructions to remove debris in the burner. If the problem persists after trying the following solutions please contact Gozney for further support. -
Page 47: Disconnecting Gas
After cooking, be sure to turn off the gas from the gas canister first before turning of Dome S1. This will allow any gas left in the burner or pipe to be used up safely. Three minutes after turning the gas off... -
Page 48: General Maintenance
Your guide to general maintenance. -
Page 50: Maintenance
Maintenance CLEANING THE VENTURI If your burner’s flame is overly yellow or making more noise than usual you may have debris blocking the venturi. When the oven is turned off, disconnected from the gas and cool, remove the rear right hand side panel using the torx screwdriver located in the front hatch of the dock. -
Page 51: Cleaning The Oven
Cleaning The Oven INTERNAL The best way to clean the inside of Dome S1 is to burn off any food debris or soot that is left behind. When the oven is over 650˚F it will start self cleaning and any burnt on food will burn off after a period of three hours. -
Page 52: External
EXTERNAL For the exterior of the oven use a non caustic bleach free cleaning spray on the dirty areas. Clean the area with warm soapy water and a sponge or non abrasive dish cloth and then wipe clean with paper towels. Avoid spraying directly onto the thermometer or control dial. -
Page 53: Replacing The Probe
Replacing The Probe OVEN T °F PROBE T ll Only when the oven is cold, remove the thermometer and unplug the cable. Unscrew the probe from inside the oven and pull the old probe out the mouth of the oven. - Page 54 Plug the new cable into the back of the thermometer and return it to its position within the Dome S1 Dock. Double check the probe is functioning by checking the digital temperature display and return the panel to the back...
Need help?
Do you have a question about the Dome S1 and is the answer not in the manual?
Questions and answers