
Related Manuals for HBM MP70DP


Summary of Contents for HBM MP70DP
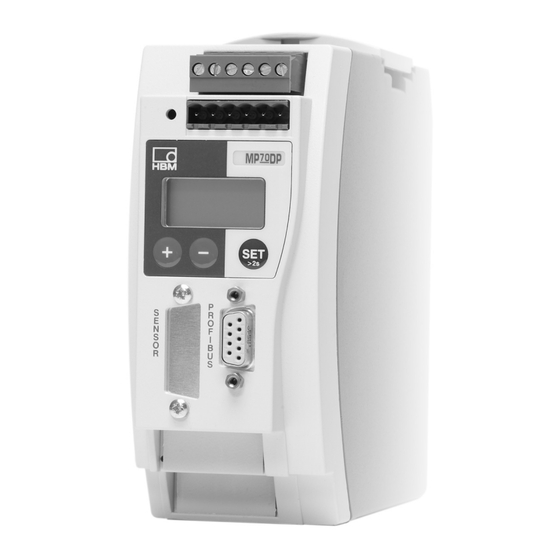
- Page 1 Operating manual Profibus interface for the PME MP70DP MP70DPS7, MP70S7 A0658-7.2 en...
-
Page 3: Table Of Contents
......1.2 General information on MP70DP and variants .... - Page 4 PME-MP70DP 9.6 Manufacturer−specific objects in FLOAT data format ..9.7 Examples ..........
-
Page 5: Safety Instructions
The supply connection, as well as the signal and sense leads, must be installed in such a way that electromagnetic interference does not adversely affect device functionality (HBM recommendation: ”Greenline shielding design”, downloadable from the Internet at http://www.hbm.com/Greenline). Automation equipment and devices must be covered over in such a way that adequate protection or locking against unintentional actuation is provided (such as access checks, password protection, etc.). - Page 6 General dangers due to non-observance of the safety instructions The MP70DP module complies with the state of the art and is safe to operate. If the equipment is used and operated inappropriately by untrained personnel, residual dangers may arise.
- Page 7 Prevailing regulations must be complied with at all times. Residual dangers connected with measurement technology need to be pointed out. Any risk of residual dangers when working with the MP70DP is pointed out in this introduction by means of the following symbols: WARNING...
- Page 8 Greenline shielding only (conncect the shield of the transducer cable to the plug housing). The cables of the digital inputs and outputs of the MP70/MP70DP should not be longer than 30 m or should they be routed outside the building where the system is located.
- Page 9 Conversions and modifications HBM’s express consent is required for modifications affecting the transdu- cers’s design and safety. HBM does not take responsibility for damage resul- ting from unauthorized modifications. The product is delivered from the factory with a fixed hardware and software configuration.
-
Page 10: Introduction
Order No.: 3.3312−0250 D 10−pin ribbon cable connector D Additional spring for assembly of housing (enclosed in bag) D 1 Operating Manual module MP70DP / MP70DPS7 / MP70S7 Accessories: D Standard ribbon cable, 10pin, 1.27 mm pitch 1.2 General information on MP70DP and variants... - Page 11 Profibus functions are not available here. No function Settings and parameters are assigned to the MP70DP module via the keyboard and the display, or by using the PME Assistent. The PME Assistent program provides a simple operator interface running under Windows for assigning parameters to the modules (described in the ”PME Assistent”...
-
Page 12: Select Amplifier Settings With Dip Switches
PME-MP70DP Select amplifier settings with DIP switches NOTE The DIP switches must be set/adjusted before mounting the PME. Various settings are defined by the DIP switches and can be read out on the display (see Chapter 7.2). These are the settings for... - Page 13 PME-MP70DP Factory settings: Analogue output 1 2 3 For module MP70S7 1 2 3 4 5 6 3 4 5 6 3 4 5 6 Synchronisation Analogue Amplifier type output WARNING Switch positions must not be changed! only for MP70DPS7 and MP70S7...
- Page 14 PME-MP70DP Synchronisation Analogue output "10V Master 1 2 3 4 5 6 1 2 3 1 2 3 4 5 6 1 2 3 4 5 6 Slave 1 2 3 4 5 6 1 2 3 1 2 3 4 5 6 only for MP70DPS7 and MP70S7 Fig.
-
Page 15: Mounting/Dismounting The Mp70Dp
PME-MP70DP Mounting/dismounting the MP70DP Fig. 3.1: Mounting on a support rail Fig. 3.2: Disassembly CAUTION The support rail must be connected to protective earth potential A0658−7.2 en... -
Page 16: Linking Several Modules
Fig. 3.4: Connecting the ribbon cable Several measurement modules (MP01, MP30, MP55, MP60) can be linked to the MP70DP via a ribbon cable. This cable provides the local connection of supply voltage and synchronisation between the modules. No more than eight modules should be interlinked via a ribbon cable. -
Page 17: Connections
Please note the safety instructions before putting into service the device. NOTE Use standard HBM cable for the transducer connection. When using other shielded, low-capacitance measuring cable, connect the transducer cable shielding to the connector housing in accordance with the HBM Greenline concept (Internet download http://www.hbm.com/Greenline). -
Page 18: Supply Voltage And Control Inputs/Outputs
OUT1 − OUT4 = digital output Further details of the inputs and outputs can be found in Chapter 8, page 35. If there is a power failure at the MP70DP module, all the control CAUTION outputs will be set to 0 V. -
Page 19: External Supply Voltage For The Control Outputs
PME-MP70DP Control inputs and control outputs are available for the MP70DPS7 and MP70S7 variants: 4.2.1 External supply voltage for the control outputs Example: PLC connection Module MP70 relay max. 0.5 A max. 0.5 A OUT3 OUT1 24 V 24 V*... -
Page 20: Can Interface
CANopen specification). In the first and last bus users, the CAN−BUS requires a terminating resistance of 120 Ω. The bus line has a maximum of two terminating resistances. In the MP70DP and MP70DPS7 module has a built-in terminating resistor which is enabled by toggle switch S14 (see page 14). -
Page 21: Synchronisation
PME-MP70DP 4.5 Synchronisation Synchronisation is advisable when D the transducer cables of several devices have been laid side by side D the channels are unshielded and bunched close together Synchronisation prevents beat interference due to carrier−frequency differences. Slave Master 1 2 3 4 5 6 1 2 34 5 6 Fig. -
Page 22: How To Connect To A Plc
The steps in successfully connecting to the Profibus: 1. Physically connect the device to the Profibus (see page 25 and page 18) 2. Configure the device parameters (can also be carried out using HBM‘s “PME-Assistent“ software). 3. Configure the Profibus message and set up its parameters with the aid of a configuration tool (such as Step7) and GSE files, or manually as shown in chapter 10.1 and 10.2. -
Page 23: Configuring And Assigning Parameters
• Start your configuration program (e.g. Step7; if you have no configuration program, proceed to chapter 10.2) • Load the HBM GSD file (PME system CD incl. GSD/GSE files for PME) • Add an HBM device (Hardware catalog) • From the hardware catalog choose the configuration you want on the Profibus. - Page 24 PME-MP70DP • Double-click on the configured entries to open the properties window and select the required parameters. Abb.5.3: Setting parameters Notes for users of the Simatic S7 PLC: • To download consistent data of 3 bytes or over 4 bytes, use special function modules SFC14 to read and SFC15 to write.
-
Page 25: Putting Into Service
PME-MP70DP Putting into service D Use the ribbon cable to link the modules (a maximum of 8) to the MP70DP (see Fig. 4.5, page 20). This establishes the supply voltage link, the CAN-BUS link and synchronisation link between the modules. - Page 26 D Connect the Profibus line to the Profibus connection on the front of the MP70DP (see page 20). Make sure that the line terminating resistance of 120 Ω is connected at the first and last bus users (there is usually a slide switch for this on the Profibus connector housing).
-
Page 27: Setting Up And Operation (Mp70Dp)
PME-MP70DP Setting up and operation (MP70DP) 7.1 Operating philosophy Display in measuring mode: Measured value −18.0024 Status field Unit ↓ ↑ Flashes in the status field if the parameter value can be edited The keys are pressure−sensitive: − Keep the key pressed to run the value continuously (press harder for faster run) - Page 28 PME-MP70DP Measuring mode Password status inactive Password status active (factory setting): SET 2 secs. SET 2 secs. DIALOGUE PASSWORD Set−up mode Enter password: Password ↓ ↑ Input mode Enter required password (factory setting 0) − Confirm Example: Enter numerical Select table...
- Page 29 PME-MP70DP During measurement you can press − − to display: 1. the display mode 2. the status of the input and the output 3. the kinds of error (ERRORS) The following symbol also appears in the status field Measured value −18.0024...
-
Page 30: Overview Of All Groups And Parameters
Zeroing I.CAN Tare HW−Vers. MAINGRP I.PrBus PkMomMax I.AddFnc PkHldMax MAINGRP PkMomMin PkHldMin ParaCo1 ParaCo2 InpFunc MAINGRP Preset with DIP switches with back to Group MAINGRP Depending on the unit selected For MP70DPS7 and MP70S7 Not for MP70S7 A0658-7.2 en HBM... -
Page 31: Setting All The Parameters
Back to MAINGRP ft/s press Confirm input: rad/s +/− = − kImp Note Back to measuring mode: 2sec If you cannot select a particular group, check under DIALOGUE whether the group has been enabled. A0658-7.2 en HBM... - Page 32 >T<kN 0.00 +/− ↓ ↑ 10.00 +/− EndV kN Volatil ↓ ↑ >T< Save +/− Save ↓ ↑ 10.00 EndV V +/− Back to MAINGRP back to MAINGRP A0658-7.2 en HBM depending on the unit selected for MP70DPS7 and MP70S7...
- Page 33 MAINGRP ↓ ↑ +/− OffDlay PkHldMin ParaCo1 Back to MAINGRP ParaCo2 The same applies for limit values 2...4 ↓ ↑ enabled InpFunc +/− disabled Back to depending on the unit selected for MP70DPS7 and MP70S7 MAINGRP A0658-7.2 en HBM...
- Page 34 DIP switch S10 Master ↓ ↑ Slow Keyboard Fast +/− ↓ ↑ Outp ms +/− Medium ↓ ↑ float PDO-Frmt +/− int32 HW−Vers. Back to Back to MAINGRP MAINGRP depending on the unit selected not for MP70S7 A0658-7.2 en HBM...
-
Page 35: Description Of The Essential Parameters
PME-MP70DP Description of the essential parameters Group Parameter Meaning DIA- Password Define (change) password, 0000...9999 LOGUE (Factory setting password: 0000) PassStat Define password status: active=you must enter a password; inactive=you can operate the PME without entering a password I.ParaS to Access to group via keyboard enabled or disabled. - Page 36 PME-MP70DP Group Parameter Meaning ANA- SourceVo As the source of the analogue signal, you can select the gross LOGUE value, the net value or the peak value. OUTPUT Mode Vo Use DIP switches S11 and S5 to define the signal mode for the analogue output.
- Page 37 PME-MP70DP Group Parameter Meaning LIMIT VAL. Source As the source of the limit value signal, you can select: gross, 1...4 net, peak value max/min/peak−to−peak SwtchDir Functions and parameters of the limit values Value Limit1, ON Value Hyst Overshoot Hyst Undershoot...
- Page 38 PME-MP70DP Control inputs and control outputs are available for the MP70DPS7 and MP70S7 versions: Inputs /Outputs Plug-in terminal 3: For controlling the PME functions, there are 4 inputs available here. Plug-in terminal 4: There are 4 outputs available. Group Parameter...
- Page 39 PME-MP70DP Group Parameter Meaning IN/OUT PkMomMa Mode peak value Measurement signal PkMomMin PkHldMax Store value PkHldMin characteristic Hold Hold Function Mode Peak value (PkVal1) Current value Current value mode Measurement signal Hold Function Mode Current value CAN-BUS Baud rate 10 kB, 20 kB, 50 kB, 125 kB, 250 kB, 500 kB, 1000 kB...
- Page 40 PME-MP70DP Group Parameter Meaning ADDITION >0<Rf Reference zero FUNCTION When zeroing via the remotes, the analogue output is adjusted to 0V. The display value is adjusted to >0<Ref. StillDsp motion count indication. If there is a standstill and ON is...
-
Page 41: Can Interface Description
CAN interface description 9.1 General The MP70DP module has an integrated CAN interface, which can be used both for transmitting measured values and for assigning module parameters. You can select the baud rate, but the maximum is 1 MBaud. The interface protocol is adapted to the CANopen standard. -
Page 42: Parameter Assignment
Data byte 4 Subindex Data bytes 5..8 Value (LSB-MSB) Writing a parameter: Sending a value (PC or PLC to MP70DP) CAN identifier 1536 (600 hex) + module address Data byte 1 47 (2F hex) = 1 byte write 43 (2B hex) = 2 byte write... - Page 43 Index (LSB_MSB) Data byte 4 Subindex Data bytes 5..8 Response when an error occurs while reading or writing parameters: Error acknowledgement (MP70DP to PC or PLC) CAN identifier 1408 (580 hex) + module address Data byte 1 128 (80 hex)
-
Page 44: Object Directory: Communications Profile Range
PME-MP70DP 9.4 Object directory: communications profile range as per CAN-open (CiA-DS301) Index Sub- Name Data type Attr. Values (hex) index 1000 Device type Unsigned32 1001 Error register Unsigned8 Bit 0: Fatal error Bit 4: Communications error Bit 7: Manufacturer−specif 1003... - Page 45 PME-MP70DP Index Sub- Name Data type Attr. Values (hex) index 1600 0..2 1. Receive-PDO mapping PDOMapping 1601 0..2 2. Receive-PDO mapping PDOMapping 1800 0..2 1. Send-PDO parameter PDOCommPar 1801 0..2 2. Send-PDO parameter PDOCommPar 1A00 0..2 1. Send-PDO mapping PDOMapping 1A01 0..2...
- Page 46 PME-MP70DP SDO parameters: Index Subindex Name Data type 0022 Number of entries unsigned8 COB-ID client->server unsigned32 COB-ID server->client unsigned32 Node ID (optional) unsigned8 Error code (object 1003 hex): Value Meaning No error 1000 Fatal error 8100 Communication FF00 Device−specific Error code - additional information (object 1003 hex):...
-
Page 47: Object Directory: Manufacturer−Specific Objects
PME-MP70DP 9.5 Object directory: manufacturer−specific objects Parameters which refer to measured values are scaled with figures in the appropriate range and coded as Long (integer 32 bit). The position of the decimal point is defined in object 2120 hex. These variables are also available as float values (IEEE754-1985 32 bit format) (see page 56). - Page 48 PME-MP70DP Index Sub- Name Format Attr. Values (hex) index 2080 Edit mode unsigned8 1: Edit mode On 0: Edit mode Off 2081 Restart executed unsigned8 rw 1: Restart executed 0: Write = Clear 2082 Serial number vis.string 12 char. 2083...
- Page 49 PME-MP70DP Index Sub- Name Format Attr. Values (hex) index Display adaptation 2120 Position of decimal unsigned16 0..5 point 2121 Increment unsigned16 110: 111: 112: 113: 114: 115: 116: 117: 118: 119: 1000 2122 Physical unit unsigned16 1601: V 1602: mA...
- Page 50 PME-MP70DP Index Sub- Name Format Attr. Values (hex) index Display adaptation 2122 Physical unit unsigned16 1626: FTLB 1627: INLB 1628: μm/m 1629: m/s 1630: m/s 1631: percent 1632: per th. 1633: ppm 1634: S 1635: MPas 1636: MN 1637: blank...
- Page 51 PME-MP70DP Index Sub- Name Format Attr. Values (hex) index Conditioning 2180 Tare value integer32 2181 Zero value integer32 2182 Taring memory mode unsigned16 6611: volatile 6610: permanent 2183 Zeroing memory mode unsigned16 6611: volatile 6610: permanent 2185 Zero reference integer32...
- Page 52 PME-MP70DP Index Sub- Name Format Attr. Values (hex) index Limit value switch 2210 Enable limit value 1 unsigned16 1: Yes 0: No 2211 Input signal limit value 1 unsigned16 214: Gross 215: Net 204: Min 205: Max 218: Peak−to−peak 2212...
- Page 53 PME-MP70DP Index Sub- Name Format Attr. Values (hex) index 2234 On delay Limit 3 integer32 2235 Off delay Limit 3 integer32 2236 Switching level limit value 3 integer32 2237 Hysteresis limit value 3 integer32 2238 Status limit value 3 unsigned8...
- Page 54 PME-MP70DP Index Sub- Name Format Attr. Values (hex) index Digital IN/OUT 2310 Function Output1 unsigned16 200: no function 221: Limit value 1 222: Limit value 2 223: Limit value 3 224: Limit value 4 230: Error / Warning 231: Standstill...
- Page 55 PME-MP70DP Index Sub- Name Format Attr. Values (hex) index CAN interface 2400 Baud rate in CAN unsigned16 1409: 10 kBaud 1411: 20 kBaud 1413: 50 kBaud 1427: 100 kBaud 1417: 125 kBaud 1419: 250 kBaud 1421: 500 kBaud 1423: 800 kBaud...
-
Page 56: Manufacturer−Specific Objects In Float Data Format
PME-MP70DP 9.6 Manufacturer−specific objects in FLOAT data format Á Á Á Á Á Á Á Á Á Á Á Á Á Á Á Á Á Á Á Á Á Á Á Á Á Á Á Á Á Á Á Á Á Á Á Á Á... -
Page 57: Examples
PME-MP70DP 9.7 Examples Example 1: Reading the net measured value as a Float value using SDO transfer from the amplifier with module address 3. Protocol to the amplifier: Á Á Á Á Á Identifier Á Á Á Á Byte1 Á Á Á Á Á... -
Page 58: Settings For Profibus
10.1 Profibus parameter assignment The amplifier parameters are set using the keyboard or the CAN interface. With the MP70DP, the Profibus participant address must be set using the keyboard. The Profibus DP parameter assignment message defines some parameters for the DP communication. If you use Profibus parameter... -
Page 59: Parameters For The Mp30, Mp55, Mp60, Mp70 Modules
PME-MP70DP 10.1.1 Parameters for the MP30, MP55, MP60, MP70 modules Parameter name Available Default Meaning values Zeroing control bit disabled disabled operates function for control of enabled output control word Taring control bit disabled disabled operates function for control of... -
Page 60: Profibus Configuration
10.2 Profibus configuration The configuration defines which data content is exchanged in cyclical data communication. A configuration entry is reserved for each of the modules connected at the MP70DP. The first entry is always reserved for the MP70DP itself. Cfg entry... -
Page 61: Configuration For Mp30, Mp55, Mp60, Mp70 Modules
PME-MP70DP The following data is available for selection: 10.2.1 Configuration for MP30, MP55, MP60, MP70 modules Input values: Name Meaning Length Gross Gross measured value 2 or 4 bytes Net measured value (gross minus tare value) 2 or 4 bytes... -
Page 62: Configuration For Module Mp01
PME-MP70DP 10.2.2 Configuration for module MP01 Name Meaning Length Channels 1...4 Gross Gross measured value 2 or 4 bytes Net measured value (gross minus tare value) 2 or 4 bytes Content of maximum store 2 or 4 bytes Content of minimum store 2 or 4 bytes Pk−Pk... -
Page 63: Cyclical Data Exchange
PME-MP70DP 10.3 Cyclical data exchange Depending on the configuration, the following data content is exchanged: 10.3.1 Inputs Measured values Measured values can be communicated in various forms of representation. The formats available for selection are 16 bit fixed point number (16 bit integer in two‘s complement, reading device must be aware of decimal point position) -
Page 64: Outputs
PME-MP70DP NOTE The state of the MP70DP can be queried via the MP70DP device status. A CAN slave fault can also be detected and indicated after about 10 seconds (bit 14). This bit is set when a number of errors are present on the CAN bus. - Page 65 0..7 a0(hex) Type information (manufacturer−specific) 0..7 reserved 0..7 reserved Status of MP70DP Module Measured value overflow module 1 Analogue output overflow module 1 Scaling defective Parameter set defective Status of limit switch 1 Status of limit switch 2 Status of limit switch 3...
-
Page 66: Assigning Parameters With Decimal And Hexadecimal Values
PME-MP70DP 10.5 Assigning parameters with decimal and hexadecimal values If you are using older parameter assignment tools the parameter values will have to be converted to decimal or hexadecimal values: Parameter assignment message Byte Bits Parameter name Available values Default Meaning 0..7... -
Page 67: Defining Internal Configuration Combinations
PME-MP70DP 10.5.1 Defining internal configuration combinations A total number of 9 configuration entries is available. The first entry has been reserved for the MP70 module, the following 8 entries have been assigned to the measurement modules connected to the MP70. The special identification format (special format) must be used for this. - Page 68 PME-MP70DP Configuration for MP01 Configuration Length of Length of Cyclical data content cyclical data cyclical data manufacturer− inputs outputs specific data Byte no. Bit no. (words) (words) 0..7 Module type (MP01) Input values: 1(2) Gross channel 1 1(2) Net channel 1 1(2) Max.
- Page 69 PME-MP70DP ...configuration for MP01 Output values: Control word channel 1 1(2) Limit value level 1 channel 1 1(2) Limit value level 2 channel 1 3..7 reserved Control word channel 2 1(2) Limit value level 1 channel 2 1(2) Limit value level 2 channel 2 3..7...
- Page 70 PME-MP70DP The configuration message thus has the following format: Meaning Permitted values for CFG (hex.) byte Header 0xC3..0xC9 (inputs and outputs, 3..9 bytes manuf.−specific. data) Length of outputs 0x40 − 0x48 (1 to 9 words of outputs) or 0xC0 − 0xC8 (1 to 9 words of outputs with consistency) Length of inputs 0xC0 −...
-
Page 71: Error Messages/Operational Status (Led)
PME-MP70DP Error messages/operational status (LED) Depending on the display mode, different error messages may appear on the display instead of the measured value: Signal status (mode) Possible error message Grs+Ovfl HrdwOvfl Init Err − − − − − − −... - Page 72 If “Errors” is set at the digital output, the error message is displayed at the digital output. NOTE The state of the MP70DP can be queried via the MP70DP device status. A CAN slave fault can also be detected and indicated after about 10 seconds (bit 14).
- Page 73 The following applies for the MP70DP and MP70DP−S7 modules: The LED shows the operating status (ready to take measurements, overflow etc.) of the MP70DP. Instead of the CAN status (as with the MP01, MP30, MP55 and MP60), however, the Profibus status is displayed.
- Page 74 PME-MP70DP Status Meaning Remedy colour Measuring mode Bus mode Flashes Measurement overflow Adapt measuring − range LCD error Restart Steady Initialisation phase: not CAN-bus not ready for Wait light (yet) ready to measure, communication Calibration error Initial calibration error Send PME to...
-
Page 75: Keyword Index
PME-MP70DP Keyword index digital input, 18 digital output, 18 additional functions, 40 , 53 DIP switches, 12 address, 39 disassembly, 15 amplifier settings, 12 discharge rate, 37 analogue output, 11 , 13 , 14 , 18 , 36 , display adaptation, 49 , 50... - Page 76 67 , 68 putting into service, 25 module parameters, 59 , 61 , 62 motion count indication, 40 mounting, 15 reference zero, 40 MP70DP, 10 remotes, 38 MP70DPS7, 11 , 19 ribbon cable, 21 MP70S7, 11 , 19 save, 35...
- Page 77 PME-MP70DP zero balance, 35 Zero value, 35 zeroing, 35 A0658-7.2 en...
- Page 80 Hottinger Baldwin Messtechnik GmbH 7-2002.0434 Postfach 10 01 51, D-64201 Darmstadt Im Tiefen See 45, D-64293 Darmstadt Tel.: +49 6151 803-0 Fax: +49 6151 8039100 Email: support@hbm.com Internet: www.hbm.com A0658-7.2 en...
Need help?
Do you have a question about the MP70DP and is the answer not in the manual?
Questions and answers