Table of Contents
Advertisement
Quick Links
Advertisement
Table of Contents

Subscribe to Our Youtube Channel
Related Manuals for Growatt WIT 50K-A-US


Summary of Contents for Growatt WIT 50K-A-US
- Page 1 WIT 50-100K-US Storage/Hybrid Inverter User Manual...
-
Page 2: Table Of Contents
Contents 1 Notes on this manual .................1 1.1 Introduction ........................1 1.2 Target Group ......................... 1 1.3 Product Range....................... 1 Safety Precautions ................2 2.1 Safety Instructions ....................... 2 2.2 Symbol Conventions ....................3 2.3 Label Description ......................4 3 Product Description ................5 3.1 Overview ........................ - Page 3 6.4 Connection on the Battery Side ................31 6.4.1 Connecting the Main Power Cable of the Battery..........32 6.4.2 Connecting the Battery BMS-AC Terminal............33 6.5 Connecting Communication Cables ............... 33 6.5.1 Battery Communication Connection ..............33 6.5.2 External Communication Connection ..............35 6.5.3 Parallel Communication Connection..............
- Page 4 Table 10.3 WIT 50/63/75/100K-AU-US specification ..........110 Table 10.4 WIT 50/63/75/100K-HU-US specification ..........113 11 Decommissioning the WIT Inverter ..........117 12 Warranty ..................118 12.1 Conditions ......................118 12.2 Disclaimer ......................118 13 Contact Us ..................119...
-
Page 5: Notes On This Manual
This document is intended for qualified technicians. Only qualified and well-trained technicians are allowed to install and operate the WIT inverter. Should any questions arise during installation, you can visit www.growatt.com to leave a message, or call our 24- hour service hotline at 866-686-0298. -
Page 6: Safety Precautions 2
Safety Precautions 2 2.1 Safety Instructions 1) Please read this manual carefully before installation. Damages caused by failure to follow the instructions in the manual are beyond the warranty scope. 2) Only qualified and trained electrical technicians can perform operations on the WIT Inverter. -
Page 7: Symbol Conventions
Each WIT Inverter must be equipped with an AC circuit breaker. Ÿ Multiple WIT Inverters cannot connect to the same AC circuit breaker. Do not connect the load between the WIT Inverter and the circuit Ÿ breaker. If the cable is thick, do not shake the cable terminals after tightening Ÿ... -
Page 8: Label Description
Symbol Description CAUTION indicates a hazard with potential risk which, if not avoided, could result in minor or moderate injury. CAUTION NOTICE indicates that under certain circumstances, improper operations could result in property damage. NOTICE Remind operators to check the instructions before installing or operating the WIT Inverter. -
Page 9: Product Description
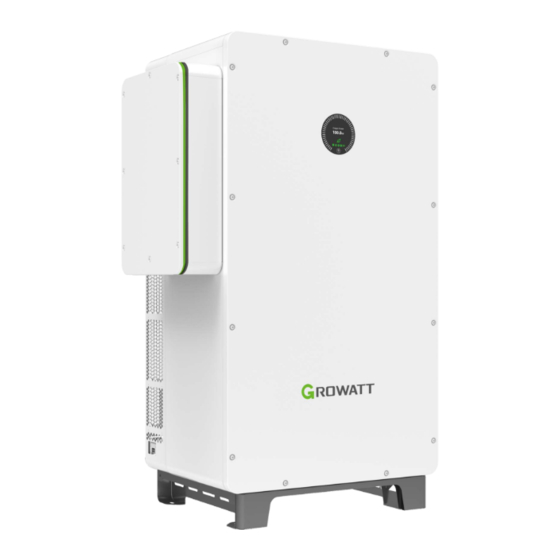
3 Product Description The front view and the bottom view of all models are identical. NOTICE 3.1 Overview Front view: Fig 3.1 Front view Bottom view: Fig 3.2 Bottom view... - Page 10 Left view: Fig 3.3 Left view of WIT 50-100K-A-US and WIT 50-100K-H-US Fig 3.4 Left view of WIT 50-100K-AU-US and WIT 50-100K-HU-US...
- Page 11 Right view: Fig 3.5 Right view of WIT 50-100K-A-US, WIT 50-100K-AU-US Fig 3.6 Right view of WIT 50-100K-H-US and WIT 50-100K-HU-US...
-
Page 12: Basic Data
Table 3.1 Component description Description Description Display AC junction box Base Power grid connection terminal Load wiring terminal Heat sink Nameplate 16-pin terminal (BMS COM) 30 pin terminal (COM2) 16-pin terminal (COM1) Communication port DC Switch PV terminal Battery supply terminal (BMS AC) Battery terminal DRMS port Flexible handle (4 groups) -
Page 13: Nameplate
3.3 Nameplate Fig 3.8 Nameplate NOTE: The figure above shows the nameplate of WIT 100K-HU-US as an example. The nameplate figure is for reference only. The actual nameplate prevails. For the specifications, please refer to Section 10 Product Specifications. -
Page 14: Operating Principle
3.4 Operating Principle 3.4.1 Operating Principle of WIT 50-100K-A-US 1> Converts DC power into AC power consistent with the voltage and power quality requirements of the utility grid through an inverter circuit to supply power to the loads and feed power into the grid; 2>... -
Page 15: Operating Principle Of Wit 50-100K-Au-Us
3.4.3 Operating Principle of WIT 50-100K-AU-US 1> Converts battery power to AC power to power the loads and export energy to the grid; 2> Charges the battery from the grid through a rectifier circuit; 3> Converts the battery power into AC power through the inverter circuit to provide power to critical loads connected to the LOAD port. -
Page 16: Storing The Wit Inverter
3.5 Storing the WIT Inverter 1> Place the WIT Inverter in the original package and store it in a dry and well-ventilated place. 2> Keep the storage temperature from –22°F to +158°F and the humidity from 0%–95% 3> A maximum of three WIT Inverters can be stacked. Do not stack the inverters without packaging. -
Page 17: Clearing The Alarm
The Anti-PID function integrated in Growatt inverters can effectively reverse the PID effect by applying DC voltage to the PV modules during nighttime, enhancing solar energy... -
Page 18: Inspection Upon Delivery 4
Inspection upon delivery 4 Unpacking and inspection 1. Before unpacking the WIT Inverter, check the shipping box for any externally visible damage. If damage is found, contact the shipping company as soon as possible. 2. After unpacking the WIT Inverter, check if the scope of delivery is intact and complete. If any damage is found or any component is missing, contact your distributor. - Page 19 Description Quantity 30-pin terminal Antenna 1 or 2 RJ45 connector protector 1 or 2 BMS power supply terminal User manual Quick installation guide Hoist ring RSD and accessories NOTE: 1. For the WIT 50-100K-H-US and WIT 50-100K-HU-US inverters please reference the table below for the list PV terminal equipment and Metal Contacts based on the inverter's size.
-
Page 20: Installation 5
Installation 5 5.1 Basic Installation Requirements A. Ensure that the installation surface is solid enough to bear the weight of the WIT Inverter. (Refer to Table 3.2 for the weight of the WIT Inverter) B. Ensure that the installation position is suitable for the dimensions of the WIT Inverter. C. -
Page 21: Installation Environment Requirements
J. Keep the WIT Inverter away from strong interference sources. K. Ensure that the WIT Inverter is not accessible to children. 5.2 Installation Environment Requirements A. Though the WIT Inverter is protected to IP66/Type 4X, do not expose it to direct sunlight, rain and snow. -
Page 22: Moving The Wit Inverter
C. Do not place the WIT Inverter in an enclosed or narrow space. Fig 5.5 5.3 Moving the WIT Inverter To prevent personal injury caused by a falling inverter, keep balance Ÿ and be careful when moving the WIT Inverter as it is heavy. CAUTION Plan 1 Hoisting: 1>... -
Page 23: Mounting The Wit Inverter
0.42m 0.72m Fig 5.7 Moving the WIT Inverter with a forklift Option 3 Lifting: 1> Unpack the WIT Inverter (remove the top panel and the support plates) and pull out the handles, as shown in Fig 5.8 below. It requires four people to lift the WIT Inverter and move it to the installation position;... -
Page 24: Wall-Mounted Installation
CAUTION The WIT 50-100K-US Storage/Hybrid Inverters can be mounted on the wall. For wall- mounted installation, you need to purchase the mounting bracket from Growatt. Determine the hole positions for installing the mounting bracket using the marking-off template and drill holes. Align the mounting bracket with the hole positions and insert nuts (φ12) into the holes. - Page 25 NOTE: The marking-off template and mounting bracket are optional accessories. Customers who purchase the mounting bracket will have a marking-off template delivered with the bracket. Unit: inch Fig 5.12 Wall-mounting installation Ensure that the wall meets the load-bearing requirements of the equipment.
-
Page 26: Electrical Connection 6
Electrical Connection 6 Wiring diagram of the system with a single WIT 50-100K-HU-US inverter... - Page 27 Wiring diagram of the system with two WIT 50-100K-HU-US inverters connected in parallel...
- Page 28 Wiring diagram of the system with three WIT 50-100K-HU-US inverters connected in parallel...
- Page 29 Wiring diagram of the system with a single WIT 50-100K-HU-US inverter and two meters...
-
Page 30: Connecting The Ground Cables
6.1 Connecting The Ground Cables 1. It is essential to connect the ground cable to the WIT inverter before connecting other cables to prevent personal injury or device damage. 2. All non-current-carrying metal parts and the enclosures of the devices of the energy storage system, including the rack and the enclosures of the combiner box, the distribution panel, the inverter and the battery should be properly grounded. -
Page 31: Connection On The Ac Side
6.2 Connection on the AC Side Before connecting cables, ensure that the DC switches on the WIT Ÿ Inverter are OFF. Turn off the switches and breakers on the AC side and the battery side. Otherwise, the high voltages of the WIT Inverter may result in electric shocks. - Page 32 2. Recommended circuit breaker specifications for WIT 50-100K-AU-US and WIT 50- 100K-HU-US models. Rated current of Rated current of Rated voltage of Device type the circuit breaker the circuit breaker the circuit breaker on the grid side on the load side WIT 50K-AU/-HU-US 480V 300A...
- Page 33 AC junction box cover Terminal Label -AE/-AU/-HE/-HU -A/-H AC AC junction box junction box Fig 6.2 AC terminal wiring position and diagram NOTE: 1. Determine the stripped length according to the wiring position (recommendation: 0.87-1.03 inches for power cables and 0.87-1.03 inches for ground cables). Remove the protective plugs and install the cable conduits correctly.
-
Page 34: Connection On The Pv Side
Ÿ 1100Vdc. Ensure that the following conditions are met; Otherwise, fire hazard Ÿ or inverter damage may occur. Growatt is not liable for the WARNING consequence and it is beyond the warranty scope. NOTE: 1. The solar irradiance on the PV modules generates voltage and high voltages presented in the PV strings connected in series could be fatal. -
Page 35: Connection On The Battery Side
Procedure for connecting cables on the PV side: 1. Open the right cover plate of the WIT inverter, the position of which is shown in Fig 6.1; 2. Strip 0.24-0.32 inches of the insulation layer of the DC cables. 3. Insert the exposed core wires into the crimping area of the wiring terminal and crimp them using a crimping plier;... -
Page 36: Connecting The Main Power Cable Of The Battery
If the cable is thick, do not shake the cable after fastening it. Ensure Ÿ that all cables are securely connected before powering on the WIT Inverter. Loose connection may cause overheating that will damage the device. The battery terminals are protected by a plate. Upon completion of Ÿ... -
Page 37: Connecting The Battery Bms-Ac Terminal
6.4.2 Connecting the Battery BMS-AC Terminal NOTE: Perform operations according to on-site requirements. Procedure for connecting the battery BMS-AC terminal: 1. Open the cover plate on the right side of the inverter, the position of which is shown in Fig 6.6; 2. - Page 38 BMS-COM Fig 6.8 BMS-COM communication terminals Ttable 6.4 Battery communication terminal description Definition of battery communication terminal Number Definition of signal Note Wakeup+ Battery wake up signal Wakeup- RS485A3 The PCS communicates with the battery via RS485 RS485B3 CANH The PCS communicates with the battery via CANL CAN.GND Battery shutdown input signal...
-
Page 39: External Communication Connection
BMS-COM Wakeup+ Wakeup- RS485A3 RS485B3 CANH CANL CAN.GND Fig 6.9 BMS-COM communication connection 6.5.2 External Communication connection NOTE: When connecting to external devices, such as the PC, please use isolated communication devices. The external communication terminal of the WIT 50-100K-US Inverter is a 16-pin connector. - Page 40 COM1 RS485A4 RS485B4 RS485A1(IN) RS485B1(IN) Res-RS4851A RS485A2(IN) RS485B2(IN) RS485A2(OUT) RS485B2(OUT) Res-RS4851B REPO2(DI) REPO1(DI) Fig 6.11 COM1 communication connection 3. The external communication terminals of the WIT 50-100K-US Inverters are described in Table 6.5. Short Pin 5 and pin 10 when the host computer is used. Table 6.5 External communication terminal description Definition of battery communication terminal Number...
-
Page 41: Parallel Communication Connection
6.5.3 Parallel Communication Connection The parallel signal terminal (COM2) of WIT 50-100K-US Inverters uses a 30-pin terminal. The matching terminal is in the accessary kit. The connection steps are as follows: 1. Connect the communication cables to the corresponding terminals as required. For details, see Table 6.6 and Table 6.7;... - Page 42 Table 6.6 Parallel communication terminal description Pin definition of the parallel communication terminal (WIT 50-100K-A-US and WIT 50-100K-H-US) Number Definition of signal Note 24V.S Output 24V signal GND.S CAN1_H (IN) CAN1_L (IN) Parallel communication CAN1 signal (input) GND.S CAN2_H (IN) Parallel communication CAN2 signal (input) CAN2_L (IN) RS485_1A (IN)
- Page 43 Table 6.7 Description of parallel signal terminal interface Pin definition of the parallel communication terminal (WIT 50-100K-HU-US, WIT 50-100K-AU-US) Number Definition of signal Note 24V.S Output 24V signal GND.S CAN1_H (IN) CAN1_L (IN) Parallel communication CAN1 signal (input) GND.S CAN2_H (IN) Parallel communication CAN2 signal (input) CAN2_L (IN) RS485_1A (IN)
-
Page 44: Monitoring Device Terminal
6.5.4 Monitoring Device Terminal The WIT 50-100K-US Storage/Hybrid inverters support remote monitoring when working with the optional WiFi&LAN datalogger or the WiFi&4G datalogger. If the WiFi&LAN datalogger is used, you need to connect a WiFi antenna and a network cable. If the WiFi&4G datalogger is used, you need to connect a WiFi antenna and a 4G antenna. -
Page 45: Rapid Shutdown Device (Rsd)
DRMS Fig 6.15 DRMS port Table 6.8 Demand Response Modes (DRMs) Socket asserted by Mode Requirement shorting pins DRM0 5, 6 Operate the disconnection device DRM1 1, 6 Do not consume power DRM2 2, 6 Do not consume at more than 50% of rated power Do not consume at more than 75% of rated power DRM3 3, 6... -
Page 46: Post-Installation Checks
Installation: 1. Unscrew the four plastic screws assembled on the RSD in the accessory kit using a cross- head screwdriver. 2. Drill four holes in the wall using an electrical drill with an M6 drill bit. 3. Insert the four green plastic pipes into the holes. 4. - Page 47 Position Item Check item Ground cable connected Check the cable specifications; ensure that to the chassis the cable has been securely fastened Ground cable on the AC Check the cable specifications; ensure that side the cable has been securely fastened Check the cable specifications;...
-
Page 48: Commissioning 7
Commissioning 7 7.1 Powering on/off the System 1. Turn the DC switches on the WIT Inverter to the “ON” position. 2. Turn on the breaker between the grid and the inverter. 3. Turn on the breaker between the battery and the inverter, then turn on the switch on the battery to power it on. -
Page 49: Commissioning The Wit Inverter
Section 8.1.1. Tap Control > Set Inverter Time, then enter the password “growatt+date”. For instance, if the date is July 18, 2023, the password would be “growatt20230718”. After that, tap “Yes”. -
Page 50: Mode Of Operation
7.2.2.2 Set the Date & Time Automatically Connect the WIT Inverter to the server following the procedure specified in Section 8.1.2 when the inverter is powered on, then the WIT Inverter will update its date and time automatically. 7.3 Mode of operation 7.3.1 Waiting Mode When the PV voltage is greater than 180V, the WIT Inverter will be powered on and enters the waiting mode. -
Page 51: Fault Mode
NOTE: 1. It is recommended to charge batteries with grid power during off-peak times and discharge battery power during peak hours to lower your electric bills. 2. The working modes listed above are applicable to the grid-tied power system. For the off-grid system, the WIT Inverter converts battery power to power the loads. -
Page 52: Led And Oled Display Panel
7.4 LED and OLED Displays Panel The LED and OLED display panel demonstrating the running status of the WIT Inverter is shown in the Fig 7.1. The symbol description is shown in Table 7.1; The user interfaces are shown in Fig 7.2, and the LED indicator description is shown in Table 7.2. ROWATT Fig 7.1 Display panel Table 7.1 Symbol Description... - Page 53 Output Power ROWATT 123.4 startup page display page AFCI Fault Programming update page alarm page Fig 7.2 User interfaces Table 7.2 Indicator description Status Meaning The system is not operating Steady green The system is operating properly Blinking green at long The system is in standby mode or intervals performing an upgrade...
- Page 54 Status Meaning Off-grid mode is disabled Off-grid mode is enabled and has no Steady green faults or alarms Off-grid mode is enabled and a fault or Steady red alarm is reported on the AC side The battery voltage dose not reach the operating voltage The battery voltage reaches the Steady green...
-
Page 55: Monitoring
Monitoring 8.1 Remote Monitoring Growatt WIT 50-100K-US Storage/Hybrid inverters support remote monitoring, which can be enabled by installing a datalogger. The operation and configuration methods are illustrated below. Scan the following QR code or search for “ShinePhone” in Google/Apple Store to download and install the mobile APP. - Page 56 Select “Direct WiFi” > “WIT-A/AU-US” or “WIT-H/HE/HU-US”. For the SN (serial number), you can scan the SN barcode on the enclosure or enter it manually. Then tap “Confirm” and it will start searching for Bluetooth devices.
- Page 57 Click “Connect” after the target Bluetooth device is displayed. When the device is successfully connected, the screen as demonstrated below will appear, ensuring that the communication between the WIT inverter and the mobile phone has been established via Bluetooth.
-
Page 58: Remote Monitoring On The App (Shinephone)
Then connect the WIT inverter to the WiFi network. Tap “Quick Setting” > “Network Type” > “WiFi”. Insert the WiFi name and password and tap “Connect to the Internet”, which configures the inverter to the server via the network. 8.1.2 Remote Monitoring on the APP (ShinePhone) Account Registration on ShinePhone Run the APP and tap “Create account”... - Page 59 Home Screen of ShinePhone 1. Dashboard: displays the critical information of all power plants under the account, such as the total yield, the total revenue and the status of the device. Please refer to the figures below:...
- Page 60 2. Plant: displays the plant list and the basic information about each PV plant, as shown in the figure below. You can select your target plant to view detailed information. Detail Page of the WIT Inverter: To access details about the WIT Inverter or related devices: (1) Tap “Plant”...
- Page 61 (4) On the “Log” screen, you can view the fault/warning message and suggested trouble- shooting measures.
- Page 62 (5) On the “Control” screen, you can configure the WIT Inverter. The password is in the format of “Growatt + the current date”, e.g. Growatt20230718. Ø Set Working Modes for Different Time Periods Tap Control > Mode Selection and Time Setting; 6 time segments are configurable. You...
- Page 63 Ø Set Inverter On/Off Tap Control > Set Inverter On/Off; you can power on/off the inverter, as the figure shows. Ø Set the Time of the Inverter Tap Control > Set Inverter Time; you can set the local time, as the figure shows.
- Page 64 Ø Set the Working Mode and the On-/Off-grid mode Tap Control > Mode selection and On/off grid mode setting. Two options are available: Automatic mode and Manual mode. If the Manual mode is selected, you can set the inverter to work in the on-grid or off-grid mode, as the figure shows. The Automatic Mode is recommended.
- Page 65 Ø Set the Off-grid Parameters Tap Control > Off-grid Setting, you can enable/disable the off-grid mode, set the off- grid frequency (50Hz/60Hz) and the off-grid voltage (220V/230V/240V/277V/127V), complying with the safety regulations. Ø Set Whether to Apply the Following PF Command Tap Control >...
- Page 66 Ø Set AC Charging and Discharging Power Tap Control > AC Charging and Discharging Power, you can configure the AC charging/discharging power and choose whether to remember your settings, as the figure shows. Ø Set the Storage Parameters Tap Control > Storage Parameter Setting, you can enable/disable the AC charging function (Charge from grid), the charging cutoff SOC (100 is recommended) and the discharging cutoff SOC (10 is recommended), as the figure shows.
- Page 67 Ø Set the Reactive Power Tap Control > Set reactive power, you can select the corresponding PF mode and whether to remember your settings, as the figure shows. Ø Set the Export Limitation Parameters Tap Control > Export Limitation, you can enable/disable the export limitation function according to local regulations.
- Page 68 Ø Set the Single-phase Export Limitation Tap Control > Single Export, you can enable/disable the single-phase export limitation function, as the figure shows. Ø Set the Power Factor Tap Control > Set power factor, you can set the PF value, ranging from -1 to 1, as the figure shows.
- Page 69 Ø Set the Maximum Charging/Discharging Current Tap Control > Max. Charging/Discharging Current, you can set the maximum charging/discharging current, ranging from 0 to 200A, as the figure shows. Ø Set the Equalization Voltage Tap Control > Equalization Voltage, you can set the battery maximum charging voltage, ranging from 750 V to 1000V, as the figure shows.
- Page 70 Ø Set the EOD voltage Tap Control > EOD Voltage, you can set the battery discharge cutoff voltage, ranging from 750 V to 1000V, as the figure shows. Ø Set the Customized PF Curve Tap Control > Custom PF curve, you can set the power percentage and the power factor of each point, as the figure shows.
- Page 71 (6) Edit: you can change the device name as the figure shows. 3. GroHome: displays the home energy system, including four sections: “PV linkage”, “My device list”, “My room” and “My scenario”.
- Page 73 4. Support: includes the common faults and troubleshooting suggestions, as shown in the figure below. Should you encounter any problem about our product, you can contact the Growatt after-sales support or refer to the related document. 5. Me: You can check the account information, configure the datalogger or view...
-
Page 74: Remote Monitoring On The Shineserver Webpage
8.1.3 Remote Monitoring on the ShineServer Webpage 1. Open the browser, then enter https://server-us.growatt.com/login?lang=en in the address box to access the login page. Click “Register an Account” if you do not have an account. 2. After the Registration Page is displayed, fill in the information as required and click to agree to the Privacy Policy. - Page 75 3. On the Login screen, enter the username and the password to log in to the home screen. 4. After accessing the home screen, the “Add Plant” window will pop up. Fill in the information as required (marked with “·”) and click “Yes”. If the plant has been created, you can select the target plant on the home screen.
- Page 76 5. Click the target plant and the detailed page will be displayed, click “Add Data Logger” on the upper right corner to add the datalogger connected to the inverter. 1) Enter the serial number (SN) of the datalogger 2) Enter the verification code of the datalogger...
- Page 77 6. After adding the datalogger successfully, you can click Dashboard to view details about related devices. Dashboard: 1. Running status and energy display 1) Plant List: select the target plant from the drop-down list 2) Device Type: Select the device from the drop-down list 3) Input/Search Number: Upon the initial search, enter the serial number of the specific device;...
- Page 78 2. Energy Trend 1) System Production: displays the power for self-consumption and the power exported to the grid 2) Date: select a specific date, you can view the energy data in a specific period, day, month or year 3) Load Consumption: displays the power for self-consumption and the power drawn from the grid 4) Display options: to show/hide the content by clicking the corresponding color circle.
- Page 79 2. Plant Management Click Plant Management and you can view all PV plants associated with the current account. 1) Edit: Click the “Edit” icon (indicated in the figure above) to modify the PV plant information 2) Delete: Click the “Delete” icon (indicated in the figure above) to delete the selected PV plant 3) Data: Click the “Data”...
- Page 80 2. Download A range of documents are available for download. Device 1. Datalogger 1) Serial number: each datalogger has a specific SN, which can be used to search for the device; 2) User name and the PV plant to which the datalogger is connected; 3) Connection status: connected or disconnected;...
- Page 81 2. WIT 1) Enter the serial number to find the device; 2) Device model; 3) User name and the PV plant to which the device is connected; 4) Daily and monthly energy yield; 5) Serial number of the selected device; 6) Operating status: operating, standby, disconnected or faulty;...
- Page 82 10.2) Powering on/off the device: you can power on/off the device remotely 10.3) Set the time: you can set the time for the device...
- Page 83 10.4) Mode switch: you can choose to switch the working mode manually or automatically. If “Manual” is selected, you can set the device to operate in on-grid or off-grid mode. Generally, you are advised to select “Automatic” mode switch. 10.5) High grid voltage limit (voltage upper threshold of grid connection)
- Page 84 10.6) Low grid voltage limit (voltage lower threshold of grid connection) 10.7) High grid frequency limit (frequency upper threshold of grid connection)
- Page 85 10.8) Low grid frequency limit (frequency lower threshold of grid connection) 10.9) Set off-grid mode on/off: you can set whether to operate the inverter in the off-grid mode...
- Page 86 10.10) Off-grid frequency: two options are available: 50Hz/60Hz 10.11) Off-grid voltage: you can set the value to 220V/230V/240V/277V/127V...
- Page 87 10.12) Save the PF Command: you can set whether to save the PF command setting 10.13) AC charging power: you can set the inverter's maximum output power...
- Page 88 10.14) Charge cutoff SOC: you can set the battery charge cutoff SOC (100 is recommended) 10.15) Enable AC charging:...
- Page 89 10.16) AC discharge power: you can set the battery discharge power 10.17) Discharge cutoff SOC: you can set the battery discharge cutoff SOC (10 is recommended)
- Page 90 10.18) Set Reactive Power: you can set the corresponding PF mode and select whether to save the configured values 10.19) Export Limitation: You can enable/disable the export limitation function according to the local applicable regulations and set the export limit power rate if it is enabled...
- Page 91 10.20) Single-phase Export Limitation 10.21) Set PF value: you can set the PF value, ranging from -1 to 1.
- Page 92 10.22) Charge Max. Current: you can set the battery maximum charge current 10.23) Discharge Max. Current: you can set the battery maximum discharge current...
- Page 93 10.24) Equalization voltage: you can set the battery maximum charge voltage 10.25) EOD voltage: you can set the battery discharge cutoff voltage...
- Page 94 10.26) Customized PF curve: you can set the power percentage and the power factor for each point of the PF curve Meter 1) Enter the serial number of the meter or the datatlogger to search for the desired meter 2) Meter type 3) The datalogger worked in conjunction with the meter 4) Status of the meter 5) The serial number of the WIT inverter to which the meter is connected...
-
Page 95: System Maintenance
9 System Maintenance 9.1 Routine Maintenance 9.1.1 Clean the Chassis Before performing any operation, disconnect the AC and DC power Ÿ supply and wait for 5 minutes after the system is powered off. Wipe the dust off the chassis and clean the chassis with a moistened Ÿ... - Page 96 Fig 9.1 Position of the fan fixing plate 3> Disconnect the fan connector, remove the fan fixing plate with a screwdriver, and remove the fan, as shown in Fig 9.2: Fig 9.2 Position of the fan NOTE: ① WIT 50-100K-A-US and WIT 50-100K-H-US models have five external fans; ②...
-
Page 97: Troubleshooting
2. If the error message persists, contact Growatt support. 1. After shutdown, check the AC SPD. AC SPD Warning AC SPD function abnormal 2. If the fault persists, contact Growatt. 1. Power off the system and check the Warning 208 DC fuse blows fuse. - Page 98 DC input voltage exceeds Warning 209 2. If the DC voltage is within the the upper threshold specified range and the error message persists, contact Growatt support. 1. Check the polarity of the PV PV string is reversely terminals. PV Reversed connected 2.
- Page 99 2. Check if the PV voltage is within the grid connection are not met specified range. 3. Restart the inverter. If the error message persists, contact Growatt support. The inverter failed to 1. Check if the battery is turned on.
- Page 100 2. Check if the battery is correctly Warning 502 Battery voltage too high connected. 3. If the error message persists, contact Growatt support. 1. Check if the battery voltage is within the permissible range. 2. Check if the battery is correctly Warning 503 Battery voltage too low connected.
- Page 101 1. Check if the load power exceeds the upper limit. Off-grid bus voltage too Warning 605 2. Restart the inverter. If the error message persists, contact Growatt support. 1. Restart the inverter. Warning 609 Balanced circuit abnormal 2. If the error message persists, contact...
-
Page 102: Error
An arc fault has been AFCI Fault 2. Restart the inverter. detected 3. If the error message persists, please contact Growatt support. 1. Restart the inverter. An excessively high leakage GFCI High 2. If the error message persists, please current has been detected contact Growatt support. - Page 103 Grid frequency is beyond the the inverter. AC F Outrange permissible range 2. If the error message persists, please contact Growatt support.. 1. Check the grid frequency and restart Grid ROCOF (Rated of the inverter. Error 309 Change of Frequency) 2.
- Page 104 1. Check if the temperature sensor Temperature sensor module is properly connected. Error 412 disconnected 2. If the error message persists, please contact Growatt support. 1. Restart the inverter. Error 413 IGBT drive fault 2. If the error message persists, please contact Growatt support.
- Page 105 Suggestion 1. Restart the inverter. AC current sampling Error 427 2. If the error message persists, please abnormal contact Growatt support. 1. Restart the inverter. Error 430 EPO fault 2. If the error message persists, please contact Growatt support. 1. Restart the inverter.
- Page 106 Error 507 Battery overload protection power. 2. If the error message persists, please contact Growatt support. 1. Restart the inverter. Error 508 BUS2 Volt Abnormal 2. If the error message persists, please contact Growatt support.
- Page 107 1. Restart the inverter. High DC component in Error 606 2. If the error message persists, please output voltage contact Growatt support. 1. Restart the inverter. EPS Overload Off-grid output overload 2. If the error message persists, please contact Growatt support.
-
Page 108: Product Specifications 10
Product Specifications 10 Table 10.1 WIT 50/63/75/100K-A-US Specification Model 50K-A-US 63K-A-US 75K-A-US 100K-A-US Specifications Battery data(DC) Continuous charging / 56700W 71400W 85100W 113500W discharging power 750-1000V (for 3P3W) Battery voltage range 820-1000V (for 3P4W) Max. charging / 75.6A 95.2A 113.5A 151.3A discharging current BMS communication... - Page 109 Model 50K-A-US 63K-A-US 75K-A-US 100K-A-US Specifications Voltage accuracy Frequency accuracy 0.1Hz THDv <3% (Linear load) Unbalanced load 100% three-phase unbalanced ≤110%,continuous; Overload capacity 110%~120%:10min >120%,200ms Efficiency Max. efficiency 98.20% 98.20% 98.20% 98.20% Protection devices Battery reverse protection AC/DC surge protection Yes(Class II) Insulation resistance monitoring...
- Page 110 Model 50K-A-US 63K-A-US 75K-A-US 100K-A-US Specifications Relative humidity 0~100% Altitude ≤13123ft (4000m) Nighttime power consumption Standby power 250W consumption Topology Transformerless Cooling Smart air cooling Protection degree IP66/Type 4X Warranty 5/10 years (Optional) Standard compliance Safety UL 1741:2021, CSA22.2 NO107.1-2016 FCC Part 15 IEEE 1547:2018, IEEE1547.1:2020, HECO Rule 14, UL 1741 Grid connection standards...
- Page 111 Table 10.2 WIT 50/63/75/100K-H-US Specification Model 50K-H-US 63K-H-US 75K-H-US 100K-H-US Specifications Input data (DC) Max. recommended PV 109200W 124800W 156000W 156000W power Max. PV voltage 1100V Start-up voltage 195V Rated voltage 550V MPP voltage range 180V-800V Full power MPPT voltage 520V-800V range Max.
- Page 112 Model WIT 7 50K-H-US 63K-H-US 5K-H-US 100K-H-US Specifications Max. input/output current 66.2A/66.2A 83.4A/83.4A 99.3A/99.3A 132.4A/132.4A Power factor (@Rated >0.99 power) 1 leading~1 lagging Adjustable power factor THDi <3% AC grid 3P+PE/3P+N+PE connection type Stand alone (AC power) Rated AC output power 50000W 63000W 75000W...
- Page 113 Model 50K-H-US 63K-H-US 75K-H-US 100K-H-US Specifications Ground fault monitoring Grid monitoring String monitoring Anti-PID function AFCI protection Display and communication Display OLED+LED/WiFi+APP RS485 Optional Optional WIFI Optional General data 33.5/53.1/20.1 inch Dimensions (W /H / D) (850/1350/510mm) Weight 294lb 294lb 309lb 309lb Operating temperature...
- Page 114 Table 10.3 WIT 50/63/75/100K-AU-US Specification Model 50K-AU-US 63K-AU-US 75K-AU-US 100K-AU-US Specifications Battery data (DC) Continuous charging / 56700W 71400W 85100W 113500W discharging power 750-1000V (for 3P3W) Battery voltage range 820-1000V (for 3P4W) Max. charging / 75.6A 95.2A 113.5A 151.3A discharging current BMS communication RS485/CAN Types of Battery...
- Page 115 Model 50K-AU-US 63K-AU-US 75K-AU-US 100K-AU-US Specifications Max. output current 72.2A 108.3A 144.4A Voltage accuracy Frequency accuracy 0.1Hz THDv <3% (Linear load) Unbalanced load 100% three-phase unbalanced ≤110%,continuous; Overload capacity 110%~120%:10min >120%,200ms Switch time from on- <16.6ms grid to off-grid Switch time from off- grid to on-grid Efficiency Max.
- Page 116 Model 50K-AU-US 63K-AU-US 75K-AU-US 100K-AU-US Specifications General data 33.5/53.1/20.1 inch Dimensions (W /H / D) (850/1350/510mm) Weight 309lb Operating temperature -13°F~+140°F range >122°F, derating Noise emission (typical) ≤65dB(A) ≤65dB(A) ≤65dB(A) ≤65dB(A) Relative humidity 0~100% Altitude ≤13123ft (4000m) Nighttime power consumption Standby power 250W consumption...
- Page 117 Table 10.4 WIT 50/63/75/100K-HU-US Specification Model 50K-HU-US 63K-HU-US 75K-HU-US 100K-HU-US Specifications Input data (DC) Max. recommended PV 109200W 124800W 156000W 156000W power Max. PV voltage 1100V Start-up voltage 195V Rated voltage 550V MPP voltage range 180V-800V Full power MPPT voltage 520V-800V range Max.
- Page 118 Model 50K-HU-US 63K-HU-US 75K-HU-US 100K-HU-US Specifications Rated input/output 120.3A/60.2A 151.6A/75.8A 180.5A/90.3A 240.7A/120.3A current Max. input/output 120.3A/66.2A 151.6A/83.4A 180.5A/99.3A 240.7A/132.4A current Power factor(@Rated >0.99 power) 1 leading~1 lagging Adjustable power factor THDi <3% AC grid 3P+PE/3P+N+PE connection type Backup power (AC) Rated AC output power 50000W 63000W...
- Page 119 Model 50K-HU-US 63K-HU-US 75K-HU-US 100K-HU-US Specifications Battery reverse protection AC/DC surge protection Yes(Class II) Insulation resistance monitoring Residual-current monitoring unit AC short-circuit protection Anti-islanding protection Ground fault monitoring Grid monitoring String monitoring AFCI protection Anti-PID function Display and communication Display OLED+LED/WiFi+APP RS485 Optional...
- Page 120 Model 50K-HU-US 63K-HU-US 75K-HU-US 100K-HU-US Specifications Topology Transformerless Cooling Smart air cooling IP66/Type 4X Protection degree Warranty 5/10 years (Optional) Standard compliance Safety UL 1741:2021, CSA22.2 NO107.1-2016 FCC Part 15 Grid connection IEEE 1547:2018, IEEE1547.1:2020, HECO Rule 14, UL 1741 standards SA/SB:2020...
- Page 121 Handle the WIT Inverter that will not be operated in the future properly. 1> Disconnect the external AC circuit breaker and prevent accidental reconnection due to improper operation. 2> Set the DC switches to the OFF position. 3> Disconnect the upstream battery circuit breaker. 4>...
- Page 122 WIT Inverter, fault description and other information. 2. Return the defective product to Growatt for recycling and disposal. Growatt shall not be liable for any consequences of the following circumstances: 1. Unauthorized removal of the product, such as removing the tamper-proof label and the upper cover of the WIT Inverter.
- Page 123 If you have technical problems with our products, please contact Growatt for technical support. We require the following information in order to provide you with the necessary assistance: 1. Model number of the WIT Inverter 2. Serial number of the WIT Inverter 3.
- Page 124 Download Manual Growatt USA, Inc. 9227 Reseda Blvd, #435 Northridge, CA 91324, USA. +1-866-686-0298 usaservice@ginverter.com us.growatt.com GR-UM-355-A-00...
Need help?
Do you have a question about the WIT 50K-A-US and is the answer not in the manual?
Questions and answers