
Related Manuals for Blue Diamond 429015


Summary of Contents for Blue Diamond 429015
- Page 1 Standard Duty Tractor Rototiller Operation and Maintenance Manual Register your WARRANTY within 30 days of purchase 888-376-7027 | BlueDiamondAttachments.com...
- Page 2 Blue Diamond is continually working to improve its Model Number: _____________________________ products. Blue Diamond reserves the right to make any Serial Number: _____________________________ improvements or changes as deemed practical and pos- sible without incurring any responsibility or obligation...
-
Page 3: Table Of Contents
4. Operation ................18-22 11.5 Slipclutch Driveline Components – 4’, 5’, & 6’ Tillers ...40 4.1 Start Up..................17 11. Warranty ..................41 4.2 Operation Instructions ............19 4.3 Adjustments ................20 4.4 Stopping and Disconnecting ..........22 4.5 Transporting ................22 Blue Diamond® Attachments... -
Page 4: Introduction
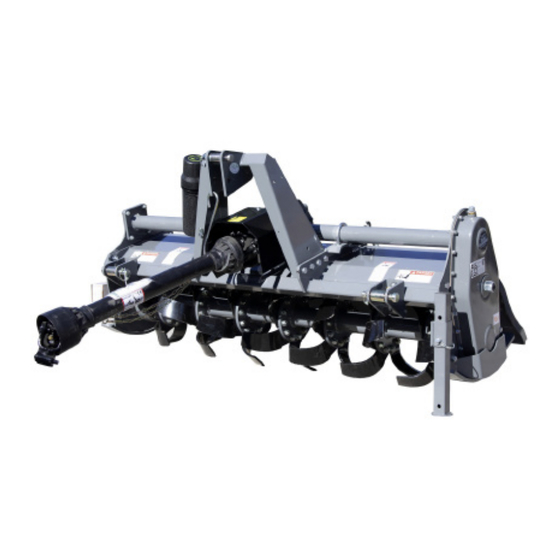
Rotor shaft Clevis (lower hitch) Tine Lower hitch pin Parking stand Upper hitch pin Skid Topmast Cardan driveshaft PTO shield Driveshaft support Implement Input Connection Front guards Gearbox Rear guards Side transmission case Manual Container Rear leveling board Blue Diamond® Attachments... -
Page 5: Attachment Specifications
RPM @ Rotor Shaft Speed Standard Tine Construction — curved curved Transmission Type — gear gear Maximum Working Depth Rotor Tube Diameter Rotor Swing Diameter Driveline Safety Device — Slip clutch Slip clutch Weight (driveline not included) Blue Diamond® Attachments... -
Page 6: Safety
Ensure that all safety pictograms/decals are legible. If pictograms/decals are worn, they must be replaced with new ones obtained DANGER from Blue Diamond and placed in the position indicated by this manual. The signal word DANGER on the machine and in •... -
Page 7: Qualified Operators
• Any unauthorized modification of the machine DANGER may cause problems in safety and relieves Blue Diamond from any liability for damages or injuries that may result to operators, third AVOID SERIOUS INJURY OR DEATH parties, and objects. Operators must receive instructions before operating the machine. -
Page 8: Operating Safety Instructions
• Always disengage the PTO before raising the tiller, and never engage the PTO with the tiller in the raised position. The machine might throw objects at high speed, causing serious injury or death. Blue Diamond® Attachments... -
Page 9: Transporting Safety Instructions
• All adjustment operations on the tiller must be performed by qualified and trained operators, with the tractor engine off, the PTO disengaged, the tiller lowered to the ground or Blue Diamond® Attachments... -
Page 10: Maintenance Safety Instructions
Blue Diamond. • Do not swallow fuels or lubricants. In case of accidental injestion, immediately seek medical treatment. In case of accidental contact with eyes, rinse well with water and consult a doctor. Blue Diamond® Attachments... -
Page 11: Safety Decals
Make sure safety decals are in good condition. If the decals are worn, they must be replaced with others obtained from Blue Diamond and placed in the correct positions indicted by this manual. Make sure the safety decals are legible. If necessary, wipe them by a cloth with soap and water. - Page 12 OIL FILLING PLUG - NEW 529312 GREASE - NEW 529313 OIL DRAIN PLUG 529314 MAINTAIN OIL LEVEL 529315 LIFTING HOOK JOINT 529316 MAINTENANCE GUIDE (STANDARD DUTY) 529317 CE LOGO 529318 ROTATING DRIVELINE (COVER) 529319 ROTATING DRIVELINE (TUBE) Blue Diamond® Attachments...
-
Page 13: Set Up
In case of Quick Hitch, and reposition the pin through damage or missing parts immediately notify the the lower hole. Replace the elastic pins when dealer or Blue Diamond. finished. Store the bushing for possible future use. 3.1 General Information 2. - Page 14 Be sure the pin is provided with bushing for coupling with the Quick Hitch. Replace the to tractors with 3-point hitch Category 1. elastic pins when finished. Figure 2 Blue Diamond® Attachments...
-
Page 15: Connecting To The Tractor
(when tiller is raised up off the ground) Blue Diamond. To connect the driveshaft to the tractor and implement, the operator must: Blue Diamond® Attachments... - Page 16 (see Maintenance section). Figure 4 • Always engage the tractor PTO at low RPM to minimize the effect of the peak torque on the driveline and the machine. Blue Diamond® Attachments...
-
Page 17: Tractor-Tiller Stability
T = Weight of tractor + operator (75 kg) Z = Ballast weight (kg) M = Implement weight (kg) S1 = Distance between rear axle and lower hitch points (cm) S2 = Distance between lower hitch points and implement center of mass = 34 cm Blue Diamond® Attachments... -
Page 18: Operation
Make sure the soil to be worked is not too • Check that the driveshaft clutch is in good grassy, muddy, sandy, or rocky. condition, and that its componenets are not subject to “sticking” (see Maintenance and Driveline sections on pages 23 and 16). Blue Diamond® Attachments... -
Page 19: Operation Instructions
20). the tractor, setting the parking brake, stopping the engine, and removing the ignition key. Repair any damages immediately, and make sure rotor and blades are in good condition before restarting operation. Blue Diamond® Attachments... -
Page 20: Adjustments
Friction Clutch Adjustment machine from overload. Make sure that the height of all the compressed springs is equal to prevent The PTO drivehsaft and friction clutch are clutch malfunctioning. designed to transmit adequate power to the tiller. Blue Diamond® Attachments... - Page 21 Adjust with the 3-point top link if necessary. edge, not from the sides. Blue Diamond® Attachments...
-
Page 22: Stopping And Disconnecting
Make sure the tiller remains stored in a protected area, to prevent that unauthorized personnel can approach it. Before a long term storage (e.g. at seasonal end), do cleaning and maintenance operations as specified in Maintenance and Storage sections on pages 23 and 28). Blue Diamond® Attachments... -
Page 23: Maintenance
NOT parts to come to a complete start. be performed without consulting your dealer or Blue Diamond. Blue Diamond, may on a case by • Place the tiller slightly lifted from the ground on... - Page 24 5. Maintenance Figure 9 IMPORTANT CAUTION Remove and install one blade at a time to ensure WORN TINES MAY BE VERY SHARP! blades are correctly oriented when installed. Replace worn blades only with original parts. Blue Diamond® Attachments...
-
Page 25: Gearbox Lubrication
• Retighten the filling plug. To make the oil change: • Dispose the discharged oil into containers for • Remove the skid from the transmission side. used oil. • Place a tank under the oil level plug. Blue Diamond® Attachments... -
Page 26: Bearing Housing Lubrication
Make sure to clean the fitting zerk before using the grease gun. • Take note of the height of the compressed Do not let excess grease collect on or around springs. parts, particularly when operating in sandy areas. Blue Diamond® Attachments... - Page 27 • Retighten the bolts restoring the original springs postion on the driveshaft. NOTE: For replacement of the driveshaft service parts (e.g. friction discs), refer to the user manual of the driveshaft manufacturer. Blue Diamond® Attachments...
-
Page 28: Storage
“sticking” effect due to moisture that may cause the clutch failure at the restart of activities (see Driveshaft Maintenance section on page 24). Before restarting operations, restore the original height of the springs. Blue Diamond® Attachments... -
Page 29: Scrapping
In case of scrapping, the machine must be disposed in appropriate and authorized sites, according to local legislation. Before scrapping, separate plastic parts from rubber parts, aluminum, steel, et. Recover and dispose any exhausted oils to authorized centers for oil collecting. Blue Diamond® Attachments... -
Page 30: Troubleshooting
Install tines correctly Debris entangled in blades and/or rotor Clear rotor and/or blades Rear board too high Lower rear board Soil texture too course PTO speed too slow Increase PTO speed Ground speed too fast Reduce ground speed Blue Diamond® Attachments... - Page 31 Blades worn or damaged Replace blades Skids not aligned Align skids Tiller left side not leveled with right side Adjust tractor 3-point arms Excessive working depth Lower skids Too much load required of tractor Excessive PTO speed Reduce PTO speed Blue Diamond® Attachments...
-
Page 32: Specifications
200 N•m 165 ft / lb 225 N•m 230 ft / lb 315 N•m 230 ft / lb 310 N•m 300 ft / lb 405 N•m 325 ft / lb 440 N•m 450 ft / lb 610 N•m Blue Diamond® Attachments... -
Page 33: Spare Parts
• Type of machine • Tiller serial number • Description and Blue Diamond® part number • Quantities of each part needed NOTE: For identification of Part Numbers and description of safety decals refer to the Safety Labels section on page 11. -
Page 34: Parts
529325 Hex Bolt M12 X 1.75 X 25 (8.8) 529326 Lock Washer 12mm 529327 Housing Gasket 529331 Circlip Internal 100mm 529328 Bearing 6309 Lu 529329 Oil Seal 55 X 90 X 10 529330 LH Side Plate Assembly Blue Diamond® Attachments... -
Page 35: Rh Side Plate Components
End Cover 529334 Allen Bolt M12 X 1.75 X 30 (8.8) 529335 1/8 Grease Zerk 7.5mm 529329 Oil Seal 55 X 90 X 10 529336 Gear Side Housing 529337 Stub Axle Shaft 529338 RH Side Plate Assembly Blue Diamond® Attachments... -
Page 36: Main Frame Components
11. Parts 11.3 Main Frame Components 31 30 Blue Diamond® Attachments... - Page 37 Gearbox Assembly (60" Tiller) 529366 Gearbox Assembly (50" Tiller) 529367 Tailgate Lift Chain 529368 J-Bolt 529369 Spring 529370 Lockwasher 12mm 529371 Tailgate (72" Tiller) 529372 Tailgate (60" Tiller) 529373 Tailgate (50" Tiller) 529374 LH Skid Shoe 529375 Side Cover Blue Diamond® Attachments...
- Page 38 Nylock Nut M35x1.50 529330 LH Side Plate Assembly 529380 Tractor Rototiller Standard Duty Stand Holder 529381 Tractor Rototiller Standard Duty Stand 529382 Tractor Rototiller Standard Duty Sq. Plastic Cap 40mm 529383 Tractor Rototiller Standard Duty Flange Gasket Blue Diamond® Attachments...
-
Page 39: Top Gearbox Components
Hex Bolt M8 X 1.25 X 30 529399 Lock Washer 8mm 529400 Hex Bolt M8 X 1.25 X 25 529401 Lock Washer 10mm 529402 Hex Bolt M10 X 1.50 X 25 (8.8) 529364 Gearbox Assembly (72” Tiller) 529365 Gearbox Assembly (60” Tiller) Blue Diamond® Attachments... -
Page 40: Slipclutch Driveline Components - 4', 5', & 6' Tillers
529406 Outer Plastic Shield Brg 529407 Inner Plastic Shield Brg 529408 Complete Safety Shield 529409 Safety Support Chains 529410 Clutch Lining (Pack Of 2) 529411 Complete Slip Clutch 529412 Eccentric Pin Kit 529413 Complete SC Driveline – Blue Diamond® Attachments... -
Page 41: Warranty
ATTACHMENTS before work is performed. ® The BLUE DIAMOND® PRODUCT SUPPORT TEAM will advise repairs and applicable parts exchanges. Tampering with the failed part may void the warranty. This warranty does not include freight or delivery charges incurred when returning machinery for servicing. Dealer mileage, service calls, and pickup/delivery charges are the customers’... - Page 42 QUALITY | DEPENDABILITY | INTEGRITY Blue Diamond® Attachments 4512 Anderson Road, Knoxville, TN 37918 888-376-7027...
Need help?
Do you have a question about the 429015 and is the answer not in the manual?
Questions and answers