
Related Manuals for Elo Touch Solutions 1593L


Summary of Contents for Elo Touch Solutions 1593L
- Page 1 Questo manuale d’istruzione è fornito da trovaprezzi.it. Scopri tutte le offerte per Elo 1593L o cerca il tuo prodotto tra le migliori offerte di Monitor USER MANUAL Elo Touch Solutions 90 Series Open Fram e Touch Displays...
- Page 2 No part of this publication may be reproduced, transmitted, transcribed, stored in a retrieval system, or translated into any language or computer language, in any form or by any means, including, but not limited to, electronic, magnetic, optical, chemical, manual, or otherw ise w ithout prior w ritten permission of Elo Touch Solutions, Inc.
-
Page 3: Table Of Contents
Table of Contents Section 1: Introduction ..........................................4 Section 2: Installation ..........................................4 Section 3: Mounting ..........................................7 Section 4: Operation ..........................................9 Section 5: Technical Support ........................................14 Section 6: Safety & Maintenance ......................................16 Section 7: Regulatory Information ......................................17 Section 8: Warranty Information ...................................... -
Page 4: Section 1: Introduction
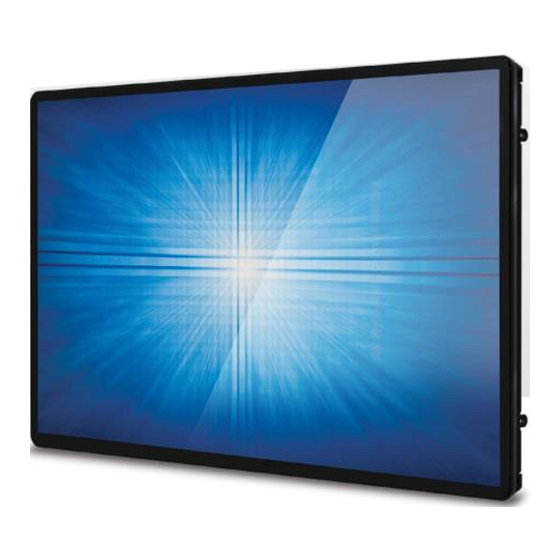
Section 1: Introduction Product Description Your new touch display combines Elo Touch Solutions touch the latest developments in touch technology and display design with the reliability for use in high-traffic environment. This touch display incorporates a 24-bit color, active matrix thin-film-transistor LCD panel to provide high quality display performance. The 90 Series offers sizes that range from 10.1 inch to 27 inch and resolutions that range from 800x600 to Full HD 1920x1080. - Page 5 • VGA cable • USB cable (not available for ETXX9XL-0NXX models) • Mounting brackets • OSD remote User Manual: 90 Series UM600050 Rev D, page 4 of 25...
- Page 6 Connector Panel & Interfaces 12V DC IN OSD Connector Touch USB Touch Display Connections 1. Connect the DP or VGA video cables between the monitor’s DP/VGA input connectors and your DP/VGA video source. Tighten the video cable’s screws for best performance on VGA connector. 2.
- Page 7 Installing the Touch Technology Software Drivers No additional drivers are required for your projected-capacitive touchmonitor with Windows 7 and 8 operating systems, it uses Windows HID drivers. If the monitor is used with Windows XP operating system, follow below steps to install W indows XP touch driver. To download the latest touch drivers 1.
-
Page 8: Section 3: Mounting
Section 3: Mounting Flush Mount Flush-mount Bracket Installation Notes: Bracket shape varies for each model, draw ing for illustration purposes only. See dimensional draw ing for exact dimensions. 1. Attach bracket “A” To touch display (all four sides) with M4 screws (included) 2. - Page 9 Rear VESA Mount A four-hole (200x100mm for 2794 and 75x75mm, 100x100mm for the rest size) mounting pattern for M4 screws is provided on the rear of the monitor. The VESA FDMI-compliant counting is coded: VESA MIS-E,C. ET1093L ET1291L ET1590L ET1593 L ET1790L ET1990/1991L ET2094L ET2293/2294L ET2494L...
-
Page 10: Section 4: Operation
Section 4: Operation Power The touch display ships in an ON state. To turn the touch display on or off, press the touch display power button on the OSD controller once. The power status LED on the OSD controller functions according to the following table. Touch Display/Computer Module Status LED Status SLEEP... - Page 11 IntelliTouch Plus Touchscreen Technology When connected to Windows 7 computers, the touch display can report 2 simultaneous touches. When connected to Windows XP computers, the touch display reports single touches. The IntelliTouch Plus touchscreen can be re-calibrated to your displayed video image, if needed, through the calibration function in the Elo driver control panel.
- Page 12 A display’s native resolution is its width and height measured in number of pixels. Generally, for best performance, an image displayed on this monitor will look best when your computer’s output resolution matches this monitor’s native resolution. For computer output resolutions at non-native resolutions, the monitor will scale the video to its panel’s native resolution. This involves stretching or compressing the input image as needed in the X- and Y-dimensions to fit the display’s native resolution.
- Page 13 Using the OSD buttons controls an on-screen graphical user interface which displays on top of your input video, allowing intuitive adjustment of the following display parameters: Parameter Available Adjustment Increase/decrease monitor brightness Brightness Default: maximum Increase/decrease monitor contrast Contrast Default: best gray-shade performance Allows fine adjustments of the panel’s pixel dot clock.
- Page 14 Defa ult: User Defined with R, G, and B all set to 100. User Manual: 90 Series UM600050 Rev D, page 13 of 25...
- Page 15 Parameter Available Adjustment Adjusts the horizontal location of the OSD menus on the display OSD H-Position Default: centered Adjusts the vertical location of the OSD menus on the display. OSD V-Position Default: centered Adjusts how long a period of OSD button inactivity the will wait before closing the touch display OSD Timeout...
- Page 16 Press and hold the “Menu” and “Up” buttons for two seconds to enable/disable the Power Locking feature. When the Power Locking is enabled, pressing the power switch will have no effect on the system. User Manual: 90 Series UM600050 Rev D, page 15 of 25...
-
Page 17: Section 5: Technical Support
If you are experiencing trouble with your touch display, refer to the following suggestions. If the problem persists, please contact your local dealer or contact Elo Touch Solutions Customer Service. Worldwide technical support phone numbers are available on the last page of this use manual. - Page 18 Technical Assistance Technical Specifications Online Self-Help Technical Support visit www.elotouch.com/go/contactsupport visit www.elotouch.com/products visit www.elotouch.com/go/websupport for technical specifications for this device for online self-help for technical support See this user manual’s last page for worldwide technical support phone numbers. User Manual: 90 Series UM600050 Rev D, page 17 of 25...
-
Page 19: Section 6: Safety & Maintenance
Section 6: Safety & Maintenance Safety • To avoid risk of electric shock, follow all safety notices and do not disassemble the touch display. They are not user-serviceable. • The slots located on the sides and top of the touch display case are for ventilation. Do not block or insert anything inside the ventilation slots. •... -
Page 20: Section 7: Regulatory Information
Section 7: Regulatory Information Electrical Safety Information Compliance is required with respect to the voltage, frequency, and current requirements indicated on the manufacturer’s label . Connection to a different power source than those specified herein will likely result in improper operation, damage to the equipment or pose a fire hazard if the limitations are not followed. There are no operator serviceable parts inside this equipment. - Page 21 General Information to all Users: This equipment generates, uses and can radiate radio frequency energy. If not installed and used according to this manual the equipment may cause interference with radio and television communications. There is, however, no guarantee that interference will not occur in any particular installation due to site-specific factors.
- Page 22 Explanation of Markings 1. In accordance with the SJ/T11364-2006 requirement, the electronic information products are marked with the following pollution control logo. The Environment-Friendly Use Period for this product is 10 years. The product will not leak or mutate under normal operating conditions listed below, so that the use of this electronic information product will not result in any severe environmental pollution, any bodily injury, or damage to any assets.
-
Page 23: Section 8: Warranty Information
Section 8: Warranty Information Except as otherwise stated herein, or in an order acknowledgment delivered to Buyer, Seller warrants to Buyer that the Product shall be free of defects in materials and workmanship. The warranty for the touch display and their components is three years. Seller makes no warranty regarding the model life of components. - Page 24 Notes User Manual: 90 Series UM600050 Rev D, page 23 of 25...
- Page 25 • Press Releases • Software Drivers • Touch Display Newsletter To find out more about our extensive range of Elo touch solutions, go to www.elotouch.com, or call the office nearest you. North America 800-ELO-TOU CH Europe Asia-Pacific Latin America Elo Touch Solut ions...
Need help?
Do you have a question about the 1593L and is the answer not in the manual?
Questions and answers