
Related Manuals for Ricoh Ri 1000X


Summary of Contents for Ricoh Ri 1000X
- Page 1 RICOH Ri 1000X User Manual For safe and correct use, be sure to read the Safety Information in Safety Information and Quick Installation Guide before using the machine.
-
Page 3: Table Of Contents
Front and Right View ........................13 Rear View ............................. 13 1.3. Important ............................14 8 Essential Tips for Keeping Your RICOH Ri 1000X in Top Shape ..........17 1.4. Machine Installation ........................19 Space Needed for the Printer ......................19 Unpacking ............................. - Page 4 TABLE OF CONTENTS RICOH Ri 1000X User Manual The setting of IP address for the machine ..................43 1.7. Usage of ColorGATE Productionserver ..................46 Register as a user and product on the ColorGATE Service & Support website ......48 Download software of ColorGATE RIP/MIM files ................
- Page 5 TABLE OF CONTENTS RICOH Ri 1000X User Manual Monthly ............................114 3.2. NOZZLE CHECK ........................115 3.3. AUTO HEAD CLEAN ........................118 Specifying the Maintenance Schedule ..................121 3.4. REGULAR MAINTENANCE......................123 3.5. How to Clean the Guide Rod ...................... 124 Start REGULAR MAINTENANCE ....................
- Page 6 Firmware update (Panel (GIB)) ....................219 Firmware update (Sub Control (SCB) / Engine (CTL)) ..............220 When update is failed ........................221 Update by connecting your PC and RICOH Ri 1000X with Ethernet cable ......... 222 10.2. Specifications ..........................223 General ............................223 Ink Set ............................
-
Page 7: How To Read The Manuals
How to Read the Manuals RICOH Ri 1000X User Manual How to Read the Manuals Before You Begin... Only appropriately trained users should operate the machine. Disclaimer Contents of this manual are subject to change without prior notice. To the maximum extent permitted by applicable laws, in no event will the manufacturer be liable for any damages whatsoever arising out of failures of this machine, losses of the registered data, or the use or non-use of this machine and operation manuals provided with it. -
Page 8: The Meanings Of The Safety Symbols Used With This Machine
The Meanings of the Safety Symbols Used with This Machine RICOH Ri 1000X User Manual The Meanings of the Safety Symbols Used with This Machine The meanings of the safety symbols for this machine are as follows: Prohibition Caution Warning; Pinch Point... -
Page 9: Notes For Using This Machine Safely
Notes for Using This Machine Safely RICOH Ri 1000X User Manual Notes for Using This Machine Safely To use this machine, it is recommended you take the following measures, which include: • Installing this machine in a network protected by a firewall. -
Page 10: Before You Begin
1. Before You Begin RICOH Ri 1000X User Manual 1. Before You Begin 1.1. Checking the Contents of the Product Item Number This machine Power cord Ethernet cable Platen (Medium) Frame (Medium) - Page 11 1. Before You Begin RICOH Ri 1000X User Manual Item Number Waste ink bottle Waste ink tube with waste ink bottle cap Squeegee Heat press paper ColorGATE Productionserver License card Safety Information and Quick Installation Guide User Maintenance Precautions...
- Page 12 1. Before You Begin RICOH Ri 1000X User Manual Maintenance Supplies Number Cleaning liquid (with dropper) Cleaning applicators Lint free wipes Grease Polyethylene gloves 5 sets Cleaning JIG Head protection cover (This is attached to the main unit.)
-
Page 13: Guide To Components
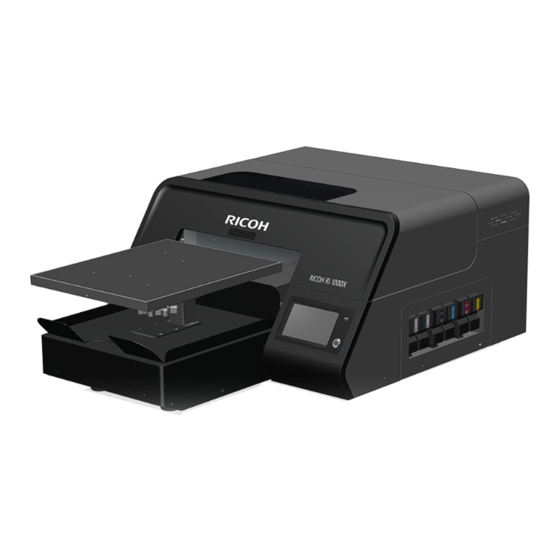
1. Before You Begin RICOH Ri 1000X User Manual 1.2. Guide to Components Front and Right View Front cover Platen Touch panel Ink cartridges USB-A port (2.0) Sub power button Rear View Ethernet port Waste ink bottle connector Main power switch Power connector USB-A port (2.0)*... -
Page 14: Important
1. Before You Begin RICOH Ri 1000X User Manual 1.3. Important Prevent Print Heads from Clogging • Shake the ink cartridge when either of these pop-ups shows up. • Replace a used ink cartridge with new one immediately to prevent print heads from clogging. - Page 15 1. Before You Begin RICOH Ri 1000X User Manual • Clean print heads to prevent them from clogging. For details, see page 115 "NOZZLE CHECK". For details, see page 118 "AUTO HEAD CLEAN". • Clean the path of carriages with grease so that they can move smoothly and print precisely.
- Page 16 1. Before You Begin RICOH Ri 1000X User Manual • Do not leave an error. This might cause some kind of problem. Please resolve an error shortly after the pop-up shows up. • Some parts require periodical replacement This printer includes parts that require replacement due to usage.
-
Page 17: Essential Tips For Keeping Your Ricoh Ri 1000X In Top Shape
As part of our commitment to your success, we want to make sure that you are getting optimal performance from your RICOH Ri 1000X while also minimizing any issues that can easily be prevented by following a few simple tips: 1. - Page 18 5. Check the following websites to ensure that your printer and software firmware are completely up to date. Firmware: Ricoh website of the country that you are in Software: Use latest dated version of the following. ColorGATE products support page (https://www.colorgate.com/support/) Please check the latest date in the Web site.
-
Page 19: Machine Installation
1. Before You Begin RICOH Ri 1000X User Manual 1.4. Machine Installation Space Needed for the Printer Installation Space: Top View Rear: 10 cm (approx. 3.9 inches) or more Right: 70 cm (approx. 27.6 inches) or more Front: 50 cm (approx. 19.7 inches) or more ... -
Page 20: Unpacking
1. Before You Begin RICOH Ri 1000X User Manual Unpacking • The machine weights around 110 kg (242.5 lb.). • Four or more people are required to lift the printer. When moving the printer, lift it slowly so that you do not strain yourself. Lifting the printer forcibly or handling it roughly to drop it will risk injury. -
Page 21: Installing The Waste Ink Bottle And Ink Cartridges
1. Before You Begin RICOH Ri 1000X User Manual Installing the Waste Ink Bottle and Ink Cartridges IMPORTANT! The printer cannot determine if the waste ink bottle is connected. Make sure the waste ink bottle is connected properly. Insert the waste ink tube into the waste ink bottle. - Page 22 1. Before You Begin RICOH Ri 1000X User Manual Remove the tape and towel from the waste ink bottle connector, and then connect the waste ink tube to the waste ink bottle connectors on the right back side of the printer.
- Page 23 1. Before You Begin RICOH Ri 1000X User Manual IMPORTANT! Install the waste ink bottle vertically. If installed horizontally, the waste ink inside could leak out. IMPORTANT! Connect the waste ink tube straight to the waste ink bottle. If the waste ink tube is bent or twisted, ink could become clogged inside the tube and thus could cause a malfunction.
- Page 24 1. Before You Begin RICOH Ri 1000X User Manual Insert the ink cartridges. IMPORTANT! When installing the ink cartridges, do not touch the inside of the machine. Carefully install a cartridge in the correct position. During the initial ink charging, do not lift the front cover. Also, do not pull out the ink cartridge.
-
Page 25: Turning On The Power
1. Before You Begin RICOH Ri 1000X User Manual Turning On the Power • Avoid taking the following actions because doing so can result in fire or electric shock: Using any power supply voltage or frequencies other than those that match the specifications ... - Page 26 1. Before You Begin RICOH Ri 1000X User Manual Connect the power cord to the power connecter. Turn ON the main power switch. Hold down the sub power button for more than 2 seconds.
- Page 27 1. Before You Begin RICOH Ri 1000X User Manual After booting, the printer will perform initial ink charging if the ink is not charged. Initial ink charging takes about 20 minutes. NOTE – During the initial ink charging, do not lift the front cover. Also, do not pull out the ink cartridge.
- Page 28 1. Before You Begin RICOH Ri 1000X User Manual Turning Off the Power To turn off the power, hold down the sub power button for more than 3 seconds, which is located at the front near the touch panel.
-
Page 29: Attaching The Platen
1. Before You Begin RICOH Ri 1000X User Manual Attaching the Platen Attach the platen. The two protrusions on the back of the platen should be set correctly into the holes in the platen base. There is a hole on the back side of the platen base that has a guide shape. -
Page 30: Handling The Ink Cartridge
1. Before You Begin RICOH Ri 1000X User Manual Handling the Ink Cartridge • The following explains the warning messages on the plastic bag used in this product's packaging: • Do not leave the polythene materials (bags, etc.) supplied with this machine close to babies and small children. - Page 31 1. Before You Begin RICOH Ri 1000X User Manual • The ink cartridge surface may have ink on it, so be careful to avoid ink stains. • Do not remove the cartridge while operating the machine. Doing so may cause the ink to spray, staining clothes and surroundings.
- Page 32 1. Before You Begin RICOH Ri 1000X User Manual • The warranty period after opening the ink cartridge is 90 days or running out the ink, whichever comes first. If you print 50 sheets a month or less, it is recommended to use the standard type ink cartridges.
-
Page 33: Handling The Waste Ink Bottle
1. Before You Begin RICOH Ri 1000X User Manual Disposing a Depleted Ink Cartridge Dispose of a Depleted Ink Cartridge and Cleaning cartridge in accordance with applicable laws and ordinances. If you are uncertain about disposal, consult with your local dealer. - Page 34 1. Before You Begin RICOH Ri 1000X User Manual Removing the Waste Ink tube It is recommended to keep the waste ink tube installed unless absolutely necessary. If it is necessary to remove the waste ink tube, use the below instructions.
-
Page 35: Handling The Front Cover
1. Before You Begin RICOH Ri 1000X User Manual Handling the Front Cover Opening the Front Cover • When lifting and lowering the front cover, be sure to hold it by the part shown below. Be careful to ensure that your hand or any other part of your body does not get caught in the front cover. - Page 36 1. Before You Begin RICOH Ri 1000X User Manual Closing the Front Cover Close the front cover. NOTE – Printer will not function if the front cover is open.
-
Page 37: Control Panel Functions
1. Before You Begin RICOH Ri 1000X User Manual 1.5. Control Panel Functions Print Tab Status bar Press/Drag down the status bar to open the status screen menu. Machine status • There are 4 possible colors. Green: The printer is fully functional. -
Page 38: Status
1. Before You Begin RICOH Ri 1000X User Manual [STOP] Stops any current movement of the platen and allows you to cancel the print job. [EJECT] Press to eject the platen from the printable position so that the media can be placed on the platen. -
Page 39: Maintenance Tab
1. Before You Begin RICOH Ri 1000X User Manual Maintenance Tab [NOZZLE CHECK] Prints a nozzle check pattern result. It is recommended that this is performed daily to monitor the printer. [AUTO HEAD CLEAN] Performs head cleaning automatically using systems components. -
Page 40: Service Part Status Tab
1. Before You Begin RICOH Ri 1000X User Manual Service Part Status Tab Displays the current usage or status of each service part. For details, see page 187, “Service parts”. [REPLACE LIST] Allows you to check the part replacement history. -
Page 41: Settings Tab
1. Before You Begin RICOH Ri 1000X User Manual Settings Tab [INK PATH CONTROL] Performs the ink path control. If you press this button, you can flush the printer. For details, see page 198, "Ink Path Guide". [OPTION] You can change the following settings via the Option screen. - Page 42 1. Before You Begin RICOH Ri 1000X User Manual [VOLUME] Set volume of buzzer [AGITATE SETTING] Select display format when agitating white cartridges. [USB UPDATE] Update firmware using USB drive. If run it, you need to save latest firmware to USB drive in advance.
-
Page 43: Printer Setup
1. Before You Begin RICOH Ri 1000X User Manual 1.6. Printer Setup The setting of IP address for the machine The setting method of IP address for this machine are two patterns. Case1: For connecting directly to the printer from a PC that is not parts of a network... - Page 44 1. Before You Begin RICOH Ri 1000X User Manual [Configuring the IP address of the machine] Press the Setting tab on the touch panel of this machine. Press [OPTION]. Press [IP ADDRESS]. If DHCP setting is “ENABLE”, change to “DISABLE”.
- Page 45 1. Before You Begin RICOH Ri 1000X User Manual Case2: For DHCP setup Press the Setting tab on the touch panel of this machine. Press [OPTION]. Press [IP ADDRESS]. Setting DHCP to [ENABLE] to add the printer to an existing network.
-
Page 46: Usage Of Colorgate Productionserver
1. Before You Begin RICOH Ri 1000X User Manual 1.7. Usage of ColorGATE Productionserver This machine uses ColorGATE Productionserver for printing. ColorGATE Productionserver must be installed on your PC. The productionserver22 system requirements are as follows. For the system requirements for the latest version, see the ColorGATE web site (https://www.colorgate.com/). - Page 47 1. Before You Begin RICOH Ri 1000X User Manual Please check (https://www.colorgate.com/requirements/) for the latest supported OS. The supported OS for each version can be found on the ColorGATE support site (https://www.colorgate.com/support/). See the 2.2 system requirements in the Productionserver Manual. This document is located when ColorGATE Support site >...
-
Page 48: Register As A User And Product On The Colorgate Service & Support Website
1. Before You Begin RICOH Ri 1000X User Manual Register as a user and product on the ColorGATE Service & Support website NOTE - ColorGATE Service & Support website is available in English and German. Products after ColorGATE Productionserver 22 are only available in Windows 64 bit. - Page 49 1. Before You Begin RICOH Ri 1000X User Manual When registration is complete, the following message will be displayed. Important! At this point, registration has not been completed yet. You can use the service by activating the user account by following the steps below.
- Page 50 Next, click [REGISTER PRODUCT] for product registration. (If you are not logged in, please log in.) Enter the license number of the license card included with the RICOH Ri 1000X and click [Next]. Check the contents of the license, and if there are no problems, click [Next].
- Page 51 1. Before You Begin RICOH Ri 1000X User Manual The printer selection screen is displayed. Select “Ricoh Ri 1000X” and click [Next]. The image below is when Ri 1000X is selected. Select the mode in which you want to use the license and click [Next].
- Page 52 1. Before You Begin RICOH Ri 1000X User Manual Make a final review of your product registration information and click [Register now] if you are satisfied. When the following screen is displayed, product registration is complete.
-
Page 53: Download Software Of Colorgate Rip/Mim Files
1. Before You Begin RICOH Ri 1000X User Manual Download software of ColorGATE RIP/MIM files Note - If the email you received when you execute “User registration” contains a download link for the Productionserver and MIM, download it from that download location. - Page 54 1. Before You Begin RICOH Ri 1000X User Manual Click the icon of [DOWNLOAD] of “PS_Ricoh_Ri1000X_Combi-MIM_ver***.cmp”, and then save the file in your local PC. The file name is subject to change. Download the latest version of ColorGATE Productionserver. Click [SOFTWARE].
- Page 55 1. Before You Begin RICOH Ri 1000X User Manual Follow the install wizard to install ColorGATE Productionserver. NOTE1 – If you are using a bundled license, on the "License Type Selection" screen displayed in the wizard, Select [Single Host License/Software (SHL-SW)].
-
Page 56: Start Software
1. Before You Begin RICOH Ri 1000X User Manual Start Software Go to https://www.colorgate.com/support/. If you are not logged in to your user profile, click Login to log in using your email address and password. Click the [MENU] button in the upper right corner of the browser, and click [Account&Licenses]. -
Page 57: License Update
1. Before You Begin RICOH Ri 1000X User Manual License Update When the following dialog is displayed, click [Start Update…]. For details about updating the license file, see the manual or help file of ColorGATE Productionserver. Setup Driver Click [Printer], and then click [New]. - Page 58 1. Before You Begin RICOH Ri 1000X User Manual Select [Ricoh] and [Ricoh Ri 1000X], and then click [Next]. Click [Import MIM…]. If the message on the window is not displayed properly, read the following sentences. For your chosen printer, you can import MIM combinations, which can be found on ColorGATE Service &...
- Page 59 1. Before You Begin RICOH Ri 1000X User Manual Select the MIM file*, and then click "Open". *Example: Filename of “RICOH Ri1000X MIM package.cmp” Click [Import]. Make sure "Media", "Ink" and "Metamode" are set to "All". Click [OK]. Click [Next].
- Page 60 1. Before You Begin RICOH Ri 1000X User Manual Enter the IP address of the printer, and then click [Next]. Do not change the port number, displayed as "3782". If Data Collector Module has not been installed, the installer will be started after clicking [Next].
- Page 61 1. Before You Begin RICOH Ri 1000X User Manual For details about how to setup and operate the Data Collector Module, see the Data Collector Module manual. You can view the manual from the following URL: https://contents-usstage.supervisori.ricoh.com/manual/supervisor-i.manual.pdf • Click [Next].
- Page 62 1. Before You Begin RICOH Ri 1000X User Manual Click [Finish].
-
Page 63: Print Method
1. Before You Begin RICOH Ri 1000X User Manual Print method Drag & drop your job file(s) from Windows Explorer into the “Job” queue. Supported file type: BMP, JPEG, TIFF, PNG Job file(s) Select the job in the “Job” archive, and then right-click the selected job. - Page 64 1. Before You Begin RICOH Ri 1000X User Manual Click [Print]. For details about loading jobs, see the manual or help file of ColorGATE Productionserver.
-
Page 65: Setting Of Print Mode
1. Before You Begin RICOH Ri 1000X User Manual Setting of print mode Select the job in the “Job” archive, and then right-click the selected job. Click [Settings]. Click the [Media] in [Color] tab, and then select the Garment color. - Page 66 1. Before You Begin RICOH Ri 1000X User Manual Media Description Black-Garment For printing black T-shirt Ink for use : W / C / M / Y NOTE - Black is expressed using the garment color. Not recommended for use other than black T-shirt.
- Page 67 1. Before You Begin RICOH Ri 1000X User Manual <Metamode> • 1. SuperFine 1200x1200dpi 16Pass High definition print mode. Recommended image : photograph • 2. ExtraFine 600x600dpi 9Pass Standard print mode, recommended as default. • 3. Fine 600x600dpi 8Pass Faster print mode than ExtraFine.
- Page 68 1. Before You Begin RICOH Ri 1000X User Manual Additional Tips (Improvement of whiteness) If you want to print more whiteness, you can increase the whiteness by following the steps below. Click the [Metamode], and then select the print mode.
- Page 69 1. Before You Begin RICOH Ri 1000X User Manual Click the [Settings] under Advanced in [Color] tab. And, select white print mode [White: 1200x1200 16pass BiDir 2bit] or [White: 1200x1200 16pass UniDir 2bit]. Set the Limit value. Recommended value:60 However, the optimum value depends on the type of T-shirt, so adjust the value if necessary.
- Page 70 1. Before You Begin RICOH Ri 1000X User Manual NOTE – This setting will increase the consumption of white ink. If ink bleeding occurs, set the drying time with of the printer. (see page 41, "[DRYING TIME]" in Settings Tab) When returning the white print mode to [White: 600x1200 8pass BiDir 2bit], also return the ...
-
Page 71: Image Transparency Setting
1. Before You Begin RICOH Ri 1000X User Manual Image transparency setting If your image contains transparency information and you want to use that setting, follow the steps below. Click [RIP] tab and check [Use document transparency]. Displayed only for file formats that allow transparency information (such as PNG). -
Page 72: Adjusting Special Colors: White
1. Before You Begin RICOH Ri 1000X User Manual Adjusting Special Colors: White Specify this when you adjust the mode to print white. Select the job in the “Job” archive, and then right-click the selected job. Click [Settings]. Click the [Settings] under Advanced in [Color] tab. - Page 73 1. Before You Begin RICOH Ri 1000X User Manual Click on the [Print Mode] tab, and then specify [White] in [Special Colors]. < White > • Not printing white. • Brightness - Black Substrate Select this when using the black color on black materials for printing.
- Page 74 1. Before You Begin RICOH Ri 1000X User Manual Set the [Limit] and [Minimum]. It is required to specify this setting only if [Brightness - Black Substrate] or [Brightness] is selected in [White]. < Limit > Specify (by %) the maximum limit for white ink consumption. (Recommended value:100) <...
-
Page 75: Change Of Media Size
1. Before You Begin RICOH Ri 1000X User Manual Change of Media size Select the job in the “Job” archive, and then right-click the selected job. Click [Settings]. Click the [Media size] in [Printer] tab, and then select the platen type. -
Page 76: Specifying The Image Position/Size And Number Of Prints
1. Before You Begin RICOH Ri 1000X User Manual Specifying the Image Position/Size and Number of Prints Select the job in the "Job" archive, and then right-click the selected job. Click [Settings...]. On the [Job] tab, set the position and size of the image. - Page 77 1. Before You Begin RICOH Ri 1000X User Manual Parameter Description Scale 1:1 If you want to print the job with no scaling. Proportional If you want to retain the proportions of the job when entering the height or width.
- Page 78 1. Before You Begin RICOH Ri 1000X User Manual On the [Job] tab, enter the number of sheets to print in [Number:] for [Multiple Output].
-
Page 79: About Operating Colorgate Productionserver
1. Before You Begin RICOH Ri 1000X User Manual About Operating ColorGATE Productionserver HELP For details about how to operate ColorGATE Productionserver, refer to the help file for ColorGATE Productionserver. Manual You can also check the manual for ColorGATE Productionserver via the ColorGATE website. -
Page 80: Firewall Settings
1. Before You Begin RICOH Ri 1000X User Manual Click [DOCUMENTATION]. Check [Software Manuals] in "Filter Results:" and select a language. Click the icon of [DOWNLOAD] of “Manual_PS_EN_V**.**_***.pdf”, and then save the file in your local PC. The latest version name and release date are entered in ********. - Page 81 1. Before You Begin RICOH Ri 1000X User Manual Click [System and Security]. Click [Windows Defender Firewall]. Click [Advanced settings].
- Page 82 1. Before You Begin RICOH Ri 1000X User Manual Click [Inbound Rules]. Click [New Rule...].
- Page 83 1. Before You Begin RICOH Ri 1000X User Manual Select the [Program] radial button, and then click [Next]. Type the path of the ColorGATE Productionserver program file, or browse to it via the [Browse] button. Select [Next] once the file path is selected.
- Page 84 1. Before You Begin RICOH Ri 1000X User Manual Select the [Allow the connection] radial button, and then click [Next]. Select the box of the correct "Profile" of when this rule should apply. It is suggested to select [Domain] and [Private].
- Page 85 1. Before You Begin RICOH Ri 1000X User Manual Name the rule and add a description (optional), and then click [Finish] when complete.
-
Page 86: Printing
2. Printing RICOH Ri 1000X User Manual 2. Printing 2.1. Printing Flow The basic printing flow is as follows. Adjust the image or printer settings as necessary. When printing on dark-color garments, pre- treat the garments. See page 89, “Pre-treatment of Dark Colored Garments”. -
Page 87: Before Printing
2. Printing RICOH Ri 1000X User Manual 2.2. Before Printing Things to Prepare Things to prepare for pre-treatment (for dark-color garments) Purpose Items To wear Polyethylene gloves Protective glasses or goggles (commercially available) For use Dark-color (black) garment (commercially available) -
Page 88: Checking Garments
2. Printing RICOH Ri 1000X User Manual Checking Garments Check the color of the garment that you want to use. White garments For printing on white garments or light-color garments which do not require the white undercoat, only color inks are used. -
Page 89: Pre-Treatment Of Dark Colored Garments
Pre-treatment application procedure: This section describes an example of using PowerBright pre-treatment liquid. • Dilute the RICOH-authorized pretreatment liquid (i.e., PowerBright pre-treatment liquid) with a 1.5- time volume amount of distilled water (2:1). • Fill the sprayer reservoir with the mixture. It is very important to use distilled water. Tap water, well water, or filtered water could have mineral content that can affect the performance of the pre- treatment. - Page 90 2. Printing RICOH Ri 1000X User Manual • Going in only one direction, use a plastic squeegee to help spread the pre-treatment evenly after spraying. This also flattens any fabric fibers that may have risen due to the application of the wet pre-treatment.
- Page 91 2. Printing RICOH Ri 1000X User Manual The following image is shown to be muddled, gray, and not as solid as the nose of the leopard (green arrow). Poor pre-treatment can be seen on the left side. NOTE: Contact your sales representative for the usage method when using other pre-treatment agents.
-
Page 92: Setting The Garment
2. Printing RICOH Ri 1000X User Manual 2.3. Setting the Garment Flatten the garment by using a heat press • Read the heat press manual carefully and use the press according to the safety precautions. Otherwise, injury or burns could result. -
Page 93: Setting The Garment Onto The Platen
2. Printing RICOH Ri 1000X User Manual Setting the Garment onto the Platen Place the garment flattened with a heat press on the platen. The following explains how to set the T-shirt on the platen as an example. Remove the platen frame from the platen. - Page 94 2. Printing RICOH Ri 1000X User Manual Place the hem and sleeves outside the print range under the platen. Gather the hem and sleeves protruding from the platen as shown below. Remove wrinkles and distortion on the printed surface. If there is slack, the GAP becomes wider, so set it horizontally.
- Page 95 2. Printing RICOH Ri 1000X User Manual Set the platen frame. IMPORTANT! Make sure that the garment does not stick out of the lower frame of the platen. If you print with the garment protruding, the garment could get caught in the...
-
Page 96: Adjusting The Height Of The Platen To The Print Position
2. Printing RICOH Ri 1000X User Manual 2.4. Adjusting the Height of the Platen to the Print Position The height adjustment of the platen must be performed before printing a garment. IMPORTANT! If the garment is not flat, the platen height will not be set properly and will not print properly. - Page 97 2. Printing RICOH Ri 1000X User Manual Press [SET]. If there is a problem with the height, "Display1" appears on the screen and prompts you to turn the height adjustment knob. <Display1> Turn the height adjustment knob according to the instructions on "Display1". Be sure to turn the...
- Page 98 2. Printing RICOH Ri 1000X User Manual Keep turning the height adjustment knob until "Display2" appears. <Display2> The message "Display2" automatically disappears after a while (or by touching the control panel). Press [SET]. If "Display1" appears again while the platen slides in, turn the height adjustment knob clockwise until "Display2"...
-
Page 99: Sending The Print Job And Printing It
2. Printing RICOH Ri 1000X User Manual 2.5. Sending the Print Job and Printing It You can start printing after setting the garment, adjusting the platen height, and selecting the print image. IMPORTANT! If you change the type of garment to be printed since the last time you adjusted the height, be sure to adjust the height again. -
Page 100: Send The Image File From Colorgate Productionserver
2. Printing RICOH Ri 1000X User Manual Note - After sending print data, you can confirm setting of Media size. The items displayed in print image preview are following. Image file name for print Print mode Media size (Data Platen) ... -
Page 101: Save The Image File To A Usb Flash Drive And Read It Via The Machine
2. Printing RICOH Ri 1000X User Manual Save the image file to a USB flash drive and read it via the machine About how convert the image file into print data and save it to USB drive, see the ColorGATE Productionserver manual. - Page 102 2. Printing RICOH Ri 1000X User Manual Select the desired file to be printed, and then press [SELECT]. Press [YES]. The job ready to print is shown in the printing image preview.
-
Page 103: Selecting The Image From The Internal Memory
2. Printing RICOH Ri 1000X User Manual Selecting the image from the internal memory Jobs previously sent from ColorGATE Productionserver are stored in internal memory. Press [STORED JOB]. Select the desired file to be printed, and then press [SELECT]. You can also delete jobs in the internal memory by selecting the file or files so that there is a checkmark in the box to the right, and then by pressing [DELETE]. - Page 104 2. Printing RICOH Ri 1000X User Manual Press [YES]. The job ready to print is shown in the printing image preview.
-
Page 105: Checking The Print Progress
2. Printing RICOH Ri 1000X User Manual Checking the Print Progress You can check the print progress on the touch panel. Assess the print progress in accordance with the following table. Print When printing in white then in full When printing only in white or in full... -
Page 106: Removing The Garment From The Platen
2. Printing RICOH Ri 1000X User Manual Removing the Garment from the Platen When printing is complete, the platen returns to the front side of the machine. Remove the platen frame. Grasp the front side of the garment and remove it horizontally from the platen. -
Page 107: To Cancel A Print Job
2. Printing RICOH Ri 1000X User Manual To cancel a print job Press [STOP] during printing. Press [CANCEL] to stop the current print job. -
Page 108: Set The Image With Heat Treatment
2. Printing RICOH Ri 1000X User Manual 2.6. Set the Image with Heat Treatment NOTE - For information about how to use the heat press device, see the heat press manual. In order to fix the ink so that your images can be color-fast when washing, it is necessary to heat treat the image so that the image bonds with the garment. - Page 109 2. Printing RICOH Ri 1000X User Manual NOTE - If you are using a textile oven or conveyor dryer, make sure to test the temperature of the printed image when it exits the dryer to ensure that it has reached the following temperature.
-
Page 110: Maintenance
3. Maintenance RICOH Ri 1000X User Manual 3. Maintenance Your printer performs automatic maintenance routines based on time and use. Because of this, your machine is almost always ready to print when you need it. However, it is also a best practice to perform a nozzle check prior to printing. - Page 111 3. Maintenance RICOH Ri 1000X User Manual IMPORTANT! Failure to address the underlying condition that is preventing auto maintenance in a timely manner can result in head clogging. If you do not know how to clear the condition, contact technical support immediately for assistance.
- Page 112 3. Maintenance RICOH Ri 1000X User Manual Watching the Procedure on Video You can watch the maintenance instruction video. • Daily Maintenance: Agitating a White Cartridge https://vimeo.com/725399556 • Weekly Maintenance: Cleaning the Maintenance unit and the Left ink sump https://vimeo.com/725408095...
- Page 113 3. Maintenance RICOH Ri 1000X User Manual Press [VIDEO]. Select the maintenance instruction video from among [Daily Maintenance], [Weekly Maintenance], [Monthly Maintenance], and [Head Cleaning Jig] and then press [SELECT]. The QR code is displayed on the screen. Start the application on the smart device, and then read the QR code.
-
Page 114: Maintenance Schedule
3. Maintenance RICOH Ri 1000X User Manual 3.1. Maintenance Schedule Daily The machine will prompt you to agitate white cartridges every 12 hours. When the message appears, the white cartridges should be agitated. For details, see page 165, “Agitating a White Cartridge”. -
Page 115: Nozzle Check
3. Maintenance RICOH Ri 1000X User Manual 3.2. NOZZLE CHECK Things to prepare Purpose Items For use Transparent A4 media IMPORTANT! Make sure to perform a nozzle check before printing. If a nozzle is clogged, perform head cleaning until the clog is removed and reflected on the nozzle check. - Page 116 3. Maintenance RICOH Ri 1000X User Manual Press the Maintenance tab. Set the transparent media, and press [SET]. Press [NOZZLE CHECK]. Press [YES]. A nozzle check pattern is printed.
- Page 117 3. Maintenance RICOH Ri 1000X User Manual Check the results of the printed nozzle check pattern. Head number Nozzle check pattern In your nozzle check please check for the following and take the appropriate steps: Nozzle Check Pattern Description Perfect Nozzle Check...
-
Page 118: Auto Head Clean
3. Maintenance RICOH Ri 1000X User Manual 3.3. AUTO HEAD CLEAN • "STRONG" head cleaning will use more ink than the "NORMAL" head cleaning. Use only as needed. Press the Maintenance tab. Press [AUTO HEAD CLEAN]. - Page 119 3. Maintenance RICOH Ri 1000X User Manual Press the head number to clean. You can select multiple heads. To clean all heads, press the button for all heads. Press [NORMAL] or [STRONG]. NORMAL: For small or minor missing nozzles in the nozzle check.
- Page 120 3. Maintenance RICOH Ri 1000X User Manual NOTE - After performing the normal cleaning, if the nozzle condition is not recovered, proceed to using the "STRONG" head cleaning option. "STRONG" head cleaning is the best to resolve deflection. Press [CLEANING].
-
Page 121: Specifying The Maintenance Schedule
3. Maintenance RICOH Ri 1000X User Manual Specifying the Maintenance Schedule Specify the schedule to execute automatic maintenance. Although the printer periodically executes automatic maintenance, you can specify the schedule to execute it when not using the printer in order to reduce loss of time caused by automatic maintenance executed during printer operation. - Page 122 3. Maintenance RICOH Ri 1000X User Manual Press [SCHEDULE SET]. Select the list on which to register the schedule. Press [DAILY] or [DATE]. If you have selected [DAILY], proceed to Step 8. Specify the date, and then press [OK]. Press [TIME].
-
Page 123: Regular Maintenance
3. Maintenance RICOH Ri 1000X User Manual 3.4. REGULAR MAINTENANCE Regular maintenance includes cleaning of the following parts: • Cleaning the Guide rod For details see page 124, “How to Clean the Guide Rod”. • Cleaning the Maintenance unit and the Left ink sump For details see page 137, “How to Clean the Maintenance Unit and the Left Ink Sump”. -
Page 124: How To Clean The Guide Rod
3. Maintenance RICOH Ri 1000X User Manual 3.5. How to Clean the Guide Rod Things to prepare Purpose Items To wear Polyethylene gloves Protective glasses or goggles (commercially available) For use Cleaning Applicator (Only for cleaning the Guide Rod) -
Page 125: Start Regular Maintenance
3. Maintenance RICOH Ri 1000X User Manual Video instruction You can watch the maintenance instruction video. For details, see page 112, “Watching the Procedure on Video”. Start REGULAR MAINTENANCE Press the Maintenance tab. Press [REGULAR MAINTENANCE]. The carriage moves to the center position. -
Page 126: Cleaning The Guide Rods
3. Maintenance RICOH Ri 1000X User Manual Cleaning the Guide Rods • Be careful not to touch the nozzle with the Cleaning Applicator. Also, be careful not to adhere the wiped solid ink or lint to the nozzle. Also, be careful to keep the nozzle area dry (no cleaning fluid) while cleaning the side of the print head. - Page 127 3. Maintenance RICOH Ri 1000X User Manual • Do not move the carriage to the prohibited range, which is outside the designated sliding range. Since the wiper of the Maintenance Unit is raised to the Wiper cleaning position and the carriage is moved above the Maintenance Unit, and the Wiper interferes with the Head.
- Page 128 3. Maintenance RICOH Ri 1000X User Manual Wipe off any old grease and lint that are stuck on both guide rods with a cleaning applicator. Move the carriage to the left, and then wipe off any old grease and lint on the guide rods where the carriage had stopped.
- Page 129 3. Maintenance RICOH Ri 1000X User Manual Apply the dedicated grease to the Guide Rod. Use a new Cleaning Applicator for application. As shown in the following picture, add the grease. • The Guide Rod: main Apply approximately 0.01 ml of grease to each of the six peripheral parts of the arrow.
- Page 130 3. Maintenance RICOH Ri 1000X User Manual Use a dedicated Cleaning Applicator to spread the grease smoothly on the top portion of the rod (cover about the top third of the circumference of the rod). Grease application range Move the carriage to the left and right by hand in order to smooth the grease. Then move the carriage slowly over 2 seconds within the carriage designated sliding range.
- Page 131 3. Maintenance RICOH Ri 1000X User Manual Wipe away grease that protrudes far beyond the coverage described in step 5. IMPORTANT! Check that grease is not attached to the Filler Sensor. After cleaning the guide rods, move the carriage to the left end by hand.
-
Page 132: Cleaning The Encoder Sheet
3. Maintenance RICOH Ri 1000X User Manual Cleaning the Encoder Sheet IMPORTANT! Cleaning the encoder strip is usually not required. • Lint free wipes help ensure the integrity of the encoder strip, but improper usage of the lint free wipes may result in damage to the encoder strip and prevent printer functionality. - Page 133 3. Maintenance RICOH Ri 1000X User Manual Clean the encoder seat only when: • Grease or ink drops on encoder strip. • Vertical stripes appear in the printed image. Print direction (moving carriage direction) Clean the Encoder Sheet after applying the grease to the Guide Rod.
- Page 134 3. Maintenance RICOH Ri 1000X User Manual Move the carriage to the left end side by hand. Wet a Lint Free Wipe with the cleaning liquid. After applying the Lint Free Wipe with the Cleaning Liquid, use it to remove lint and ink adhering to the Encoder Sheet.
- Page 135 3. Maintenance RICOH Ri 1000X User Manual After cleaning the Encoder, move the carriage to the left end by hand. The Wiper may damage the Head if it makes it stand by on the right end Maintenance Unit.
-
Page 136: Ending The Maintenance
3. Maintenance RICOH Ri 1000X User Manual Ending the maintenance Close the front cover. Press [YES]. The carriage moves to the right end, and the Head is capped. IMPORTANT! If encoder errors are frequent and require cleaning often, the encoder may need more thorough cleaning. -
Page 137: How To Clean The Maintenance Unit And The Left Ink Sump
3. Maintenance RICOH Ri 1000X User Manual 3.6. How to Clean the Maintenance Unit and the Left Ink Sump Things to prepare Purpose Items To wear Polyethylene gloves Protective glasses or goggles (commercially available) For use Cleaning Applicator Cleaning Liquid Dropper ... - Page 138 3. Maintenance RICOH Ri 1000X User Manual Maintenance unit 1. Wiper 2. Wiper cleaner 3. Suction Cap 4. Moisturizing cap Video instruction You can watch the maintenance instruction video. For details, see page 112, “Watching the Procedure on Video”.
-
Page 139: Start Regular Maintenance
3. Maintenance RICOH Ri 1000X User Manual Start REGULAR MAINTENANCE Press the Maintenance tab. Press [REGULAR MAINTENANCE]. The carriage moves to the center position. -
Page 140: Cleaning The Maintenance Unit And The Left Ink Sump
3. Maintenance RICOH Ri 1000X User Manual Cleaning the Maintenance Unit and the Left Ink Sump • Do not rub too strongly. Do not wipe in areas other than indicated. There is a possibility that parts may become damaged, deformed, or detached. - Page 141 3. Maintenance RICOH Ri 1000X User Manual Clean the Moisturizing Caps. IMPORTANT! Do not deform or scratch the caps. Deformation and scratches may cause troubles. Especially, wipe the top part gently and carefully. Example of how to apply the Cleaning Applicator:...
- Page 142 3. Maintenance RICOH Ri 1000X User Manual Gently wipe off the top part. Gently wipe off the side part. Gently wipe off the inner part.
- Page 143 3. Maintenance RICOH Ri 1000X User Manual Example of the dirt level after cleaning. Following pictures shows an example before and after cleaning. Before After • Make sure that the solidified ink has not accumulated at the rim of the cap.
- Page 144 3. Maintenance RICOH Ri 1000X User Manual The method of cleaning the Suction Cap is the same as the cleaning method for the Moisturizing Caps. However, there is a vacuum cap inset inside the cap. Clean it carefully so as not to shift or detach this part.
- Page 145 3. Maintenance RICOH Ri 1000X User Manual Clean the surface and the inside parts of the Wiper Cleaner. Be careful as the lever is thin. It can easily deform, break, and detach. • • Clean the lever to the surface indicated in the green frame and wipe it gently.
- Page 146 3. Maintenance RICOH Ri 1000X User Manual Clean the Wiper. Clean the front and back surfaces and the upper surface of the Wiper (rubber plate part surrounded). Clean up the Roller. Rotate the roller, move the Cleaning Applicator back and forth, and then wipe the entire...
- Page 147 3. Maintenance RICOH Ri 1000X User Manual Following picture shows the removal of dirt at this level after cleaning of the Wiper and the Wiper Cleaner as described above. Perform cleaning until the surface of the roller, wiper and bottom part of the •...
- Page 148 3. Maintenance RICOH Ri 1000X User Manual Clean the Left ink sump. If the top of the left ink sump or left ink sump is dirty with ink, clean it with a cleaning applicator. After wiping off, do not leave ink on the top of the Left ink sump.
-
Page 149: Ending The Maintenance
3. Maintenance RICOH Ri 1000X User Manual Ending the maintenance Close the front cover. Press [YES]. The carriage moves to the right end, and the Head is capped. IMPORTANT! If encoder errors are frequent and require cleaning often, the encoder may need more thorough cleaning. -
Page 150: How To Clean The Cover Of Head Nozzle Plate (The Nozzle Cover)
3. Maintenance RICOH Ri 1000X User Manual 3.7. How to Clean the Cover of Head Nozzle Plate (the Nozzle Cover) Things to prepare Purpose Items To wear Polyethylene gloves Protective glasses or goggles (commercially available) For use Cleaning Applicator... - Page 151 3. Maintenance RICOH Ri 1000X User Manual Head Nozzle Plate Video instruction You can watch the maintenance instruction video. For details, see page 112, “Watching the Procedure on Video”.
-
Page 152: What Not To Do For Cleaning
3. Maintenance RICOH Ri 1000X User Manual What Not to Do for Cleaning IMPORTANT! Clean it the right way. If you clean it the wrong way, the print head will break down. Some liquid enters the head of the carriage unit and short-circuits the electric parts. Due to the short circuit, the electric parts break down and Ink droplets cannot be ejected to the target location. - Page 153 3. Maintenance RICOH Ri 1000X User Manual Incorrect Correct The sides of the head (red area shown in the picture below) is do not need to be cleaned. Do not clean the Keep this area as it is. If the sides have become...
- Page 154 3. Maintenance RICOH Ri 1000X User Manual Incorrect Correct These areas do not need to Front be cleaned. Keep them as Wetting the indicated they are. If these areas areas with a wet have become dirty and cleaning applicator. appear to require cleaning,...
-
Page 155: Start Regular Maintenance
3. Maintenance RICOH Ri 1000X User Manual Start REGULAR MAINTENANCE Press the Maintenance tab. Press [SET] and move the platen to the back. Press [REGULAR MAINTENANCE]. The carriage moves to the center position. -
Page 156: Cleaning The Cover Of Head Nozzle Plate (The Nozzle Cover)
3. Maintenance RICOH Ri 1000X User Manual Cleaning the Cover of Head Nozzle Plate (the Nozzle Cover) Open the front cover. Put tray or paper under the Head. Prevents solid ink, lint and Cleaning Liquid from entering the unit during cleaning. - Page 157 3. Maintenance RICOH Ri 1000X User Manual Case1: Cleaning with the Cleaning Jig Attached Adjust the position so that the left and right corners (shaded red) of the cleaning jig match the corners of the carriage (blue line). If it is difficult to check the position of the head, use a mirror to check the position.
- Page 158 For cleaning, use the Cleaning Applicator containing the Cleaning Liquid and the Cleaning Applicator not containing the Cleaning Liquid. IMPORTANT! Be sure to use Cleaning Applicator and Cleaning Liquid dedicated to Ri 1000X. Otherwise, it may cause a failure. Set the cleaning applicator to the cleaning area and wipe 5 to 10 times in the front- rear direction.
- Page 159 3. Maintenance RICOH Ri 1000X User Manual Put the cleaning applicator in the space between the end face and the cleaning jig. Wipe 5 to 10 times left and right. Wipe both rear and front-end face as well, and repeat this for all heads.
- Page 160 For cleaning, use the Cleaning Applicator containing the Cleaning Liquid and the Cleaning Applicator not containing the Cleaning Liquid. IMPORTANT! Be sure to use Cleaning Applicator and Cleaning Liquid dedicated to Ri 1000X. Otherwise, it may cause a failure. Clean the nozzle cover surface.
- Page 161 3. Maintenance RICOH Ri 1000X User Manual After cleaning, if washing the Cleaning Liquid and foam etc. attached to surplus have adhered to the Head, wipe it off with the dry, Cleaning Applicator that does not contain the Cleaning Liquid. (It is important not to leave wet cleaning fluid on any part of the head after this manual clean) Clean the print heads and sides.
-
Page 162: Ending The Maintenance
3. Maintenance RICOH Ri 1000X User Manual Ending the maintenance Close the front cover. Press [YES]. The carriage moves to the right end, and the Head is capped. IMPORTANT! If encoder errors are frequent and require cleaning often, the encoder may need more thorough cleaning. -
Page 163: White Clean Freq
3. Maintenance RICOH Ri 1000X User Manual 3.8. White Clean Freq. You can change the level of White Cleaning Frequency with printing. Press the Settings tab. Press [OPTION]. Press [ Press [WHITE CLEAN FREQ.]. - Page 164 3. Maintenance RICOH Ri 1000X User Manual Press the level you want to use. This option determines how often an automatic white head clean can occur while printing. Clean Levels Description LEVEL 1 (LOW) After 20 CMYK only Prints or after approximately 10 (varies depending on size) CMYK and White prints a white head Clean will occur.
-
Page 165: Agitating A White Cartridge
3. Maintenance RICOH Ri 1000X User Manual 3.9. Agitating a White Cartridge • Do not shake the cartridge too quickly or too hard. • Do not hit or drop it when agitating. It may cause injury, cartridge damage, or ink leakage. - Page 166 3. Maintenance RICOH Ri 1000X User Manual Agitate the ink • Hold the cartridge as shown in Figure 1. • Hold the white ink cartridge with the ink supply port face up. • Shake the ink cartridge by tilting it side to side at 45°degree angles, as shown below.
- Page 167 3. Maintenance RICOH Ri 1000X User Manual After agitating cartridges, insert the cartridges. • Count Automatically The printer will prompt you every 12 hours with the following message: Pull out each white cartridge, then each counter will start to decrease.
- Page 168 3. Maintenance RICOH Ri 1000X User Manual After agitating cartridges, insert the cartridges. • Select display format You can select two types of display format (Count Manually / Count Automatically). Press the Setting tab on the touch panel of this machine.
- Page 169 3. Maintenance RICOH Ri 1000X User Manual Select the display format to use from following: Setting buzzer notification You can set the buzzer notification. Press the Setting tab on the touch panel of this machine. Press [OPTION]. Press [...
- Page 170 3. Maintenance RICOH Ri 1000X User Manual Set the buzzer parameter from following. (volume 0 equals “OFF”)
-
Page 171: Circulation
3. Maintenance RICOH Ri 1000X User Manual 3.10. Circulation This printer has the function of white ink circulation that moves the white ink in the system from the ink bay to the printhead and back. This is used to avoid the white ink settling within the lines and provides quality... -
Page 172: Emptying The Waste Ink Bottle
3. Maintenance RICOH Ri 1000X User Manual 3.11. Emptying the Waste Ink Bottle • If the waste ink bottle is full, auto maintenance will not occur, and head clogging may occur. • Do not press [WASTE INK RESET] to reset the waste ink bottle warning without emptying the waste ink tank. -
Page 173: Cleaning The Cartridges And Cartridge Slots
3. Maintenance RICOH Ri 1000X User Manual 3.12. Cleaning the Cartridges and Cartridge Slots • Be sure to wear commercially available protective glasses, gloves, and clothing for this work. The (ink and cleaning) cartridges and cartridge slots may become stained by ink or cleaning solution. Be sure to perform cleaning each time after removing the cartridge for cases such as by replacing a cartridge or agitating the white ink. -
Page 174: Cleaning The Cartridge Slots
3. Maintenance RICOH Ri 1000X User Manual Cleaning the Cartridge Slots Do not use cleaning liquid for cleaning. Take care not to touch or stain the circuit board. The needle part in the cartridge slot (the cylindrical part circled in yellow on the photo) has a needle inside the cylinder, so clean only its surface with the cleaning applicators. -
Page 175: What To Check After Cleaning
3. Maintenance RICOH Ri 1000X User Manual What to Check after Cleaning After cleaning, insert the cartridges, and check that they are correctly identified. -
Page 176: Adjustments
4. Adjustments RICOH Ri 1000X User Manual 4. Adjustments This section describes how to adjust the image quality of this printer from the touch panel. Although the printer head nozzle status is good, if the printer quality is not good, you need to perform the following process. - Page 177 4. Adjustments RICOH Ri 1000X User Manual Adjustment tips If the print is misaligned even after the adjustment, it is recommended to adjust it according to the thickness of the medium (T-shirt, etc.) to be printed. Set the medium to be printed on the platen, and then adjust the height.
-
Page 178: Adjusting The Head
4. Adjustments RICOH Ri 1000X User Manual 4.1. Adjusting the Head Typically, this adjustment is only necessary after a part replacement such as a carriage or CTL replacement. This function adjusts the print head alignment position. When the print result is not clear (for example, vertical lines are misaligned, color is not clear, or print is fuzzy) this adjustment may improve the result. - Page 179 4. Adjustments RICOH Ri 1000X User Manual Press [YES]. The adjustment pattern is printed. After finding an appropriate adjustment value, form the print result of the adjustment pattern. Find a pattern with a square in the lightest color and vertical lines on both sides that are the straightest (or closest to this condition) aligned in row A.
- Page 180 4. Adjustments RICOH Ri 1000X User Manual Enter this value in the box for ROW A (the up arrows make the value go up and down arrows make the value go down). Repeat this for the other rows in the test pattern (B, C, etc.).
-
Page 181: Adjusting The Table
4. Adjustments RICOH Ri 1000X User Manual 4.2. Adjusting the Table The printing indexing of the table can be adjusted. Typically, you do not need to do this unless a component is replaced such as the sub control board or the CTL board. - Page 182 4. Adjustments RICOH Ri 1000X User Manual Press [YES]. The adjustment pattern is printed. Find an appropriate adjustment value from the print result of adjustment patterns. Find a pattern with a square in the lightest color and horizontal lines on both sides aligned.
- Page 183 4. Adjustments RICOH Ri 1000X User Manual NOTE - In some cases, an adjustment value is an in-between value of patterns. When a square is in the lightest color, but horizontal lines on both sides are misaligned. In the upper illustration, a square in the lightest color is for “+6”, but horizontal lines on both sides are misaligned.
-
Page 184: Adjusting The Print Position
4. Adjustments RICOH Ri 1000X User Manual 4.3. Adjusting the print position The printing start position can be adjusted accurately within the range of ±8.0 mm in the Table Direction and ±5.0 mm in the Head Direction. This typically only needs to be adjusted if a component such as the Z- axis or CTL is replaced. - Page 185 4. Adjustments RICOH Ri 1000X User Manual Press [YES]. The print position pattern is printed. After printing the pattern for the print position adjustment, you need to find an appropriate value based on the alignment files to the 4 arrows on the platen.
- Page 186 4. Adjustments RICOH Ri 1000X User Manual After entering the values, press [ALIGN] to set the values. Repeat the process until the print appears to be centered.
-
Page 187: Replacing Service Parts
5. Replacing Service Parts RICOH Ri 1000X User Manual 5. Replacing Service Parts 5.1. Service parts This printer has some replaceable service parts and sumps that are monitored for service life. • Each icon provides the status of each service part. - Page 188 5. Replacing Service Parts RICOH Ri 1000X User Manual • When a component is selected, the [Parts Replacement] dialog box is displayed. It shows the count and the date of the last replacement.
-
Page 189: Replacing The Mist Fan Filter
5. Replacing Service Parts RICOH Ri 1000X User Manual 5.2. Replacing the Mist Fan Filter If the mist fan filter needs to be replaced, a message will be displayed on the touch panel. Things to prepare Purpose Items To wear... - Page 190 5. Replacing Service Parts RICOH Ri 1000X User Manual Remove the mist fan filter fixing frame. Remove the mist fan filter from the fixing frame. Set the new mist fan filter into the fixing frame.
- Page 191 5. Replacing Service Parts RICOH Ri 1000X User Manual Insert the mist fan filter fixing frame into its original position until it clicks. Press [YES] on the confirmation message on the touch panel.
-
Page 192: Preparing Your Printer For Storage/Shipping
6. Preparing Your Printer for Storage/Shipping RICOH Ri 1000X User Manual 6. Preparing Your Printer for Storage/Shipping Note - Please have cleaning cartridges available for all channels Clean the Maintenance Unit. For details about how to clean, see page 137, "How to Clean the Maintenance Unit and the Left Ink Sump". - Page 193 6. Preparing Your Printer for Storage/Shipping RICOH Ri 1000X User Manual Press [CLEANER CHARGING]. Press [ALL COLOR]. Confirm by pressing [YES] to charge the system with cleaning solution. Attach the head protection cover to the carriage. For information on how to attach the head protection cover, see page 214 "Attaching the head protection cover".
-
Page 194: Using The Printer In 4-Color Mode (Cmyk Only)
7. Using the Printer in 4-color mode (CMYK Only) RICOH Ri 1000X User Manual 7. Using the Printer in 4-color mode (CMYK Only) When using the printer in Four (4) color mode, it allows you only to use CMYK and keep the white in storage mode. - Page 195 7. Using the Printer in 4-color mode (CMYK Only) RICOH Ri 1000X User Manual Press [CLEANER CHARGING]. Press [WHITE ONLY]. Confirm by pressing [YES] to charge the system with cleaning solution. NOTE – Please allow up to 40 mins (approx.) for the system to flush the ink out and full the white...
-
Page 196: Changing The Printer To 6-Color Mode From 4-Color Mode
7. Using the Printer in 4-color mode (CMYK Only) RICOH Ri 1000X User Manual 7.1. Changing the printer to 6-color mode from 4-color mode Remove the cleaning cartridges for white channel. Insert the white ink cartridges. Press the Settings tab. - Page 197 7. Using the Printer in 4-color mode (CMYK Only) RICOH Ri 1000X User Manual Press [INK CHARGING]. Press [WHITE ONLY]. Confirm by pressing [YES] to charge the system with ink.
-
Page 198: Ink Path Guide
8. Ink Path Guide RICOH Ri 1000X User Manual 8. Ink Path Guide Status Printable media Remarks Ink in all channels White media, All kinds all printing 6 Color mode Dark media After Ink Charging (requiring Underbase) Color ink in color channel... -
Page 199: Troubleshooting Guide
9. Troubleshooting Guide RICOH Ri 1000X User Manual 9. Troubleshooting Guide Issue/ Error Causes Solutions Fuzzy blurry prints Table height is too low. Set the garment correctly on the platen, and then adjust the height again. Too much ink (oversaturated) - Page 200 9. Troubleshooting Guide RICOH Ri 1000X User Manual Issue/ Error Causes Solutions Horizontal banding and Nozzles are 100% and appears Select the uni-directional printing thick horizontal lines in solid colors of dark or gray. (see page 65, "Setting of print mode”).
- Page 201 9. Troubleshooting Guide RICOH Ri 1000X User Manual Issue/ Error Causes Solutions Dark shirt prints look White nozzles are 100% or Increase the amount of pretreat being dull near 100%. In adequate sprayed onto the shirt. amount of pretreat on the shirt.
- Page 202 9. Troubleshooting Guide RICOH Ri 1000X User Manual...
-
Page 203: When The Printing Result Is Not As Expected
9. Troubleshooting Guide RICOH Ri 1000X User Manual 9.1. When the Printing Result Is Not as Expected Depending on the printing conditions, when printing on a dark-colored fabric that involves the formation of a background with white ink, an undesired printed image may occur. - Page 204 9. Troubleshooting Guide RICOH Ri 1000X User Manual Click the [Color] tab, and then click [Settings] under “Advanced”. Click the [Print Mode] tab. Set the value of “Intensity” to “70”. Click [OK]. If the problem persists • Set the drying time longer.
-
Page 205: When White Spot Appears
9. Troubleshooting Guide RICOH Ri 1000X User Manual When white spot appears For image types with solid ink, white spot appears on the surface after fixing the ink with a heat press. Causes: It may occur when the white ink is not sufficiently dried. -
Page 206: Dark Spots Appear In Light-Colored Images
9. Troubleshooting Guide RICOH Ri 1000X User Manual Dark spots appear in light-colored images After fixing the ink, dark spots may appear on the spots. Causes: The following causes are possible. • The height of the image size being less than 100 mm,* and the drying time of the white ink being short. -
Page 207: If An Sc (Service Call) Error Is Displayed
9. Troubleshooting Guide RICOH Ri 1000X User Manual 9.2. If an SC (Service Call) error is displayed If a problem occurs with the machine and if "SC-**" (** is a number) is displayed on the touch panel, contact your sales or service representative as soon as possible. -
Page 208: Stopping Printing
9. Troubleshooting Guide RICOH Ri 1000X User Manual Stopping printing If an SC error occurs during printing, stop printing. If you cannot use the touch panel and if the platen has stopped inside the machine, turn off the machine and pull the platen slowly to the front side of the machine by hand. Then, proceed to page 210, “Checking the carriage position”. -
Page 209: Moving The Carriage From The Touch Panel
9. Troubleshooting Guide RICOH Ri 1000X User Manual Moving the carriage from the touch panel To attach the head protection cover to the heads, move the carriage to the center position. First, move the position of the carriage by operating the touch panel. -
Page 210: Checking The Carriage Position
9. Troubleshooting Guide RICOH Ri 1000X User Manual Checking the carriage position Guide to parts 1. Carriage 2. Maintenance unit 3. Head (Located behind the carriage) Open the front cover. - Page 211 9. Troubleshooting Guide RICOH Ri 1000X User Manual Check the carriage position. Possible case of carriage position Case 1: The carriage is in the center position or in a position other than the position of the maintenance unit. Proceed to page 214, “Attaching the head protection cover”.
-
Page 212: Unlocking The Carriage
9. Troubleshooting Guide RICOH Ri 1000X User Manual Unlocking the carriage If the carriage is in the maintenance unit position and cannot be moved by operating the touch panel, the carriage must be unlocked manually and moved by hand. Guide to parts 1. - Page 213 9. Troubleshooting Guide RICOH Ri 1000X User Manual Turn the screwdriver counterclockwise to align mark B with mark A. When marks A and B are facing each each other, the carriage lock is released. Move the carriage slowly by hand.
-
Page 214: Attaching The Head Protection Cover
9. Troubleshooting Guide RICOH Ri 1000X User Manual Attaching the head protection cover IMPORTANT! Turn off the printer before attaching the head protection cover. Guide to the head protection cover 1. Left side (single frame on the top front) 2. - Page 215 9. Troubleshooting Guide RICOH Ri 1000X User Manual Use a dropper to pour the cleaning liquid into the cap and around the edges of the cap. Make sure that the inside of the cap is filled with cleaning liquid. Take the filled cleaning liquid with the head protection cover under the carriage to prevent spillage.
- Page 216 9. Troubleshooting Guide RICOH Ri 1000X User Manual Adjust the left and right corners of the head protection cover to the corners of the carriage. Right side Left side Push the head protection cover up until it clicks. Leave the machine as it is until a serviceperson comes.
-
Page 217: Appendix
Update by using USB drive • Update by connecting your PC and RICOH Ri 1000X with Ethernet cable Note - If you installed the Data Collector Module, you can be easy to update automatically. For details about how to install the Data Collector Module, see page 57, "Setup Driver". - Page 218 10. Appendix RICOH Ri 1000X User Manual Remove the USB drive, insert into the front USB port. Press the Settings tab. Press [OPTION]. Press [ Press [USB UPDATE]. Press [YES].
-
Page 219: Firmware Update (Panel (Gib))
Update automatically in order of Panel (GIB), Sub Control (SCB) and Engine (CTL). Follow the steps below to update each firmware. IMPORTANT! Do not turn off RICOH Ri 1000X or remove the USB drive during updating. It may cause the printer failure. -
Page 220: Firmware Update (Sub Control (Scb) / Engine (Ctl))
10. Appendix RICOH Ri 1000X User Manual After install completed, press [OPEN] when the screen below is displayed. Panel (GIB) reboot automatically after press [OPEN]. Afterwards, Sub Control (SCB) and engine (CTL) start to update automatically. IMPORTANT! You must not follow the steps different from the above. -
Page 221: When Update Is Failed
10. Appendix RICOH Ri 1000X User Manual After dialog disappears, wait until displayed “Ready” in panel. These completes all updates. When update is failed If the following is displayed or if you have started to update but there is nothing displayed about the firmware update, the update may have failed. -
Page 222: Update By Connecting Your Pc And Ricoh Ri 1000X With Ethernet Cable
10. Appendix RICOH Ri 1000X User Manual Update by connecting your PC and RICOH Ri 1000X with Ethernet cable IMPORTANT! Do not disconnect any cable (Communication, Power, and so on) during updating. Make sure that update firmware is the latest one published on the web. -
Page 223: Specifications
RICOH Ri 1000X User Manual 10.2. Specifications General Printer Type: Direct-to-garment printer Technology: RICOH Piezo-electric drop on demand inkjet systems Head Type: RICOH print head Number of Print Heads: Color - 4 channels, white - 4 channels Resolution: 1,200 x 1,200 dpi(Maximum) -
Page 224: About Open Source Software License
10. Appendix RICOH Ri 1000X User Manual 10.3. About Open Source Software License ZLib Copyright (C) 1995-1996 Jean-loup Gailly and Mark Adler This software is provided 'as-is', without any express or implied warranty. In no event will the authors be held liable for any damages arising from the use of this software. -
Page 225: Where To Inquire
10. Appendix RICOH Ri 1000X User Manual 10.4. Where to Inquire For inquiries, contact your sales or service representative. 10.5. Revision history Revision Date issued Description Initial version February, 2023 June, 2023 Page. 11,20,21,22,23,29... -
Page 226: Trademarks
10. Appendix RICOH Ri 1000X User Manual 10.6. Trademarks ColorGATE and Productionserver are registered trademarks of ColorGATE Digital Output Solutions GmbH. Adobe, Elements, Illustrator, and Photoshop are either registered trademarks or trademarks of Adobe in the United States and/or other countries. - Page 227 © 2023 Ricoh Co., Ltd.
- Page 228 J110-6613A...
Need help?
Do you have a question about the Ri 1000X and is the answer not in the manual?
Questions and answers