
Related Manuals for Fagor 5H-741 Series


Summary of Contents for Fagor 5H-741 Series
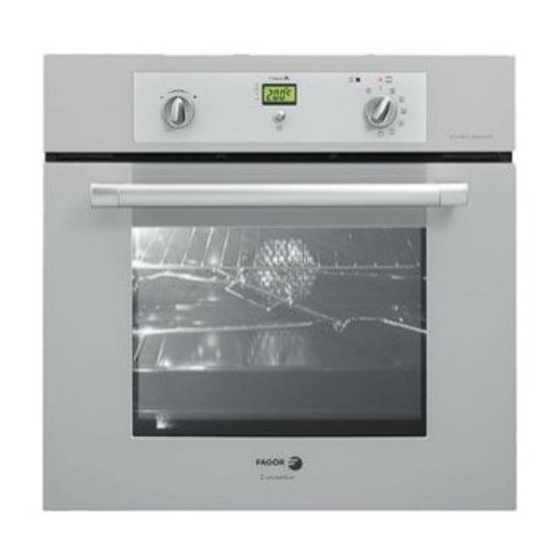
- Page 1 99638961_A_FR GB.qxp 02/03/2006 10:38 Page 1 ser Manual for Your Oven e guide d’utilisation de votre four 5H-741* - 5H-745*...
-
Page 2: Table Of Contents
99638961_A_FR GB.qxp 02/03/2006 10:38 Page 2 C o n t e n t s Introduction Your oven ow it works ccessories Safety recommendations How to install your oven lectrical connections P.7-8 imensions for installation use How to use your oven he oven programmer P.10 ow to set the clock... -
Page 3: Introduction
In the FAGOR product line, you will also find a wide range of hobs, venti- lation hoods, dishwashers and referigerators that you can coordinate with your new FAGOR oven. -
Page 4: Your Oven
99638961_A_FR GB.qxp 02/03/2006 10:38 Page 4 our oven OVEN FEATURES Temperature control Light Programme selector Rail positions Feature selector Door-open detector plate... -
Page 5: A Ccessories
99638961_A_FR GB.qxp 02/03/2006 10:38 Page 5 ccessories REAR nti-tipping safety grid The grid can be used to hold all dishes and moulds containing foodstuffs to be cooked or browned. It can be used for barbecues (to be placed directly on the grid). FRONT ulti-purpose dish (cake dish or drip tray) -
Page 6: Safety Recommendations
99638961_A_FR GB.qxp 02/03/2006 10:38 Page 6 Safety recommendations Please read these instructions before installing and using your oven. The oven has been designed for domestic use only for cooking food. No asbestos has been used in its construction. USING FOR THE FIRST TIME: Before you use your oven for the first time, leave it empty and, with the door closed, turn it on to maximum temperature and let it heat up for 15 minutes. -
Page 7: How To Install Your Oven
99638961_A_FR GB.qxp 02/03/2006 10:38 Page 7 How to install your oven Electrical connections Electricity meter (mains) (20A, single-phase 220-240 V alternating current 50 Hz) Fused 16A or differential circuit breaker 220-240 V single phase alternating current supply Socket 2 -pin with earth Connecting cable approx 1.50 m. - Page 8 99638961_A_FR GB.qxp 02/03/2006 10:38 Page 8 How do you install your oven? The electrical connections are made before the oven is installed in its housing. • The oven must be connected using an approved 3-core cable (live, neutral and ) with 1.5 mm square conductors. This should be connected via a 3- pin- earth socket (live, neutral, and earth to the main supply which should be should be a...
- Page 9 99638961_A_FR GB.qxp 02/03/2006 10:38 Page 9 How do you install your oven? Useful dimensions for installing your oven The oven can be installed under a work top or in a column of cabinetry (open* or closed) having the appropriate dimensions for built-in instal- lation (see adjacent diagram).
-
Page 10: How To Use Your Oven
99638961_A_FR GB.qxp 02/03/2006 10:38 Page 10 ow to use your oven he oven programmer Clock and cooking time display ECO (economical) cooking indicator Temperature display Door locked indicator Cooking time symbol Button for setting timed programmes End of cooking time symbol Buttons for adjusting the time Timer symbol... -
Page 11: H Ow To Set The Clock
99638961_A_FR GB.qxp 02/03/2006 10:38 Page 11 How to use your oven ow to set the clock hen the oven is first switched on at the mains • The display blinks to 12h00. • Press on the buttons until the cor- rect time is shown (Keeping a finger on the button, rather than tapping it, is quicker) The example shows 12.30... -
Page 12: H Ow To Cook Straightaway
99638961_A_FR GB.qxp 02/03/2006 10:38 Page 12 How to use your oven ow to cook straightaway The timer display only shows the time of day. It should not be blinking. • Choose how you want to cook your food: Turn the dial until it is indicating your choice. The example chosen is “... -
Page 13: H Ow To Programme The Cooking
99638961_A_FR GB.qxp 02/03/2006 10:38 Page 13 How to use your oven ow to programme the cooking ook straightaway 1. Choose the method of cooking and adjust the tem- perature if necessary. The example is “ ” Temperature 210°C. 2. Press“ ”... -
Page 14: H Ow To Use The Timer
99638961_A_FR GB.qxp 02/03/2006 10:38 Page 14 How to use your oven ow to use the timer Your oven is fitted with a separate minute timer. It is not connected to the oven's programmes. You can use it just like a kitchen timer. For this, the timer display makes the hour of day temporarily disappear. -
Page 15: Changing A Bulb
99638961_A_FR GB.qxp 02/03/2006 10:38 Page 15 hanging a bulb • The light bulb is housed in the ceiling of your oven. Warning! Switch off the power at the main switch before attemp- ting to change the bulb. Leave the oven to cool if necessary. -
Page 16: C Ooking Methods
99638961_A_FR GB.qxp 02/03/2006 10:38 Page 16 ooking methods Name of cooking mode Description of cooking mode Symbol raditional fan heating Quick temperature increase. Cooking controlled by the upper and Some dishes can be placed in lower heating elements and by the the oven while it is still cold. - Page 17 99638961_A_FR GB.qxp 02/03/2006 10:39 Page 17 Cooking methods Recommendations Recomm. T° Min. Recomm. Max. Recommended for meats, fish and vegetables, preferably placed in a terra-cotta dish. Recommended for all poultry or roasts on the Min. Recomm. Max. turnspit. For sealing and thoroughly cooking lamb roasts, beef cuts.
-
Page 18: P Yrolysis Explained
99638961_A_FR GB.qxp 02/03/2006 10:39 Page 18 ow do you clean the cavity of your oven? yrolysis explained -Pyrolysis is a cleaning method during which the oven is heated to a high tem- perature to remove debris and splatter caused by spitting and dripping food. The smoke and smells that this produces are removed as the air passes through a catalyst. -
Page 19: S Tarting Pyrolysis
99638961_A_FR GB.qxp 02/03/2006 10:39 Page 19 How do you clean the cavity of your oven ? tarting pyrolysis a) Remove the grids and trays from the oven and clean any major spill residue. b) Check that the time of day is glowing steadily in the display panel (not blin- king). -
Page 20: Troubleshooting
99638961_A_FR GB.qxp 02/03/2006 10:39 Page 20 r o u b l e s h o o t i n g If you're not sure that your oven is working properly, it doesn't necessarily mean that there's a problem. In all cases, check the following points: f you realize that.. - Page 21 99638961_A_FR GB.qxp 02/03/2006 10:39 Page 21...
- Page 22 99638961_A_FR GB.qxp 02/03/2006 10:39 Page 22 ommaire Edito P.23 Comment se présente votre four ? escriptif de l’appareil P.24 ccessoires P.25 Conseils de sécurité P.26 Comment installer votre four ? accordement électrique P.27-28 imensions utiles pour encastrer votre four P.29 Comment utiliser votre four ? e détail de votre programmateur P.30...
-
Page 23: Edito
à votre écoute pour répondre à toutes vos questions ou suggestions (coordonnées à la fin de ce livret). A la pointe de l'innovation, FAGOR contribue ainsi à l'amélioration de la qualité de la vie quotidienne en vous apportant des produits toujours plus performants, simples d'utilisation, respectueux de l'environnement, esthé-... -
Page 24: Comment Se Présente Votre Four
99638961_A_FR GB.qxp 02/03/2006 10:39 Page 24 omment se présente votre four ? DESCRIPTIF APPAREIL Sélecteur de température Lampe Programmateur Indicateur de gradin Sélecteur de fonctions Contact de détection d’ouverture de porte... -
Page 25: Accessoires
99638961_A_FR GB.qxp 02/03/2006 10:39 Page 25 Accessoires rille sécurité anti basculement La grille peut être utilisée pour supporter tous les plats et moules contenant des aliments à cuire ou à gratiner. Elle sera utilisée pour les grillades (à poser directement dessus). lat multi usages ( plat à... -
Page 26: Conseils De Sécurité
99638961_A_FR GB.qxp 02/03/2006 10:39 Page 26 Conseils de sécurité Merci de prendre connaissance de ces conseils avant d’installer et d’utiliser votre four. Ce four a été conçu pour être utlilisé par des particuliers dans leur lieu d’habitation. Il est destiné exclusivement à la cuisson des denrées alimentaires. -
Page 27: Comment Installer Votre Four
99638961_A_FR GB.qxp 02/03/2006 10:39 Page 27 Comment installer votre four ? Raccordement électrique Compteur 20A Mono 220-240 V ~ 50 Hz Disjoncteur différentiel ou fusible 16A Ligne Mono 220-240 V ~ Prise de courant 2 pôles + terre norme CEI 83 Câble d'alimentation longueur 1,50 m... - Page 28 99638961_A_FR GB.qxp 02/03/2006 10:39 Page 28 Comment installer votre four ? Le raccordement électrique est à réaliser avant la mise en place de l'appareil dans le meuble. • Le four doit être branché avec un câble d'alimentation (normalisé) à 3 conduc- teurs de 1,5 mm (1 ph +1 N + terre ) qui doivent être raccordés sur réseau 220-...
-
Page 29: Dimensions Utiles Pour Encastrer Votre Four
99638961_A_FR GB.qxp 02/03/2006 10:39 Page 29 Comment installer votre four ? Dimensions utiles pour encastrer votre four Le four peut indifféremment être installé sous un plan de travail ou dans un meuble en colonne (ouvert* ou fermé) ayant les dimensions d’en- castrement adaptées (voir schéma ci-contre). -
Page 30: Comment Utiliser Votre Four
99638961_A_FR GB.qxp 02/03/2006 10:39 Page 30 omment utiliser votre four ? e détail de votre programmateur Affichage des temps et durées Indicateur de cuisson ECO Affichage de la température Indicateur de porte verrouillée Indicateur de la durée de cuis- Touche d’accès aux différents programmes de réglage du temps Indicateur de fin de cuisson... -
Page 31: C Omment Mettre À L'heure L'horloge Du Four
99638961_A_FR GB.qxp 02/03/2006 10:39 Page 31 Comment utiliser votre four ? omment mettre à l'heure l’horloge du four ? la mise sous tension • L’afficheur clignote à 12h00. • Réglez l’heure en appuyant sur les touches (le maintien du doigt sur la touche per- met d’obtenir un défilement rapide) Exemple:12h30. -
Page 32: C Omment Faire Une Cuisson Immédiate
99638961_A_FR GB.qxp 02/03/2006 10:39 Page 32 Comment utiliser votre four ? omment faire une cuisson immédiate ? Le programmateur ne doit afficher que l'heure; celle-ci ne doit pas clignoter. • Choisissez le mode de cuisson : Tournez le sélecteur de fonctions sur la position de votre choix. -
Page 33: C Omment Programmer Une Cuisson
99638961_A_FR GB.qxp 02/03/2006 10:39 Page 33 Comment utiliser votre four ? omment programmer une cuisson ? vec départ immédiat 1. Réglez le mode de cuisson choisi et éventuellement ajustez la température. Exemple : position “ ” température 210°C. 2. Appuyez sur la touche “ ”... - Page 34 99638961_A_FR GB.qxp 02/03/2006 10:39 Page 34 Comment utiliser votre four ? omment utiliser le minuteur ? Votre four est équipé d’un minuteur électronique indépendant du fonc- tionnement du four permettant de décompter un temps. Dans ce cas, l’affichage du minuteur est prioritaire sur l’affichage de l’heure du jour.
-
Page 35: Comment Changer L'ampoule
99638961_A_FR GB.qxp 02/03/2006 10:39 Page 35 Comment utiliser votre four ? omment changer l’ampoule ? • L'ampoule se situe au plafond de la cavité de votre four. Débrancher votre four avant toute intervention sur l'ampoule pour eviter tout risque de choc électrique et laisser refroidir si besoin l’appareil. -
Page 36: M Odes De Cuisson Du Four
99638961_A_FR GB.qxp 02/03/2006 10:39 Page 36 odes de cuisson du four Symbole Nom de la fonction Description de la fonction raditionnel pulsé Montée rapide en température. La cuisson s’effectue par les élé- Certains plats peuvent être enfour- ments inférieur et supérieur et nés four froid. - Page 37 99638961_A_FR GB.qxp 02/03/2006 10:39 Page 37 Modes de cuisson du four Recommandations Préco T° mini préco maxi Recommandé pour les viandes, poissons, légumes, posés dans un plat en terre de pré- ference. Recommandé pour toutes les volailles ou rôtis au tourne-broche. mini préco maxi...
-
Page 38: Comment Nettoyer La Cavité De Votre Four
99638961_A_FR GB.qxp 02/03/2006 10:39 Page 38 omment nettoyer la cavité de votre four ? u’est-ce qu’une pyrolyse ? -La pyrolyse est un cycle de chauffe de la cavité du four à très haute températu- re qui permet d’éliminer toutes les salissures qui proviennent des éclaboussures ou des débordements. -
Page 39: C Omment Faire Une Pyrolyse
99638961_A_FR GB.qxp 02/03/2006 10:39 Page 39 Comment nettoyer la cavité de votre four ? omment faire une pyrolyse ? a) Retirez la casserolerie du four et enlevez les débordements impor- tants qui auraient pu se produire. b) Vérifiez que le programmateur affiche l’heure du jour et que celle-ci ne cli- gnote pas. -
Page 40: Que Faire En Cas D'anomalies De Fonctionnement
99638961_A_FR GB.qxp 02/03/2006 10:39 Page 40 ue faire en cas d’anomalies de fonctionnement ? Vous avez un doute sur le bon fonctionnement de votre four, ceci ne signifie pas forcément qu'il y a une panne. Dans tous les cas, vérifiez les point suivants : ous constatez que...
Need help?
Do you have a question about the 5H-741 Series and is the answer not in the manual?
Questions and answers