
Subscribe to Our Youtube Channel
Related Manuals for Miele professional G 7883 CD


Summary of Contents for Miele professional G 7883 CD
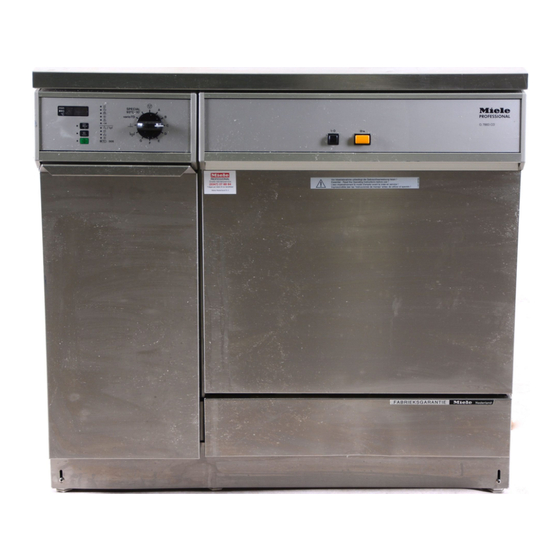
- Page 1 Operating and Installation Instructions Laboratory Glassware Washer G 7883 CD en - US To prevent accidents and machine damage read these instructions before installation or use. M.-Nr. 07 779 611...
-
Page 3: Table Of Contents
Contents IMPORTANT SAFETY INSTRUCTIONS....... . . 5 Guide to the laboratory glassware washer ......10 Function of the laboratory glassware washer. - Page 4 Contents Program Guide ........... 40 Programming functions .
-
Page 5: Important Safety Instructions
IMPORTANT SAFETY INSTRUCTIONS Please pay attention to the following This machine conforms to current notes to maintain safe procedures. safety requirements. However, The lab washer should be installed, inappropriate use can lead to commissioned and maintained only by personal injury and property a Miele Service Technician. - Page 6 IMPORTANT SAFETY INSTRUCTIONS The lab washer is only designed to When using this machine regard the operate with water and the high temperatures and be especially recommended processing chemicals. careful not to scald or burn yourself. The machine must NOT be operated When opening the door bypassing the with organic solvents or flammable electrical lock, a danger of burning,...
- Page 7 IMPORTANT SAFETY INSTRUCTIONS Avoid inhaling powder products. Use only Miele approved cleaning They can cause burning in the mouth agents with this machine. Use of and throat if swallowed, and can inhibit unsuitable cleaning agents could breathing. adversely affect the components of the machine.
- Page 8 IMPORTANT SAFETY INSTRUCTIONS In critical applications where very When using cleaning agents and stringent requirements have to be met, specialized products, it is essential that it is strongly recommended that all the the manufacturer’s instructions are relevant factors for the process, such followed.
- Page 9 IMPORTANT SAFETY INSTRUCTIONS Accessories Only genuine, Miele parts and accessories should be used with this lab washer, including Miele mobile units, baskets and inserts. Adequate cleaning results cannot be guaranteed when non-Miele accessories are used, or when Miele accessories are altered. Damages resulting from the use of unsuitable accessories are not covered by the warranty.
-
Page 10: Guide To The Laboratory Glassware Washer
Guide to the laboratory glassware washer a Display i "Rinse aid" indicator b "Display" indicator j "Neutralizer agent" indicator k "Recharge Softener" indicator c "Drying" indicator d "Start" indicator l "Fill/Drain" indicator e "Start" 6 button m Program sequence display f "Drying"... - Page 11 Guide to the laboratory glassware washer a Drying system e Level indicator for rinse aid b Dispensers for neutralizer (red) and f Filter combination liquid detergent (blue) g Salt reservoir c Dispenser for powdered detergent (water softener) d Rinse aid reservoir h Service panel (with dosage selector) i Serial interface...
-
Page 12: Function Of The Laboratory Glassware Washer
Function of the laboratory glassware washer Miele laboratory washers are designed Intended application: Laboratory to clean and rinse laboratory equipment equipment and accessories. Labware includes a wide range of In this operating manual, the general items: term "labware" is used to cover a range –... -
Page 14: Water Softener
Water softener Setting the water softener Before using the lab washer for the first time, the water softener should be ^ Use the On/Off button to switch off programmed. The water needs to be the machine. softened to avoid calcium deposits on ^ Turn the program selector to f. - Page 15 Water softener Settings Settings gr/gal Settings gr/gal 1 - 30 CaCO 31 -60 CaCO 1 - 30 31 -60 19 *) 1010 1030 1040 1060 1080 *) factory setting...
-
Page 16: Filling The Salt Reservoir
Water softener Filling the salt reservoir Only special, coarse-grained reactivation salt* should be used in this lab washer. *Available from Miele. Please see back page for more information. Do not use other types of salt, e.g. table salt, agricultural or gritting salt. These could contain components which are insoluble in water and could damage the water softener. -
Page 17: Salt Indicator
Water softener Salt indicator ^ Wipe any residual salt off the screw threads and seal of the reservoir. When the salt reservoir is empty, the "Recharge Softener" indicator b lights ^ Screw the cap on securely. to remind you to fill the reservoir. ^ Immediately after this step, start the Reactivation takes place automatically "Rinse"... -
Page 18: Rinse Aid
Rinse Aid ^ Open the machine door. Use only special processing chemicals for lab washers and observe the manufacturer's recommendations for use. In particular, always observe the manufacturer's instructions regarding residual amounts that do not pose any toxicological risk. Adding rinse aid Rinse aid is not used in laboratory glassware cleaning applications. -
Page 19: Rinse Aid Indicator Light
Rinse Aid Rinse aid indicator light Setting the rinse aid dosage ^ Rinse aid does not need to be refilled The dosage selector has settings from until the "Rinse aid" indicator light 1 to 6 (1 - 6 ml). The factory setting is at comes on in the display. -
Page 20: Neutralizing Agent
Neutralizing agent ^ Open the door of the storage cabinet Adding neutralizer that houses the neutralizer and Neutralizer has an acidic pH, and detergent dispensers. works by neutralizing any traces of ^ Take out the (red) neutralizer (alkaline) cleaner from the surface of the glassware. -
Page 21: Neutralizer Indicator Light
Neutralizing agent Neutralizer indicator light ^ When the "Neutralizer" indicator light comes on, it is important to promptly refill or exchange the neutralizer container. Make sure to refill / exchange the container before it becomes completely empty. -
Page 22: Detergent
Detergent ^ Open the door of the storage cabinet Adding detergent that houses the neutralizer and Use only cleaning agents detergent dispensers. formulated for this machine. Do not ^ Take out the (blue) liquid detergent use detergents formulated for container and refill it or replace it with household dishwashers. - Page 23 Detergent Liquid detergent refill light Using powdered detergent Avoid inhaling cleaning agents in powder form. If processing chemicals are ingested, they can cause chemical burns in the mouth and throat or suffocation. When the following upper baskets are used, powdered detergent can be loaded inside the door, but only for programs without a pre-wash cycle.
- Page 24 Detergent The flap is always open at the end of a program. ^ Load the detergent into the compartment. Dosage: To achieve a detergent concentration of approximately 3 g/l, use 30 g of detergent. Always follow the detergent manufacturer's recommendations for dosage concentration.
-
Page 25: Loading The Machine
Loading the machine Depending on the type of labware you After every program completion, wish to clean, the lab washer can be conduct the following visual used with an upper basket, lower inspection: basket, or injector wagon, as well as an –... - Page 26 Loading the machine Loading the machine – Do not use this machine to wash nickel-plated items or discolored – Always load items in a way that all (oxidized) aluminum items. surfaces are exposed. This ensures that the items will be properly –...
-
Page 27: Spring Adapter For The Water Connection
Loading the machine Spring adapter for the water Adjusting the upper basket connection The upper basket can be adjusted above and below the middle position, The spring adapter for the water by 2 cm. connection must be properly engaged when a basket or the injector wagon is Depending on the height selected and inserted into the machine. - Page 28 Loading the machine Laboratory equipment This section only covers basic information on how to prepare and load Wide-necked labware, e.g., beakers, labware. wide-necked Erlenmeyer flasks and Petri dishes, or cylindrical items, – Petri dishes and similar items should e.g., test tubes, can be cleaned inside be loaded in a suitable insert with the and out by the rotating spray arms.
- Page 29 Loading the machine Upper basket O 188 E 106 For various inserts. Stainless steel half insert with 26 spring hooks in 2 different heights for various glassware, e.g. narrow necked flasks, graduated cylinders, medicine bottles, etc. Lower basket U 874 For various inserts.
- Page 30 Loading the machine E 350 O 187 Injector wagon Injector wagon For narrow necked glassware, (Upper basket) For direct injection of 15 injectors, 160 mm high; narrow necked glassware, 18 injectors, 220 mm high. 34 injectors,160 mm high.
-
Page 31: Effects Of Processing Chemicals
Effects of Processing Chemicals General information Effects Action Damage to elastomer (seals and hoses) – Find and correct the causes of the or plastic components of the lab damage. washer may cause the materials to See "Connected processing swell, shrink, harden or become brittle, chemicals", "Soiling"... - Page 32 Effects of Processing Chemicals Connected processing chemicals Effects Action The ingredients of the processing – Use only those processing chemicals chemicals have a considerable effect recommended by Miele. on the durability and functionality (feed Consult a Miele Applications performance) of the metering systems. Specialist.
- Page 33 Effects of Processing Chemicals Connected processing chemicals Effects Action The following processing chemicals – The process parameters of the wash can result in excessive foaming: program, e.g. metering temperature, metering concentration, etc. must be – tenside cleaners containing set so that the overall process detergent and rinse aid.
- Page 34 Effects of Processing Chemicals Soiling Effects Action The following substances can damage – Retrofit the lab washer with more the elastomer components (hoses and grease-resistant elastomers. seals) and, in some cases, the plastic – Depending on what the lab washer is components of the lab washer: used for, periodically wipe the lower –...
- Page 35 Effects of Processing Chemicals Reactions between processing chemicals and soils Effects Action Natural oils and greases can be – Use the program OIL (if available). saponified with alkaline processing – Use the special program with dosing chemicals. This may cause a lot of of tenside cleaners (neutral pH) for foaming.
-
Page 36: Use
Turning on Selecting the (optional) drying function ^ Close the door. The additional function "Drying" can be ^ Press the On/Off button. selected immediately after a program If the program selector is in the f has been selected (except for "Rinse"). position, an indicator light will appear in ^ Press the "Drying"... -
Page 37: Program Sequence Display
Program sequence display Once a program cycle has started, all other programs are locked until Whenever a program is running, the completion. If the program selector is indicator light for that program will turned to a different program, the remain on. display goes out. -
Page 38: End Of A Program
End of a program Turning off ^ Press and release the On/Off button. Once the "Start" indicator goes out, and the "Complete" indicator comes on, the Because of the electric door lock, program has ended. You will see a 0 in the door can only be opened if the the middle of the display, and all other On/Off button is pressed (see... -
Page 39: Canceling A Program
^ Turn the program selector to f. Canceling a program The program is canceled after If a program is canceled it must 2 seconds. be run again to be complete. ^ Open the door. Canceling a program because of an Caution! Water and items in the interruption machine may be hot. -
Page 40: Program Guide
Program Guide Program Description Open program available for programming by end user. Custom For removing inorganic residue; INORGANICA generally for analytical applications, for light to moderate soiling, with moderate to high rinse requirements. For removing organic residue, such as oils, fats, wax, agar, preparation ORGANICA applications and for some analytical applications, with moderate to heavy soiling, and moderate rinse requirements. - Page 41 Program Guide Program sequence Pre-Wash Main Wash Rinse Rinse Final Rinse * Drying 99°C 70°C DOS 1 DOS 3 25 min 5 min 80°C 75°C 3 min 1 min 99°C 70°C DOS 3 DOS 1 DOS 3 25 min 5 min 50°C 75°C 70°C...
-
Page 42: Programming Functions
Programming functions For future servicing, be sure to document any changes made to the factory settings in the fields provided. General information: – Program selector positions that have no assigned function are represented by a bar ( - ) in the middle of the display. –... -
Page 43: Dos 1 (Liquid Detergent)
Programming functions DOS 1 (liquid detergent) Setting the detergent dosage The dosage concentration only needs to be set for liquid detergents. Set the concentration according to the detergent manufacturer's recommendations. Do not change the setting if you are using powdered detergent in the door dispenser. -
Page 44: Dos 3 (Neutralizer)
Programming functions DOS 3 (neutralizer) Setting the neutralizer dosage Set dosage concentration according to the neutralizer manufacturer's recommendations. Step Display / Result ^ Press the "Drying" 0 button until E02 appears in the display. ^ Turn the program selector to "Intensive". The programmed dosage concentration appears in the display, e.g., 0.10 = 0.10 %... -
Page 45: Buzzer
Programming functions Buzzer The buzzer can be programmed for the following functions: – a continuous tone at the end of a program, – an error signal that beeps in 1-second intervals, and – a sample-collection signal (allows a sample of the final rinse water to be collected) that beeps in sets of 3 followed by a 2-sec pause. -
Page 46: Changing Program Parameters
Programming functions Changing program parameters The factory settings for various parameters are listed in the "Program Guide". Program parameters cannot be changed unless they are activated within a given program (see "Program Guide"). It is important to document any changes e.g., by recording them in the corresponding column in the program guide. -
Page 47: Changing The Temperature
Programming functions Changing the temperature Step Display / Result ^ Press and hold the "Drying" 0 button until E09 for Main Wash 1 the setting of the desired program block E12 for Main Wash 2 appears in the display. E22 for Rinse 1 E25 for Rinse 2 E28 for Drying 1 E31 for Drying 2... -
Page 48: Restoring The Factory Settings
Programming functions Restoring the factory settings Step Display / Result ^ Press and hold the "Drying" 0 button until E33 appears in the display. ^ Turn the program selector to a program. Default factory setting(s): Re-programmed setting(s): ^ When PP appears in the display, press the 00, the factory settings have "Display"... -
Page 49: Setting The Time And Date
Programming functions Setting the time and date The date and time are set in the serial interface (optional accessory). This information appears in the print log. The date and time can be changed, e.g., from daylight saving to standard time. Use the program selector to activate the desired time and date: 1 o'clock position: Calendar day 01 - 31 2 o'clock position: Month... -
Page 50: Resetting The Filter Timer Of The Drying System
Programming functions Resetting the filter timer of the drying system Whenever the coarse or fine filter in the drying system are changed, the service timer should be reset to zero. Step Display / Result ^ Press and hold the 0 button until E04 appears in the display. -
Page 51: Process Documentation
Process documentation This machine offers the ability to During the program sequence the document the cleaning process follow data is logged: (process documentation) – Date and machine number The documentation process can be completed either by an external – Program start and program name software or an external printer. -
Page 52: Maintenance
Maintenance Periodic maintenance for the lab When using powder detergent the washer is recommended annually. temperature at the time of dosing must be checked every 2 weeks. The dosing temperature is found under Validation Routine checks in the Validation Protocol. The routine checks must be done daily The temperature review must be by the user before using the machine. -
Page 53: Cleaning And Care
Cleaning and Care Cleaning the coarse filter Wear protective gloves and goggles when cleaning this machine. Cleaning the filters in the wash cabinet The lab washer must not be used without all filters in place. The filters protect the circulation pump from damage caused by foreign objects. - Page 54 Cleaning and Care Cleaning the fine, flat and micro-fine filters ^ Remove the coarse filter. ^ Remove the fine filter from between the flat and micro-fine filters. ^ Then remove together with the flat filter. ^ Clean the filters. ^ Replace the filter combination in reverse order.
- Page 55 Cleaning and Care ^ Unscrew the upper spray arm. Cleaning the spray arms ^ Loosen the knurled nut of the lower The spray arms can get clogged. Check daily and clean if necessary. spray arm and remove. ^ Use a sharp pointed object to push Removing the spray arms particles into the spray arm jets and ^ Remove the baskets.
- Page 56 Cleaning and Care Cleaning the drain pump and The drain pump is beneath the non-return valve (see arrow). non-return valve If water has not been pumped away at the end of a program the drain pump or the non-return valve may be blocked. ^ Turn off the machine.
- Page 57 Cleaning and Care Cleaning the water inlet filters Cleaning the filters ^ Disconnect the lab washer from To protect the water inlet faucet, filters are incorporated in the intake hose electricity (unplug it or "trip" the attached to the water supply. If the circuit breaker).
- Page 58 Cleaning and Care Cleaning the control panel Never clean the lab washer or ^ The control panel should only be near its vicinity with a water or high cleaned with a damp cloth or a pressure hose. suitable cleaner for use on plastic materials.
- Page 59 Cleaning and Care Baskets and inserts If available: To ensure the function of baskets and – do the spray arms rotate freely? inserts, they must be checked daily. A – Are the spray jets clogged? See checklist is supplied with the lab "Cleaning and Care - Cleaning the washer.
- Page 60 Cleaning and Care Drying system Changing the coarse filter If SF1 flashes in the display, the coarse filter needs to be replaced. ^ Pull open the storage cabinet door. ^ Change the coarse filter. The soft side of the filter must face the forwards.
- Page 61 Cleaning and Care Changing the fine filter If SF2 flashes in the display, the fine filter needs to be replaced. To ensure optimal performance, use only original Miele HEPA filters (classification 13). It is best to have the fine (HEPA) filter replaced directly by Miele Technical Service during routine maintenance.
-
Page 62: Frequently Asked Questions
Frequently asked questions The following guide can be used to help address minor problems without a service call. Repairs should only be performed by Miele Technical Service. Work performed by unqualified persons can place the user at considerable risk of harm. - Page 63 Frequently asked questions What if... Possible fault Solution Before the start of a Before addressing the program, the "8 error: Dosing Pump" – Turn the program selector to f. The error indicator flashes, and the program can not be message is erased. started.
- Page 64 Frequently asked questions What if... Possible fault Solution Before the start of a Before addressing the program, the error: "Neutralizer" indicator – Turn the program selector to f. The error flashes, and the program can not be message is erased. started.
- Page 65 Frequently asked questions What if... Possible fault Solution The "Recharge" The water softener has run Refill the salt reservoir. indicator flashes. out of salt. A few minutes after the Before addressing the start of a program, the error: "Fill/Drain" indicator –...
- Page 66 Frequently asked questions What if... Possible fault Solution The rinse program is Before addressing the interrupted and the error: "Fill/Drain" indicator – Turn the program selector to f. The error light is flashing. message is erased. – Press the On/Off button to switch off the machine.
- Page 67 Frequently asked questions What if... Possible fault Solution After a program, there is – Remove any detergent powdered detergent residue. residue left behind in – Prepare items again. the door dispenser. The dispenser was wet Make sure the dispenser is when it was loaded.
- Page 68 Frequently asked questions What if... Possible fault Solution Items made of glass The items are not lab Only use lab washer-safe show signs of washer-safe. glassware. corrosion. No neutralization took Fill the neutralizer place in the program container. sequence. Excessively high Select an appropriate temperatures are causing program or lower the wash...
- Page 69 Frequently asked questions What if... Possible fault Solution There are white The water softener setting Test the tap water deposits and/or spots is too low. hardness and program the on the labware. water softener according. Too much powder Be sure you are using the detergent is being used.
- Page 70 Frequently asked questions What if... Possible fault Solution The wash result is The baskets and inserts Properly arrange the unacceptable. were incorrectly loaded or glassware. overcrowded. Do not overload baskets and inserts. The program used was not Select an appropriate suited to the type/amount program or modify the of soiling.
-
Page 71: Thermo Switch
Frequently asked questions Thermo switch This lab washer has a resettable heater limiter which will shut off the elements in the event of over-heating. This could be caused for example, if large articles cover the heating elements or if the filters in the wash cabinet are blocked. -
Page 72: After Sales Service
After Sales Service This lab washer must be installed, maintained and repaired by an authorized Miele service technician. Maintenance and repair work performed by unqualified persons can place the user at risk. In the event of a fault which you cannot correct yourself please contact the Miele Technical Service Department 1-800-991-9380... -
Page 73: Installation Instructions
INSTALLATION INSTRUCTIONS Information is subject to change. Please refer to our website to obtain the most current product specification, technical & warranty information. To prevent accidents and machine damage read these instructions before installation or use. -
Page 74: Installation
Installation Leveling the legs Please refer to the installation diagram supplied with the machine. Any unevenness in the floor can be compensated for and the height of the Furniture and fittings installed machine raised or lowered by adjusting near the machine must be of a the four screw feet. - Page 75 Installation Removing the lid (if necessary) Protecting the countertop ^ Open the door. Important for machines with steam condenser (depending on model): ^ Remove the fixing screws on both sides using a cross slotted To prevent steam damage to the screwdriver.
-
Page 76: Electrical Connection
Electrical connection All electrical work must be See also the supplied installation carried out by a suitably qualified diagram. electrician in accordance with local and national safety regulations. A damaged power cord must only – Connection should be made via a be replaced with a genuine Miele suitable isolator, with an on-off switch cord by a Miele service technician. -
Page 77: Plumbing
Plumbing Connecting the water inlet – An acceptable water pressure (flow rate) is 10 - 147 psi. However, the The water in the machine is not recommended pressure is drinkable. 25 - 60 psi. If the water pressure is below 30 psi, –... - Page 78 Plumbing – Connect the intake hose for the steam condenser (without water safeguard) to the cold water faucet. – See the next page for how to connect the DI water line. – Water valves with inch thread are to be provided on site. They should be easily accessible, because the water supply will need to be turned off when not in use.
- Page 79 Plumbing DI Connection (pressurized) DI connection (unpressurized) (optional) The machine comes factory standard for connection to a pressure resistant For connection to 1.23 - 8.7 psi the system. The recommended water machine must be modified, if this has pressure (flow rate) is 25 - 60 psi not done at the factory.
-
Page 80: Drainage
Plumbing Drainage Connection to the drainage system and disposal of waste water must comply with local and national regulations. – The drainage system is fitted with a non-return valve which prevents waste water from flowing back into the machine via the drain hose. –... -
Page 81: Technical Data
Technical data English Metric Height: with lid 33.5" 85 cm without lid 32.3" 82 cm Width: 35.4" 90 cm Depth: 27.5" 70 cm Depth with the door open: 49.8" 126.5 cm Net weight: 265 lbs 120 kg Voltage / Fuse: see data plate Power cord approx. -
Page 82: Caring For The Environment
Caring for the environment Disposal of the packing Disposal of an old appliance materials Old appliances may contain materials that can be recycled. Please contact The cardboard box and packing your local authorities about recycling in materials protect the appliance during your area. - Page 84 Alteration rights reserved / Publication date 9/09/2011 M.-Nr. 07 779 611 / 00 INFORMATION IS SUBJECT TO CHANGE. PLEASE REFER TO OUR WEBSITE TO OBTAIN THE MOST CURRENT PRODUCT SPECIFICATIONS, TECHNICAL & WARRANTY INFORMATION.
Need help?
Do you have a question about the G 7883 CD and is the answer not in the manual?
Questions and answers