Table of Contents

Related Manuals for Miele professional G 7831


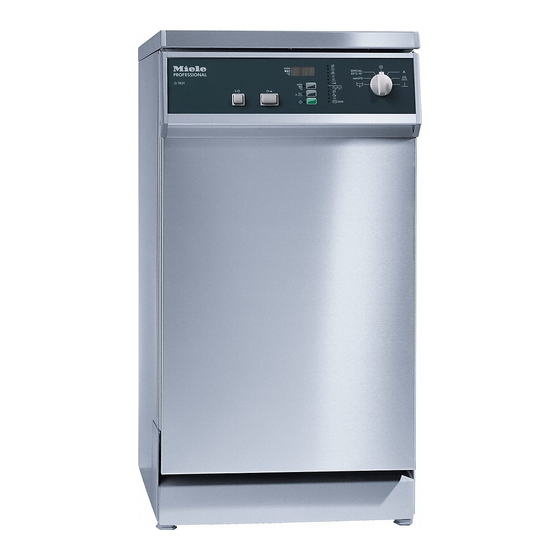
Summary of Contents for Miele professional G 7831
- Page 1 Operating instructions Washer-disinfector G 7831 en - GB To avoid the risk of accidents or damage to the machine it is essential to read these instructions before it is installed, commissioned and used for the first time. M.-Nr. 10 504 970...
-
Page 2: Table Of Contents
Contents Warning and safety instructions ........5 Symbols on the appliance . - Page 3 Contents Cancelling a programme ..........38 Programme cancellation due to a fault.
- Page 4 Contents Electrical connection ..........66 Plumbing.
-
Page 5: Warning And Safety Instructions
Warning and safety instructions This machine may only be used in This washer-disinfector complies non-stationary locations if a risk with all relevant local and national assessment of the installation has been safety requirements. Please note carried out by a suitably qualified that incorrect use can lead to engineer. - Page 6 Warning and safety instructions Personnel operating the Please be aware that the washer-disinfector should be trained washer-disinfector may be operating at regularly. Untrained personnel and high temperatures. If the door is children must not be allowed access to opened with the emergency release the machine or its controls.
- Page 7 Warning and safety instructions The machine must be disconnected Use of chemical agents could under from the mains electricity supply before certain circumstances adversely affect any maintenance or repair work is the components of the carried out. Do not reconnect it until the washer-disinfector.
- Page 8 Warning and safety instructions When using chemical agents such After carrying out any work on the cleaning agent it is essential that the mains water system, the water supply manufacturer's instructions are system to the washer-disinfector must followed. Only use chemical agents for be vented.
-
Page 9: Symbols On The Appliance
Warning and safety instructions Using accessories Disposing of your old machine Only use genuine Miele original Please note that the machine may accessories with this machine. Consult have contamination from blood or other Miele on the type and application of bodily fluids in it and must be such equipment. -
Page 10: Intended Use
Intended use This washer-disinfector can be used to National health and safety regulations clean, rinse, thermally disinfect and dry regarding disinfection must also be a wide range of reusable medical observed. devices used in dental, ENT and The cleaning programme as well as any gynacological surgery. -
Page 11: Guide To The Machine
Guide to the machine a On/Off switch I-0 h Check/Fault indicators: p / 6 Inlet/drain b Door release a Add salt c Display Add neutralising agent Add rinsing agent d ß button to switch between the 8 DOS optical interface for displays for: service technician;... - Page 12 Guide to the machine a Connection for DOS module K 60 at e Level indicator for rinsing agent the rear of the machine f Dispenser for powder cleaning agent b Filter combination g Rinsing agent reservoir (with dosage c Salt reservoir selector) d Neutralising agent reservoir (with Optional:...
-
Page 13: Caring For The Environment
Caring for the environment Disposal of the packing Disposal of your old machine material Electrical and electronic machines often contain materials which, if The transport and protective packing handled or disposed of incorrectly, has been selected from materials which could be potentially hazardous to are environmentally friendly for disposal human health and to the environment. -
Page 14: Opening And Closing The Door
Opening and closing the door Electric door lock To open the door with the emergency release This machine is equipped with an electric door lock. The emergency release should only The door can only be opened when: be used when the door cannot be opened normally, e.g. -
Page 15: Water Softener
Water softener In order to achieve good cleaning In the event of a fault, it will help the results, the washer-disinfector needs to service technician if you know the operate with soft water. Hard water hardness of your local water supply. results in the build-up of calcium Enter the water hardness below: deposits on instruments, etc, and in the... -
Page 16: Programming The Water Softener
Water softener Programming the water Table of settings softener °dH mmol/l °f Setting ^ Switch off the machine. 0 *) ^ Turn the programme selector to f. ^ Press ß and 6 at the same time, hold them in and, whilst doing so, switch the machine on with the I-0 switch. -
Page 17: Filling The Salt Reservoir
Water softener ^ Remove the bottom basket from the Filling the salt reservoir machine. Only use special coarse grained ^ Unscrew the salt reservoir cap. reactivation salt with granules of approx. 1-4 mm. Do not use other types Before filling the salt reservoir with of salt such as cooking salt, agricultural reactivation salt for the first time, you grade or gritting salt. -
Page 18: Add Salt Indicator
Water softener Add salt indicator ^ Remove the funnel and wipe any residual salt off the seal and the Reactivation takes place automatically screw threads on the socket. during a programme. The programme sequence indicator ^ Screw the cap back on firmly. light a k lights up whilst this is ^ Run the PRE-RINSE D programme to happening. -
Page 19: Areas Of Application
Areas of application This washer-disinfector normally At the end of each programme: requires an upper and a lower basket. – Carry out a visual check of the load Various inserts and special baskets are for cleanliness. also available for a wide variety of instruments and utensils. -
Page 20: Loading The Machine
Areas of application Loading the machine – It is advisable to use instruments made of surgical steel only, as these – Arrange the load so that water can are not susceptible to corrosion. access all surfaces. This ensures that they get properly cleaned. –... -
Page 21: Water Connection Spring Adapter
Areas of application Water connection spring adapter Make sure that the spring adapter for water connection engages correctly when a basket or injector unit is inserted in the machine. It must be 4-5 mm higher than the water connection inlet in the machine. If it is not, adjust the adapter accordingly. - Page 22 Areas of application Top basket / injector unit O 801/2 Upper basket O 800/1 Front and rear sections for e.g. E 800 for inserts and mesh trays, e.g. E 802 and E 801 inserts. and E 146. The central axis is fitted with a holder and 10 jets in silicone holders for the direct injection of hollow instruments.
-
Page 23: Dental
Areas of application Dental A special holder AUF 2 (optional extra) is required for processing hand pieces and contra angles in top basket O 801/2. Separate operating instructions are supplied with the holder. Fibre optic hand pieces and contra angles should be monitored frequently. Those with fibre optic rods are more durable than those with fibre optic strands. - Page 24 Areas of application It is preferable for mouth rinse beakers to be washed in the top basket. Greater fluctuations in temperatures and mechanical action in the bottom basket area can cause stress cracks and corrosion. E 805 for 8 half trays in the bottom basket. E 801/1 for 8 mouth rinse beakers.
-
Page 25: Ent
Areas of application E 803 E 416 for ear funnels and ear and nasal Insert for gynaecology specula. specula. Load as shown in the illustration. ^ Load the specula opened to allow all One part specula: surfaces to be accessed. ^ Place one part specula opened The thin chome plating on ear between the holders. -
Page 26: Chemical Processes And Technology
Chemical processes and technology General notes Problem How to resolve it If seals, hoses and plastics in the – Establish the cause of the damage washer-disinfector suffer damage they and rectify it. will not be water-tight and will not See information regarding "Chemical function correctly. - Page 27 Chemical processes and technology Chemical agents Problem How to resolve it The ingredients in chemical agents – Observe the chemical agent have a strong influence on the longevity manufacturer's instructions and and functionality (throughput) of the recommendations. dispensing system. The dispensing –...
- Page 28 Chemical processes and technology Chemical agents Problem How to resolve it The following chemical agents can – Process parameters in the wash cause large amounts of foam to build programme, such as dispensing temperature, dosage concentration etc. must be set to ensure the whole –...
- Page 29 Chemical processes and technology Soiling Problem How to resolve it The following substances can lead to a – Thoroughly rinse items in water heavy build-up of foam during washing beforehand. and rinsing: – Select a cleaning programme with at – some disinfecting agents and least one short pre-rinse in cold or dishwashing detergents, hot water.
-
Page 30: Dispensing Chemical Agents
Dispensing chemical agents Only use agents formulated specifically for use in washer-disinfectors and make sure you follow the manufacturer's instructions. Pay particular attention to information regarding toxic residues. Adding rinsing agent Rinsing agent is necessary to ensure water does not cling and leave marks on items during the drying phase and to help items dry faster after they have ^ Add rinsing agent only until it is... -
Page 31: Add Rinsing Agent Indicator
Dispensing chemical agents Add rinsing agent indicator Setting the dosage ^ Add rinsing agent to the rinsing The dosage adjuster (see arrow) in the opening has settings adjustable from 3 agent reservoir when the Add rinsing agent indicator H lights up. to 8 (3-8 ml). -
Page 32: Adding Neutralising Agent
Adding neutralising agent If with time discolouration or rust spots appear on instruments, especially at joints, a special neutralising agent can be used (contact Miele Professional for advice if necessary). Neutralising agent (pH-level: acidic) neutralises residues of alkaline cleaning agents on the surface of instruments and utensils. -
Page 33: Add Neutralising Agent Indicator
Dispensing chemical agents Add neutralising agent The neutralising agent dosage is set indicator to 6 ml at the factory. If required, the dosage setting can be adjusted by a Miele approved service technician If the cleaning agent being used is mildly alkaline, you will need to use a phosphoric acid based neutralising agent. -
Page 34: Adding Cleaning Agent
Dispensing chemical agents Adding cleaning agent Adding powder cleaning agent Only use cleaning agents Do not inhale or ingest powder suitable for washer-disinfectors. Do cleaning agent. It can cause burning not use cleaning agents designed in the mouth and throat and inhibit for domestic dishwashers. - Page 35 Some types of soiling may require different combinations of cleaning agents and other additives. The Miele Professional Department will be pleased to advise you. ^ Add powder cleaning agent to compartment II. ^ Close the dispenser lid.
-
Page 36: Operation
Operation Selecting the Drying 0 additional Switching on function ^ Close the door. The Drying additional function may be ^ Open the stopcock. selected immediately after the ^ Press the I-0 switch. programme has been selected (except with Pre-rinse D and Drain 6). When the programme selector is at f, To do this: a dot lights up in the display. -
Page 37: Programme Sequence Indicators
Operation During a programme, you can switch * Rinse block 5 (normally for chemical between the following displays: disinfection) can be programmed in as an extra stage in freely programmable – the current temperature, Programme A. It is then not possible to –... -
Page 38: Cancelling A Programme
Operation Cancelling a programme Caution. Water and items in the Where a programme is machine may be hot. Danger of cancelled, the items must be burning or scalding. reprocessed. ^ Arrange the items securely. (Wear protective gloves where Programme cancellation due to a necessary, and observe appropriate fault health and safety regulations relating... -
Page 39: Programmable Functions
Programmable functions For future servicing work, please document any alterations to the factory default settings. Enter any alterations in the appropriate box. General notes: – Switch positions that have not been allocated a function are indicated in the middle part of the display by a bar ( - ). –... -
Page 40: Dispensing Liquid Cleaning Agent Via Dos 1
Programmable functions Dispensing liquid cleaning agent via DOS 1 Setting the dosage concentration The dosage concentration must be set exclusively for liquid cleaning agent. Set it according to the manufacturer's recommendations or the official standards required. The dosage concentration must not be altered even if powder cleaning agent is dispensed via the dispenser in the door. -
Page 41: Buzzer
Programmable functions Buzzer A buzzer can be programmed for the following: – a constant tone will sound at the end of a programme, – a buzzer will sound at one second intervals as a fault warning, and – 3 short beeps followed by a 2 second pause, then 3 short beeps etc will sound as a reminder to remove a test item. -
Page 42: Changing Programme Parameters
Programmable functions Changing programme parameters The parameters for programmes A, E and Vario TD can be changed to suit particular requirements. To do this the temperature and the temperature holding time in the Main wash 1 and Final rinse 2 programme blocks can be changed. The programme chart at the end of these instructions shows the factory default settings for the temperature and temperature holding time of the individual programme blocks. -
Page 43: Changing The Temperature Holding Time
Programmable functions Changing the temperature holding time Step Display / Result ^ Press button 0 repeatedly or hold pressed in until E10 for Main wash 1 the level of the programme block you wish to change E26 for Final rinse 2 appears in the display. -
Page 44: Setting The Time And Date
Programmable functions Setting the time and date The serial interface contains the date and time. This data is transmitted to the report printer. You can reset the date and time, e.g. to change from summer to winter time. The individual values of date and time are activated according to the position of the programme selector: "1 o'clock"... -
Page 45: Process Documentation (Optional)
Process documentation (optional) The washer-disinfector is capable of A report containing the following data documenting processing procedures will be produced during a programme (process documentation). sequence: Process documentation can be carried – Date and machine number out either by using documentation software or via a printer. -
Page 46: Maintenance
Maintenance Periodic checks The following operational tests will be carried out within the framework of the This washer-disinfector should be maintenance: serviced by a Miele approved service technician in accordance with local and – A programme will be run as a test national safety regulations after every 1000 operating hours, or every 12-18 –... -
Page 47: Process Validation
Maintenance Process validation Routine checks The standard of disinfection in the Before the start of each working day, disinfection programmes must be the user must carry out a number of confirmed by the user as a routine routine checks. A check list is supplied matter. -
Page 48: Cleaning The Filters In The Wash Cabinet
Maintenance Cleaning the filters in the wash cabinet The filters in the base of the wash cabinet are designed to prevent coarse soiling getting into the circulation system. A build-up of coarse soiling can cause the filters to clog up. They should, therefore, be checked daily and cleaned if necessary. - Page 49 Maintenance ^ Turn the filter combination over and ^ Clean the coarse filter under running open the coarse filter by pulling back water, using a brush if necessary, on the locking device. and press the locking device back in. Make sure the locking device is properly locked.
-
Page 50: Cleaning The Spray Arms
Maintenance Cleaning the spray arms The spray arms can become blocked and so they should be checked every day. ^ Use a sharp pointed object to push particles into the spray arm jets, and rinse well under running water. Remove the spray arms as follows: ^ Take any baskets out of the wash cabinet. -
Page 51: Cleaning The Control Panel
Maintenance Cleaning the control panel Never clean the machine or near ^ The control panel should only be vicinity with a hose or a pressure cleaned using a damp cloth or with a washer. proprietary cleaning agent for glass or plastic surfaces. Cleaning the wash cabinet An approved and listed disinfecting agent can be used to wipe surfaces. -
Page 52: Baskets And Inserts
Maintenance Baskets and inserts Baskets and inserts should be checked daily to make sure they are functioning correctly. The washer-disinfector is supplied with a check list. The following need to be inspected: – Check that rollers on baskets/inserts are free of hindrance and that they are secure. -
Page 53: Problem Solving Guide
Problem solving guide The following guide may help to find the reason for a fault and to correct it. You should, however, note the following: Repairs should only be carried out by a Miele authorised and trained ser- vice technician in strict accordance with current local and national safety regulations. - Page 54 Problem solving guide Fault Possible cause Remedy The 8 DOS indicator Before trying to rectify the starts flashing before problem, you must: the start of a – Turn the programme selector to f (the fault programme. The programme cannot be code goes out).
- Page 55 Problem solving guide Fault Possible cause Remedy The Add salt indicator The salt reservoir has not Fill carefully with salt. light k flashes. been replenished, meaning that the water softener could not be reactivated. A few minutes after the Before trying to rectify the start of the programme, problem, you must: the p / 6 indicator...
- Page 56 Problem solving guide Fault Possible cause Remedy The wash cycle Before trying to rectify the finishes early and the problem, you must: p / 6 indicator – Turn the programme selector to f (the fault flashes. code goes out). – Switch the machine off with the I-0 switch.
- Page 57 Problem solving guide Fault Possible cause Remedy Cleaning agent residue – Remove the cleaning is left in the dispenser agent residue. at the end of a – Reprocess the items. programme. The dispenser was still Make sure the dispenser is damp when detergent was dry before adding cleaning added.
- Page 58 Problem solving guide Fault Possible cause Remedy There is corrosion on The chloride content of the Have the water analysed. If instruments. water is too high. necessary, connect the machine to an external water softener unit and use deionised water. Rust has entered the wash –...
- Page 59 Problem solving guide Fault Possible cause Remedy Items are flecked. The rinsing agent dosage Increase the rinsing agent level has been set too low. dosage setting. The rinsing agent reservoir Adding rinsing agent. is empty. The cleaning result is Baskets or inserts have Rearrange the items.
-
Page 60: Other Problems
Other problems Cleaning the drain pump and non-return valve If the water has not been pumped away at the end of a programme, the drain pump or the non-return valve might be blocked. They are easy to clean. ^ Disconnect the machine from the mains supply (switch off at the mains and withdraw the plug or withdraw the mains fuse). - Page 61 Other problems The drain pump is situated under the non-return valve (see arrow). ^ Before replacing the non-return valve, check that the drain pump is free of obstructions. ^ Carefully replace the ron-return valve and secure with the locking clamp. For safety reasons, the load should be cleaned and disinfected again.
-
Page 62: Cleaning The Filters In The Water Inlet
Other problems Cleaning the filters in the water To clean the filter inlet ^ Disconnect the machine from the mains supply. Filters are incorporated in the screw connection of the water inlet hose to ^ Turn off the stopcock and unscrew protect the water inlet valve. -
Page 63: After Sales Service
After sales service This machine must be commissioned and repaired by a Miele trained and qualified technician only. Unauthorised repair work could cause personal injury or damage to the machine. In the event of any faults that you cannot remedy yourself, please contact your authorised Service Dealer or Miele. -
Page 64: Installation
Installation Building the machine under a Please refer to the installation continuous worktop diagrams supplied with the The machine lid must be removed as machine. follows: ^ Open the door. Furniture and fittings installed near the machine must be of a commercial standard able to withstand the effects of steam and condensation. - Page 65 Installation Levelling and securing the machine Decor frame fitting kit To ensure stability, the machine must The machine front can be fitted with a first be aligned and then screwed to the decor panel to match kitchen units worktop. (optional accessory available to order). The decor frame is supplied with its own fitting instructions.
-
Page 66: Electrical Connection
Electrical connection The machine must only be operated All electrical work must be with the voltage, frequency and fusing carried out by a suitably qualified shown on the data plate. and competent person in This machine is not convertible. accordance with current local and national safety regulations (BS 7671 The data plate with test certification is on the rear of the machine and also... -
Page 67: Plumbing
Plumbing Connection to the water inlet – This machine is supplied as standard for connection to a cold water Water in the machine is not supply. The inlet hose must only be suitable for drinking. connected to the cold water stopcock. -
Page 68: Drainage
Plumbing Drainage – The drainage system is fitted with a non-return valve which prevents dirty water from flowing back into the machine via the drain hose. – The machine should preferably be connected to a separate drainage system on-site. If separate drainage is not available, contact your Miele application specialist for professional advice. -
Page 69: Technical Data
Technical data Height with lid 85 cm Height without lid 82 cm Width 45 cm Depth 60 cm Depth with door open 120 cm Weight (net) 70 kg Voltage, connected load, fuse rating See data plate Mains cable Approx. 1.8 m Water temperature max. -
Page 70: Programme Chart
Programme chart Programme When to use Freely programmable programme (programmed by a Miele authorised service technician) For normally soiled items (without disinfection) UNIVERSAL For rinsing heavily soiled items, e.g. after soaking them in disinfecting agent, to avoid the build-up of foam in the machine. PRE-RINSE For draining water out of the machine, e.g. - Page 71 Programme chart Programme sequence Pre-wash Main wash Rinses Rinses Final rinses Drying* 60°C 65°C 3 min 1 min DOS 1 DOS 2 55°C 93°C 5 min 5 min DOS 1 DOS 3 DOS 2 93°C 75°C 3 min 10 min DOS 1 DOS 3 DOS 2...
- Page 72 Alteration rights reserved / Publication date: 2016-04-01 M.-Nr. 10 504 970 / 00 0297...
Need help?
Do you have a question about the G 7831 and is the answer not in the manual?
Questions and answers