Table of Contents
Advertisement
Quick Links
Advertisement
Table of Contents

Related Manuals for Foxpro FUSION


Summary of Contents for Foxpro FUSION
- Page 2 Customer Service: (717) 248-2507 Toll Free Orders Only: 866-463-6977 General Inquiry E-mail: sales@gofoxpro.com Stay up to date with the latest sounds by visiting our online sound library. Watch for new products and upgrades from FOXPRO ® . Visit us online: www.gofoxpro.com...
-
Page 3: Table Of Contents
Integrated USB Port ..............21 Fusion Remote Operation ............... 22 What are FOX FEATURES? ............22 Turning on the Fusion Remote ..........22 Navigating the Fusion Remote ..........22 Understanding the Fusion Remote Display ......23 Accessing Fusion Remote Configuration Menu ....... 25... - Page 4 Playing Sounds with the Remote ..........26 Volume & Mute Control ............28 Presets / Favorites ..............28 FOX FEATURES ................. 29 FOXFUSION ................30 FOXMOTION ................32 FOXBANG ................. 33 FOXPITCH ................. 34 AUTO VOLUME ................. 35 User Button ................36 FOXDATA ..................
- Page 5 11-2 Connecting to a Computer ............56 11-3 Manual Programming Process ..........57 11-4 Indexing the Files ..............58 11-5 Using the FOXPRO Programming Utility ........59 11-6 Editing the Categories Manually ..........62 11-7 Editing the Categories with FOXPRO Utility ......64...
- Page 6 12. Creating FOXCAST Sequence Files ........... 65 12-1 Creating FOXCAST Sequences Manually ........65 12-2 Enabling File Extensions in Windows ........68 12-3 Placing Sequences in the Fusion ..........69 12-4 Creating FOXCAST Sequences Online ........69 12-5 Synchronizing the Fusion Remote ........... 69 13.
-
Page 7: Getting Started
1. Getting Started Congratulations on your purchase of the FOXPRO Fusion digital game call! To get the full advantage of the Fusion and its array of capabilities, please read and understand the operating instructions in full. WARNING: To avoid personal injury and product damage, read all operating instructions and safety precautions in this guide before using the FOXPRO Fusion digital game call system. - Page 8 1. Rugged ABS housing. 2. Rear cone speaker that is located at the rear of the call. 3. Battery compartment door located on the back side of the call. 4. Power switch and manual volume control knob is located on front side of the call.
-
Page 9: Fusion: Requirements
NiMH (nickel metal hydride) batteries or one of FOXPRO’s optional rechargeable battery packs. Visit our website to view the entire line of recharging options for the Fusion. Installing batteries in the Fusion 1. Access the battery compartment by removing the door on the back of the Fusion. - Page 10 After the batteries are installed, you must select the appropriate battery chemistry in the Fusion. Selecting the correct battery chemistry: 1. Turn on the Fusion. The screen will briefly display the Fusion revision number, the channel of operation, and then three horizontal dashes.
-
Page 11: Fusion Remote: First Glance
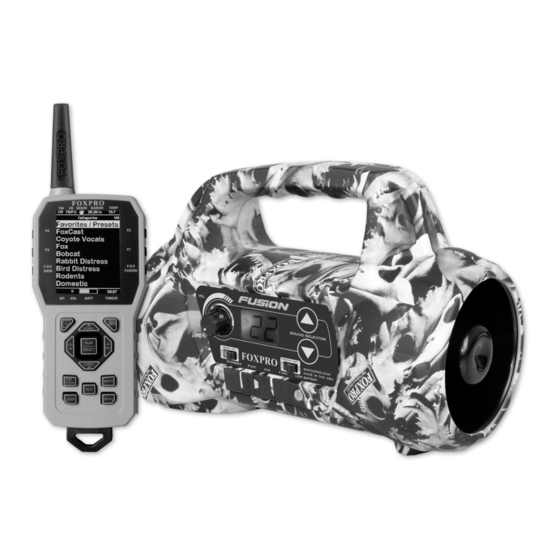
1-4 Fusion Remote: First Glance Figure 2 Image of the Fusion Remote 1. The second item from the left on the top status line is the FOXBANG/FOXGRIP status indicator. 2. Next item to the right is the moon phase indicator. - Page 12 6. The first button on the top right side of the remote is P2. 7. The P1 button is located under P2. 8. The FOXFUSION button is the last button on the right, just under the P1 button. 9. On the bottom of the remote display is the bottom status line and to the far right is the clock/elapsed stand timer.
-
Page 13: Fusion Remote: Requirements
Fusion will activate, briefly displaying the Fusion revision number, the channel of operation, and three horizontal dashes. When you see the three horizontal dashes, the Fusion is ready to be operated. Make sure that at least one of the speaker switches is moved to the right or “on”... -
Page 14: Fusion Remote Setup
The Fusion remote will keep track of the current date to properly render moon phases. This needs to be set up when you first start using the Fusion remote. The Fusion remote control features a moon phase indicator. To... -
Page 15: Playing Sounds Remotely
Playing Sounds Remotely The Fusion remote control is not intended to operate the caller at distances shorter than 1 meter (3 feet). If the remote is located too close to the caller, proper operation cannot be ensured. Make sure that you have properly installed batteries in both the Fusion and Fusion remote as described within Chapter 1. -
Page 16: Using Presets/Favorites
Chapter 4. Using Presets/Favorites The Fusion remote can store up to 50 unique presets or favorites. A preset is a shortcut to a particular sound which has a defined volume level. The Fusion remote has 4 quick access preset buttons located on the top left and right (see image in section 1-4). -
Page 17: Fusion In-Depth
To initiate playback of preset 1-4, make sure that both the Fusion and Fusion remote are turned on, and then push the corresponding preset button (P1 – P4) on the top sides of the remote. The Fusion will then instantly switch to that sound and volume level. -
Page 18: Charge Jack Specifications
The integrated charge jack is designed to be used only with the FOXPRO recharging kit that includes 8 AA rechargeable batteries and 110VAC wall charger. The Fusion digital game caller is designed to operate on 8 ‘AA’ batteries. FOXPRO has several charging accessories available for purchase. -
Page 19: External Speaker Jacks Specifications
External Speaker Jacks Specifications The Fusion features two external speaker jacks labeled “R EXT” and “F EXT”. These are standard 3.5mm female jacks that can accept a 3.5mm male plug. When selecting an external speaker to use with the Fusion, note that FOXPRO recommends the use of a speaker with 8Ω... -
Page 20: Auxiliary Device Jack Specifications
2. Connect the plug from the external speaker to either the rear or front external speaker jack. 3. Turn on the Fusion and begin playing a sound to hear the external speaker in action. Disabling the internal speakers:... -
Page 21: Integrated Usb Port
FOXCAST sequence files and reprogramming sounds. Both topics will be covered in a later chapter. A USB cable for the Fusion is not included in the base package and must be purchased separately. When connecting the... -
Page 22: Fusion Remote Operation
Navigating the Fusion Remote The Fusion remote has a scroll up and scroll down for cycling through the on-screen display. A selected menu item is highlighted with a horizontal bar and, by pressing the scroll up or down arrow button, that horizontal bar will move up or down through the menu items list. -
Page 23: Understanding The Fusion Remote Display
Fusion Remote menu configuration and step back one level in the menu system. Understanding the Fusion Remote Display The Fusion remote control screen can be viewed in three main segments: top status line, primary display area, and bottom status line. - Page 24 The image above shows the primary display area for the Fusion remote. Above the menu items you will see “Categories” which is the title of this screen. When you enter other menu sections, the title will change accordingly. The two main items on the screen “Favorites/Presets”...
-
Page 25: Accessing Fusion Remote Configuration Menu
Verifying Channel of Operation Prior to attempting remote controlled operation, it is important that you first verify that both the Fusion and Fusion remote are set to operate on the same channel. If the two devices are not on the same channel, then radio communication will not be possible. -
Page 26: Playing Sounds With The Remote
Settings item in the main menu. The method of playing a sound is identical for both modes; the way the sounds are displayed on the screen is the only difference. By default, the Fusion remote is setup to display the sounds by categories. - Page 27 “Play/Select” button to lock it in. Default: Categories View When the Fusion remote is turned on, the main screen will be displayed. The first item is “Favorites/Presets” followed by “FOXCAST”. The next menu item marks the beginning of the category listings. In category list mode, your sounds will not be displayed as one long list, but rather as elements of defined categories.
-
Page 28: Volume & Mute Control
40 and the volume is increased in steps. These steps are configured through the main menu under Sound Settings. The available stepping values are 1, 2, 3, and 5. By default, the Fusion remote is set for a volume stepping value of 2. Volume can be controlled automatically by a feature called Auto Volume. -
Page 29: Fox Features
Fusion remote, see Chapter 2. IMPORTANT NOTES • The Fusion remote control is not intended to operate the caller at distances shorter than 1 meter (3 feet). If the remote is located too close to the caller, proper operation cannot be ensured. -
Page 30: Foxfusion
FOXFUSION FOXFUSION allows you to fuse (combine) two individual sounds while operating your Fusion. When you play a sound normally, as described in chapter 4, you access your sound or category list, pick the sound, and push “Play/Select”. This sound that you pick is your main or primary sound. - Page 31 FOXFUSION automatically shutting off. If you engage other FOX FEATURES, you may receive a warning message that FOXFUSION will be deactivated by continuing. Tip from FOXPRO FOXFUSION has a variety of possible uses in the field. Combining •...
-
Page 32: Foxmotion
FOXMOTION will also work with external speakers. By using an external speaker with a longer cable, you can get more distance between the two sounds helping to enhance the effect even more. You cannot turn the speakers off or on with the Fusion remote while operating with FOXMOTION. -
Page 33: Foxbang
FOXBANG is triggered, it will create a new record within your FOXDATA in addition to performing the specified action. To Activate FOXBANG and Assign a Function: 1. Access the FOX FEATURES menu on the Fusion remote and locate FOXBANG. 2. Cycle through the available options from “Off” to the desired function you would like FOXBANG to be linked to. -
Page 34: Foxpitch
3. When the sensitivity level has been set, push “Play/Select” to lock it in. The FOXBANG sensor is located inside of the Fusion remote. For it to detect the gunshot, the remote needs to be relatively close to the firearm (within 5 feet). It is assumed that most hunters will have the remote on a lanyard around their neck. -
Page 35: Auto Volume
FOXPITCH will automatically be deactivated. Activating FOXPITCH: 1. Access the FOX FEATURES menu on the Fusion remote and locate FOXPITCH. 2. Select FOXPITCH and use the scroll buttons to change the value from “Off” to the desired level. -
Page 36: User Button
User Button The User button is located on the bottom left side of your Fusion remote keypad. This button can be assigned a function of your choice for quick one button access. You can choose from preset 5, theme change, FOXBANG, FOXMOTION, Auto Volume, time(r) toggle, timer reset, backlight, or FOXBANG toggle. -
Page 37: Foxdata
The recorded data is stored in a CSV file within the remote control. You can access this file by connecting the Fusion remote to a PC (see chapter 10). CSV files can be opened with popular software titles such as Microsoft Excel. - Page 38 1. At the beginning of a hunt, before you start calling, push and hold the FOXDATA button for 1-2 seconds. This button is located on the side of the Fusion remote. 2. Select “Hunt Started”. After selecting this option, FOXDATA recording begins.
- Page 39 • If you are performing a factory reset on the Fusion remote, be aware that it will erase your FOXDATA file. In order to preserve...
-
Page 40: Foxgrip
3. Push the “Play/Select” button a single time. A message will appear stating “Activate FOXGRIP to pair now.” 4. Push the button on your FOXGRIP. The Fusion remote will detect the signal and then display the FOXGRIP Unit ID to the right of the menu item. -
Page 41: Sound Settings
Volume Step The Fusion remote has a range of volumes from 0 – 40. Increasing the volume in the field by increments of 1 may be too slow for some and therefore this stepping value is configurable. -
Page 42: Speaker Mode
By default, the device will be setup for stereo speaker mode. As the Fusion has a dual speaker setup, a stereo audio file will be split so that the left channel plays through the left (rear) speaker while the right channel plays through the right (front) speaker. -
Page 43: Preset Mute Override
Preset Mute Override During normal operation, if the Fusion is muted and you play a preset, the preset is queued for playback, but it cannot be heard until the caller is un-muted. Preset mute override will take care of this and eliminate the need for un-muting the call upon preset activation. -
Page 44: Brightness
Theme The Fusion remote has three operational themes built in. These themes are designed to help optimize the appearance of the on-screen display based upon factors such as time of day. The two main themes to address this are: night and day. -
Page 45: Display Timeout
Also included is the FOXPRO theme which is built with FOXPRO company colors (orange/black). This theme is very good for night hunting. Changing Themes: 1. Access the Display/Power menu and select “Theme.” 2. Use the scroll buttons to cycle through the available themes. -
Page 46: Auto Off
Stand Timer & Timer Reset When activated, the far right indicator on the bottom status line will begin keeping time that has elapsed since the Fusion remote has been powered on. The timer displays as: “MMM:SS” (“M” stands for minutes and “S”... -
Page 47: Alarm
To get the clock back on the display, simply set the stand timer to off. Alarm The Fusion remote features a visual alarm that can be set to go off after a span of time. The available times are represented in minutes: 1 – 60. -
Page 48: Date & Date Format
3. Push “Play/Select” to lock in the setting. The bottom status line of the Fusion display can show either the current time or the stand timer. The stand timer will only be displayed if it is turned on—otherwise, the clock will show the current time. -
Page 49: Tx1000 Settings
Radio Channel The Fusion remote can be configured to operate on one of 16 different radio channels (0-15). If you change the radio channel for the Fusion remote, you must also change the radio channel for the Fusion digital game call—otherwise the two devices will not be able to communicate. -
Page 50: Download List
Download List Any time you reprogram the Fusion digital game call to add new sounds or new FOXCAST sequence files, you must download a new copy of the play list to the Fusion remote. This menu item will guide you through that process. -
Page 51: Temperature Units
3. When the appropriate setting is selected, push the “Play/Select” button to lock it in. Barometer Measurement Units The Fusion remote can display barometric pressure readings in either inches or millimeters depending upon your preference. Configuring the Barometer Measurement Units: 1. -
Page 52: About Info
Restore Defaults To reset your Fusion remote control back to factory defaults, use this option. Please be aware that restoring factory defaults will result in loss of your presets/favorites, sound list, categories, and all FOXDATA information. - Page 53 Connecting the Fusion Remote to a Computer: 1. Connect the USB cable from the jack on the Fusion remote to a USB port in the computer. 2. Power on the Fusion remote. The screen should activate and show “USB Active”...
-
Page 54: Editing The Presets File
10-1 Editing the Presets File While you can create and edit your presets through this file, it is recommended that presets be created through the Fusion remote as described in chapter 2. Open the file titled ‘presets.txt’ to view the contents. -
Page 55: Viewing The Foxdata File
The FOXPRO Fusion digital game call can be completely programmed from home with the use of a computer. It is possible to reprogram a Fusion from a Windows based PC as well as a Mac. Both subjects will be covered in this section. -
Page 56: Requirements
First, Windows users may see a “Found New Hardware” notification or even hear an audible tone indicating a USB device has been connected. The first thing to determine is what drive letter the Fusion is being assigned to. To do... -
Page 57: Manual Programming Process
USB port on your computer. To begin, connect the Fusion to your computer as described earlier in this chapter. Once it is connected, browse to the Fusion and open it to view the contents. You should notice a folder inside the Fusion titled “Sounds”. -
Page 58: Indexing The Files
11-4 Indexing the Files Files stored in the Fusion and Fusion remote are sorted based upon the names of the files. For example, a sound titled “000 My Sound” will appear in the list before a sound titled “123 Lightning Jack”. While you can simply copy and paste sounds directly into the Fusion’s sound... -
Page 59: Using The Foxpro Programming Utility
Woodpecker”. While indexing is not required, it can certainly be useful in many occasions. 11-5 Using the FOXPRO Programming Utility The FOXPRO Sound Programming Utility has versions available for both Windows and Mac operating systems. You can find them both at the following site: https://www.gofoxpro.com/programming Under the heading “Software Links”, you should see a link for the... - Page 60 Connecting your Fusion to the PC Connect the Fusion to your PC as outlined in Section 11-2 before continuing. Launching the Utility Windows users can launch the utility by finding the shortcut in the Start Menu and clicking on it.
- Page 61 To do this, click on the File menu on the utility screen and then click on the “Download Free Sounds” menu item. This displays a list of all free sounds available from FOXPRO. You can select one or all the free sounds to highlight them. Next, click on the “Download Selected”...
-
Page 62: Editing The Categories Manually
11-6 Editing the Categories Manually Fusion sound categories are maintained and defined through a text file that is in the Fusion. To begin working with the categories, open the file titled ‘categories.txt’ (located inside of the “Sounds” folder). The file should look something like the following: Example ‘categories.txt’... - Page 63 The best way to go about doing this is to have your Fusion remote control next to you. Turn it on and access the sound list. Next to each one of the sounds is a three digit number.
-
Page 64: Editing The Categories With Foxpro Utility
Any time you modify the category file in the Fusion, you must download the playlist to the Fusion remote control. 11-7 Editing the Categories with FOXPRO Utility With the game call connected to your computer, launch the utility as described in section 11-5. Under the Caller Files column, locate and click on the button called “Edit Categories”. -
Page 65: Creating Foxcast Sequence Files
IMPORTANT NOTE • Verify that the Fusion and Fusion remote are set to operate on the same channel prior to updating the sound list. If they are not on the same channel, you will have difficulty in getting the list to update. - Page 66 Instruction: S a [b] Parameters: a (0 – 999) b (0 - 100) Description: Plays the referenced sound number (a). The desired amount of times (b). By not specifying how many times to play the sound, it plays a single time. Instruction: V a Parameters: a (0 –...
- Page 67 Instruction: J Parameters: n/a Description: Denotes Jukebox Mode for this FOXCAST File Instruction: R Parameters: n/a Description: Denotes Repeat Mode for this FOXCAST File Instruction: Q Parameters: n/a Description: Denotes Single Play Mode for this FOXCAST File Instruction: ; Parameters: Any Description: Represents the start of a comment line.
-
Page 68: Enabling File Extensions In Windows
Fusion will play that sequence again until it is interrupted by the operator. The Fusion can accept up to 25 FOXCAST sequence files. These files will need to be in a format such as: Example FOXCAST Sequence File Names S00 My Coyote Sequence 1.seq... -
Page 69: Placing Sequences In The Fusion
“Sounds” folder in the Fusion. If you are loading the sequence files manually, the first step is to connect the Fusion to your computer. Browse to the Fusion and open it up. Locate the “Sounds” folder. Copy your sequence files from wherever they are stored on your hard drive, into this folder (drag and drop). -
Page 70: Product Care & Maintenance
13. Product Care & Maintenance To help get years of trouble-free service with your FOXPRO game call, it is strongly recommended that you read and understand the following points. Many of these are considered proactive or preventative. Avoid exposure to all precipitation and moisture. Whether you are... - Page 71 Periodically charge your rechargeable batteries when not in use! Rechargeable batteries will not last forever. To help maximize the overall life of your rechargeable batteries, we recommend that you periodically charge them up, perhaps once a month or once every other month, to keep them fresh.
-
Page 72: Troubleshooting
Problem: Fusion does not produce any sound Solution: Check that the speakers are not turned off in the Fusion remote control. Check to see if you can play sounds manually (without the remote). If you cannot play sounds manually, connect the Fusion to a computer and inspect the sound files for missing files or signs of corruption. - Page 73 Problem: External speaker does not play Solution: If you have the speaker connected to the front external speaker jack, make sure that the right speaker is not disabled in the Fusion remote, and vice versa with the rear external speaker jack. The external jacks are linked left/right accordingly.
-
Page 74: Maximizing Remote Range
Remote range can be affected by many factors. Some of these factors can be controlled while others cannot. To achieve the best possible remote range with your Fusion digital game call system, it is recommended that the following points be observed: •... -
Page 75: Fcc & Ic Information
• The remote control—the caller should always be higher. • If you are using the Fusion remotely from a long distance, be sure to allow enough time for device reaction before sending multiple signals. For example, if you request a sound change,... - Page 76 RF exposure compliance. Note: Units exported beyond the boundaries of North America are not FCC certified. FOXPRO Inc. makes every attempt at complying with regional regulations governing radio spectrum. However, it is the user’s responsibility to ensure compliance with local laws and ordinances that govern the use of radio controlled devices in the area of operation.
-
Page 77: Warranty Statement
14 Fox Hollow Drive Lewistown, PA 17044 Online Warranty Registration You can register your Fusion digital game call online at the following address (locate the Warranty Registration link on the left of this page): http://www.gofoxpro.com/warranty Make sure that you retain a hard copy of your proof of purchase (i.e., store receipt) for any future warranty claims. - Page 78 Locating the Serial Number The Fusion serial number is located on the back wall of the battery compartment inside the Fusion. This number is required for warranty registration and making sound pack purchased at the online store.
Need help?
Do you have a question about the FUSION and is the answer not in the manual?
Questions and answers