Table of Contents
Advertisement
Quick Links
Advertisement
Table of Contents

Related Manuals for Foxpro Scorpion


Summary of Contents for Foxpro Scorpion
-
Page 2: Table Of Contents
TOPIC PAGE ® Using the FOXPRO Scorpion Digital Game Call Quick Operating Guide Turning ON the Caller Turning OFF the Caller Batteries and Charging Auxiliary Jack Function Using the External Speaker Jacks Internal Speaker Control Channel Selection Mono and Stereo Mode... - Page 3 General Inquiry E-mail: sales@gofoxpro.com Stay up to date with the latest sounds by visiting our online sound library. ® Watch for new products and upgrades from FOXPRO . Visit us online: www.gofoxpro.com This manual, the animal sounds stored in your caller, and animal sounds ®...
-
Page 4: Using The Foxpro Scorpion Digital Game Call
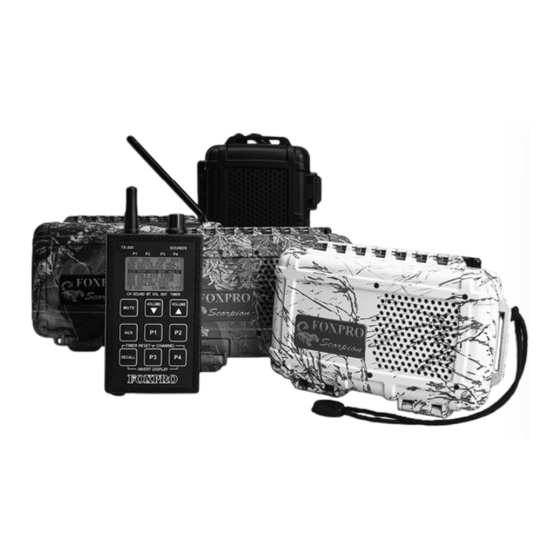
SCORPION DIGITAL GAME CALL MODEL X1-A SCORPION ® Congratulations on the purchase of the FOXPRO Scorpion digital wildlife caller! You have chosen a product that was engineered to give years of trouble free service. Please take time to read and understand the information in this instruction manual. -
Page 5: Quick Operating Guide
QUICK OPERATING GUIDE Since the Scorpion is shipped from the factory without batteries installed, the first step is to install 8 “AA” batteries. These may be alkaline or rechargeable types. NOTE: We strongly recommend high capacity NiMH rechargeable batteries over alkaline types for maximum performance, particularly when using loud volume levels. -
Page 6: Turning On The Caller
000). 2. To turn on the caller, depress and hold the TX-200 transmitter “AUX” button for five seconds (the green Scorpion pilot indicator will illuminate indicating that the caller has turned on). 3. Select the sound you wish to play by turning the rotary selector knob on the top of the transmitter either clockwise, which will scroll up or counter-clockwise which scrolls down. -
Page 7: Batteries And Charging
BATTERIES AND CHARGING If for any reason you have to ship the Scorpion back to the factory, please be sure to remove your batteries from the unit. Your Scorpion operates on 8 “AA” batteries. NOTE: For optimal performance and run times, we recommend high capacity 2500 mAh NiMH (Nickel Metal Hydride) rechargeable cells rather than alkaline types. -
Page 8: Auxiliary Jack Function
AUX” JACK FUNCTION “ The Scorpion is equipped with an auxiliary jack labeled “AUX”. The purpose of this jack is to allow for the connection of certain external devices (which ® includes the FOXPRO Jack-in-the-Box Decoy) and the ability to turn these on and off with the TX-200 remote control transmitter. -
Page 9: Using The External Speaker Jacks
You are urged to seek help from a knowledgeable professional before connecting any unapproved device to this jack. Remember that damage to your Scorpion caused by improper use of the “AUX” jack is not ®... -
Page 10: Internal Speaker Control
locations of the selection jumpers. FIGURE 1.0 INTERNAL SPEAKER CONTROL By disabling the internal speaker when using an external speaker(s), battery life will be extended. Disabling the Internal Speaker 1. Be sure that the power is turned “OFF.” 2. Locate the Internal Speaker Selector. (See FIGURE 1). NOTE: The internal speaker selector is located below the USB port in the upper left portion of the PC board. -
Page 11: Channel Selection
“B” channel from the factory, but can also operate from the “C” channel. If your Scorpion is set to the “B” channel, the TX-200 must be on the “B” channel as well. The same rule applies with the “C” channel. The current channel is displayed on the bottom status line of the TX-200 transmitter. -
Page 12: Mono And Stereo Mode
This would give the impression that two physically separate animals were involved. In addition, your Scorpion will allow you to silence either of the speakers, that is, the sheep or the coyote, independently (see External Speaker Control on Page 12). -
Page 13: About The Trans-Flash Memory Card
ABOUT THE TRANS-FLASH MEMORY CARD The miniature Trans-Flash memory storage card was chosen for use in your Scorpion because of the severe size constraints we had to work with in developing a high performance caller contained in such a small package. -
Page 14: Tx-200 Remote Control Operation
If you turn off the TX-200 transmitter while operating the Scorpion caller, it will cause an out of sync operation. In other words, the Scorpion is still playing the last sound, but when you turn the TX-200 back on, it will not display the sound or volume setting currently playing. -
Page 15: Graphic Lcd
EXTERNAL SPEAKER CONTROL One of the new features with the Scorpion is the ability to control the external speakers with your TX-200 remote control. With the ability to control the speakers with the remote, this allows you to play a desired sound on one speaker, then turn that speaker “OFF”, and play a different sound through the... -
Page 16: Selecting Sounds
Depressing the volume buttons will cause the volume number to change in the display from a low of “0” to a high of “40”. These changes are transmitted to the Scorpion in real time, causing the volume to ramp up or down. -
Page 17: Mute
The volume numbers are important, as you will begin to identify your preferred volume settings. With the Scorpion placed away from you, it gives you the ability to know exactly at what volume the Scorpion is playing. Without these numbers, it may be hard to tell how loud or soft your unit is playing. - Page 18 1. Simultaneously depress the Volume Down and Volume Up buttons. (This is helpful when you are scrolling through the sound list, and you want to check which sound is currently being played on the Scorpion. Once these buttons are pressed the current sound will appear in the sound number box to the left).
-
Page 19: Presets
PRESETS Four preset buttons are provided so that you can program your favorite sounds along with a volume level for immediate recall. The stored sound number of these presets is shown on the top status line of the TX-200 graphic LCD display. -
Page 20: Battery Monitor
RECALL and P4 buttons. REPROGRAMMING SOUNDS ON YOUR SCORPION The Scorpion comes standard with a USB 2.0 port built in (no reader / writer is necessary), which makes reprogramming or adding sounds to your Scorpion easier than ever. A computer is required in order to reprogram your sounds. -
Page 21: Programming Your Foxpro Scorpion
To download and install the Programming Utility from your Scorpion: 1. Connect your Scorpion to your PC with a standard USB (type A/B) cable. (Once the Scorpion is recognized by the PC it will be assigned a drive letter). 2. Enter your “MY COMPUTER” icon and locate the Scorpion from the list of available drive letters (Once you have located the drive for the Scorpion, double-click on the icon to open it up). - Page 22 NOTE: This drive varies on different computers. Once you have selected the proper drive, the list of sounds currently on your Scorpion will appear in the right vertical window. You will now notice that a new button appears above the Select Device window that reads “Backup”. If you have not made a backup of your sounds, simply click on this button.
-
Page 23: Downloading A Playlist To The Tx-200
17 characters. Any additional ones will not be displayed. 1. Turn the power off on both the Scorpion and the TX-200. Connect the stereo patch cable from the Scorpion “AUX” connector to the connector on the side of the TX-200. -
Page 24: Maximizing The Remote Control Range
200, hold the transmitter with the antenna in a vertical position. Do not point the antenna toward the Scorpion. 3. Have a clear line of sight to the Scorpion. Foliage and other objects between the transmitter and the Scorpion can greatly decrease the remote range. -
Page 25: Website Features
FCC Information NOTE: This equipment has been tested and found to comply with the limits for a Class B digital device, pursuant to Part 15 of the FCC Rules. These limits are designed to provide reasonable protection against harmful interference in a residential installation. This equipment generates uses and can radiate radio frequency energy and, if not installed and used in accordance with the instructions, may cause harmful interference to radio communications. - Page 27 NOTES...
- Page 28 LIMITED WARRANTY STATEMENT ® Your FOXPRO wildlife caller is warranted to be free from defects in materials and workmanship that diminish its usefulness for a period of five years from the date of purchase. Return the unit prepaid and packaged securely along with proof of purchase to the address shown below.
Need help?
Do you have a question about the Scorpion and is the answer not in the manual?
Questions and answers