Table of Contents
Advertisement
Quick Links
Advertisement
Table of Contents

Related Manuals for Foxpro CS-24C


Summary of Contents for Foxpro CS-24C
- Page 2 Toll Free Orders Only: 866-463-6977 General Inquiry E-mail: sales@gofoxpro.com Stay up to date with the latest sounds by visiting our online sound ® library. Watch for new products and upgrades from FOXPRO . Visit us online: www.gofoxpro.com This manual, the animal sounds stored in your caller, and animal sounds purchased from FOXPRO ®...
-
Page 3: Table Of Contents
4-2 Turning on the CS-24C Remote ............. 17 4-3 Navigating the CS-24C Remote ............. 17 4-4 Understanding the CS-24C Remote Display ......... 18 4-5 Access the CS-24C Remote Configuration Menu ......20 4-6 Playing Sounds with the CS-24C Remote ........20... - Page 4 4-7 Volume & Mute Control ............... 22 FOX FEATURES ................. 22 5-1 FOXMOTION .................. 22 5-2 FOXBANG ..................23 5-3 AUTO VOLUME................24 5-4 User Button ................... 25 5-5 FOXDATA ..................26 5-6 FOXGRIP ..................27 Sound Settings ................. 28 6-1 Volume Step ..................
- Page 5 11. Programming the CS-24C ..............35 12. Creating FOXCAST Sequence Files ........... 36 12-1 Creating FOXCAST Sequences Manually ........36 12-2 Placing Sequences in the CS-24C ..........37 12-3 Creating FOXCAST Sequences Online ......... 38 12-5 Synchronizing the CS-24C Remote ..........38 13.
-
Page 6: Getting Started
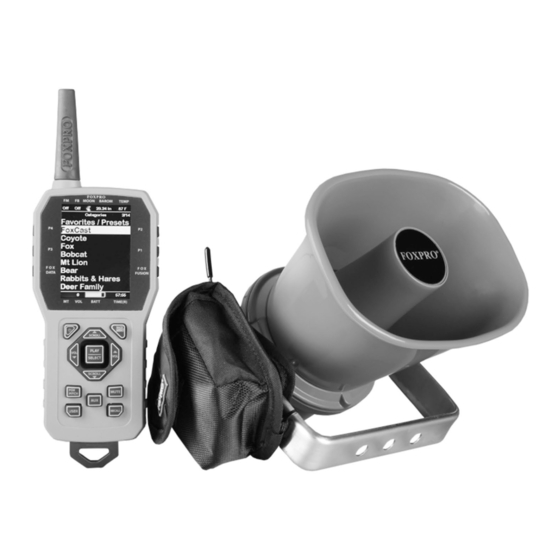
1. Getting Started Congratulations on your purchase of the FOXPRO CS-24C digital game call! To get the full advantage of the CS-24C and its features, please read and understand the operating instructions in full. 1-1 What’s in the Box? Included in the box you should find the following items: CS-24C digital game call, CS-24C remote control, Operators manual, Warranty registration card, and USB cord. -
Page 7: Cs-24C: Requirements
4. Place the batteries into each battery cavity while observing polarity as indicated. 5. Reconnect the power cable from the CS-24C to the battery tray and then slide it back into the pouch. 6. Seal the pouch. 1-4 CS-24C Remote: First Glance The following image shows the CS-24C remote control. - Page 8 1. The second item from the left on the top status line is the FOXBANG/FOXGRIP status indicator. 2. Next item to the right is the moon phase indicator. 3. The next item to the right is the barometric pressure indicator. 4.
- Page 9 8. The FOXFUSION button is the last button on the right, just under the P1 button. 9. On the bottom of the remote display is the bottom status line and to the far right is the clock/elapsed stand timer. 10. To the left of the clock is the battery level indicator. 11.
-
Page 10: Cs-24C Remote: Requirements
2-1 Powering On the CS-24C The CS-24C is powered-on by moving the power switch to the on position. When powered-on, the orange LED pilot lamp blinks rapidly several times and then illuminates solidly, signaling that it is ready to be operated from the remote control. - Page 11 3. Push “Play/Select” to lock in the setting. The bottom status line of the CS-24C display can show either the current time or the stand timer. The stand timer will only be displayed if it is turned on—otherwise, the clock will show the current time.
-
Page 12: Playing Sounds
The CS-24C remote can store up to 50 unique presets or favorites. A preset is a shortcut to a particular sound which has a defined volume level. The CS-24C remote has 4 quick access preset buttons located on the top left and right (see image on page 8). By default, your CS-24C... - Page 13 To initiate playback of presets 1-4, make sure that both the CS-24C and CS-24C remote are turned on, and then push the corresponding preset button (P1 – P4) on the top sides of the remote. The CS-24C will then instantly switch to that sound and volume level. To initiate playback of any preset, simply select the “Favorites/Presets”...
-
Page 14: Cs-24C Detailed Overview
2. Connect the plug from the external speaker to the external speaker jack. 3. Turn on the CS-24C and begin playing a sound to hear the external speaker in action. 3-2 Auxiliary Device Jack The AUX jack is provided primarily for the control of FOXPRO decoys and may be suitable for controlling other similar devices. -
Page 15: Usb Port
To Connect the CS-24C to a computer 1. Make sure that the CS-24C is turned off. 2. Connect one end of the USB cable to the USB port in the CS-24C. 3. Connect the other end of the USB cable to a USB port on your computer. -
Page 16: Setting The Battery Chemistry
To select the battery chemistry type, you must remove the speaker cap from the back of the CS-24C and modify the values of a DIP switch located inside. Changing Battery Chemistry 1. -
Page 17: Cs-24C Remote Control Detailed Overview
This chapter provides a more detailed oriented overview of the CS-24C remote. The model number for the CS-24C Remote is “TX1000”. In this manual, we tend to refer to the remote as “CS-24C Remote”, but you will encounter “TX1000” later as it referenced in specific menu options. -
Page 18: Understanding The Cs-24C Remote Display
To select a menu item, push the “Play/Select” button. The “Back/Menu” button allows you to access the CS-24C Remote configuration options as well as navigate back one level in the menu system. - Page 19 The image above shows the primary display area for the CS-24C remote. Above the menu items you will see “Categories” which is the title of this screen. When you enter other menu sections, the title will change accordingly. The two main items on the screen “Favorites/Presets” and “FoxCast”...
-
Page 20: Access The Cs-24C Remote Configuration Menu
Settings item in the main menu. The method of playing a sound is identical for both modes; the way the sounds are displayed on the screen is the only difference. By default, the CS-24C remote is setup to display the sounds by categories. - Page 21 “Play/Select” button to lock it in. Default: Categories View When the CS-24C remote is turned on, the main screen will be displayed. The first item is “Favorites/Presets” followed by “FOXCAST”. The next menu item marks the beginning of the category listings. In category list mode, your sounds will not be displayed as one long list, but rather as elements of defined categories.
-
Page 22: Volume & Mute Control
40 and the volume is increased in steps. These steps are configured through the main menu under Sound Settings. The available stepping values are 1, 2, 3, and 5. By default, the CS-24C remote is set for a volume stepping value of 2. Volume can be controlled automatically by a feature called Auto Volume. -
Page 23: Foxbang
Activating FOXMOTION: 1. Turn on the CS-24C and CS-24C remote. 2. Begin sound playback like normal. 3. Access the CS-24C remote main menu and select the FOX FEATURES item. 4. Select FOXMOTION and change it to on. Then select the Rate item directly beneath it to adjust the speed that FOXMOTION operates at. -
Page 24: Auto Volume
3. When the sensitivity level has been set, push “Play/Select” to lock it in. The FOXBANG sensor is located inside of the CS-24C remote. For it to detect the gunshot, the remote needs to be relatively close to the firearm. It is assumed that most hunters will have the remote on a lanyard around their neck. -
Page 25: User Button
5-4 User Button The User button is located on the bottom left side of your CS-24C remote keypad. This button can be assigned a function of your choice for quick one button access. You can choose from preset 5, theme change, FOXBANG, FOXMOTION, Auto Volume, time(r) toggle, timer reset, or backlight. -
Page 26: Foxdata
The recorded data is stored in a CSV file within the remote control. You can access this file by connecting the CS-24C remote to a PC. CSV files can be opened with popular software titles such as Microsoft Excel. -
Page 27: Foxgrip
5-6 FOXGRIP This allows you to pair a FOXPRO Fox Grip or Fox Grip 2 with the CS-24C Remote control. Detailed instructions for using each Fox Grip model can be found on our website. The following provides general instructions for basic setup. -
Page 28: Sound Settings
6-1 Volume Step The CS-24C remote has a range of volumes from 0 – 40. Increasing the volume in the field by increments of 1 may be too slow for some and therefore this stepping value is configurable. You can choose from 1, 2,... -
Page 29: Pri. Mode
Provides you access to turn the external speaker on and off. 6-6 Preset Mute Override During normal operation, if the CS-24C is muted and you play a preset, the preset is queued for playback, but it cannot be heard until the caller is un-muted. -
Page 30: Display / Power
This is especially important for FOXBANG operation. By having preset mute override turned on, FOXBANG activation will result in the CS-24C being un-muted if it is muted when the activation occurs. 7. Display / Power The Display/Power menu allows for control of on-screen display options such as backlight, screen timeout, and operational theme. -
Page 31: Auto Off
CS-24C remote is turned on. 8-2 Alarm The CS-24C remote features a visual alarm that can be set to go off after a span of time. The available times are represented in minutes: 1 – 60. When the alarm is set and the configured time span passes, the stand timer (or clock if set to display the clock) will begin to flash alerting you. -
Page 32: Time
8-3 Time The CS-24C remote has a real time clock. This clock must be set when you first install or change batteries. The clock can be displayed in either the standard 12-hour format or 24-hour format (military time). The bottom status line of the CS-24C display can show either the current time or the stand timer. -
Page 33: View
9-3 View The CS-24C remote control can display your sounds either by general listing or by category listing. Sound categories are the best route to go if you have many sounds. 9-4 Temperature Units The integrated thermometer can display temperature in either Celsius or Fahrenheit based upon your preference. -
Page 34: Restore Defaults
A/B cable (provided with the CS- 24C). Connecting the CS-24C Remote to a Computer: 1. Connect the USB cable from the jack on the CS-24C remote to a USB port in the computer. 2. Power on the CS-24C remote. The screen should activate and show “USB Active”... -
Page 35: Editing The Presets File
10-1 Editing the Presets File While you can create and edit your presets through this file, it is recommended that presets be created through the CS-24C remote as described earlier. Open the file titled ‘presets.txt’ to view the contents. The file should look something like the following:... -
Page 36: Creating Foxcast Sequence Files
12. Creating FOXCAST Sequence Files This section will provide you with detailed information on creating and installing FOXCAST sequence files in your CS-24C digital game caller. 12-1 Creating FOXCAST Sequences Manually A FOXCAST sequence file is a simple text-based file that contains unique instructions to guide your CS-24C through a stand. -
Page 37: Placing Sequences In The Cs-24C
“Sounds” folder in the CS-24C. If you are loading the sequence files manually, the first step is to connect the CS-24C to your computer. Browse to the CS-24C and open it up. Locate the “Sounds” folder. Copy your sequence files from wherever they are stored on your hard drive, into this folder (drag and drop). -
Page 38: Creating Foxcast Sequences Online
13. Product Care & Maintenance To help get years of trouble-free service with your FOXPRO game call, it is strongly recommended that you read and understand the following points. Many of these are considered proactive or preventative. - Page 39 it is recommended that you place the unit inside of a large plastic freezer storage bag or use a water/weatherproof deployment bag to keep water from getting to it. When storing the unit for prolonged periods, be sure that you keep it in a dry location not susceptible to drawing moisture.
-
Page 40: Troubleshooting
Problem: CS-24C will not turn on. Solution: Make sure that you have fresh batteries installed. If you are using rechargeable batteries, make sure they are fully charged. Inspect your battery tray and make sure the springs are not compressed or corroded as this could lead to poor battery connectivity. - Page 41 Problem: CS-24C does not produce audio. Solution: Check that the speakers are not turned off in the CS-24C remote control. Check to see if you can play sounds manually (without the remote). If you cannot play sounds manually, connect the CS-24C to a computer and inspect the sound files for missing files or signs of corruption.
-
Page 42: Maximizing Remote Range
Remote range can be affected by many factors. Some of these factors can be controlled while others cannot. To achieve the best possible remote range with your CS-24C digital game call system, it is recommended that the following points be observed: •... -
Page 43: Fcc & Ic Information
• If you are using the CS-24C remotely from a long distance, be sure to allow enough time for device reaction before sending multiple signals. For example, if you request a sound change, consider the amount of time from radio transmission from the remote to the CS-24C until that signal is turned into a change in operation that you can perceive. - Page 44 RF exposure compliance. Note: Units exported beyond the boundaries of North America are not FCC certified. FOXPRO Inc. makes every attempt at complying with regional regulations governing radio spectrum. However, it is the user’s responsibility to ensure compliance with local laws and ordinances that...
-
Page 45: Warranty Statement
Online Warranty Registration You can register your CS-24C digital game call online at the following address): http://www.gofoxpro.com/warranty Make sure that you retain a hard copy of your proof of purchase (i.e.,...
Need help?
Do you have a question about the CS-24C and is the answer not in the manual?
Questions and answers