
Related Manuals for Ormesa BUG


Summary of Contents for Ormesa BUG
- Page 1 modular seating system SEAT UNIT with OUTDOOR BASE FOUR-WHEEL BASE with HI-LOW FEEDING BASE HI-LOW COMPACT BASE INDOOR BASES USE AND MAINTENANCE HANDBOOK...
- Page 3 If, after reading it, you still have questions, contact your retailer, who will be happy to help you, or call ORMESA directly at +39 0742 22927, send a fax to +39 0742 22637 or send an e-mail to: info@ormesa.com...
-
Page 4: Table Of Contents
BASE 856 BRAKING ....................19 INITIAL PREPARATION ..................20 PACKAGING INFORMATION ..................20 HOW and WHERE TO HOLD the COMPONENTS of BUG, in SAFETY ....... 20 Bug SEAT UNIT ...................... 21 SEATING UNIT ADJUSTMENTS ................22 ADJUSTING THE INCLINATION OF THE SEAT (TILT-IN-SPACE SYSTEM) ....22 RECLINING THE BACKREST .................. - Page 5 45° SEAT BELT 894 ...................... 69 Padded SIDE SUPPORTS 838 ..................70 TRAY 824 ........................71 TRAY for BUG WITH 856 and 851 BASES 824B ............72 5- POINT VEST HARNESS 903 ..................75 5- POINT HARNESS 906 ....................76 PADDED COVERING for FOOTPLATE 892 ..............
-
Page 6: Warnings
- The manual reflects the technical state of the product at the time it was sold. ORMESA s.r.l. reserves the right to make any changes to the product ormanual suggested by experience, technical considerations or regulatory developments without any obligation to update its previous production and relevant manual. - Page 7 USING THE SEAT UNIT WITHOUT THE USER THE BUG SEAT UNIT can be POSITIONED on EVERY FLAT SURFACE provided that the following INDICATIONS are see fig.b (table) and fig. c (floor) followed: Place the leg rest in extension or tilt it completely before placing the seat unit on the floor (Fic.
- Page 8 USING THE SEAT UNIT WITH THE USER POSITIONED FIX THE SEAT TO THE FRAME According to the instructions given on page 33 for 869 base, on page 40 for 856 base, on page 46 for 851 base ATTENTION! BEFORE POSITIONING THE CHILD, MAKE SURE THAT THE SEAT UNIT IS ATTACHED TO THE FRAME IF THE SEAT REMAINS ATTACHED IF THE SEAT TILTS,...
- Page 9 THE SEAT UNIT CAN ALSO BE USED SEPARATELY FROM THE FRAME (869 AND 856, 851 BASES) FOR VERY SHORT PERIODS AND UNDER THE CAREFUL CONTROL OF AN ADULT. IN SUCH CASES MAKE SURE THAT THE WHOLE SUPPORT SURFACE OF THE SEAT UNIT IS IN CONTACT WITH THE TABLE OR THE FLOOR (see fig.
- Page 10 USE and CONTACT a SPECIALIZED SERVICE CENTER in the maintenance of mechanical aids for disables, or directly ORMESA. THE BUG 4-WHEEL STROLLER (seat unit + 869 base) conforms the ISO 7176-19 and ANSI RESNA WC/19 standard, which defines the SAFETY REQUIREMENTS FOR TRANSPORT, facing in the direction of travel, on MOVING VEHICLES (private cars, buses, etc.)
-
Page 11: Guarantee
GUARANTEE ORMESA warrants the product for 2 years; in case of problems, contact the retailer where you purchased it.Always ask for original spare parts, otherwise the guarantee will decline ORMESA will not be liable for damage in the following cases: - use by an unsuitable person;... -
Page 12: What Not To Do With The Product
ONLY ORIGINAL REPLACEMENT PARTS ARE USED BECAUSE ANY OTHER TYPE WILL VOIDTHE WARRANTY AND CE MARKING - The Seat Unit Bug without 869 four wheels base has not been homologated ECE/44 or AS/NZS 1754 to be used as car seat. Bug+869 has been homologated for use according to ISO 7176/10 or ANSI RESNA WC/19 (see pag. -
Page 13: How To Tilt The Bug And Climb Up Pavements
HOW TO TILT THE BUG AND CLIMB UP PAVEMENTS BUG WITH 4-WHEEL BASE 869 ATTENTION! ADJUST THE HANDLE (see page 38) TO THE CORRECT HEIGHT FOR THE ATTENDANT to avoid excessive effort when climbing stairs and facilitate manoeuvres ADJUSTABLE HANDLEBAR... -
Page 14: How To Use The Bug 4-Wheel Stroller With 869 Base For Transport On A Moving Vehicle (Private Cars, Buses, Etc.)
BASE FOR TRANSPORT ON A MOVING VEHICLE (private cars, buses, etc.) THE BUG 4-WHEEL STROLLER (seat unit + 869 base) conforms to the ISO 7176-19 and ANSI RESNA WC/19 standard, which defines the safety requirements for transport, facing in the direction of travel, on moving vehicles (private cars, buses, etc.). - Page 15 POSITION THE 891 TIEDOWN HOOKS (4 RINGS) ON THE POINTS (NOTCHES) INDICATED ON THE FRAME (only for the 4-wheel 869 base) AND FIX THEM FOLLOWING THE INSTRUCTIONS ON PAGE 15 VIEW FROM THE FRONT 891 SECUREMENT POINTS FIXING HOLE Fig. 1 VIEW FROM BEHIND 891 SECUREMENT POINTS FIXING HOLE...
- Page 16 2) HOW TO FIX THE 891 TIEDOWN (4 RINGS) ON THE FRAME (only for 4- wheel 869 base) ATTENTION: - suitable for ISO 10542-approved four-point straps provided in the vehicle. To anchor the stroller to the transport vehicle, see the instructions on page 16 - the child must wear both a lap belt and a diagonal shoulder belt ISO 7176-19- or ISO...
- Page 17 3) HOW THE STROLLERIS TO BE SECURED IN A VEHICLE HOOK THE APPROVED 4-POINT BELTS OF THE VEHICLE TO THE 891-4 TIEDOWN HOOKS (4 RINGS) AS SHOWN IN THE FIGURE AND IN THE DIRECTION OF TRAVEL OF THE VEHICLE 4-POINT STRAP-TYPE TIEDOWN PUSHCHAIR RESTRAINT 891 TIEDOWN HOOKS types of tiedown end-fittings...
- Page 18 THE CORRECT POSITIONING OF OCCUPANT BELT RESTRAINTS ON THE USER ATTENTION! the pelvic-belt restraint should be worn low across the front of the pelvis, so that the angle of the pelvic-belt restraint is within the preferred zone of 30° to 75° to the horizontal, similar to that shown in Figure 5.
-
Page 19: Labels And Plates
Series number Catalog code Name of the model Via delle Industrie, 6/8 - Z.I. Sant’Eraclio 06034 Foligno (PG) ITALY Tel. +39 0742 22927 Fax + 39 0742 22637 Max. load Conformity with the European safety standards Date of Medical Warning! Read the use and LOT code production device... -
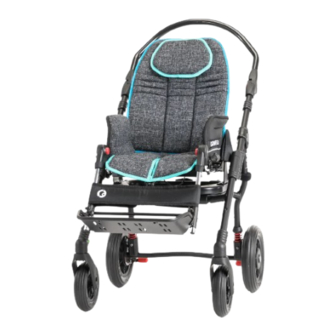
Page 20: What Bug Is
The use of BUG and its components always requires the prescription of a physician that verifies also its use. BUG follows the child's growth thanks to its wide range of adjustments and it has a tilt and recline system included in the seat(and not in the frame), that allows you to maintain the same posture with the 3 different bases: - 869 Outdoor 4-wheel base;... -
Page 21: Base 869 Braking
BASE 869 BRAKING LOCKS UNLOCKS BASE 856 BRAKING LOCKS UNLOCKS 19/101... -
Page 22: Initial Preparation
REMOVE THE SEAT FROM TOO HARD WITH THE BLADE THE BOX AND THEN THE SO AS NOT TO DAMAGE FRAME THE CONTENTS OF THE BOX HOW and WHERE TO HOLD the COMPONENTS of BUG Seat unit Base 869 Base 856 20/101... -
Page 23: Bug Seat Unit
SEAT UNIT THE ADJUSTMENTS HEREINAFTER SPECIFIED ARE FOR THE SEAT UNIT ON THE 869, 856 and 851 base 21/101... -
Page 24: Seating Unit Adjustments
SEATING UNIT ADJUSTMENTS ON BASES ADJUSTING THE INCLINATION OF THE SEAT (TILT-IN-SPACE SYSTEM) PULL UP THE GREEN KNOB TILT THE SEAT KEEPING THE KNOB PULLED AND RELEASE IT WHEN ADJUSTED TO THE DESIRED POSITION VIEW FROM BEHIND GREEN KNOB FOR ADJUSTING THE INCLINATION OF THE SEAT 22/101... -
Page 25: Reclining The Backrest
RECLINING THE BACKREST PULL UP THE RED KNOB RECLINE THE BACKREST, KEEPING THE KNOB PULLED AND RELEASE IT WHEN THE BACKREST HAS REACHED THE DESIRED POSITION VIEW FROM BEHIND RED KNOB FOR ADJUSTING THE RECLINING BACKREST 23/101... -
Page 26: Adjusting The Height Of The Backrest
- SLIDE THE BACKREST TO THE DESIRED POSITION TIGHTEN THE SCREWS - FIX THE EXTENSION OF THE BACKREST CUSHION VIEW FROM BEHIND VIEW FROM BEHIND BACKREST ADJUSTMENT 4 SCREWS BUG SMALL BUG MEDIUM WRENCH EXTENDED BACKREST CUSHION BUTTONHOLE VELCRO ON THE BACK OF THE CUSHION HOOK VELCRO... -
Page 27: Adjusting The Width Of The Seat Base
ADJUSTING THE WIDTH OF THE SEAT BASE SEAT WRENCH ADJUSTMENT 4 SCREWS VIEW FROM BELOW VIEW FROM ABOVE 25/101... -
Page 28: Adjusting The Legrest
ADJUSTING THE LEGREST PRESS BOTH BUTTONS AT THE SAME TIME TO ADJUST THE TILT OF THE LEG SUPPORT RED BUTTON 26/101... -
Page 29: Adjusting The Footrest
ADJUSTING THE FOOTREST a) In height SIZE SMALL SIZE MEDIUM b) in tilt c) in tipping up SCREW FOR ADJUSTING WRENCH THE TILT OF THE FOOTREST 27/101... -
Page 30: Adjusting The Depth Of The Seat
ADJUSTING THE DEPTH OF THE SEAT WRENCH 28/101... -
Page 31: Bug Seat With 4-Wheel Base 869
seat with 4-WHEEL base 29/101... -
Page 32: Technical Specifications Of Bug With Four Wheel Base 869
TECHNICAL SPECIFICATIONS of Bug with four wheel BASE HANDLE ADJUSTABLE 180° Stroller closed with seat removed Stroller closed with seat attached - WHEELS: front, with direction locks, 17 cm (7 Inches); rear, with shock absorbers, 25 cm (10 Inches) sizes S, 30 cm (12 Inches) size M... - Page 33 Measures in cm and Inches Weights in kilos and Libbres User height Size Small: from 90 to 120 cm (from 35,4” to 47,2”) User height Size Medium: from 115 to 140 cm (from 45,2” to 55,1”) Size Max load 35 kg 20-30 cm 52-62 cm 37 cm...
-
Page 34: How To Use Bug With Base 869
HOW TO USE Bug WITH BASE OPENING the STROLLER a) WITHOUT THE SEAT RECOMMENDED PROCEDURE CLOSING LOCK PULL THE HANDLE UPWARDS A CLICK MEANS THAT THE FRAME IS SECURELY OPEN remove velcro roll velcro MAKE SURE THE FRAME IS LOCKED... -
Page 35: How To Attach The Seat To The Frame
HOW TO ATTACH THE SEAT TO THE FRAME APPLY the BRAKES; then, PLACE THE SEAT ON THE MOUNTING PLATE VIEW FROM ABOVE MOUNTING PLATE PUSH THE SEAT BACKWARDS , sliding it ON TO THE MOUNTING PLATE OPERATE THE LOCKING LEVER VIEW LOCKING FROM BEHIND... -
Page 36: How To Reverse The Seat So That The Child Faces His Mother(Fig.a)
HOW TO REVERSE THE SEAT SO THAT THE CHILD FACES HIS MOTHER (FIG. A) (ONLY FOR SIZE S, THE SIZE M SEAT IS NOT REVERSIBLE) 1- UNSCREW THE 4 SCREWS 2- FOLD THE FRAME SLIGHTLY AND REMOVE THE LOWER SEAT 3- TURN THE LOWER SEAT 180°... -
Page 37: How To Detach The Seat From The Frame
HOW TO DETACH THE SEAT FROM THE FRAME FIRST APPLY BRAKES PUSH-BUTTON LOCKING LEVER 2- AT THE SAME TIME TURN THE LOCKING LEVER FROM LEFT TO RIGHT 3- SLIDE THE SEAT FORWARD UNLOCKS VIEW FROM BEHIND UNLOCKS 35/101... -
Page 38: Folding The Base
FOLDING THE BASE WE SUGGEST THAT YOU FOLD THE BASE WITHOUT THE SEAT GENTLY PULL THE PULL THE BLACK LOCKS WITH HANDLE DOWNWARD BOTH HANDS IF YOU WANT TO POSITION THE FRAME CLOSED FRAME VERTICALLY, TILT THE PUSH HANDLE SLIGHTLY (SEE PAGE 38) 36/101... -
Page 39: Adjusting The Inclination Of The Handle
ADJUSTING THE INCLINATION OF THE HANDLE IT FACILITATES THE ENTRANCE INTO THE ELEVATOR AND ITS TRANSPORT INTO THE CAR RED BUTTON FRONT WHEEL DIRECTION LOCKS 37/101... -
Page 40: Bug Seat With Indoor Base 856
seat with INDOOR base 38/101... -
Page 41: Technical Specifications Of Bug With Base 856
TECHNICAL SPECIFICATIONS of Bug with BASE Measures in cm and Inches Weights in kilos and Libbres User height Size Small: from 90 to 120 cm (from 35,4” to 47,2”) User height Size Medium: from 115 to 140 cm (from 45,2” to 55,1”) -
Page 42: How To Use Bug With Base 856
HOW TO USE Bug WITH BASE HOW TO ATTACH THE SEAT TO THE FRAME APPLY the BRAKES; then, PLACE THE SEAT ON THE MOUNTING PLATE VIEW FROM ABOVE MOUNTING PLATE PUSH THE SEAT BACKWARDS , sliding it ON TO THE MOUNTING PLATE... -
Page 43: How To Detach The Seat From The Frame
HOW TO DETACH THE SEAT FROM THE FRAME FIRST APPLY BRAKES THE SEAT IS NOT REVERSIBLE WITH INDOOR BASE 856 41/101... -
Page 44: Adjusting The Height Of The Seat
ADJUSTING THE HEIGHT OF THE SEAT 42/101... - Page 45 43/101...
-
Page 46: Bug Seat With Indoor Base 851
seat WITH INDOOR BASE (HIGH-LOW COMPACT BASE) 44/101... -
Page 47: Technical Specifications Of Bug With Base 851
TECHNICAL SPECIFICATIONS of Bug with BASE 851 Measures in cm and Inches Weights in kilos and Libbres User height Size Small: from 90 to 120 cm (from 35,4” to 47,2”) User height Size Medium: from 115 to 140 cm (from 45,2” to 55,1”) WHEELS, 10 cm (2,7 Inches),swive lling with brakes. -
Page 48: How To Use Bug With Base 851
HOW TO USE Bug with BASE HOW TO ATTACH THE SEAT TO THE FRAME APPLY the BRAKES; then, PLACE THE SEAT ON THE MOUNTING PLATE MOUNTING PLATE VIEW FROM ABOVE MOUNTING PLATE PUSH THE SEAT BACKWARDS , sliding it ON... -
Page 49: How To Detach The Seat From The Frame
HOW TO DETACH THE SEAT FROM THE FRAME FIRST APPLY BRAKES 1-PRESS THE SAFETY RED PUSH-BUTTON 2- AT THE SAME TIME TURN THE LOCKING LEVER SAFETY RED PUSH-BUTTON FROM LEFT TO RIGHT 3-SLIDE THE SEAT FORWARD LOCKS UNLOCKS LOCKING LEVER BACK VIEW LOCKS UNLOCKS... -
Page 50: Adjusting The Height Of The Seat With Base 851
ADJUSTING THE HEIGHT OF THE SEAT with BASE 851 PEDAL HEIGHT ADJUSTMENT LEVER HEIGHT ADJUSTMENT POSITIONING OF THE HEIGHT ADJUSTMENT LEVER THE HEIGHT OF THE PUSHCHAIR POSITIONING OF THE PEDAL CAN BE ADJUSTED EVEN WITH FOR THE HEIGHT ADJUSTMENT THE CHILD IN IT 48/101... -
Page 51: Base 851 Braking
MAXIMUM HEIGHT MINIMUM HEIGHT BASE 851 BRAKING LOCKS UNLOCKS 49/101... -
Page 52: Mounting The Additional Components
MOUNTING THE ADDITIONAL COMPONENTS HEADREST with OCCIPITAL-PARIETAL PROTECTIONS adjustable height, width, tilt and forward-backward position 50/101... - Page 53 51/101...
- Page 54 52/101...
- Page 55 HEADREST 8 cm 10 cm 10-21 cm SMALL 3,1” 3,9” 3,9”-8,2” 11 cm 12 cm 12-24 cm MEDIUM 4,3” 4,7” 4,7”-9,4” The numbers divided by the dash specify a minimum and a maximum adjustment 53/101...
-
Page 56: Ergonomic Headrest 942
ERGONOMIC HEADREST Adjustable in height, tilt, back and forwards MOUNTING 1. REMOVE THE PARTS POINTED ON FIGURE A 2. TIGHTEN THE TWO SCREWS OF THE LEFT SIDE 3. REMOVE THE LOWER KNOB AND MOVE ITS SCREW WITHOUT REMOVING IT 4. TIGHTEN THE TWO SCREWS OF THE RIGHT SIDE 5. - Page 57 WRENCH NUTS WRENCH 2 SCREWS TO FIX THE HEADREST 55/101...
- Page 58 FIG. E ADJUSTMENT LOOSEN THE THREE KNOBS ADJUST THE INCLINATION, THE HEIGHT AND DEPTH OF THE HEADREST TIGHTEN THE KNOBS KNOBS 56/101...
-
Page 59: Headrest With Parietal Protections 852
HEADREST with PARIETAL PROTECTIONS adjustable height and width LOCKING ELEMENT WRENCH LOCKING ELEMENT WRENCH VELCRO STUD STUD 57/101... - Page 60 SIDE VIEW WRENCH SCREWS ADJUSTMENT IN WIDTH HEADREST 8 cm 10 cm 10-21 cm SMALL 3,1” 3,9” 3,9”-8,2” 11 cm 12 cm 12-24 cm MEDIUM 4,3” 4,7” 4,7”-9,4” The numbers divided by the dash specify a minimum and a maximum adjustment 58/101...
-
Page 61: Thermic Cover 818
THERMIC COVER VIEW FROM BEHIND 59/101... -
Page 62: Canopy 819
CANOPY SCREW WRENCH CANOPY ATTACHMENT VIEW FROM BEHIND 60/101... -
Page 63: Rain Cover 825
RAIN COVER THE RAIN COVER CAN ONLY BE ATTACHED AFTER THE CANOPY (819) IS IN PLACE 1- ATTACH THE RAIN COVER POUCH WITH THE TWO BUTTONS LOCATED ON THE BACK OF THE CANOPY 2- OPEN THE ZIPPER ON THE POUCH 3- REMOVE THE RAIN COVER FROM THE POUCH AND POSITION IT SO THAT IT COVERS THE STROLLER 4- ATTACH THE RAIN COVER TO THE FRAME USING THE STRAPS WITH BUTTONS... -
Page 64: Foot Straps 827
FOOT STRAPS WRENCH Padded ABDUCTION BLOCK TIGHTEN THE KNOB 62/101... -
Page 65: Adjustable Abduction Block 834R
834R ADJUSTABLE ABDUCTION BLOCK INSERT THE ABDUCTION BLOCK AND TIGHTEN THE KNOB WARNING! TIGHTEN THE KNOB WELL OPEN THE EDGE COVER USING THE TWO ZIPPERS ZIPPER 63/101... - Page 66 ADJUST THE LEFT PART OF THE ABDUCTION BLOCK SHEET IN WIDTH. ADJUST THE RIGHT PART OF THE ABDUCTION BLOCK SHEET IN WIDTH BACK VIEW 64/101...
- Page 67 CLOSE THE EDGE COVER USING THE TWO ZIPPERS 65/101...
-
Page 68: Front Handle 839
FRONT HANDLE Size Small Size Medium TIGHTEN THE KNOB 66/101... -
Page 69: Flexible And Wrap-Around Side Supports For The Trunk 868
FLEXIBLE AND WRAP-AROUND SIDE SUPPORTS FOR THE TRUNK adjustable height and width WASHER LOCKING ELEMENT WRENCH TO ADJUST THE POSITION OF THE FRONT JOINTED BRACE, LOOSEN THE SCREWS LOCATED BEHIND THE BACKREST WITH THE PROVIDED WRENCH SCREWS ADJUSTMENT IN WIDTH WRENCH VIEW FROM BEHIND WRENCH... -
Page 70: Tiedown Hooks (4 Rings) 891
891 TIEDOWN HOOKS (4 RINGS) only available for the 4-wheel 869 base THE BUG 4-WHEEL STROLLER (seat unit + 869 base) conforms to the ISO 7176-19 and ANSI RESNA WC/19 standard, which defines the safety requirements for transport, facing in the direction of travel, on moving vehicles (private cars, buses, etc.) -
Page 71: Net Basket 858
NET BASKET Only available for OUTDOOR BASE 45° SEAT BELT VIEW FROM BEHIND 69/101... -
Page 72: Padded Side Supports 838
Padded SIDE SUPPORTS STUD WASHER WRENCH LOCKING ELEMENT SCREWS ADJUSTMENT IN WIDTH WRENCH VIEW FROM BEHIND WRENCH 70/101... -
Page 73: Tray 824
TRAY knob VIEW FROM BELOW knob locking lever TIGHTEN THE KNOB 71/101... -
Page 74: Tray For Bug With 856 And 851 Bases 824B
824B TRA Y for BUG WITH 856 and 851 BASES THIS TRAY IS ONLY FOR THE 856 AND 851 INDOOR BASES 72/101... - Page 75 INSERT THE TRAY FOR INDOOR BASES knob WARNING! TIGHTEN THE KNOB WELL 73/101...
- Page 76 WARNINGS! a) Before adjusting the tray, brake the 856, 851 base. b) Before adjusting the tray or change the seat tilt, take any material off as, should it tip over, it could damage or cause injury to someone DEPTH ADJUSTMENT TILT ADJUSTMENT VIEW FROM BELOW 74/101...
-
Page 77: 5- Point Vest Harness 903
5-POINT VEST HARNESS VIEW FROM BEHIND 75/101... -
Page 78: 5- Point Harness 906
5-POINT HARNESS FIXING THE STRAP ON THE BOTTOM OF THE SEAT FIXING THE STRAPS ON THE FIXING THE BACK BUCKLES UPPER PART OF THE BACKREST VIEW FROM BEHIND 76/101... - Page 79 FIXING THE FRONT BUCKLES ASSEMBLED HARNESS Circumference sizes Min. max. SMALL 57-84 cm (22,4”-33”) MEDIUM 80-108 cm (31,4”-42,5”) The numbers divided by the dash specify a minimum and a maximum adjustment 77/101...
-
Page 80: Padded Covering For Footplate 892
PADDED COVERING for FOOTPLATE VIEW FROM BEHIND OF THE FOOTPLATE 78/101... -
Page 81: Hand Brake 905
HAND BRAKE - TAKE THE SEAT OUT OF THE FRAME BEWARE ! The hand brake must be installed by qualified personnel, such as the manufacturer or the dealer who sold the product or a specialized mechanical company - ASSEMBLING THE TWO PLATES WRENCH SCREW The plates... - Page 82 - FIXING THE LEVER OF THE HAND BRAKE 1-GET THE PLASTIC PART OF THE BRAKE LEVER WARM, BY USING A DRYER 2-PUT THE BRAKE LEVER ON THE PUSH HANDLE 3-FIX AND TIGHTEN THE SCREW WASHER SCREW WRENCH 80/101...
- Page 83 - FIXING THE CABLE CLIPS LOOSEN THE 4 SCREWS REMOVE THE 4 EXISTING PLASTIC BUSH FIX THE 4 PLASTIC BUSH IN EQUIPMENT AND THE CABLE CLIPS FIX THE SCREWS WRENCH WRENCH WRENCH WRENCH BUSH IN EQUIPMENT CABLE CLIPS IN EQUIPMENT 81/101...
- Page 84 - FIXING THE DOUBLER OF THE BRAKE LET THE FREE END OF THE CABLE, PASS THROUGH THE CABLE CLIPS WRENCH SCREW DOUBLER COVER LET THE FREE END DOUBLER OF THE CABLE, PASS THROUGH CABLE CLIPS CABLE CLIPS 82/101...
- Page 85 - FIXING THE CABLES CABLE CLIPS CABLE LOCK HOLE TO INSERT THE CABLE CABLE TERMINAL LOCK BLACK SHEATH CABLE TRANSPARENT EXTERNAL SHEATH 83/101...
-
Page 86: Vent Tray 911
VENT TRAY Available only for 869 external base NUT M6 WRENCH SCREW M6X16 WRENCH ADJUSTABLE SCREW M6X25 BUSHING HOW TO FIX THE ADJUSTABLE BUSHING 84101... - Page 87 NUT M6 SCREW M6X25 ADJUSTABLE BUSHING SCREW M6X25 HOW TO FIX THE ADJUSTABLE BUSHING 85/101...
-
Page 88: Oxygen Bottle Holder 935
OXYGEN BOTTLE HOLDER BEWARE! during transport on a moving vehicle, the oxygen bottle and the respirator have to be removed from the pushchair frame to avoid damages in case of an accident, and they have to be secured to the vehicle to reduce the chances of injury to the other occupants Remove the 2 screws TOP VIEW SCREWS TO REMOVE... - Page 89 assemble the upper frame using the supplied screws SUPPLIED SCREWS SUPPLIED SCREWS SUPPLIED NUTS SUPPLIED NUTS WRENCH WRENCH assemble the lower frame through the 4 buckles 87/101...
-
Page 90: Bottle Holder 922
Fix the bottle WARNING! Pull well all the straps so to avoid the oscillation of the oxygen bottle BOTTLE HOLDER 88/101... -
Page 91: 4- Point Seat Belt 920
4-POINT SEAT BELT BEFORE FIXING THE 4-POINT SEAT BELT REMOVE THE SIDE UPHOLSTERIES (SEE PAGE 94) buckle 89/101... - Page 92 ADJUSTMENT IN DEPTH nut M5 wrench REAR VIEW 90/101...
-
Page 93: Sibling Rear Footboard 921
SIBLING REAR FOOTBOARD Available only for 869 external base The 921sibling rear footboard must be fixed on the back thanks to the plastic straps. It has a telescopic arm to adjust the footboard in depth, screws to adjust the tilt and two pivoting wheels. - Page 94 In effect, adjusting the telescopic arms to their maximum extension, could reduce the available space inside the push handle excessively and/or the footboard could hinder the driver. BUG seat with 4 wheel base 869 92/101...
- Page 95 - MOUNTING VIEW FROM BEHIND TO MOUNT THE STRAPS FOLLOW THE INSTRUCTIONS OF THE MANUFACTURER OF THE BOARD where to place the straps to position the board Mounted straps TO ATTACH THE STRAPS FOLLOW THE INSTRUCTIONS OF THE MANUFACTURER OF THE BOARD Board attached 93/101...
-
Page 96: Attaching The Cushion
ATTACHING THE CUSHION BUTTONHOLE VELCRO ON THE BACK OF THE BACKREST HOOK VELCRO EXTENSION OF THE BACKREST CUSHION EXTENDED BACKREST CUSHION INSIDE VELCRO STRAPS WITH BUTTON TO FIX THE CUSHION UNDERNEATH VELCRO LEGREST BAND INSIDE VELCRO 94/101... - Page 97 SOFT PART INSIDE BUTTON RIGID PART VIEW FROM BEHIND STUD INSIDE VELCRO BUTTONS TO FIX THE CUSHION IN THE BACK OF THE BACKREST 95/101...
-
Page 98: Maintenance
MAINTENANCE The execution of all maintenance operations is necessary to maintain the correct functionality and safety of the device. 1. ORDINARY MAINTENANCE (monthly) 1.1 Clean the WHEELS from dust and dirt (threads, hair, etc.) that can accumulate on the rotating parts to maintain smoothness and braking effectiveness. Keep the tire pressure constant at 2.5 atm (only for pneumatic alternative wheels, base 869 for outdoor use). -
Page 99: Extraordinary Maintenance (Or Corrective)
(mentioned above). Extraordinary maintenance must be carried out by the Dealer who supplied the product or by another subject indicated by the Manufacturer or the Distributor of the ORMESA products in the country of destination. The interventions must be performed with ORIGINAL REPLACEMENTS PARTS of the... -
Page 100: Cleaning, Disinfection, Sanitization
CLEANING, DISINFECTION, SANITIZATION INFORMATION SANIFICATION is the complex of cleaning and / or disinfection procedures and operations The CLEANING is a physical and mechanical process (i.e., rubbing) with which a large part of potential pathogenic microorganisms (bacteria, fungus, or virus), further to the visible dirt, is removed from the surface. -
Page 101: Procedure
PROCEDURE Activities Cadence Description Soak a sponge or a clean disposable 4.1 CLEANING daily or weekly cloth with neutral detergent previously and CLEANSING based on intensity of use diluted in hot water (max. temperature and biological risk 40°). (patient with particular Rub upholstery, frame, additional sweating, salivation;... -
Page 102: Customer Service And Spare Parts
For an ANTIVIRAL DISINFECTANT action, a SPECIFIC CHEMICAL PRODUCT can be added to the normal washing cycle; washing at a high temperature (60 ° C) is possible as long as occasionally, as the upholstery may wear out. WARNING! The additional components 825 and 819 are NOT WASHABLE. -
Page 103: Conditions For Durability, Reuse And Reassignment To A New User
Quality Management System certificated in 1998 according to ISO 13485, there is adequate confidence that the average lifespan of the BUG is about 5 years, on condition that it is used according to the directions given in the user manual. - Page 104 Ormesa srl Via delle Industrie, 6/8 - Z.I. Sant’Eraclio - 06034 FOLIGNO (PG) ITALY P.I. IT 00574020541 CCIAA Perugia 119215 Iscr. Trib. Perugia 11907 Tel. + 39 0742 22927 Fax +39 0742 22637 info@ormesa.com www.ormesa.com SINCE 1980 BUG WITH 869 BASE PASSES...
Need help?
Do you have a question about the BUG and is the answer not in the manual?
Questions and answers