Ormesa GRILLO Use And Maintenance Handbook
Hide thumbs
Also See for GRILLO:
- Use and maintenance handbook (48 pages) ,
- Use and maintenance handbook (84 pages) ,
- Use and maintenance handbook (72 pages)
Table of Contents
Advertisement
Advertisement
Table of Contents

Related Manuals for Ormesa GRILLO


Summary of Contents for Ormesa GRILLO
- Page 1 front drive gait trainer rear drive gait trainer...
- Page 3 GRILLO is a medical device designed and manufactured by ORMESA srl. ORMESA then suggests you to read this handbook very carefully. It will help you in becoming familiar with GRILLO soon and more efficaciously, and you will also find many practical pieces of advice to use it safely and in the best possible way and to keep it perfectly efficient.
-
Page 4: Table Of Contents
HOW GRILLO WORKS ......................8 HOW GRILLO IS COMPOSED ....................10 TECHNICAL SPECIFICATIONS - GRILLO GAIT TRAINER............ 11 HOW TO USE GRILLO, FRONT DRIVE and REAR DRIVE GAIT TRAINER ......15 FRAME: HEIGHT ADJUSTMENT ......................15 PARKING BRAKES ..........................16 ADJUSTABLE BRAKE.......................... - Page 5 LEG DIVIDER WITH TIGHT STRAPS ....................44 DISTAL ABDUCTOR ..........................47 FOLDING SEAT for GRILLO REAR DRIVE GAIT TRAINER [sizes S and M] ........49 LUMBAR SUPPORT for GRILLO REAR DRIVE GAIT TRAINER [sizes S and M] ....... 50 PUSH HANDLE for THE ASSISTANT [sizes S and M] ................52 WEIGHT BARS ............................
-
Page 6: Warnings
- The handbook reflects the state of technique at the moment of taking the aid into the market. ORMESA srl reserves the right to carry out any modification to the aid and to its handbook which can be suggested by the experience, by technical considerations or by the change of standards. - Page 7 GRILLO IS A MECHANICAL MEDICAL DEVICE: THE USER has to perform REGULAR MAINTENANCE and CLEANING following the instructions shown in the "Maintenance" chapter on page 67,68, 69, 70, 71, 72, 73, 74,75, 76 and HAVE THE DEVICE INSPECTED AT THE INTERVALS...
-
Page 8: What Not To Do With The Product
WHAT NOT TO DO WITH THE PRODUCT - GRILLO MUSTN'T BE USED UNLESS A MEMBER OF THE USER’S FAMILY OR QUALIFIED PERSON IS PRESENT AT ALL TIME - DO NOT CARRY OUT ANY OPERATION OR MANOEUVRE UNLESS YOU ARE SURE OF THE RESULT: IF IN DOUBT, CONTACT YOUR NEAREST... -
Page 9: Guarantee
GUARANTEE ORMESA warrants the product for 2 years; in case of problems, contact the retailer where you purchased it. Always ask for original parts and components. ORMESA will not be liable for damage in the following cases: - use by an unsuitable person;... -
Page 10: What Grillo Is And What It Is For. Intended Use
WHAT GRILLO IS AND WHAT IT IS FOR. INTENDED USE GRILLO is a gait trainer, that’s to say a product that was designed to help and make the independent moving of a User easier. The intended use is for spasthic/distonic users, for subjects with hyposthenia and/or exhaustion of the antigravity response, to subjects with difficulty in coordination and motor control, and to subjects beginning to ambulate. - Page 11 In fact they should be encouraged. In the first days it is a good idea to let the child use GRILLO freely so that he can try the different ways of using it. For "fearful" children who are afraid to use GRILLO (probably due to problems of perception which make awareness of space and distance altered) it is better to start its use in a different way.
-
Page 12: How Grillo Is Composed
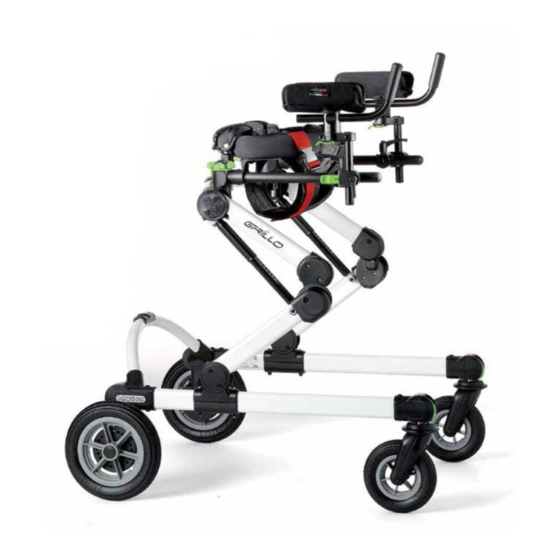
HOW GRILLO IS COMPOSED FRONT-DRIVE FRAME thoracic support pelvic support handlebar harness support height adjustment numbered bars anterior wheels with posterior wheels with directional locks - pedal parking brake - adjustable brake - anti-reverse wheel stops REAR DRIVE FRAME arm supports... -
Page 13: Technical Specifications - Grillo Gait Trainer
TECHNICAL SPECIFICATIONS - GRILLO GAIT TRAINER § Available in 3 SIZES [S, M and L] and 2 MODELS (GRILLO Front drive and REAR DRIVE gait trainer). § ALUMINIUM FRAME, foldable for easy transportation and with PATENTED HEIGHT-ADJUSTMENT SYSTEM. § PELVIC SUPPORT and THORACIC SUPPORT, padded, independently adjustable in height, width and circumference;... - Page 14 WEIGHT 19 kg MAX. LOAD kg 45 Inner circumference of the adjustable pelvic support, from 60 cm to 86 cm GRILLO REAR DRIVE size S WEIGHT 18,5 kg MAX LOAD. kg 45 HYPHEN-SEPARATED NUMBERS INDICATE THE MINIMUM AND MAXIMUM RANGE OF ADJUSTMENT...
- Page 15 WEIGHT 22,5 kg MAX. LOAD kg 90 Inner circumference of the adjustable pelvic support, from cm to GRILLO REAR DRIVE size M WEIGHT 21,7kg MAX LOAD. kg 90 HYPHEN-SEPARATED NUMBERS INDICATE THE MINIMUM AND MAXIMUM RANGE OF ADJUSTMENT Page 13 of 77...
- Page 16 MAX. LOAD kg 110 Inn er circumference of the adjustable pelvic support, from cm to GRILLO REAR DRIVE size L WEIGHT 28.5 kg MAX LOAD. kg 110 HYPHEN-SEPARATED NUMBERS INDICATE THE MINIMUM AND MAXIMUM RANGE OF ADJUSTMENT Page 14 of 77...
-
Page 17: How To Use Grillo, Front Drive And Rear Drive Gait Trainer
HOW TO USE GRILLO, FRONT DRIVE and REAR DRIVE GAIT TRAINER FRAME: HEIGHT ADJUSTMENT OPERATE THE ADJUSTMENT KNOBS WITH BOTH HANDS ADJUST THE HEIGHT OF GRILLO RELEASING THE ADJUSTMENT KNOBS press-buttons height adjustment numbered bars height Size S adjustment numbered bars... -
Page 18: Parking Brakes
PARKING BRAKES Release lever PEDAL brake LOCK UNLOCK Page 16 of 77... -
Page 19: Adjustable Brake
ADJUSTABLE BRAKE 5 POSITIONS OF THE ADJUSTABLE BRAKES ADJUSTABLE BRAKE LEVER POSITION ZERO POSITION FOUR FREE WHEEL WHEEL LOCKED Page 17 of 77... -
Page 20: Anti Rollback Device
DEVICE WARNINGS! The anti-reverse device reduces the maneuverability of the gait trainer ANTI ROLLBACK LEVER DISACTIVATED ACTIVATED ANTI ROLLBACK ANTI ROLLBACK Page 18 of 77... -
Page 21: Pelvic Support Assembly
PELVIC SUPPORT ASSEMBLY sizes S and M VIEW FROM ABOVE unlock lock locking lever sizes L Page 19 of 77... -
Page 22: Pelvic Support: Height Adjustment [Sizes S And M]
PELVIC SUPPORT: HEIGHT ADJUSTMENT [sizes S and M] height adjustment numbered bars position of the locking lever VIEW FROM ABOVE unlock lock locking lever Page 20 of 77... -
Page 23: Pelvic And Thoracic Supports: Circumference Adjustment
PELVIC AND THORACIC SUPPORTS: CIRCUMFERENCE ADJUSTMENT VIEW FROM THE BACK lock lock unlock locking lever Page 21 of 77... -
Page 24: Directional Locks
DIRECTIONAL LOCKS unlock lock DIRECTIONAL LOCK Page 22 of 77... -
Page 25: Change Grillo From Rear Drive To Front-Drive Gait Trainer And Vice Versa
CHANGE GRILLO from REAR DRIVE to FRONT-DRIVE GAIT TRAINER and VICE VERSA WARNINGS! This operation must be done by qualified personnel only WHEEL-ASSEMBLING AND DISASSEMBLING SCHEME GRILLO FRONT-DRIVE GRILLO REAR DRIVE VIEW FROM ABOVE Page 23 of 77... - Page 26 GRILLO FRONT-DRIVE GAIT TRAINER DISASSEMBLING SWIVELING WHEELS unlock extractor Push strongly until you hear CLICK screw cap wrench screw directional lock with extractor bushing supplied wrench Page 24 of 77...
- Page 27 DISASSEMBLING FIXED WHEELS screw cap wrench screw M12 extractor supplied Push strongly until you hear CLICK top with extractor Page 25 of 77...
- Page 28 GRILLO REAR DRIVE GAIT TRAINER: ASSEMBLING THE WHEELS screw cap Wrench M12 screw Tighten Wrench bushing Wrench screw cap M12 nut directional lock Page 26 of 77...
-
Page 29: Handles: Adjustments In Width
TURNING OF THE HANDLES Knob Turn the handles 180° HANDLES: ADJUSTMENTS in WIDTH VIEW FROM ABOVE unlock lock Adjustment knob Adjustment knob Page 27 of 77... -
Page 30: Thoracic Support Assembly
THORACIC SUPPORT ASSEMBLY Unlock Lock Locking lever Page 28 of 77... -
Page 31: Thoracic Support: Height Adjustment
THORACIC SUPPORT: THORACIC SUPPORT: HEIGHT ADJUSTMENT HEIGHT ADJUSTMENT height adjustment height adjustment graduated bars graduated bars locking lever locking lever DON’T TURN VIEW FROM ABOVE position of the position of the unlock locking levers locking levers lock locking lever ing lever Page 29 of 77... -
Page 32: Thoracic Support: Forward-Backward And Tilt Adjustments
THORACIC SUPPORT: FORWARD-BACKWARD and TILT ADJUSTMENTS NOTE: UNLOCK ALL THREE LEVERS ILLUSTRATED IN THE FIGURE TO OBTAIN THE FORWARD- BACKWARD ADJUSTMENT OF THE THORACIC SUPPORT. Page 30 of 77... - Page 33 LATERAL VIEW FRONT VIEW unlock lock locking lever Tilt adjustment numbered bars Tilt adjustment numbered bars unlock unlock lock lock locking lever locking lever Page 31 of 77...
-
Page 34: Changing Size M Pelvic And Trunk Supports With Size S And Size L With Size M
CHANGING size M PELVIC and TRUNK SUPPORTS WITH size S AND size L WITH size M Follow A-B-C operations in order to DISASSEMBLE the part; Follow the same operations to ASSEMBLE IT, but in the opposite order (C-B-A) Page 32 of 77... -
Page 35: Adjustments For Grillo Front-Drive Gait Trainer
FRONT-DRIVE ADJUSTMENTS FOR GRILLO GAIT TRAINER PELVIC HARNESS: ADJUSTMENT sizes M and L Adjustable carabiner Fixed carabiner The harness can be reduced as indicated in the following figures: velcro strap 1- remove Velcro 2- shorten the strap clasp 3- insert the clasp in the hole... -
Page 36: Pelvic Harness: Assembly Sizes S, M And L
PELVIC HARNESS: ASSEMBLY sizes S, M and L The procedure and harness position are the same, both on the front drive models Attach the two fixed carabiners on the two hooks on the front of the pelvic support, see figure. size S-M FRONT VIEW size L... - Page 37 Keeping the frame of the walker slightly lowered, fix the right inguinal belt with the hook and then proceed with the left one. Lift the frame of the walker until the correct height for walking is reached. Pull the straps until the inguinal belts are tightened.
-
Page 38: Handlebar: Height, Tilt, Forward-Backward Adjustments
HANDLEBAR : HEIGHT, TILT, FORWARD-BACKWARD ADJUSTMENTS a) height adjustment unlock handle lock b) tilt adjustment locking lever unlock lock c) forward-backward adjustment handle unlock lock Page 36 of 77... -
Page 39: Adjustments For Grillo Rear Drive Gait Trainer
GRILLO REAR DRIVE ADJUSTMENTS for GAIT TRAINER REMOVABLE GRIP HANDLES INSERTING OF THE GRIP HANDLES grip handle runner button to lock the grip handle runners be sure that the button coincides with the grip handle hole REMOVING OF THE GRIP HANDLES... -
Page 40: Pelvic Harness: Assembly And Adjustment
PELVIC HARNESS: ASSEMBLY AND ADJUSTMENT Follow the instructions on p. 34, 35, and 36 to mount the pelvic harness Pull the straps until the inguinal belts are tightened. Page 38 of 77... -
Page 41: Assembling And Adjusting The Additional Components
ASSEMBLING AND ADJUSTING THE ADDITIONAL COMPONENTS ARM SUPPORTS ASSEMBLY push the end of stroke button to position and remove the handles end of stroke Page 39 of 77... - Page 42 POSITIONING outside 1) Arm support positioned the handle Right arm support handle Left arm support inside 2) Arm support positioned the handle handle Left arm support Right arm support Page 40 of 77...
- Page 43 ADJUSTMENTS Height adjustment handle unlock lock unlock lock Depth of the handle adjustment handle Depth lock unlock adjustment handle Page 41 of 77...
- Page 44 Tilt locking lever unlock lock From prone to supine position of the handle unlock lock adjustment Rotation handle lock unlock adjustment handle locking lock lever unlock 7) rotation on vertical axis Page 42 of 77...
-
Page 45: Arm Straps
ARM STRAPS This component can only be mounted in presence of arm supports Page 43 of 77... -
Page 46: Leg Divider With Tight Straps
LEG DIVIDER WITH TIGHT STRAPS wrench ASSEMBLY LEG DIVIDER CONNECTED TO THE FRAME Page 44 of 77... - Page 47 ADJUSTMENT IN HEIGHT locking lever unlock lock ADJUSTING THE TRAVEL STOP travel stop adjustment screws wrench Page 45 of 77...
- Page 48 POSITIONING THE LEGS DIVIDER GRILLO IN THE FRONT-DRIVE GAIT-TRAINER POSITIONING THE LEGS DIVIDER GRILLO IN THE REAR DRIVE GAIT TRAINER Page 46 of 77...
-
Page 49: Distal Abductor
DI TAL A D wrench bushings ASSEMBLY Page 47 of 77... - Page 50 ADJUSTMENT IN HEIGHT unlock lock POSITIONING THE DI TAL A D TO GRILLO Page 48 of 77...
-
Page 51: Folding Seat For Grillo Rear Drive Gait Trainer [Sizes S And M]
FOLDING SEAT for GRILLO REAR DRIVE GAIT TRAINER [sizes S and M] screw ASSEMBLING wrench 2 POSITIONS FOLDING Page 49 of 77... -
Page 52: Lumbar Support For Grillo Rear Drive Gait Trainer [Sizes S And M]
LUMBAR SUPPORT for GRILLO REAR DRIVE GAIT TRAINER [sizes S and M] ASSEMBLY YOU CAN USE ALSO THE FOLDING SEAT WITH THE LUMBAR SUPPORT Page 50 of 77... - Page 53 HEIGHT ADJUSTMENT Height Adjustment Indicator position of the locking lever REAR VIEW Unlock lock VIEW FROM ABOVE locking lever Page 51 of 77...
-
Page 54: Push Handle For The Assistant [Sizes S And M]
PUSH HANDLE for THE ASSISTANT [sizes S and M] POSITION ON THE FRONT DRIVE GRILLO POSITION ON THE REAR DRIVE GRILLO ASSEMBLY OF THE HANDLE FORK wrench screw wrench bushing Page 52 of 77... - Page 55 FIXING OF THE PUSH HANDLE locking lever WARNING! THE PUSHING HANDLEBAR MUST BE COMPLETELY INSERTED INSIDE THE SUPPORT HEIGHT AND ROTATION ADJUSTMENT locking lever Page 53 of 77...
-
Page 56: Weight Bars
WEIGHT BARS REAR DRIVE FRONT DRIVE FIXED ON GRILLO FIXED ON GRILLO wrench wrench screw Page 54 of 77... -
Page 57: Pair Of Wheels For Narrow Base With Parking Brakes Pedals Only For Indoor Use [Sizes M And L]
PAIR of WHEELS for NARROW BASE with PARKING BRAKES PEDALS only for INDOOR USE [sizes M and L] DISASSEMBLY WHEELS OF THE STANDARD BASE screw cup wrench screw M12 Page 55 of 77... - Page 58 ASSEMBLY WHEELS FOR THE NARROW BASE screw cup wrench screw M12 BRAKING, ADJUSTABLE BRAKING, ANTI R SYSTEM See pages 17,18,19 Page 56 of 77...
-
Page 59: Proximal Abductor [Sizes S And M]
O I AL A D TO [ sizes S and M ASSEMBLE THE A D WRENCH HOW TO ROTATE THE A D TO TO NOT USE IT Page 57 of 77... - Page 60 HEIGHT ADJUSTMENT ASSEMBLE THE A D TO ON LUMBAR SUPPORT WRENCH Page 58 of 77...
- Page 61 O I AL A D TO [ sizes L REMOVE THE SCREWS OF THE LEVER SUPPORT M6x20 screws to remove ∅10 spacer to exclude Wrench FIX THE UPPER LOCKING M6X20 screw OUTSIDE VIEW INSIDE VIEW M6X16 screw screw wrench wrench Page 59 of 77...
- Page 62 FIXING THE NUMBERED VERTICAL BAR numbered vertical bar locking lever O I AL A D TO ASSEMBLY locking lever wrench Page 60 of 77...
- Page 63 HOW TO ROTATE THE A D TO NOT TO USE IT HOW TO ADJUST IN HEIGHT locking lever height adjustment indicator Page 61 of 77...
-
Page 64: Ergonomic Handles Of Grillo
ERGONOMIC HANDLES of GRILLO POSITIONING push the end of stroke button to position and remove the handles end of stroke Page 62 of 77... - Page 65 POSITIONING and ADJUSTMENT positioned outside the horizontal bars positioned within the horizontal bars in depth in height locking unlock lever lock unlock lock locking lever in tilt in rotation locking lever unlock lock unlock lock locking lever Page 63 of 77...
-
Page 66: Multi Adjustable Headrest
MULTI ADJUSTABLE HEADREST Available only for rear drive version with Trunk support Page 64 of 77... - Page 67 Page 65 of 77...
-
Page 68: Ergonomic Saddle
ERGONOMIC SADDLE Page 66 of 77... -
Page 69: Maintenance
If in doubt about the safety or damage of the product, discontinue use and contact ORMESA. 1. ORDINARY MAINTENANCE (monthly) 1.1 Clean the WHEELS from dust and dirt to maintain the smoothness and efficiency of the braking 1.2 check the smoothness of the MOVABLE PARTS and keep them clean from dust and dirt,... - Page 70 SETTING OF CONTROL LOCKING LEVERS should you have noticed an INEFFICIENCY, even partially, on the LOCKING of the adjustment GREEN LEVERS of the PELVIC SUPPORT, of the TRUNK SUPPORT, of the HANDLEBAR, of the ARM SUPPORTS, please contact your ORTHOPAEDIC WORKSHOP to TIGHTEN THE NUT LITTLE BY LITTLE as shown below, UNTIL the PROPER LOCKING IS REACHED.
- Page 71 Locking levers for trunk support joints SOCKET WRENCH Locking levers for handlebar/arm supports joints SOCKET WRENCH SOCKET WRENCH Page 69 of 77...
- Page 72 Height adjustment locking levers for trunk support SOCKET WRENCH Width adjustment locking lever for pelvic and trunk supports WRENCH Page 70 of 77...
-
Page 73: Preventive Maintenance (Biennial)
Adjustable braking rope 1.2 CLEANING THE WHEELS Clean the wheels at least once a month keeping them free from waste (thread, hair etc...) which can stick to them If you verify an INEFFICIENCY, even if just partial, of the BRAKES, contact the Dealer who sold you the product immediately. -
Page 74: Extraordinary Maintenance (Or Corrective)
(mentioned above). Extraordinary maintenance must be carried out by the Dealer who supplied the product or by another subject indicated by the Manufacturer or the Distributor of the ORMESA products in the country of destination. The interventions must be performed with ORIGINAL REPLACEMENTS PARTS of the... -
Page 75: Cleaning, Disinfection, Sanitization
CLEANING, DISINFECTION, SANITIZATION INFORMATION SANIFICATION is the complex of cleaning and / or disinfection procedures and operations The CLEANING is a physical and mechanical process (i.e., rubbing) with which a large part of potential pathogenic microorganisms (bacteria, fungus, or virus), further to the visible dirt, is removed from the surface. -
Page 76: Procedure
PROCEDURE Activities Cadence Description 4.1 CLEANING daily or weekly Soak a sponge or a clean disposable cloth with and CLEANSING based on intensity neutral detergent previously diluted in water. of use and biological Rub upholstery, frame, accessories and finally risk (patient with wheels. - Page 77 4.3 WASHING Besed on use It is possible to wash the HARNESS and REMOVABLE UPHOLSTERIES, respecting the following indications Machine wash with neutral soap .Max. temperature. 40°. Delicate cycle Do not bleach Do not iron Do not tumble dry Dry horizontally. PADDED UPHOLSTERIES require EFFECTIVE DRYING IN...
-
Page 78: Assistance And Spare Parts Of Grillo
(for example: Vinegar, Lemon), as it could create chemical reactions that could damage it. ASSISTANCE AND SPARE PARTS OF GRILLO Should you need assistance or spare parts, contact the Dealer who sold you the product. DISPOSAL If the aid must be scrapped, dispose of the parts according to the legal requirements in force in your Country. -
Page 79: Conditions For Durability, Reuse And Reassignment Toa New User
Quality Management System certificated in 1998 according to ISO 13485, there is adequate confidence that the average lifespan of the GRILLO is about 5 years, on condition that it is used according to the directions given in the user manual. - Page 80 SINCE 1980 Authorized Dealer The technical Data and information given in this handbook are not binding. ORMESA reserves the right to carry out any necessary change without prior notice or replacements...
Need help?
Do you have a question about the GRILLO and is the answer not in the manual?
Questions and answers