Table of Contents
Advertisement
Quick Links
Advertisement
Table of Contents
Troubleshooting

Related Manuals for DeLonghi ECAM37X.85


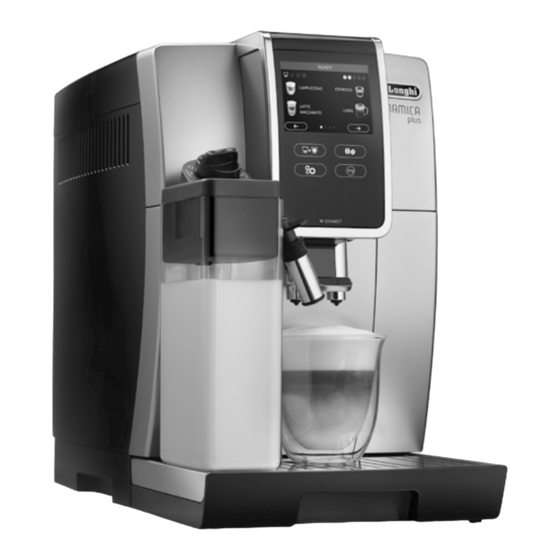
Summary of Contents for DeLonghi ECAM37X.85
- Page 1 ECAM37X.85 Instructions videos available at: http://dinamicaplus.delonghi.com...
- Page 2 READY...
-
Page 6: Table Of Contents
CONTENTS 10. DELIVERING HOT WATER ......13 1. INTRODUCTION ...........7 11. CUSTOMISING THE BEVERAGES ....13 Letters in brackets ............ 7 12. CLEANING ..........13 Troubleshooting and repairs........7 12.1 Cleaning the machine ..........13 Download the App! ..........7 12.2 Cleaning the internal circuit ........ -
Page 7: Introduction
: beverage aroma selection appliance. : My beverages selection menu. Unless previously Please note: programmed from the settings menu as described in chap- Check compatible devices on "compatibledevices.delonghi. ter "11. com". C3. Customising the beverages ", the beverage is pro-... -
Page 8: Description Of The Accessories (Page 2 - D)
2.4 Description of the accessories Please note! (page 2 - D) • The first time you use the appliance, you need to make 4 D1. "Total Hardness Test" indicator paper (attached to page 2 - 5 cappuccinos before it starts to give satisfactory results. of the English instructions) •... -
Page 9: Menu Settings
MENU SETTINGS 5. "CONFIRM RESET?": to confirm, press cancel, press 6.1 Access the settings menu 6. "VALORI FABBRICA""IMPOSTATI": press 1. Press the " " button (C3) to enter the menu; The beverage has been reset to the default values. Proceed with 2. -
Page 10: Beep
• COFFEE 6.12 Beep • LONG This enables or disables the beep emitted by the machine each • DOPPIO+ time an icon is pressed or an accessory is inserted/removed. To • 2X ESPRESSO disable or enable the beep, proceed as follows: 5. -
Page 11: Making Coffee Using Pre-Ground Coffee
too slow (a drop at a time), this can be corrected by adjusting Custom (if programmed) / the grinding adjustment dial (A5) (fig. 13). Standard (see table in sec- tion "11. Customising the Please note! beverages" The grinding adjustment dial must only be turned when the coffee mill is in operation during the initial phase of coffee SMALL SIZE preparation. -
Page 12: Making Cappuccinos And Milk-Based Coffees
Please note: Dial Description Recommended for… • : press to interrupt preparation completely position and go back to the homepage. NO FROTH HOT MILK (not frothed) / SAFETY WARNING: CAFFELATTE After making the pot of coffee, leave the ap- MIN. FROTH latte macchiato/ FLAT WHITE pliance to cool for 5 minutes before making... -
Page 13: Delivering Hot Water
• You can also customise the beverages by connecting with • The milk container can be kept in the refrigerator. the DeLonghi Coffee Link App. • In some cases, to clean you must wait for the appliance to • Press to exit programming. -
Page 14: Cleaning The Internal Circuit
12.4 Cleaning the drip tray and condensate tray • hot water connection nozzle (A8); • touch screen (B). Important! Important! The drip tray (A15) is fitted with a level indicator (A13) (red) • Do not use solvents, abrasive detergents or alcohol to clean showing the amount of water it contains (fig. -
Page 15: Cleaning The Pre-Ground Coffee Funnel
12.8 Cleaning the pre-ground coffee funnel 5. Rinse inside the froth adjustment dial seat with Check regularly (about once a month) that the pre-ground running water (fig. 33); coffee funnel (A4) is not blocked. If necessary, remove coffee 6. Check that the intake deposits with the brush (D5) supplied. -
Page 16: Setting Water Hardness
12. When the water in the tank has run out, empty the container used to collect the rinsing water; 13. (If the filter is installed) "INSERT FILTER INTO ITS HOUSING" (fig. 36). Press " " and extract the water tank. Replace the water sof- tener filter if removed previously;... -
Page 17: Measuring Water Hardness
The machine is set by default for a hardness value of "4". The machine can also be programmed according to the hardness of the mains water in the various regions so that the machine needs to be descaled less often. 14.1 Measuring water hardness 1. -
Page 18: Removing The Filter
16.1 Tips for Energy Saving To replace the filter later, press . The sym- • Do not attach the accessories to the steam connection noz- bol appears on the display to remind you that the filter needs zle (A8) until needed for the beverage to be made. After replacing. -
Page 19: Displayed Messages
DISPLAYED MESSAGES DISPLAYED MESSAGE POSSIBLE CAUSE REMEDY FILL TANK WITH FRESH Insufficient water in the tank (A17). Fill the tank with water and/or insert it correct- WATER ly, pushing it as far as it will go until it clicks into place. INSERT WATER TANK The tank (A17) is not correctly in place. - Page 20 DISPLAYED MESSAGE POSSIBLE CAUSE REMEDY ADD GROUND COFFEE MAX. A LONG coffee with pre-ground coffee has been Place pre-ground coffee in the funnel (A4) (fig. ONE MEASURE requested 12) and press the selector corresponding to "OK" to continue and complete delivery. FILL BEANS CONTAINER The coffee beans have run out.
- Page 21 DISPLAYED MESSAGE POSSIBLE CAUSE REMEDY The hot water spout (D6) is not inserted or is Insert the water spout as far as it will go. INSERT WATER SPOUT inserted incorrectly INSERT MILK CONTAINER The milk container (E) is not inserted correctly. Insert the milk container, pushing it as far as it will go.
- Page 22 DISPLAYED MESSAGE POSSIBLE CAUSE REMEDY The milk container has been inserted with To proceed with the CLEAN function, press the PRESS OK TO CLEAN OR TURN DIAL the froth adjustment dial (E1) in the CLEAN selector corresponding to "OK", or turn the froth position.
- Page 23 DISPLAYED MESSAGE POSSIBLE CAUSE REMEDY GENERAL ALARM: CONSULT The inside of the appliance is very dirty. Clean the inside of the appliance thoroughly, USER MANUAL/APP as described in section "12. Cleaning". If the message is still displayed after cleaning, con- tact a customer service centre.
-
Page 24: Troubleshooting
TROUBLESHOOTING Below is a list of some of the possible malfunctions. If the problem cannot be resolved as described, contact Customer Services. PROBLEM POSSIBLE CAUSE REMEDY The coffee is not hot. The cups were not preheated. Warm the cups by rinsing them with hot water (Please note: you can use the hot water function). - Page 25 PROBLEM POSSIBLE CAUSE REMEDY The infuser cannot be extracted The appliance has not been turned off Turn the appliance off by pressing the but- correctly ton (A15) (see section "5. Turning the appliance off"). At the end of descaling, the appliance During the two rinse cycles, the water Follow the instructions displayed by the appli- requests a third rinse...
Need help?
Do you have a question about the ECAM37X.85 and is the answer not in the manual?
Questions and answers