
Related Manuals for DeLonghi ECAM37X.95


Summary of Contents for DeLonghi ECAM37X.95
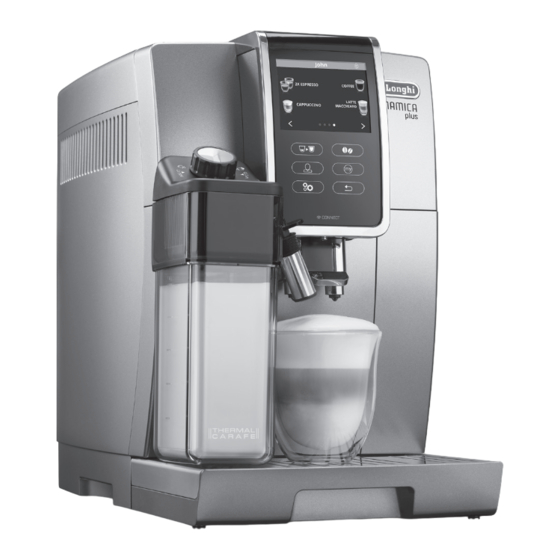
- Page 1 ECAM37X.95 BEAN TO CUP ESPRESSO AND CAPPUCCINO MACHINE Instruction for Use Instructions videos available at: http://ecam37095.delonghi.com...
- Page 2 page 6 PROFILE 1...
- Page 5 CLEAN...
-
Page 6: Table Of Contents
CONTENTS 10. DELIVERING HOT WATER ......13 1. INTRODUCTION ...........7 11. CUSTOMISING THE BEVERAGES ....13 Letters in brackets ............ 7 12. MEMORISING YOUR OWN USER PROFILE ..14 Troubleshooting and repairs........7 13. CLEANING ..........14 Download the App! ..........7 13.1 Cleaning the machine .......... -
Page 7: Introduction
You can also create up to 3 new beverages and save them in your : profile selection appliance. : appliance settings menu Please note: Check compatible devices on "compatibledevices.delonghi. : press to exit from the selected function and go com". back to the main menu : My beverages selection menu. Unless previ- ously programmed from the settings menu as described in chapter "11. -
Page 8: Description Of The Accessories (Page 2 - D)
2.4 Description of the accessories Please note! (page 2 - D) • The first time you use the appliance, you need to make 4-5 D1. "Total Hardness Test" indicator paper (attached to page 2 cappuccinos before it starts to give satisfactory results. of the English instructions) •... -
Page 9: Menu Settings
MENU SETTINGS 5. "CONFIRM RESET?": to confirm, press cancel, press 6.1 Access the settings menu 6. "VALORI FABBRICA""IMPOSTATI": press 1. Press the " " button (C3) to enter the menu; The beverage has been reset to the default values. Proceed with 2. -
Page 10: Beep
MAKING COFFEE 2. Press the flag corresponding to the language you want to set (press to display all the languages 7.1 Making coffee using coffee beans available). Important! 6.12 Beep Do not use green, caramelised or candied coffee beans as they This enables or disables the beep emitted by the machine each could stick to the coffee mill and make it unusable. -
Page 11: Selecting The Coffee Quantity
6. Preparation begins. An image of the selected beverage LIGHT appears on the display, together with a progress bar which gradually fills as preparation proceeds. MEDIUM Once the coffee has been delivered, the machine will be ready for further use. STRONG Important! Making LONG coffee: X-STRONG... -
Page 12: Filling And Attaching The Milk Container
8.1 Filling and attaching the milk container • CAPPUCCINO MIX • CAFFELATTE 1. Remove the lid (E2) (fig. 14); • FLAT WHITE 2. Fill the milk container (E3) with a sufficient quantity of milk, • ESPRESSO MACCHIATO not exceeding the MAX level marked on the container (fig. 3. -
Page 13: Coffee Carafe
• You can also customise the beverages by connecting with 2. Place a container under the spout (as close as possible to the DeLonghi Coffee Link App. avoid splashes); • Press to exit programming. The values will 3. -
Page 14: Memorising Your Own User Profile
You can rename your personal profile by connecting with container message is displayed 72 hours after the first coffee has the DeLonghi Coffee Link App (only the first three charac- been prepared. For the 72 hours to be calculated correctly, the ters will be displayed). -
Page 15: Cleaning The Inside Of The Coffee Machine
To remove the drip tray, proceed as follows: 1. Make sure the machine is correctly turned off (see section 1. Remove the drip tray and coffee grounds container (A11) "5. Turning the appliance off"); (fig. 22); 2. Remove the water tank (A17) (fig. 3); 2. -
Page 16: Cleaning The Hot Water Nozzle
6. Check that the intake tube and spout are not clogged with (one litre) up to level B and put the water tank back. Press milk residues; 7. Replace the dial (in correspondence to the word "INSERT"), 5. "EMPTY DRIP TRAY" (fig. 22): spout and milk intake tube;... -
Page 17: Setting Water Hardness
16. "POSITION 2l CONTAINER" "OK TO START RINSING": Place Indicator paper Water hardness the container used to collect the descaler solution empty under the hot water spout (fig. 9) and press Level 1 - soft water 17. Hot water is delivered from the hot water/steam spout and "RINSING UNDERWAY"... -
Page 18: Replacing The Filter
Please note Please note! IThe filter lasts about two months if the appliance is used nor- After two months (see date indicator) or when the appliance has mally. If the coffee machine is left unused with the filter in- not been used for 3 weeks, you should replace the filter even if stalled, it will last a maximum of 3 weeks. -
Page 19: Displayed Messages
DISPLAYED MESSAGES DISPLAYED MESSAGE POSSIBLE CAUSE REMEDY FILL TANK WITH FRESH Insufficient water in the tank (A17). Fill the tank with water and/or insert it correct- WATER ly, pushing it as far as it will go until it clicks into place. INSERT WATER TANK The tank (A17) is not correctly in place. - Page 20 DISPLAYED MESSAGE POSSIBLE CAUSE REMEDY ADD GROUND COFFEE MAX. A LONG coffee with pre-ground coffee has been Place pre-ground coffee in the funnel (A4) (fig. ONE MEASURE requested 12) and press the selector corresponding to "OK" to continue and complete delivery. FILL BEANS CONTAINER The coffee beans have run out.
- Page 21 DISPLAYED MESSAGE POSSIBLE CAUSE REMEDY INSERT WATER SPOUT The hot water spout (D6) is not inserted or is Insert the water spout as far as it will go. inserted incorrectly INSERT MILK CONTAINER The milk container (E) is not inserted correctly. Insert the milk container, pushing it as far as it will go.
- Page 22 DISPLAYED MESSAGE POSSIBLE CAUSE REMEDY PRESS OK TO CLEAN OR TURN The milk container has been inserted with To proceed with the CLEAN function, press the DIAL the froth adjustment dial (E1) in the CLEAN selector corresponding to "OK", or turn the froth position.
- Page 23 DISPLAYED MESSAGE POSSIBLE CAUSE REMEDY GENERAL ALARM: REFER TO The inside of the appliance is very dirty. Clean the inside of the appliance thoroughly, USER MANUAL / APP as described in section "13. Cleaning". If the message is still displayed after cleaning, con- tact a customer service centre.
-
Page 24: Troubleshooting
TROUBLESHOOTING Below is a list of some of the possible malfunctions. If the problem cannot be resolved as described, contact Customer Services. PROBLEM POSSIBLE CAUSE REMEDY The coffee is not hot. The cups were not preheated. Warm the cups by rinsing them with hot water (Please note: you can use the hot water function). - Page 25 PROBLEM POSSIBLE CAUSE REMEDY At the end of descaling, the appliance During the two rinse cycles, the water Follow the instructions displayed by the appli- requests a third rinse tank (A17) has not been filled to the ance, but first empty the drip tray (A15) to avoid MAX level the water overflowing.
Need help?
Do you have a question about the ECAM37X.95 and is the answer not in the manual?
Questions and answers