
Related Manuals for ZANKER KOU10412XB


Summary of Contents for ZANKER KOU10412XB
- Page 1 Benutzerin‐ Notice d'utili‐ User Manual formation sation Backofen Oven Four KOU10412XB...
-
Page 2: Table Of Contents
Änderungen vorbehalten. BESUCHEN SIE UNSERE WEBSITE, UM: Anwendungshinweise, Prospekte, Informationen zu Fehlerbehebung, Service und Reparatur zu erhalten: www.zanker.de/support Sicherheitshinweise Lesen Sie vor der Montage und dem Gebrauch des Geräts zuerst die Bedienungsanleitung. Bei Verletzungen oder Schäden infolge nicht ordnungsgemäßer Montage oder Verwendung übernimmt der Hersteller keine Haftung. - Page 3 WARNUNG: Halten Sie Kinder und Haustiere von dem Gerät fern, wenn • es in Betrieb oder in der Abkühlphase ist. Die zugänglichen Geräteteile werden beim Betrieb sehr heiß. Falls Ihr Gerät mit einer Kindersicherung ausgestattet ist, empfehlen wir, • diese einzuschalten. Kinder dürfen keine Reinigung und Wartung des Geräts ohne •...
-
Page 4: Sicherheitsanweisungen
Sicherheitsanweisungen Montage Tiefe bei geöffneter Tür 1007 mm WARNUNG! Die Montage des Geräts darf nur von einer qualifizierten Fachkraft Mindestgröße der Belüf- 560x20 mm durchgeführt werden. tungsöffnung. Öffnung auf der Rückseite unten • Entfernen Sie das gesamte Verpackungsmaterial. • Montieren Sie ein beschädigtes Gerät nicht und Befestigungsschrauben 4x25 mm benutzen Sie es nicht. - Page 5 • Falls die Steckdose lose ist, schließen Sie den Netzstecker nicht an. Anschluss an die Klemmleiste • Ziehen Sie nicht am Netzkabel, wenn Sie das Gerät von der Stromversorgung trennen möchten. Ziehen Sie stets am Netzstecker. 1 2 3 4 5 •...
- Page 6 • Verwenden Sie das Gerät nicht als Arbeits- oder • Gehen Sie beim Aushängen der Tür vorsichtig vor. Abstellfläche. Die Tür ist schwer! • Öffnen Sie die Gerätetür vorsichtig. Die Verwendung • Reinigen Sie das Gerät regelmäßig, um eine von Zutaten mit Alkohol kann eine Mischung aus Verschlechterung des Oberflächenmaterials zu Alkohol und Luft verursachen.
-
Page 7: Montage
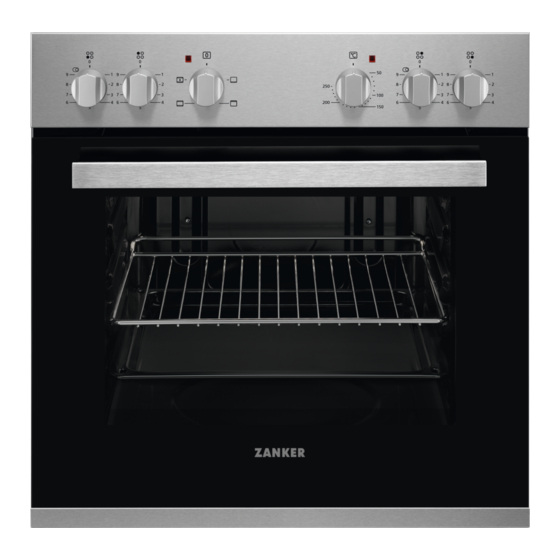
Montage Montage WARNUNG! Siehe Kapitel Sicherheitshinweise. min. 550 min. 560 Befestigung des Ofens am Möbel Gerätebeschreibung Gesamtansicht Bedienfeld Kochfeld-Einstellknöpfe Betriebskontrolllampe/-symbol Einstellknopf für die Ofenfunktionen Einstellknopf (für die Temperatur) Temperaturanzeige / -symbol Lüftungsöffnungen für den Kühlventilator Heizelement Lampe Garraumvertiefung - Behälter für Aqua- Reinigungsfunktion Einschubebenen... -
Page 8: Bedienfeld
Zubehör • Backblech Für Kuchen und Plätzchen. • Kombirost Für Kochgeschirr, Kuchenformen, Braten. Bedienfeld Kochzonen-Einstellknöpfe WARNUNG! Siehe Sicherheitshinweise in der Gebrauchsanleitung des Kochfelds. Sie können das Kochfeld mit den Einstellknöpfen für die Kochzonen bedienen. Kochstufen 1. Drehen Sie den Knopf im Uhrzeigersinn auf die Stellung 9. -
Page 9: Täglicher Gebrauch
Entfernen Sie die Innenausstattung aus dem Back- Stellen Sie die Höchsttemperatur für folgende Funk- ofen. tion ein: Feuchten Sie ein weiches Tuch mit warmem Was- Zeit: 1 Std. ser und etwas mildem Reinigungsmittel an, und rei- Stellen Sie die Höchsttemperatur für folgende Funk- nigen Sie damit den Backofen und das Zubehör. -
Page 10: Verwendung Des Zubehörs
Verwendung des Zubehörs Einsetzen des Zubehörs WARNUNG! Siehe Kapitel Sicherheitshinweise. Kombirost: Schieben Sie den Rost zwischen die Führungs- schienen der Einhängegitter mit den Füßen nach unten zeigend. Backblech: Schieben Sie das Backblech zwischen die Füh- rungsstäbe der Einhängegitter. Zusatzfunktionen Kühlgebläse führen. - Page 11 Die Funktion Ober-/Unterhitze bei Standardtemperatur Garzeiten ist ideal zum Brotbacken. Die Garzeiten hängen von der Art des Garguts, seiner Konsistenz und der Menge ab. Garen von Fleisch und Fisch Lassen Sie das Fleisch vor dem Anschneiden etwa 15 Beobachten Sie den Garfortschritt. Finden Sie heraus, Minuten ruhen, damit der Fleischsaft nicht ausläuft.
- Page 12 (°C) (Min.) Englischer Sandwich- Backform auf Kombirost 35 - 45 kuchen à la Victoria Fisch, pochiert, 0,3 Backblech oder tiefes Blech 35 - 45 Fisch, 0,2 kg Backblech oder tiefes Blech 35 - 45 Fischfilet, 0,3 kg Pizzapfanne auf Kombirost 35 - 45 Fleisch, pochiert, Backblech oder tiefes Blech...
-
Page 13: Reinigung Und Pflege
(°C) (Min.) Apfelku- Ober-/Unter- Kombirost 80 - 120 chen, 2 hitze Formen à Ø 20 cm Biskuit, Ober-/Unter- Kombirost 35 - 45 Kuchen- hitze form Ø 26 Mürbeteig- Ober-/Unter- Back- 20 - 35 Backofen 10 Minuten gebäck hitze blech vorheizen. Toast, 4 - 6 Grill Kombirost... - Page 14 Reinigen Sie den Garraum nach jedem Gebrauch. Fettansammlungen oder andere Speisereste könnten einen Brand verursachen. Es kann sich Feuchtigkeit im Ofen oder an den Glasscheiben der Tür niederschlagen. Um die Kondensation zu reduzieren, schalten Sie den Backofen immer 10 Minuten vor dem Garen ein. Täglicher Ge- Lassen Sie die Speisen nicht länger als 20 Minuten im Backofen stehen.
- Page 15 Schritt 3 Schließen Sie die Backofentür halb Schritt 4 Legen Sie die Backofentür auf eine sta- bis zur ersten Raststellung. Anschlie- bilen Fläche und lösen Sie das Verrie- ßend heben und ziehen Sie die Tür gelungssystem, um die innere Glas- nach vorn aus der Aufnahme heraus.
-
Page 16: Fehlersuche
Rahmen des Garraums. Entfernen Sie das Typenschild nicht vom Garraum. Wir empfehlen Ihnen, die Daten hier zu notieren: Modell (MOD.): ......... Produktnummer (PNC) ......... Seriennummer (S.N.) ......... Energieeffizienz Produktinformationen und Produktdatenblatt* Herstellername Zanker Modellidentifikation KOU10412XB 944068058 Energieeffizienzindex 95.1 Energieeffizienzklasse... -
Page 17: Umwelttipps
Energieverbrauch bei Standardbeladung, Ober-/Unterhitze 0.77 kWh/Programm Anzahl der Garräume Wärmequelle Strom Fassungsvermögen 63 l Backofentyp Unterbau-Backofen Gewicht 25.7 kg * Für die Europäische Union gemäß EU-Richtlinien 65/2014 und 66/2014. Für die Republik Weißrussland gemäß STB 2478-2017, Anhang G; STB 2477-2017, Anlagen A und B. Für die Ukraine gemäß... -
Page 18: Safety Information
Subject to change without notice. VISIT OUR WEBSITE TO: Get usage advice, brochures, trouble shooter, service and repair information: www.zanker.de/support Safety information Before the installation and use of the appliance, carefully read the supplied instructions. The manufacturer is not responsible for any injuries or damage that are the result of incorrect installation or usage. -
Page 19: Safety Instructions
General Safety Only a qualified person must install this appliance and replace the cable. • Do not use the appliance before installing it in the built-in structure. • Disconnect the appliance from the power supply before carrying out any • maintenance. - Page 20 • Connect the mains plug to the mains socket only at the end of the installation. Make sure that there is Width of the front of the 594 mm access to the mains plug after the installation. appliance • If the mains socket is loose, do not connect the Width of the back of the 558 mm mains plug.
- Page 21 • Do not let sparks or open flames to come in contact with the appliance when you open the door. Connecting to terminal board • Do not put flammable products or items that are wet with flammable products in, near or on the appliance.
-
Page 22: Installation
information about the operational status of the • Contact your municipal authority for information on appliance. They are not intended to be used in other how to dispose of the appliance. applications and are not suitable for household room • Disconnect the appliance from the mains supply. -
Page 23: Product Description
Product description General overview Control panel Knobs for the hob Power lamp / symbol Knob for the heating functions Control knob (for the temperature) Temperature indicator / symbol Air vents for the cooling fan Heating element Lamp Cavity embossment - Aqua cleaning container Shelf positions Accessories •... -
Page 24: Daily Use
Before first use The oven can emit an odour and smoke during preheating. Make sure that the room is ventilated. Step 1 Step 2 Clean the oven Preheat the empty oven Remove all accessories from the oven. Set the maximum temperature for the function: Clean the oven and the accessories with a soft Time: 1 h. -
Page 25: Using The Accessories
The oven door should be closed during cooking so that For the cooking instructions refer to "Hints and tips" the function is not interrupted and the oven operates chapter, Conventional Baking. For general energy with the highest energy efficiency possible. saving recommendations refer to "Energy Efficiency"... - Page 26 If you cannot find the settings for a special recipe, look smoke condensation, add water each time after it dries for the similar one. Baking cakes Cooking times Do not open the oven door before 3/4 of the set cooking Cooking times depend on the type of food, its time is up.
- Page 27 (°C) (min) Victoria sandwich baking dish on wire shelf 35 - 45 Poached fish, 0.3 kg baking tray or dripping pan 35 - 45 Whole fish, 0.2 kg baking tray or dripping pan 35 - 45 Fish fillet, 0.3 kg pizza pan on wire shelf 35 - 45 Poached meat, 0.25...
-
Page 28: Care And Cleaning
(°C) (min) Sponge Conventional Wire shelf 35 - 45 cake, cake Cooking mould Ø26 Short Conventional Baking 20 - 35 Preheat the oven for bread Cooking tray 10 minutes. Toast, 4 - 6 Grill Wire shelf max. 2 - 4 minutes first Preheat the oven for pieces side;... - Page 29 Clean all accessories after each use and let them dry. Use a soft cloth with warm water and a mild detergent. Do not clean the accessories in a dishwasher. Do not clean the non-stick accessories using abrasive cleaner or sharp-edged objects. Accessories How to use: Aqua Clean Step 3...
-
Page 30: Troubleshooting
Step 5 Turn the fasteners by 90° and remove Step 6 First lift carefully and then remove the them from their seats. glass panel. 90° Step 7 Clean the glass panels with water and soap. Dry the glass panels carefully. Do not clean the glass panels in the dishwasher. -
Page 31: Energy Efficiency
Serial number (S.N.) ......... Energy efficiency Product Information and Product Information Sheet* Supplier's name Zanker Model identification KOU10412XB 944068058 Energy Efficiency Index 95.1 Energy efficiency class Energy consumption with a standard load, conventional mode 0.77 kWh/cycle Number of cavities Heat source... -
Page 32: Environmental Concerns
Energy saving before the end of cooking. The residual heat inside the oven will continue to cook. The oven has features which help you Use the residual heat to warm up other dishes. save energy during everyday cooking. Keep food warm Make sure that the oven door is closed when the oven Choose the lowest possible temperature setting to use operates. -
Page 33: Information Sur La Sécurité
VISITEZ NOTRE SITE WEB POUR : Obtenir des conseils d’utilisation, des brochures, un dépanneur, des informations sur le service et les réparations : www.zanker.de/support Information sur la sécurité Avant d'installer et d'utiliser cet appareil, lisez soigneusement les instructions fournies. Le fabricant ne pourra être tenu pour responsable des blessures et dégâts résultant d'une mauvaise installation ou utilisation. -
Page 34: Consignes De Sécurité
Si l'appareil est équipé d'un dispositif de sécurité enfants, nous vous • recommandons de l'activer. Le nettoyage et l'entretien par l'usager ne doivent pas être effectués par • des enfants sans surveillance. Sécurité générale Cet appareil doit être installé et le câble remplacé uniquement par un •... - Page 35 • Installez l'appareil dans un lieu sûr et adapté répondant aux exigences d'installation. Type Puissance maximale • Les dimensions du meuble de cuisine et de la niche d'encastrement doivent être appropriées. KAV6041XXK 6500 W • Respectez l'espacement minimal requis par rapport aux autres appareils et éléments.
- Page 36 • La prise de la table de cuisson se trouve en haut du meuble du four. La table de cuisson possède des fils Types de câbles compatibles pour l'installation ou de raccordement pour les zones de cuisson et le le remplacement pour l’Europe : câble de terre.
- Page 37 – ne versez pas d'eau directement dans • Concernant la/les lampe(s) à l’intérieur de ce produit l'appareil chaud. et les lampes de rechange vendues séparément : – ne conservez pas de plats et de nourriture Ces lampes sont conçues pour résister à des humides dans l'appareil après avoir terminé...
-
Page 38: Installation
Installation Encastrement AVERTISSEMENT! Reportez-vous aux chapitres concernant la sécurité. min. 550 min. 560 Fixation du four au meuble Description de l'appareil Vue d’ensemble Bandeau de commande Manettes de la table de cuisson Voyant / symbole de mise sous tension Manette de sélection des modes de cuisson Manette de commande (de la température) Indicateur / symbole de température Fentes d’aération du ventilateur de refroidissement... -
Page 39: Bandeau De Commande
Accessoires • Plateau de cuisson Pour les gâteaux et biscuits. • Grille métallique Pour les plats de cuisson, les moules à gâteaux, les rôtis. Bandeau de commande Manettes des zones de cuisson AVERTISSEMENT! Reportez-vous au chapitre « Sécurité » de la notice d’utilisation de la table de cuisson. -
Page 40: Utilisation Quotidienne
Utilisation quotidienne AVERTISSEMENT! Reportez-vous aux chapitres concernant la sécurité. Étape 2 Tournez la manette pour sélectionner la température. Comment régler : Mode de cuisson Étape 3 Une fois la cuisson terminée, tournez les manettes sur la position Arrêt pour Étape 1 Tournez la manette des modes de cuis- éteindre le four. -
Page 41: Utilisation Des Accessoires
Utilisation des accessoires Insertion des accessoires AVERTISSEMENT! Reportez-vous aux chapitres concernant la sécurité. Grille métallique: Poussez la grille entre les barres de guidage des supports de grille et assurez-vous que les pieds sont orientés vers le bas. Plateau de cuisson: Poussez la plaque entre les rails du support de gril- Fonctions supplémentaires Ventilateur de refroidissement... - Page 42 Pour éviter qu'une trop grande quantité de fumée ne se Au départ, surveillez la cuisson lorsque vous cuisinez. forme dans le four, ajoutez de l'eau dans le plat à rôtir. Ainsi, vous trouverez les meilleurs réglages (fonction, Pour éviter que la fumée ne se condense, ajoutez à temps de cuisson, etc.) pour vos ustensiles, vos nouveau de l'eau dans le plat à...
- Page 43 (°C) (min) Fond de tarte en gé- moule à tarte sur une grille 20 - 30 noise métallique Génoise Victoria Plat de cuisson sur la grille 35 - 45 métallique Poisson poché, 0,3 Plateau de cuisson ou plat à 35 - 45 rôtir Poisson entier, 0,2 kg Plateau de cuisson ou plat à...
-
Page 44: Entretien Et Nettoyage
(°C) (min) Petits gâ- Chauffage Plateau 20 - 30 teaux, 20 Haut/ Bas de cuis- par pla- teau Tourte aux Chauffage Grille mé- 80 - 120 pommes, Haut/ Bas tallique 2 moules Ø20 cm Génoise, Chauffage Grille mé- 35 - 45 moule à... - Page 45 Nettoyez la cavité après chaque utilisation. L’accumulation de graisse ou d’autres résidus peut provoquer un incendie. De l'humidité peut se déposer dans l'enceinte du four ou sur les vitres de la porte. Pour diminuer la condensation, laissez fonctionner le four pendant 10 minutes avant la cuisson. Ne conservez Utilisation quo- pas les aliments dans le four pendant plus de 20 minutes.
- Page 46 Étape 5 Étape 6 Faites pivoter les fixations de 90° et Soulevez doucement puis sortez le retirez-les de leurs logements. panneau de verre. 90° Étape 7 Nettoyez les panneaux de verre avec de l'eau savonneuse. Séchez soigneusement les panneaux de ver- re.
-
Page 47: Dépannage
Numéro de série (S.N.) ......... Rendement énergétique Informations produit et Fiche d’informations produit* Nom du fournisseur Zanker Identification du modèle KOU10412XB 944068058 Index d'efficacité énergétique 95.1 Classe d’efficacité énergétique Consommation d'énergie avec charge standard et mode traditionnel 0.77 kWh/cycle Nombre de cavités... -
Page 48: En Matière De Protection De L'environnement
Source de chaleur Électricité Volume 63 l Type de four Four encastrable sous un plan de travail Masse 25.7 kg * Pour l’Union européenne conformément aux Règlements UE 65/2014 et 66/2014. Pour la République de Biélorussie conformément à STB 2478-2017, Annexe G ; STB 2477-2017, Annexes A et B. Pour l’Ukraine conformément à... - Page 52 www.electrolux.com/shop 867368535-A-262021...
Need help?
Do you have a question about the KOU10412XB and is the answer not in the manual?
Questions and answers