Table of Contents

Related Manuals for Euroboor EBM.360


Summary of Contents for Euroboor EBM.360
- Page 1 Operators manual V 1.0 EN Cordless magnetic drilling machine EBM.360 Serial number: Date of purchase: Don’t forget to register your machine at: www.euroboor.com/register [ only when registered you benefit from extended warranty ]...
- Page 2 Congratulations on your purchase of the Euroboor EBM.360 Cordless Magnetic Drilling Machine. Your model is designed to produce superior holes quickly and efficiently. Through years of experience, constant innovation and development, Euroboor BV is committed to provide you with metal cutting tools and products to help you be more productive.
-
Page 3: Table Of Contents
Table of contents 1. Safety 1.1 General safety instructions 1.2 Specific safety information 2. Description 2.1 Intended use 2.2 Description and features 2.3 Box contents 2.4 Serial number 2.5 Technical data 2.6 Symbols 2.7 Environmental 3. Preparation & adjustment 3.1 Assembly 3.2 Prior to use 4. -
Page 4: Safety
1. Safety 1.1 General safety instructions Do not use this power tool before you have thoroughly read and completely understood this Instruction Manual and the “General Safety Instructions”, including the figures, specifications, safety regulations and the signs indicating DANGER, WARNING and CAUTION. WARNING: When using electrical tools basic safety precautions should always be followed to reduce the risk of fire, electrical shock and personal injury including following. - Page 5 If damaged, have the tool serviced before using. Many accidents are caused by poorly maintained tools. 9. Use only accessories that are recommended by Euroboor for your model. Accessories that may be suitable for one machine, may become hazardous when used on another machine.
-
Page 6: Specific Safety Information
1.2 Specific safety information • Keep your fingers well out of the drill area; • Avoid touching the drilled core that is automatically ejected by the centering pin when the working procedure is finished. Contact with the core when it is hot, or if it falls, can cause personal injuries;... -
Page 7: Description
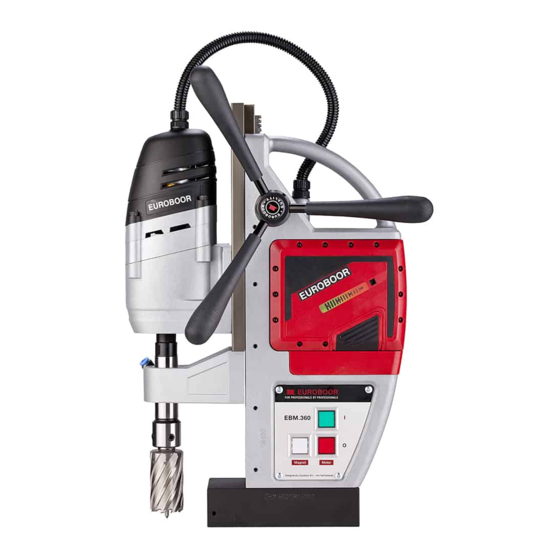
EUROBOOR. The magnetic drilling machine can be used horizontally, vertically or overhead. 2.2 Description and features... -
Page 8: Box Contents
2.3 Box contents 1 Carrying case 1 Magnetic drilling machine 1 Battery pack 37 V / 2.6 Ah 1 Instruction manual 3 Handles 1 Drill guard 1 Lubrication system 1 Bottle cutting oil 1 Allen Key 2.5 mm 1 Allen Key 4 mm 1 Allen Key 5 mm 1 Safety chain/strap 1 Set of ear plugs... -
Page 9: Technical Data
2.5 Technical data EBM.360 ANNULAR CUTTERS Ø 12 - 36 mm Ø 7/16 – 1 7/16” TWIST DRILLS Ø 1 - 13 mm Ø 1/16 – 1/2” THREADING COUNTERSINKING Ø 10 – 40 mm Ø 3/8 – 1 9/16” LENGTH 297 mm 11 11/16”... -
Page 10: Symbols
2.6 Symbols Symbol Term, meaning Explanation Be absolutely sure to read the enclosed Read documentation documentation such as the Instruction Manual and the General Safety Instructions. Wear ear protection Use ear protection during operation. Wear eye protection Use eye-protection during operation. Danger/warning/caution Observe the information in the adjacent text! European conformity symbol... -
Page 11: Environmental
2.7 Environmental Separate collection. This product must not be disposed of with normal household waste. Separate collection of used products and packaging allows materials to be recycled and used again. Re-use of recycled materials helps prevent environmental pollution and reduces the demand for raw materials. -
Page 12: Preparation & Adjustment
3. Preparation & adjustment 3.1 Assembly WARNING: To reduce the risk of injury, turn unit off and disconnect machine from power source before installing and removing accessories, before adjusting or changing set- ups or when making repairs. Be sure all switches are in the OFF position. An accidental start-up can cause injury. - Page 13 3. Fill the container with cutting fluid; 4. Screw the cap back on. WARNING: Do not use the lubrication system in vertical or overhead drilling applications. Instead use Euroboor cutting paste FITTING THE SAFETY CHAIN 1. Pass the safety chain through the frame grip opening 2.
-
Page 14: Prior To Use
Please make sure that the contacting surface for the magnet is level, clean and rust-free. Remove any varnish or primer. When working on materials that are not magnetizable, suitable fixation devices, obtainable as accessories from EUROBOOR, e. g. suction plate, vacuum plate or pipe-drilling device must be used. - Page 15 KEEP THE MACHINE CLEAR FROM MOISTURE AT ALL TIMES TO PROTECT THE MACHINE, YOURSELF AND OTHERS.
-
Page 16: Using The Machine
4. Using the machine WARNING: Always observe the safety instructions and applicable regulations. WARNING: To reduce the risk of serious personal injury, turn tool off and disconnect tool from power source before making any adjustments or removing/installing attachments or accessories. 4.1 Control panel THE CONTROL PANEL The control panel on your magnetic drilling machine is designed for maximum operating facility and... -
Page 17: Spindle
4.2 Spindle This machine is equipped with a detachable tool holder (spindle) with bottom ¾” (19,05mm) Weldon connection. To accommodate a drill chuck (either directly to the gearbox output shaft or with adapter), the spindle can be detached. 1. Hold the gearbox output shaft in place with a narrow 18 mm spanner 2. -
Page 18: Switching Motor On And Off
CAUTION: EUROBOOR EBM.360 does not allow turning on the motor if LED light in the Magnet Switch alternately lights up RED/GREEN. If turning on the machine is possible while this happens, please return the machine to EUROBOOR or any authorized dealer. -
Page 19: Safety Rules 37V/2.6 Ah Lithium -Ion Battery Pack
Make sure to use only suitable cutting oil or fluid. Euroboor offers a wide range of cutting lubricants for all tool and material combinations. Proper cooling will help you create better and faster results, and extend the lifetime of your tools. - Page 20 BATTERY PROTECTION FEATURES EUROBOOR 37V lithium-ion batteries are designed with features that protect the lithium-ion cells and maximize battery life. Under some operating conditions, these built-in features may cause the battery and the tool it is powering to act differently from nickel-cadmium batteries.
- Page 21 Do not disassemble battery pack and attempt to replace the batteries. Handling of these batteries, especially when wearing rings and jewelry, could result in a serious burn. To obtain the longest possible battery life from EUROBOOR lithium-ion batteries, we suggest the following: •...
-
Page 22: Battery Charger
SIGNALS ON THE MACHINE Signals well-functioning magnetic drilling machine • When the EBM.360 magnetic drilling machine is well positioned on the work piece, press the magnet (white) switch to on the magnet. The LED will flash 2x GREEN and then remain lit GREEN. -
Page 23: Working With Operation Tools
5. Working with operation tools 5.1 Annular cutters Annular cutters only cut material at the periphery of the hole, rather than converting the entire hole to shavings. As a result, the energy required to make a hole is lower than for a twist drill. When drilling with an annular cutter, it is not necessary to drill a pilot hole. - Page 24 A continuous, non-discoloured iron swarf is a sign of correct drilling speed and a well- cooled, sharp cutter. Let the cutter do the job and give it time to cut the metal !!! For a hole 32 mm/ 1-1/4” in a 25 mm (1”) steel plate, EUROBOOR recommends one minute drilling time.
-
Page 25: Twist Drills
5.2 Twist drills 1. Remove the spindle as described in chapter 4.2 2. Attach a drill chuck to the gearbox output shaft either directly or with an (extension) adapter 3. Precisely mark the center of the hole, and use the tip of the twist drill to position the machine and in the correct position, with the tip of the twist drill to meet the marked center of the hole. -
Page 26: Maintenance
6. Maintenance Your EUROBOOR power tool has been designed to operate over a long period of time with a minimum of maintenance. Continuous satisfactory operation depends upon proper tool care and regular cleaning. CAUTION: To reduce the risk of injury, turn unit off and disconnect machine from power source before installing and removing accessories, before adjusting or changing set- ups or when making repairs. - Page 27 Repair, modification and inspection of Euroboor Magnetic drilling machines must be done by EUROBOOR or an EUROBOOR authorized dealer. The spare parts list will be helpful if presented with the machine to the Euroboor dealer for service when requesting repair or other maintenance.
-
Page 28: Trouble Shooting
7. Trouble shooting Magnet and motor do not - The magnet switch is not connected to the power supply function - Damaged or defective wiring - Defective fuse - Defective magnet switch - Defective Control Unit - Defective power supply Magnet does function, the motor - Damaged or defective wiring does not work... - Page 29 Insufficient magnetic force - Damaged or defective wiring - Bottom of magnet not clean and dry - Bottom of magnet not flat - Work piece is not bare metal - Work piece is not clean or flat - Work piece is less than 10 mm (too thin) - Defective Control Unit - Defective magnet Frame under voltage...
-
Page 30: Exploded View & Spare Part List
8. Exploded view & spare part list 8.1 Exploded views EBM.360... -
Page 31: Spare Part Lists
360.1058 Magnet switch 27 360.1028 Rack 360.1059 Wire connector + 28 020.0081 End screw BKVZ M6 x 16 PP.F-EBM.360/2019 Front panel EBM.360/2019 29 020.0077 End plate 020.0101 Panel screw BKVZ M4 x 8 360.1063 Screw M3 x 8 360.1030 Rail set Aluminium (L/R) L-profile 360.1064... -
Page 32: Wiring Diagram
8.3 Wiring diagram EBM.360...
Need help?
Do you have a question about the EBM.360 and is the answer not in the manual?
Questions and answers