
Related Manuals for Euroboor ECO.36


Summary of Contents for Euroboor ECO.36
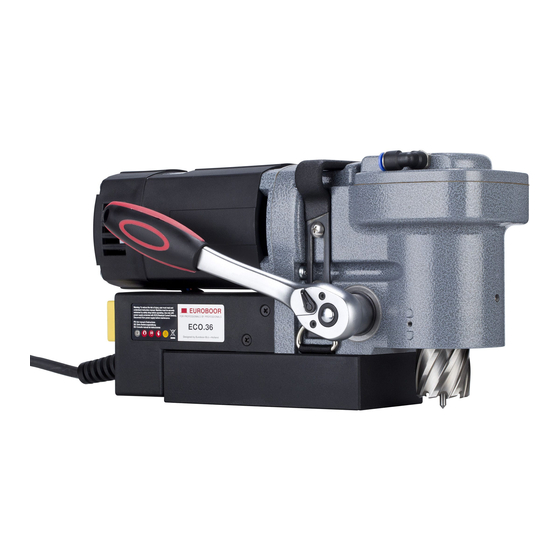
- Page 1 Operators manual version 1.0.1 EN Magnetic drilling machine ECO.36 Serial no.: _______________________ Date of purchase: _______________________...
- Page 2 Congratulations on your purchase of the Euroboor ECO.36 portable magnetic drilling machine. Your model is designed to produce superior holes quickly and efficiently. Through years of experience, constant innovation and development, Euroboor is committed to provide you with metal cutting tools and products to help you be more productive.
-
Page 3: Table Of Contents
Table of contents 1. Safety 1.1 General safety instructions 1.2 Specific safety information 2. Description 2.1 Intended use 2.2 Description and features 2.3 Box contents 2.4 Serial number 2.5 Technical data 2.6 Symbols 2.7 Environmental 3. Preparation & adjustment 3.1 Assembly 3.2 Prior to use 4. -
Page 4: Safety
1. Safety 1.1 General safety instructions Do not use this power tool before you have thoroughly read and completely understood this Instruction Manual and the “General Safety Instructions”, including the figures, specifications, safety regulations and the signs indicating DANGER, WARNING and CAUTION. WARNING: When using electrical tools basic safety precautions should always be followed to reduce the risk of fire, electrical shock and personal injury including following. - Page 5 If damaged, have the tool serviced before using. Many accidents are caused by poorly maintained tools. 9. Use only accessories that are recommended by Euroboor for your model. Accessories that may be suitable for one machine, may become hazardous when used on another machine.
-
Page 6: Specific Safety Information
1.2 Specific safety information • Keep your fingers well out of the drill area; • Avoid touching the drilled core that is automatically ejected by the centering pin when the working procedure is finished. Contact with the core when it is hot, or if it falls, can cause personal injuries;... -
Page 7: Description
This magnetic drilling machine is intended for commercial use as a drilling machine for drilling materials with a magnetizable surface using annular cutters and twist drills in a weather-protected environment using the application tools and accessories recommended by EUROBOOR. The magnetic drilling machine can be used horizontally, vertically or overhead. -
Page 8: Box Contents
2.3 Box contents 1 Carrying case 1 Magnetic drilling machine 1 Instruction manual 1 Ratchet feed handle 1 Drill guard + 2 thumbscrews 1 Oil tank with hose 1 Bottle of cutting oil 1 Allen key (3) 1 Safety strap 1 Set of ear plugs 1 Pair of safety glasses 1 Pair of gloves... -
Page 9: Technical Data
2.5 Technical data ECO.36 ANNULAR CUTTERS Ø 12 – 36 mm TWIST DRILLS Ø 1 – 14 mm (Weldon shank) THREADING COUNTERSINKING LENGTH 310 mm WIDTH 135 mm HEIGHT 165 mm STROKE 40 mm WEIGHT 10,3 kg MAGNET 160 x 80 x 37 mm (L x W x H) -
Page 10: Symbols
2.6 Symbols Symbol Term, meaning Explanation Be absolutely sure to read the enclosed Read documentation documentation such as the Instruction Manual and the General Safety Instructions. Wear ear protection Use ear protection during operation. Wear eye protection Use eye-protection during operation. Danger/warning/caution Observe the information in the adjacent text! European conformity symbol... -
Page 11: Environmental
2.7 Environmental Separate collection. This product must not be disposed of with normal household waste. Separate collection of used products and packaging allows materials to be recycled and used again. Re-use of recycled materials helps prevent environmental pollution and reduces the demand for raw materials. -
Page 12: Preparation & Adjustment
3. Preparation & adjustment 3.1 Assembly WARNING: To reduce the risk of injury, turn unit off and disconnect machine from power source before installing and removing accessories, before adjusting or changing set- ups or when making repairs. Be sure all switches are in the OFF position. An accidental start-up can cause injury. - Page 13 4. To release the ratchet feed handle from the machine, press the release button on the ratchet feed handle (image 2-2, ② and image 2-3, ②) and pull it away from the machine [image 2-3] 5. It is possible to position the ratchet feed handle on either side of the machine (image 2-4). Method of fitting and releasing (steps 1.
- Page 14 MOUNTING THE DRILL GUARD The drill guard protects against chippings and accidental contact and must always be mounted during operation. 1. Place the drill guard in front of the machine. Make sure the long slots on the side clip over the small humps protruding from the gearbox body.
- Page 15 FITTING THE LUBRICATION SYSTEM The lubrication system can be used for horizontal drilling applications (the drill being used horizontally). 1. The coolant bottle is equipped with an extra long hose. This hose can be cut to the desired length. 2. The coolant bottle is equipped with an magnet at the back. This makes it possible to place the coolant bottle against any ferro product.
- Page 16 3. Connect the coolant hose to the drilling by pushing it firmly into the connector on the machine (image 2-7) [image 2-7] 4. To disconnect the coolant hose, press the blue ring on the connector and gently pull out the hose...
- Page 17 FITTING THE SAFETY BELT The safety belt should always be used during operation. Use of the safety belt limits the risk of personal injury when for some reason magnets comes loose from the workpiece (such as loss of power supply). In no way does the use of the safety belt clear the operator from following other safety and operating instructions.
-
Page 18: Prior To Use
Please make sure that the contacting surface for the magnet is level, clean and rust-free. Remove any varnish or primer. When working on materials that are not magnetizable, suitable fixation devices, obtainable as accessories from EUROBOOR, e. g. suction plate, vacuum plate or pipe-drilling device must be used. -
Page 19: Using The Machine
4. Using the machine WARNING: Always observe the safety instructions and applicable regulations. WARNING: To reduce the risk of serious personal injury, turn tool off and disconnect tool from power source before making any adjustments or removing/installing attachments or accessories. 4.1 Carrying handle This machine is designed to be carried by hand only, with the use of the integrated retractable carrying handle. -
Page 20: Control Panel
4.2 Control panel The control panel on your magnetic drilling machine is designed for maximum operating facility and safety. 1. Magnet switch 2. Motor switch 3. Power cable... -
Page 21: Electromagnet
Make sure that the magnet attaches tightly to the work piece before turning on the motor unit of the magnetic drilling machine. Euroboor magnets have 2 coils; make sure that both coils are in contact with the workpiece. Do not connect any other machines to the electrical outlet the machine is... -
Page 22: Switching Motor On And Off
WARNING: Do not use the lubrication system in vertical or overhead drilling applications. Instead use Euroboor cutting paste Make sure to use only suitable cutting oil or fluid. Euroboor offers a wide range of cutting lubricants for all tool and material combinations. Proper cooling will help you create better and faster results,... -
Page 23: Working With Operating Tools
5. Working with operating tools 5.1 Annular cutters Annular cutters only cut material at the periphery of the hole, rather than converting the entire hole to shavings. As a result, the energy required to make a hole is lower than for a twist drill. When drilling with an annular cutter, it is not necessary to drill a pilot hole. - Page 24 The white dot indicates the location of the cutter lock ALWAYS MAKE SURE THE POWER PLUG IS DISCONNECTED! Line-up one of the flats on the cutter shank with the white dot (image 3-2, ①) Rotate the lock ring in counterclockwise direction to open up the tool holder and hold the lock ring.
- Page 25 8. Apply a regular pressure while drilling. The drilling performance does not improve by putting more pressure on the tool. Too much pressure will overload the motor and your annular cutter will be worn sooner. A continuous, non-discoloured iron swarf is a sign of correct drilling speed and a well- cooled, sharp cutter.
-
Page 26: Twist Drills
5.2 Twist drills This magnetic drilling machine can be used with Weldon shank twist drills. For fitment and removal, follow instructions as provided in chapter [5.1 Annular cutters]. -
Page 27: Maintenance
6. Maintenance Your EUROBOOR power tool has been designed to operate over a long period of time with a minimum of maintenance. Continuous satisfactory operation depends upon proper tool care and regular cleaning. CAUTION: To reduce the risk of injury, turn unit off and disconnect machine from power source before installing and removing accessories, before adjusting or changing set- ups or when making repairs. - Page 28 Repair, modification and inspection of Euroboor Magnetic drilling machines must be done by EUROBOOR or an EUROBOOR authorized dealer. The spare parts list will be helpful if presented with the machine to the Euroboor dealer for service when requesting repair or other maintenance.
- Page 29 Euroboor machines are constantly being improved and modified to incorporate the latest technological advancements. Accordingly, some parts (i.e. part numbers and/or design) may be changed without prior notice. Also, due to Euroboor’s continuing program of research and development, the specifications of machines are subject to change without prior notice.
-
Page 30: Trouble Shooting
7. Trouble shooting Magnet and motor do not - The magnet switch is not connected to the power supply function - Damaged or defective wiring - Defective fuse - Defective magnet switch - Defective Control Unit - Defective power supply Magnet does function, the motor - Damaged or defective wiring does not work... - Page 31 Frame under voltage - Damaged / defective wiring - Defective magnet - Motor seriously dirty Fuse blows when magnet switch is - Damaged or defective wiring turned on - Wrong value fuse - Defective magnet switch - Defective Control Unit - Defective magnet Fuse blows when motor is started - Damaged or defective wiring...
-
Page 32: Exploded View & Spare Part List
8. Exploded view & spare part list 8.1 Exploded views... -
Page 35: Spare Part Lists
8.2 Spare part lists Article Description Description Article number number Connector KSP.S Handle 036.0152 Torx Screw 036.0043 Spanner 036.0026 End cover 032.0111 Screw 360.1024 Screw 032.0136 Screw 020.0146 Carbon brush holder spring 032.0141 Magnet 036.1005 Screw 020.0181A Fuse 020.0017 Housing 036.1012 Control unit incl. -
Page 36: Wiring Diagrams
8.3 Wiring diagrams... -
Page 37: Certification
CE mark Directives requirements: Product Magnetic drilling machine Model MD3 (ECO.36) Ratings and principal characteristics 220-240V~, 50/60Hz, 1050W, n :700/min, Class 1 Relevant Standard(s) / Specification(s) EN 61029-1:2009 + A11:2010 / Directive(s)
Need help?
Do you have a question about the ECO.36 and is the answer not in the manual?
Questions and answers