Table of Contents
Advertisement
Quick Links
Advertisement
Table of Contents

Related Manuals for Marshall Amplification CV350-10XB


Summary of Contents for Marshall Amplification CV350-10XB
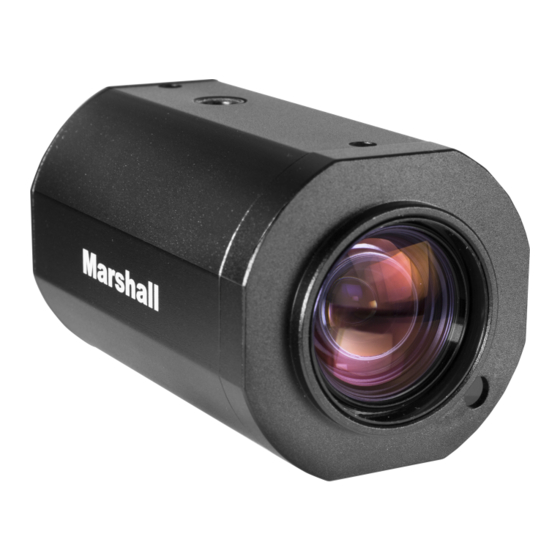
- Page 1 CV350-10XB/10X Operation Manual Compact 10X Autofocus Camera (Full-HD)
-
Page 2: Menu Structure
MENU STRUCTURE PUSH CONTROL INDOOR OUTDOOR MANUAL BLUE: 0~31, RED:0~31 INDOOR, OUTDOOR AUTO MANUAL SHUTTER PRIORITY Mode IRIS PRIORITY BRIGHT CONTROL BRIGHTNESS MANUAL, BRIGHT (0~31), 0~20 (EXPOSURE) IRIS AUTO, MANUAL, 0~20 AGC LIMIT 0~20 SHUTTER AUTO, MANUAL, 1/1~30K DSS(SENS-UP) MANUAL, OFF~1/1 FLICKERLESS OFF, ON AUTO... - Page 3 MENU STRUCTURE D/N LEVEL MARGIN AUTO DWELL TIME NIGHT BURST NIGHT NIGHT BURST D/N LEVEL DWELL TIME IMAGE NIGHT BURST CONTROL COLOR LEVEL 0~20 SHARPNESS 0~20 IMAGE FLIP DEFOG AUTO, MANUAL 3D-DNR OFF, LOW, MIDDLE, HIGH MOTION SHADING GAMMA RESOLUTION USER TITLE ZOOM MAGNIFICATION PRIVACY...
- Page 4 Zoom/Focus & OSD Button MENU On, One Push AF Key Menu On: Press and hold menu key for 2 seconds to display menu. Menu Mode: To select data or exit from menu, press menu key. One Push AF: To adjust focus position, press and release menu key when One Push AF mode is enabled. Focus NEAR: Press and hold right key for continuous optical focus near.
- Page 5 WB CONTROL AWB, ATW, PUSH, INDOOR, OUTDOOR, MANUAL Select WB CONTROL using the UP or DOWN button. You can change between AWB, ATW, PUSH, INDOOR, OUTDOOR, and MANUAL using the LEFT or RIGHT button. AWB: Controls the automatic adjustment of the light source's color temperature to 3,000°K ~ 8,000°K.
- Page 6 AE CONTROL INDOOR, OUTDOOR Select AE CONTROL using the UP or DOWN button. You can change between INDOOR and OUTDOOR using the LEFT or RIGHT button. INDOOR: Select this when the camera is installed indoor. You can select one sub-mode from AUTO, MANUAL, SHUTTER PRIORITY, IRIS PRIORITY, and BRIGHT.
- Page 7 AE CONTROL BRIGHTNESS, IRIS, AGC LIMIT, SHUTTER, DSS, FLICKERNESS You can change the AE CONTROL mode between AUTO, MANUAL, IRIS PRIORITY, SHUTTER PRIOROTY, and BRIGHT using the LEFT or RIGHT button. Select a menu from BRIGHTNESS, IRIS, AGC GAIN LIMIT, SHUTTER, DSS, and FLICKERLESS using the UP or DOWN button.
-
Page 8: Focus Control
FOCUS CONTROL AUTO, MANUAL, PUSH Select FOCUS CONTROL using the UP or DOWN button. You can select FOCUS MODE from AUTO, MANUAL and PUSH using the LEFT or RIGHT button. AUTO: Automatically adjusts the focus position. MANUAL: Manually adjusts the focus position when zoom is changed. PUSH: When this mode is enabled, it will automatically adjusts the focus position only when the zoom is changed. - Page 9 FOCUS CONTROL Select FOCUS CONTROL using the UP or DOWN button. You can select ZOOM SPEED, TELE LIMIT, WIDE LIMIT, FAR END, NEAR END, LENS INITIAL and USER PRESET using the LEFT or RIGHT button. ZOOM SPEED: Set the zoom speed from 00~07. 00 is the slowest zoom speed set value.
- Page 10 BACK LIGHT WDR/BLC Select BACK LIGHT using the UP or DOWN button. You can select WDR/BLC, ACE, and ECLIPSE using the LEFT or RIGHT button. WDR/BLC WDR: Enable user to view both object and background more clearly when background is too bright. WDR-LEVEL: Select the WDR level from 01~04 using the LEFT or RIGHT button.
- Page 11 BACK LIGHT WDR/BLC Select BACK LIGHT using the UP or DOWN button. You can select WDR/BLC, ACE, and ECLIPSE using the LEFT or RIGHT button. ACE (D-WDR): Brightness correction of the dark image area. GAIN: Select the GAIN level from LOW, MIDDLE, and HIGH using the LEFT or RIGHT button.
-
Page 12: Image Control
IMAGE CONTROL DAY/NIGHT Select IMAGE CONTROL using the UP or DOWN button. You can select DAY/NIGHT using the UP or DOWN button. DAY/NIGHT Select the DAY/NIGHT mode of the camera from AUTO, DAY, NIGHT, and EXT using the LEFT or RIGHT button. AUTO: The camera will stay in DAY in a normal environment, but switched to NIGHT mode when ambient illumination become this pre-set level. - Page 13 IMAGE CONTROL DAY/NIGHT Select IMAGE CONTROL using the UP or DOWN button. You can select DAY/NIGHT using the UP or DOWN button. DAY/NIGHT Select the DAY/NIGHT mode of the camera from AUTO, DAY, NIGHT, and EXT using the LEFT or RIGHT button. DAY: The picture is always displayed in color.
- Page 14 IMAGE CONTROL COLOR LEVEL, SHARPNESS IMAGE FLIP, DEFOG Select IMAGE CONTROL using the UP or DOWN button. You can select COLOR LEVEL, SHARPNESS, IMAGE FLIP, and DEFOG using the UP or DOWN button. COLOR LEVEL: Adjust the color level value for a fine color tune. Adjust the color level from 00~20 using the LEFT or RIGHT button.
- Page 15 IMAGE CONTROL 3D-DNR, MOTION SHADING, GAMMA Select IMAGE CONTROL using the UP or DOWN button. You can select 3D-DNR, MOTION, SHADING, and GAMMA using the UP or DOWN button. 3D-DNR: This feature will reduce the video noise caused by movement at low ambient light.
- Page 16 Select the RESOLUTION using the LEFT or RIGHT button. CV350-10X Model Select the RESOLUTION from 1080P25/30, 1080i50/60, 720P50/60, and 1080P50/60 using the LEFT or RIGHT button. CV350-10XB Model Select the RESOLUTION from 1080P29.97, 1080i59.94, 1080P59.94, 720P59.94 using the LEFT or RIGHT button. MAIN MENU...
-
Page 17: Display Control
DISPLAY CONTROL USER TITLE, ZOOM MAG Select DISPLAY CONTROL using the UP or DOWN button. You can select USER TITLE, ZOOM MAGNIFICATION, PRIVACY, ADDRESS, ADDRESSS DISPLAY, BAUDRATE, LANGUAGE, DEFECT ADJ, and VER. using the UP or DOWN button. USER TITLE: The camera title can be entered and it will appear over the video output. You can input the camera title from the virtual keyboard using the LEFT, RIGHT, UP, DOWN, and SET button. - Page 18 DISPLAY CONTROL PRIVACY Select DISPLAY CONTROL using the UP or DOWN button. You can select PRIVACY using the UP or DOWN button. PRIVACY: Mask an area you want to hide on the screen. MASK NO: Select the mask number to modify using the LEFT or RIGHT button. MASK ACTIVE: Enable/Disable the mask display using the LEFT or RIGHT button.
- Page 19 DISPLAY CONTROL ADDRESS, BAUDRATE LANGUAGE, DEFECT Select DISPLAY CONTROL using the UP or DOWN button. You can select ADDRESS, ADD DISPLAY, BAUDRATE, LANGUAGE, DEFECT ADJ, and VER. using the UP or DOWN button. ADDRESS: Select the camera ID number from 01~255. ADD DISPLAY: Enable/Disable the display of the camera address ID.
- Page 20 RESET RESET Select RESET using the UP or DOWN button. RESET: Reset the camera settings to the factory defaults. MAIN MENU WB CONTROL INDOOR AE CONTROL FOCUS CONTROL BACK LIGHT IMAGE CONTROL DISPLAY CONTROL RESET SAVE EXIT...
- Page 21 EXIT SAVE Select EXIT using the UP or DOWN button. SAVE: Exit the setup after saving the setting value changes. MAIN MENU WB CONTROL INDOOR AE CONTROL FOCUS CONTROL BACK LIGHT IMAGE CONTROL DISPLAY CONTROL RESET SAVE EXIT...
-
Page 22: Troubleshooting
TROUBLESHOOTING Before sending the camera for repair, please check below to make sure that the camera is installed correctly. If it still does not perform adequately, please consult with your supplier. Problem Solutions a. Check that all connected devices are powered on. Nothing appears b. - Page 24 20608 Madrona Ave. Torrance, CA 90503 Tel: (800) 800-6608 / (310) 333-0606 Fax: (310) 333-0688 www.LCDracks.com support@marshall-usa.com...
Need help?
Do you have a question about the CV350-10XB and is the answer not in the manual?
Questions and answers