
Related Manuals for Marshall Amplification CV605-U3


Summary of Contents for Marshall Amplification CV605-U3
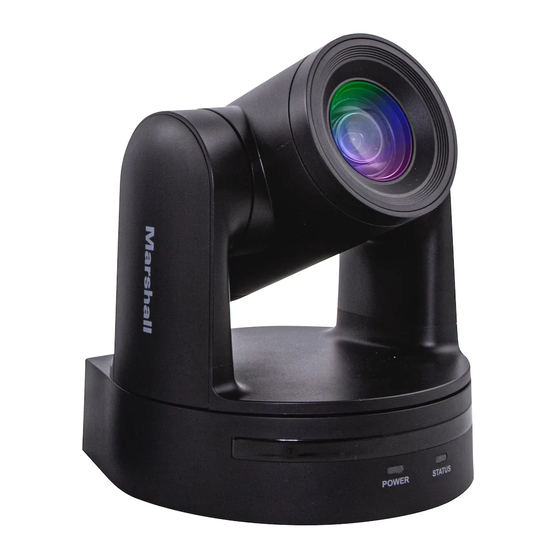
- Page 1 B r o a d c a s t A / V D i v i s i o n CV605-U3 CV605-U3W 5x HD USB-C PTZ Camera with HDMI & IP User Manual [Firmware Version 0.43]...
-
Page 2: Table Of Contents
CV605-U3 Manual Table of Contents 1. General Information GENERAL INFORMATION This manual details features, functions, installation, operation and recommendation. Please 1. INSTALLATION read this manual completely before installation and use. 1.1 Camera Layout Explanation 1.2 Power On Initial Configuration Description of use 1.3 Video Output... -
Page 3: Installation
CV605-U3 Manual 1. Installation 2. USB3.0 Type-C output: Use the included USB cable to connect camera to computer USB3.0 port, then run whichever video capture software chosen on computer and select the camera to display image. 1.1 Camera Layout 3. HDMI output: Use HDMI cable to connect camera to a monitor or switching equipment, then the monitor or other processing equipment will display image. -
Page 4: Main Features
CV605 models support H.264 and H.265 encoding which creates smooth video performance and clear images under less-than-ideal bandwidth conditions. CV605-BK/WH also Optical Zoom 5X, f=3.1~15.5mm contain 3GSDI outputs, and CV605-U3/U3W also contain USB-C and HDMI outputs. Sensor 1/2.8-inch HD CMOS sensor Effective Pixels 16:9, 2.07 megapixel... -
Page 5: Interface Instruction
CV605-U3 Manual 2.4 Interface Instruction Power Interface HEC3800 outlet (DC12V) Supply Adapter AC110V-AC220V to DC12V/1.5A 2.4.1 External Interface Input Voltage DC12V±10% External interfaces: Audio Input, USB3.0 Type-C, HDMI, (IP) Ethernet, RS232 input, DC12V Power Input Current 1A (Max) Consumption 12W (Max) -
Page 6: Application Instruction
CV605-U3 Manual 3. Application Instruction 11. Camera IR Remote Control Address Setting [ * ] + [ # ] + [ F1 ]: Camera Address No.1 [ * ] + [ # ] + [ F2 ]: Camera Address No. 2 3.1 IR Remote Controller... - Page 7 CV605-U3 Manual 1) Camera Selection 1. Preset setting: to set a preset position, the users should press the [SET PRESET] key first and then press the number key 0-9 to set a relative preset. Select the camera address to control.
-
Page 8: Menu Setting
CV605-U3 Manual 3.2 MENU SETTING 3.2.2 System Setting Move the pointer to (Setup) in the Main Menu, click the [HOME] key and enter into Setup menu as 3.2.1 Main Menu below. In normal working mode, press [MENU] key to display the OSD main menu. Use up/down arrows to navigate the menu and press [HOME] as an ENTER button within the menu. -
Page 9: Camera Setting
CV605-U3 Manual 3.2.3 Camera Setting 1) EXPOSURE Move the pointer to (Camera) in the Main Menu, click the [HOME] key and enter into Camera menu as Move the pointer to the (Exposure) menu, click the [HOME] key to enter into Exposure menu as follow, below. - Page 10 CV605-U3 Manual 2) COLOR 3) IMAGE Move the pointer to the (Color) menu, click the [HOME] key to enter into Color menu as follow, Move the pointer to the (Image) menu, click the [HOME] key to enter into Image menu as follow,...
-
Page 11: P/T/Z
CV605-U3 Manual 4) FOCUS 3.2.4 P/T/Z Move the pointer to the (Focus) menu, click the [HOME] key to enter into Color menu as follow, Move the pointer to the (P/T/Z) in the Main Menu, click the [HOME] key to enter into P/T/Z menu as... -
Page 12: Network Settings
CV605-U3 Manual 3.2.5 Network settings 3.2.7 Video Format Move the pointer to the (Network Settings) in the Main Menu, click the [HOME] key to enter into network Move the pointer to the (Video Format) in the main Menu, click the [HOME] key to enter into video... -
Page 13: Restore Default
CV605-U3 Manual 4. Network Connection 3.2.9 Restore Default Move the pointer to the (Restore Default) in the Main Menu, click the [HOME] key to enter the restore default menu as follow, 4.1 Connecting Mode Direct connection: Connect the camera directly to a computer or laptop by Ethernet cable. -
Page 14: Ie Log In
CV605-U3 Manual Internet connection (Using DHCP): 4.2.4 Configuration To use DHCP, first turn on DHCP in Network Settings OSD menu on camera. Power cycle the camera Click Configuration to enter the device parameters setting page so the assigned IP address from network switch gets assigned to the camera. Check the assigned IP There are the following options: Audio Configure, Video Configure, Network Configure, System address in Network Setting OSD menu again and use the address to log into camera webpage. - Page 15 CV605-U3 Manual 2) Video configuration RTP Multicast: Main/Sub code stream: can select by ON/OFF Video Encode Protocol Type: can choose multicast protocol (default RTP, TS optional) Stream: Different video output mode setting, use different streams. (Main stream, Sub stream) Multicast Address: can set multicast address, default 224.1.2.3 Compression Format: Set the video compression format, save and reboot to take it effect (primary / secondary stream default: H.264, H.265 optional)
-
Page 16: Network Configure
CV605-U3 Manual D. Image: Brightness, contrast, sharpness, black and white mode, the gamma curve, Horizontal 4) OSD Font Size Flip and Vertical Flip can be set. Auto zoom in/out according to the resolution. Brightness: Set the brightness (default 6,0-14 optional). -
Page 17: System Configure
CV605-U3 Manual 2) Ethernet 4.2.7 System Configure DHCP: Enable or disable obtain IP automatically can be set. Save changes and reboot the device to 1) System Attribute takes effect (Default: OFF) Device Name: Set the device name (the default Camera1, user can add their own). -
Page 18: Logout
CV605-U3 Manual 5. Serial Communication Control 4) Update MCU version: V2.0.0.16 2015-12-18 Under common working condition, the camera could be controlled through RS232/RS485 interface Camera version: V2.0.0.16 2015-12-18 (VISCA), RS232C serial parameter are as follows: AF version: V2.0.0.6 2015-12-11 Baud rate: 2400/4800/9600/115200 bits / sec; Start bit: 1; data bits: 8; Stop bit: 1; Parity: None. -
Page 19: Camera Control Command
CV605-U3 Manual 5.1.2 Camera Control Command Command Function Command Packet Note Command Function Command Packet Note Auto 8x 01 04 35 00 FF AddressSet Broadcast 88 30 0p FF p: Address setting 2400K 8x 01 04 35 0C FF IF_Clear... - Page 20 CV605-U3 Manual Command Function Command Packet Note Command Function Command Packet Note 6100K 8x 01 04 35 2B FF Reset 8x 01 04 0C 00 FF 6200K 8x 01 04 35 2C FF 8x 01 04 0C 02 FF Gain Limit Setting...
-
Page 21: Inquiry Command
CV605-U3 Manual 5.1.3 Inquiry Command Command Function Command Packet Note 8x 01 04 61 02 FF CAM_LR_Re- Image Flip Horizontal ON/OFF verse Command Command Packet Return Packet Note 8x 01 04 61 03 FF y0 50 02 FF 8x 01 04 66 02 FF... -
Page 22: Camera Maintenance And Troubleshooting
CV605-U3 Manual 6. Camera Maintenance and Troubleshooting Command Command Packet Return Packet Note p: Flicker Settings(0: OFF, 1: CAM_FlickerModeInq 8x 09 04 55 FF y0 50 0p FF 50Hz, 2:60Hz) 6.1 Camera Maintenance CAM_ApertureInq 8x 09 04 42 FF y0 50 00 00 0p 0q FF pq: Aperture Gain 1) If camera is not used for long time, please turn off power adapter switch and AC plug.
Need help?
Do you have a question about the CV605-U3 and is the answer not in the manual?
Questions and answers