
Related Manuals for Matsusada Precision ECU Series


Summary of Contents for Matsusada Precision ECU Series
- Page 1 Instruction Manual ECU SERIES MODEL *213.9.004* B/N 213.9.004 Rev. 0.3 F-RA-001-3R0...
- Page 2 SAFETY This power supply unit generates high voltage and energy. Electric shock may lead to death or serious injury. Be sure to follow the instructions below and handle the unit with caution. 1. BE SURE TO GROUND!! Be sure to ground the power supply unit before use. 2.
- Page 3 Symbols Various symbols are used in this instruction manual and on the product for ensuring safety. What will be caused by ignoring the instructions given with the symbols or by improper handling are classified as shown below. Read carefully and understand the descriptions before proceeding to the main body of this manual.
- Page 4 Caution ! Do not install the unit upside down or Do not use the unit in a place subject to on a wrong side. high temperature or in an enclosed, Insufficient heat release may cause limited area. deterioration of parts, which may It not only hampers the unit from generate smoke or set fire.
- Page 5 First-aid procedures to be implemented in case of electrical shock RESCUE 1. Free victim from contact with live conductor quickly. Avoid contact with neither live conductor nor victim’s body. 2. Shut off high voltage at once and ground the circuit. If high voltage cannot be turned off quickly, ground the circuit to discharge, or cut high voltage line by an ax with dry wooden handle.
- Page 6 Artificial respiration PLACE VICTIM 2.Clear throat Place victim in face-upward position horizontally. CLEAR THROAT Turn head to one side quickly wipe out any fluid, mucus, or foreign body from mouth and throat with fingers. 3.Open air passage OPEN AIR PASSAGE Tilt head back and extend neck to open air passage.
- Page 7 WARRANTY 1. WARRANTY POLICY Matsusada Precision Inc. ("Matsusada") warrants that the products supplied by it will be free from defects in materials and workmanship for a period of twelve (12) months from the date of original shipment to buyer. This warranty shall not apply to any product which has been repaired, modified...
-
Page 8: Table Of Contents
CONTENTS Page SAFETY........................................ⅰ For Safe use......................................ⅱ First-aid procedures to be implemented in case of electrical shock................ⅳ Artificial respiration...................................ⅴ WARRANTY......................................ⅵ CONTENTS......................................ⅶ 1 Features and specifications .......................... 1 1-1 Summary ....................................1 1-2 Features ..................................... 1 2 Exterior view diagram ............................2 2-1 Front panel .................................... - Page 9 6 Digital remote ..............................15 6-1 RS-232C connector ................................15 6-2 Communication method ..............................15 6-3 Delimiter ....................................15 6-4 Command ....................................16 6-4-1 Syntax ..................................... 16 6-4-2 Character set for the command ........................... 17 6-4-3 Command lost ................................18 6-4-4 Reference ..................................
-
Page 11: 1 Features And Specifications
Features and specifications 1 1 Features and specifications 1-1 Summary ECU series is designed for Electrostatic Chuck application. 1-2 Features User-friendly panel layout which contain all basic functions. ・ Output ON/OFF control. ・ Output voltage and current setting. ・ Setting of ramp time. -
Page 12: 2 Exterior View Diagram
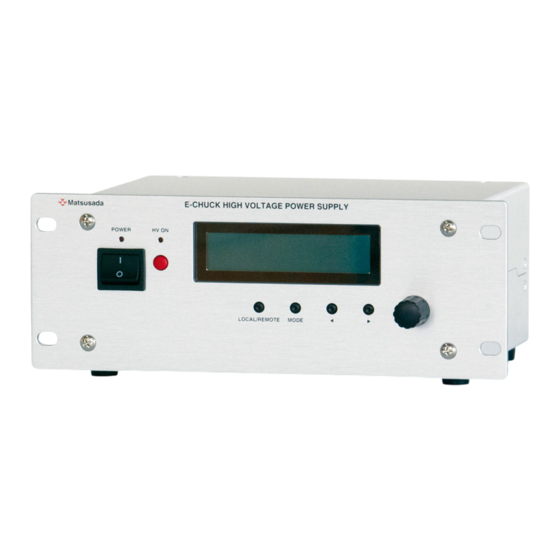
ANALOG REMOTE connector (Dsub-25) ① 24V input connector ② RS-232C connector (Dsub-9) ③ -HV output connector (MHV connector) ④ HV CT center tap connector (BNC connector) ⑤ +HV output connector (MHV connector) ⑥ GND terminal (#6-32) ⑦ MATSUSADA PRECISION Inc. ECU Series... -
Page 13: Dimensions
2 Exterior 2-3 Dimensions MATSUSADA PRECISION Inc. ECU Series... -
Page 14: 3 Installation And Connection
When operating welding by the unit, unplug all the connecting cable from the unit. ・ CAUTION Do not unscrew the plastic foot(4 pcs) and fix the unit using the screw hole because it is not ・ strong enough, and also fixing screw might contact internal circuit board. MATSUSADA PRECISION Inc. ECU Series... -
Page 15: Connection
If there is a possibility of development of a short-circuiting of load or discharging, ・ make larger and shorter the grounding conductor. MATSUSADA PRECISION Inc. ECU Series... -
Page 16: Connection To Load
Grounding an output for more than 10 seconds, check and confirm that voltage is zero at another voltmeter (for high voltage). It is especially dangerous that the load is capacitive or a long cable is attached there to. Make it a rule to touch load with right hand. MATSUSADA PRECISION Inc. ECU Series... -
Page 17: 4 Functions
Move the cursor to right direction. Numerical value setting encoder Change the value selected by cursor. 4-2 Display Voltage monitor Current monitor (+) Center tap monitor +0.00kV+0.00mA - 0V -0.00mA LO Current monitor (-) Local control/Remote control MATSUSADA PRECISION Inc. ECU Series... -
Page 18: 5 Operations
5-1-1 Switch to local control or external control. 1. Press LOCAL/EXTERNAL switch to switch to local control or external control. +0.00kV+0.00mA - 0V External control -0.00mA EX +0.00kV+0.00mA - 0V Local control -0.00mA LO Initial setting is external control. MATSUSADA PRECISION Inc. ECU Series... -
Page 19: Setting Of Output Voltage
5 Oper rations 5-1-2 S Setting of o utput volta Press MO ODE switch h to switch to output v voltage sett ting mode. +0. 00kV V+0. 00mA - 0V Monitor -0. 00mA LO +0. 00kV V+0. 00mA - 0V Output volt age setting V0.... -
Page 20: Setting Of Output Current
5 Op perations -1-3 Settin ng of output t current ess MODE switch to s switch to ou utput curre ent setting m mode. + +0.0 0kV+ 0.00 0mA - - 0V V Monit - 0.00 0mA LO O + +0.0... -
Page 21: Setting Of Upramp Time
5 Oper rations 5-1-4 S Setting of u pramp time Press MO ODE switch h to switch to upramp time settin ng mode. +0. 00kV V+0. 00mA - 0V Monitor -0. 00mA LO +0. 00kV V+0. 00mA - 0V Output volt age setting V0.... -
Page 22: Setting Of Downramp Time
5 Op perations -1-5 Settin ng of downr ramp time ess MODE switch to s switch to do ownramp ti me setting mode. + +0.0 0kV+ 0.00 0mA - - 0V V Monit - 0.00 0mA LO O + +0.0 0kV+... -
Page 23: Setting Of Auto Discharge
5 Oper rations 5-1-6 S Setting of a uto dischar Press MO ODE switch h to switch to auto dis scharge set ting mode. +0. 00kV V+0. 00mA - 0V Monitor -0. 00mA LO +0. 00kV V+0. 00mA - 0V Output volt age setting V0.... -
Page 24: Setting Of Auto Voltage Reversal
5 Op perations -1-7 Settin ng of auto v voltage reve ersal ess MODE switch to s switch to au uto voltage reversal se etting mode + +0.0 0kV+ 0.00 0mA - - 0V V Monit - 0.00 0mA LO O... -
Page 25: 6 Digital Remote
Dsub-9 FEMALE 6-2 Communication method Baud rate : asynchronous 9600 [bps] (fixed) Data length : 8 [bit] Stop bit : 1 [bit] Parity : NONE Flow control : NONE 6-3 Delimiter Delimiter is CR(0D ) Fixed. MATSUSADA PRECISION Inc. ECU Series... -
Page 26: Command
345 CR(0D 20 letters are to be ignored, and balance H 5 letters are to be input. (Description) In the above case “345 CR(0D )” is considered as invalid command, and input shall be ignored. MATSUSADA PRECISION Inc. ECU Series... -
Page 27: Character Set For The Command
) for only delimiter ・ Command string is not case sensitive. ・ Command string accepts to use space (20 ) among unit number, command and parameter. table 1 ASCII code Upper Lower ” & ‘ < ¥ > MATSUSADA PRECISION Inc. ECU Series... -
Page 28: Command Lost
RTU? Read the setting of upramp time RTD? Read the setting of downramp time Read the setting of SW command ADC? Read the setting of auto discharge ARV? Read the setting of auto voltage reversal MATSUSADA PRECISION Inc. ECU Series... -
Page 29: Reference
Same as “RTU 1.2”. (Default) RTU 0.1 (Description) It ignores as a parameter of integer over 9.9sec. (e.g.③) It ignores as a parameter of integer under 0.1sec. (e.g.④) It ignores as a parameter under 1 decimal. (e.g.⑤) MATSUSADA PRECISION Inc. ECU Series... - Page 30 Enable to auto discharge. (Default) ADC1 ARV command This command programs auto voltage reversal of the power supply. (Syntax) ① ARV0 Disable to auto voltage reversal. ② ARV1 Enable to auto voltage reversal. (Default) ARV1 MATSUSADA PRECISION Inc. ECU Series...
- Page 31 If receiving above command, all the command except REN, VGET, VCGET, IPGET, INGET, ALGET and STS commands will be ignored. (Default) GTL Turns into external control mode and shows “EX” at right bottom in the display. +0.00kV+0.00mA - 0V -0.00mA EX MATSUSADA PRECISION Inc. ECU Series...
- Page 32 Output voltage is 0.5kV. Center tap voltage is 1kV. Output current(+) is 3mA. Output current(-) is 3mA. ② ALGET=0,0,0,0 Output voltage is 0kV. Center tap voltage is 0kV. Output current(+) is 0mA. Output current(-) is 0mA. MATSUSADA PRECISION Inc. ECU Series...
- Page 33 Local control Remote control External control ADC1/0 Auto discharge ARV1/0 Auto voltage reversal (Return) ① ON RMADC1 ARV1 Unit is in the status of output enable, remote control, auto discharge enable and auto voltage reversal enable. MATSUSADA PRECISION Inc. ECU Series...
- Page 34 RTD? Command This command allows receiving the setting value of downramp time with 0.1 to 9.9(sec). (Syntax) RTD? (Return) ① RTD=1.0 Downramp time is set to 1sec. ② RTD=9.9 Downramp time is set to 9.9sec. MATSUSADA PRECISION Inc. ECU Series...
- Page 35 Disable to auto discharge. ② ADC1 Enable to auto discharge. ARV? command This command allows receiving the setting auto voltage reversal. (Syntax) ARV? (Return) ① ARV0 Disable to auto voltage reversal. ② ARV1 Enable to auto voltage reversal. MATSUSADA PRECISION Inc. ECU Series...
-
Page 36: 7 Analog Remote
External current limit control 0-10V PIN23 PIN16 Center tap voltage monitor 0-5V PIN22 PIN17 (-)Current monitor 0-10V Polarity monitor (+15V=Normal, 0V=Reverse) PIN21 PIN18 HV ON/OFF input(+24V=HV ON) HV ON status(collector) PIN20 PIN19 Polarity change (+24V=REVERSE) Forced discharge(+24V=Forced discharge OFF) MATSUSADA PRECISION Inc. ECU Series... -
Page 37: Description Of Analog Remote Features
Output current monitor 10V voltage is output at the maximum output current. The monitor output polarity is positive regardless of the high voltage output polarity. Output current monitor Output current monitor ⑤ ④ ⑤ ⑰ 0-10Vdc 0-10Vdc MATSUSADA PRECISION Inc. ECU Series... - Page 38 Open collector output for status of HV ON or HV OFF. ⑨ Open collector OFF = HV OFF Open collector ON = HV ON Emitter Collector j. Polarity monitor 15V output = NORMAL ⑩ 0V output = REVERSE 15V or 0V MATSUSADA PRECISION Inc. ECU Series...
Need help?
Do you have a question about the ECU Series and is the answer not in the manual?
Questions and answers