
Related Manuals for Cole Parmer HG-600 Geno/Grinder 2010


Summary of Contents for Cole Parmer HG-600 Geno/Grinder 2010
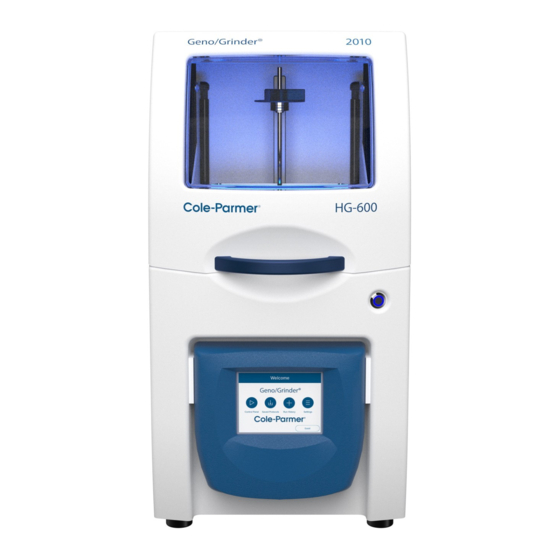
- Page 1 HG-600 Geno/Grinder® 2010 Tissue and Cell Lyser for Biological Applications Operation Manual For 115V (04500-17) and 230V (04576-84) 1300-87055-1M, REV 6...
- Page 2 HG-600 Geno/Grinder® 2010 Copyright 2023 by Cole-Parmer All rights reserved. No part of the work may be reproduced or transmitted in any form or by any means, electronic or mechanical; including photocopying and recording, except as may be expressly permitted by the 1976 Copyright Act or in writing from the publisher. Requests for permission should be addressed in writing to Cole-Parmer®, 65 Liberty Street, Metuchen, NJ 08840.
-
Page 3: Table Of Contents
HG-600 Geno/Grinder® 2010 TABLE OF CONTENTS SECTION DESCRIPTION PAGE Introduction ........................5 Specifications ........................ 6 Unpacking ........................7 Setting Up ........................8 Electrical Connection ....................8 Cabinet Set-Up ......................8 Installing the Adjustable Clamp Assembly ..............8 Touchscreen Display ....................10 Logo Screen ......................... - Page 4 HG-600 Geno/Grinder® 2010 11.0 Warranty ........................34 11.1 Product Specifications ....................34 11.2 To Arrange a Return Shipment ................... 34 12.0 Instrument Disposal ....................35 13.0 Contact Us ........................36 1300-87055-1M, REV 6 Cole-Parmer® Page 4 of 36...
-
Page 5: Introduction
HG-600 Geno/Grinder® 2010 1.0 INTRODUCTION The HG-600 Geno/Grinder® was re-engineered with a new look and updated features. The features include: programmable and operating commands through a series of touchscreen displays, administrative lockout (passcode) which allows Lab Manager to restrict user access to specific protocols, self-diagnostics, larger observation window, improved visibility of sample loading area, and the new clamp orientation makes it easier to load/unload samples. -
Page 6: Specifications
HG-600 Geno/Grinder® 2010 2.0 SPECIFICATIONS Type of Grinder: Homogenizer, Bead Beater Display: Touchscreen Grinding Grinding balls of stainless steel, silica or zirconia beads. Mechanism: Dimensions 28 in. (71.1 cm) high (40 in., 102 cm with lid open) x 14 in. (35.6 cm) wide x 22.5 in. -
Page 7: Unpacking
HG-600 Geno/Grinder® 2010 3.0 UNPACKING Carefully inspect the exterior of the packing box. Any visible damage should immediately be reported to the carrier. Remove all packed documents from the exterior of the box and file in your records. Remove the top of the shipping box, the foam packaging material, and the Geno/Grinder®... -
Page 8: Setting Up
HG-600 Geno/Grinder® 2010 4.0 SETTING UP The HG-600 Geno/Grinder® weighs 100 pounds (45.5 Kg). The lid opens from the front with the handle in the center. The AC Input module, fuse tray, and power cord receptacle are located on the rear of the Geno/Grinder® cabinet, toward its bottom. The power (On/Off) button is on the front right, as shown in Figure 2. - Page 9 HG-600 Geno/Grinder® 2010 4.3.1 Installing the Adjustable Clamp Assembly To install the clamp, first locate the 3/16” Allen wrench and the two bolts and lock washers supplied with the Geno/Grinder®. Open the Geno/Grinder® lid and place the clamp base on top of the shaft.
-
Page 10: Touchscreen Display
HG-600 Geno/Grinder® 2010 5.0 TOUCHSCREEN DISPLAY The HG-600 Geno/Grinder® is programmed and operated through a series of touchscreen displays. Transition between screens, and all programming and operating commands, are done by touching the screen with a fingertip or stylus. Do not use a sharp point as this can damage or deface the screen. -
Page 11: User List
HG-600 Geno/Grinder® 2010 5.2 User List To access the USER LIST screen touch the Username button on the Home Screen. An infinite number of users can be stored. Only 10 user slots at one-time are visible on the User List screen (Figure 5). To access or make visible additional users, or vacant spaces swipe up or down the touchscreen. - Page 12 HG-600 Geno/Grinder® 2010 5.2.2 Add a User To add a new user, touch the add button on the User List Screen (Figure 5) which will bring up the EDIT/ADD USER Screen. Touch inside the Box, as shown in Figure 7. Touching the Back Arrow button (top left) allows the user to return to the previous screen.
-
Page 13: Control Panel
HG-600 Geno/Grinder® 2010 5.2.3 Edit a User To edit a saved user, touch the username to highlight the name on the User List screen (Figure 5). Then touch the EDIT User button. From the Edit/Add User screen change the name by touching inside the box. This will bring up the KEYBOARD screen, follow the instructions listed in the Add a User SECTION 5.2.2. - Page 14 HG-600 Geno/Grinder® 2010 5.3 Control Panel (Cont’d) The following sequence of events will occur from the current settings in Figure 8. 1. Cycle 1 - the unit runs for 2 minutes at a rate of 1000 strokes per minute. 2. Pause - the unit is inactive for 30 seconds allowing the samples to undergo lysis. 3.
-
Page 15: Changing Settings
HG-600 Geno/Grinder® 2010 5.3 Control Panel (Cont’d) During the RUN TIME stage the TIME REMAINING line counts down the time for the programmed run in 1-second increments. To pause the program, touch the pause button. To continue the program, touch the RESUME button. To abort the program, touch the STOP button. -
Page 16: Saved Protocols
HG-600 Geno/Grinder® 2010 5.4 Changing Settings (Cont’d) Home Screen Icon (+) plus (-) minus Increases the Decreases the Parameter Parameter Store and Recall Protocols Figure 10 – Changing Settings 5.5 Saved Protocols The SAVED PROTOCOLS Screen is shown in Figure 11. Up to 500 Protocols can be saved for simple and fast recall, increasing productivity and reducing operator error. - Page 17 HG-600 Geno/Grinder® 2010 5.5 Saved Protocols (Cont’d) The Default protocol recalls the last programed run setting that was not saved. The Default protocol can be changed without saving the new settings, as described in section 5.4. At the top left on the Saved Protocols Screen is the Back Arrow button. Touching the Back Arrow button returns the user to the previous screen.
- Page 18 HG-600 Geno/Grinder® 2010 5.5 Saved Protocols (Cont’d) The CLEAR key deletes whatever has been entered in the Label Box. Touching the DONE key enters the label shown in the box. Touch the SAVE button to save the label shown in the Box. The label will appear as the name of the program in the SAVED PROTOCOLS Screen (Figure 11).
-
Page 19: Loading The Clamp
HG-600 Geno/Grinder® 2010 5.5.4 Delete a Protocol To delete a saved protocol, touch the protocol name to highlight the name on the Saved Protocols Screen (Figure 11). Then touch the Delete button. A pop-up window opens confirming to delete this protocol. Touch YES to clear or touch NO to keep the saved protocol, as shown in Figure 13. -
Page 20: Loading The Adjustable Clamp
HG-600 Geno/Grinder® 2010 6.1 Loading the Adjustable Clamp The clamp is the most critical component of the HG-600 Geno/Grinder®, as it must be carefully adjusted to hold the titer plates (or vials, centrifuge tubes, etc.) firmly in place. The up-and-down motion of the clamp is extremely vigorous. Sample holders (titer plates, vials, centrifuge tubes, etc.) must be held securely in the clamp during operation to prevent damage and leakage. - Page 21 HG-600 Geno/Grinder® 2010 6.1.1 Vials in Holders or Cryo-Blocks (Cont’d) Slide lid on top of the vials (with guide on upright at rear). Screw down the locking onto the threaded rod. Place vial in holders or Figure 14 – Loading the cryo-blocks in clamp base 2012 Clamp Figure 15 –...
- Page 22 HG-600 Geno/Grinder® 2010 6.1.2 Titer Plates Titer plates are made by many companies and are sealed in various ways. The Geno/Grinder® is designed for use with the vast majority of currently available titer plates. Plates can be sealed using a variety of formats. For PCR and DNA/RNA work a heat sealer is suggested, to minimize the possibility of contamination between wells.
- Page 23 HG-600 Geno/Grinder® 2010 6.1.2 Titer Plates (Cont’d) Single-sided nesting tray Figure 17– Bottom nesting Plate in the 2012 Clamp Base Double-sided nesting tray Single-sided nesting tray (bottom only) Figure 18 – Stacking Titer Plates Note: When stacking 4 or 6 titer plates, do not add more than five 4 mm steel balls to a single titer plate well.
- Page 24 HG-600 Geno/Grinder® 2010 6.1.3 Releasing the 2012 Clamp 1. When the Geno/Grinder® comes to a complete stop, open the lid. 2. Turn the clamp lid knob counterclockwise until it rotates freely (Figure 20). 3. Remove the clamp lid entirely. The sample vials or titer plates are easily accessible. Vials or titer plates can be unloaded and the next set loaded.
-
Page 25: Operation
HG-600 Geno/Grinder® 2010 7.0 OPERATION Before operating the Geno/Grinder®, make sure it is plugged in and turned on. The power cord inlet is located on the rear of the cabinet. The On/Off button is located on the face of the unit to the right of the red handle. The following steps outline a standard operating cycle: 1. -
Page 26: Operating The Lid
HG-600 Geno/Grinder® 2010 7.2 Operating the Lid To close the cabinet, grasp the handle and slowly lower the lid to the closed position. The lid must remain closed during a run. To open the cabinet, grasp the handle and raise the lid to its full upright position. The gas springs will hold the lid in its open position. -
Page 27: Safety Recommendations
HG-600 Geno/Grinder® 2010 7.3 Running the Geno/Grinder® (Cont’d) Figure 22 – Lid Open Screen 7.4 Safety Recommendations The HG-600 Geno/Grinder® is intended for use only by qualified and trained personnel. For questions about the OPERATION, MAINTENANCE, or SERVICE of the HG-600 GENO/GRINDER®, please call Cole-Parmer®... -
Page 28: Run History
HG-600 Geno/Grinder® 2010 8.0 Run History To recall Run History touch the Run History button. The Date, Time, User, Run Label, and Run Protocol data are stored on this screen, as shown in Figure 23. The Run History can be exported to computer devices via the USB located under the front of the Controller. -
Page 29: System Settings
HG-600 Geno/Grinder® 2010 8.1 System Settings To access the Settings Screen touch the Settings Icon on the Home Screen (Figure 4). The System can be upgraded, Diagnostics view/exported, and files exported (Run History, Saved Protocols) and saved protocols imported, as well as the time display changed from 12-hour to 24-hour, and Time and Date can be entered or changed, as shown in Figure 24. -
Page 30: Administrative Lockout Feature
HG-600 Geno/Grinder® 2010 8.2 Administrative Lockout Features The Administrative lockout features (passcode protected) restricts user access to specific protocols or modify a protocol. From the Home Screen touch the Settings Icon. The Admin Lock button is located on the bottom left of the screen. When the Admin Lock mode is disabled the button will display “OFF”... -
Page 31: Diagnostics
HG-600 Geno/Grinder® 2010 8.3 Diagnostics The Diagnostics Screen can be accessed from the Settings Screen (Figure 24). Touching the Back Arrow button returns the user to the previous screen. Figure 26 – Diagnostics Screen 8.3.1 Refresh Data Button Touching the Refresh Data Button allows the user to take a reading of the data displayed in Figure 26. -
Page 32: Error Messages
HG-600 Geno/Grinder® 2010 9.0 ERROR MESSAGES 9.1 Lid Error If the lid lock fails while the HG-600 Geno/Grinder® is running, the mill will stop running and the screen will display a “LID OPEN” message. The timer will maintain the time remaining in the run. -
Page 33: Maintenance
HG-600 Geno/Grinder® 2010 10.0 MAINTENANCE The HG-600 Geno/Grinder® has been designed to provide trouble-free operation over a long period of time. To assure proper performance, the most important factor is cleanliness. Any spills should be wiped up immediately. The HG-600 Geno/Grinder® cabinet is made primarily of painted aluminum. The front panel is painted plastic. -
Page 34: Warranty
HG-600 Geno/Grinder® 2010 11.0 WARRANTY Cole-Parmer® guarantees its products against defects in materials or workmanship for three years from the date of original shipment. Repairs, replacements, or parts are guaranteed for 30 days or for the remaining original warranty period (whichever is greater) for the item that was repaired or replaced. -
Page 35: Instrument Disposal
HG-600 Geno/Grinder® 2010 12.0 INSTRUMENT DISPOSAL In accordance to the EU Directive 2012/19/EU covering Waste Electrical and Electronic Equipment, all equipment with the disposal symbol must not be disposed of with general waste. (See Figure 29) Disposal Label is located on the back of unit. -
Page 36: Contact Us
HG-600 Geno/Grinder® 2010 13.0 CONTACT US Repair Service Phone: 1.732.623.0465 Cole-Parmer 65 Liberty St Metuchen, NJ 08840 Attn: Service and Repair Please include RA Number on the shipping label. Germany T: +1.800.323.4340 or T: +49 (0) 9377 92030 +1.800.323.4340 E: de.sales@antylia.com E: sales@antylia.com W: coleparmer.de W: coleparmer.com...
Need help?
Do you have a question about the HG-600 Geno/Grinder 2010 and is the answer not in the manual?
Questions and answers