
Related Manuals for Viessmann VITOWELL comfort


Summary of Contents for Viessmann VITOWELL comfort
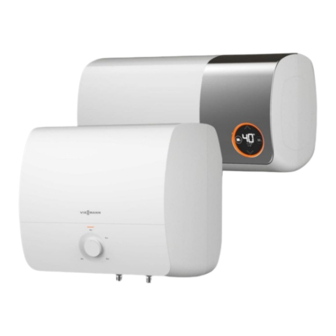
- Page 1 ENGLISH Installation And Operation Manual ELECTRIC STORAGE WATER HEATER 6194193 07/2023 Please read this manual carefully, before installation, usage and maintenance.
-
Page 2: Table Of Contents
Contents Safety------------------------------------------------------------------2 General warnings ------------------------------------------------------------------------------------2 Key to symbols -------------------------------------------------------------------------------------2 General safety norms--------------------------------------------------------------------------------2 Specific safety norms for this appliance------------------------------------------------------------3 Appliance description--------------------------------------------------------4 Appliance profile-------------------------------------------------------------------------------------4 Appliance norms-------------------------------------------------------------------------------------6 Appliance installation--------------------------------------------------------6 Packing list------------------------------------------------------------------------------------------ 6 Installation norms (for the installer) ------------------------------------------------------------------6 Installing the appliance------------------------------------------------------------------------------6 Installation steps ------------------------------------------------------------------------------------7 User instructions----------------------------------------------------------- 10 Advice for user-------------------------------------------------------------------------------------10 Control and operating instructions-----------------------------------------------------------------10... -
Page 3: Safety
Safety GENERAL WARNINGS 1. This manual is an integral and essential part of the appliance. It should be preserved with care and transferred alongside the appliance if the latter is transferred to another owner or user and/or moved to another location. 2. -
Page 4: Specific Safety Norms For This Appliance
Safety Risk Ref. Warning Symbol Do not open or remove the appliance. Electrocution from live components; personal injury from burns due to overheated components wounds caused by sharp edges or protrusions. Do not use a 13 A socket which may cause your Electrocution from a damaged cable or plug, or socket. -
Page 5: Appliance Description
Appliance description Appliance profile Cube type C2 (Classic) Upper panel Bottom panel Temperature knob Hot water outlet Cold water inlet ELCB electricity protection* Housing-rear Model 15L Cube C2 390 mm 360 mm 340 mm 100 mm 84 mm 30L Cube C2 470 mm 440 mm 395 mm... - Page 6 Appliance description Slim type C2 (Classic): Left panel Magnesium anode cover Hot water outlet Cold water inlet Right panel Temperature knob ELCB electricity protection* Housing-rear Model 15L Slim C2 550mm 260mm 260mm 100mm 130mm 20L Slim C2 630 mm 280 mm 280 mm 100 mm 140mm...
-
Page 7: Appliance Norms
Appliance norms Implementation norms IEC60335-1 Safety of household and similar electrical appliances---General requirements IEC60335-2-21 Household and similar electrical appliances---Safety---Particular requirements for storage water heaters Appliance installation Packing list All water heaters are shipped with the following items. Please check them before installation. Component description Qty. -
Page 8: Installation Steps
Appliance installation The appliance should be installed not too far from the point of use to limit heat dispersion along the piping. Allow for a clearance of at least 50 cm to provide access to the electrical components, thus facilitating the maintenance activities. - Page 9 Appliance installation Slim type 1. Installing expansion-bolts hook Drill two ø10 x 85 mm holes in the wall. Insert expansion tubes into the holes, place the screws through the hanging plate, and tighten the screws with a screwdriver. Ensure hanging plate is positioned vertically upward. 20L SLIM 15/30L SLIM 2.
- Page 10 Appliance installation Hydraulic connection Connect the water heater’s inlet and outlet with pipes or fittings that are able to withstand temperature in excess of 80°C at a pressure above the working pressure. Therefore, we advise against the use of any materials which cannot resist such high temperatures.
-
Page 11: User Instructions
User instructions Warning! Follow the general warnings and the safety norms listed at the beginning of the text and keep to all the instructions given under all circumstances. Advice for user ■ Do not power the appliance until the tank is filled with water. Otherwise, the appliance may be damaged. ■... - Page 12 User instructions Control and operating instructions (D2 types) Turning on or off the appliance Turn on the power at heater switch on the wall. The power LED near the power plug keeps bright as long as the appliance is powered. To start the appliance, switch on the power supply and press To stop and reset a working appliance, press and hold for 3 seconds.
- Page 13 User instructions 3. Exit Calibration ■ From Minute Value Setting, press SET once to exit calibration. Timing mode The appliance provides the following default times: ■ Time 1: 18:00-22:00, one calendar day. ■ Time 2: 5:00-9:00, one calendar day ■ The setting temperature is 72°C. Press SET to activate/deactivate timer setting feature: Activate Time 1 →...
-
Page 14: Wiring Diagram And Technical Parameters
User instructions 3. Exit Calibration ■ From END Time Setting, press SET once to exit calibration for Time 1. Repeat same step for setting of Time 2. Wiring diagram and technical parameters Wiring diagram C type P type D type *ELCB not available in some countries... -
Page 15: Technical Parameters
Wiring diagram and technical parameters Technical parameters... -
Page 16: Maintenance Instructions
Maintenance instructions Maintenance regulations (for professional installers) Warning! Follow the general warnings and the safety norms listed at the beginning of the text and keep to all the instructions given under all circumstances. All maintenance operations and service visits should be performed by a professional installer (who has the skills required by the applicable norms in force). -
Page 17: Troubleshooting
Troubleshooting Fault analysis Fault Possible cause Remedy Water Connections between components Tighten seals. leakage are sealed poorly. The tank leaks. Switch off the electricity mains and contact our Technical Servicing Center. No hot water or The appliance is not powered. Switch on the electricity mains. - Page 18 TIẾNG VIỆT Sổ tay hướng dẫn vận hành và lắp đặt MÁY NƯỚC NÓNG GIÁN TIẾP Mục lục An toàn --------------------------------------------------------------------18 Cảnh báo chung -----------------------------------------------------------------------------------18 Ý nghĩa của các biểu tượng--------------------------------------------------------------------------18 Các tiêu chuẩn an toàn chung-----------------------------------------------------------------------18 Các tiêu chuẩn an toàn riêng cho thiết bị-----------------------------------------------------------19 Mô...
-
Page 19: An Toàn
An toàn CẢNH BÁO CHUNG 1. Sổ tay này là một phần không thể tách rời và cần thiết của thiết bị. Cần bảo quản sổ tay cẩn thận và phải đi kèm với thiết bị nếu thiết bị được chuyển cho chủ sử hữu hoặc người sử dụng khác và/ hoặc di chuyển đến địa điểm khác. -
Page 20: Các Tiêu Chuẩn An Toàn Riêng Cho Thiết
An toàn Cảnh báo Rủi ro Biểu tượng Không mở hoặc tháo gỡ thiết bị. Điện giật do các linh kiện vẫn còn điện; gây bỏng da do các linh kiện nóng quá mức hoặc bị thương do các phần sắc nhọn nhô... -
Page 21: Mô Tả Thiết
Mô tả thiết bị Lược tả thiết bị Dòng sản phẩm khối lập phương Loại khối lập phương C2 (bản Classic) Tấm trên Đèn LED Tấm dưới Núm chọn nhiệt độ Đường nước nóng ra Cold water inlet Bảo vệ bằng cầu dao ELCB* Vỏ... - Page 22 Mô tả thiết bị Loại khối dẹt C2 (bản Classic) Tấm bên trái Nắp đậy thanh Magie Đường nước nóng ra Đường nước lạnh vào Tấm bên phải Núm chọn nhiệt độ Đèn LED Bảo vệ bằng cầu dao ELCB* Vỏ...
-
Page 23: Các Tiêu Chuẩn Thiết
Tiêu chuẩn thiết bị Tiêu chuẩn đối với việc triển khai IEC60335-1 An toàn cho thiết bị gia dụng và các thiết bị điện tương tự--- Các yêu cầu chung IEC60335-2-21 Thiết bị gia dụng và các thiết bị điện tương tự---An toàn--- Yêu cầu cụ thể đối với máy nước nóng gián tiếp Lắp đặt thiết bị... -
Page 24: Các Bước Lắp Đặt
Lắp đặt thiết bị Không nên lắp đặt thiết bị quá xa so với nơi sử dụng để hạn chế mất nhiệt dọc đường ống. Để khoảng trống tối thiểu 50 cm để cung cấp khả năng tiếp cận các linh kiện điện, quá đó tạo điều kiện thuận lợi cho việc bảo trì thiết bị. - Page 25 Lắp đặt thiết bị Loại khối dẹt 1. Lắp đặt bulông nở móc Khoan hai lỗ ø10 x 85 mm trên tường. Lắp ống giãn nở vào lỗ, đặt đinh vít xuyên qua tấm treo, và vặn chặt đinh vít bằng tua vít. Đảm bảo tấm treo thẳng đứng hướng lên trên. 20L SLIM 15/30L SLIM 2.
- Page 26 Lắp đặt thiết bị Kết nối đường dẫn nước Nối đường dẫn nước vào và ra của máy nước nóng với các đường ống hoặc phụ kiện có thể chịu được nhiệt độ trên 80°C ở áp suất cao hơn áp suất khi làm việc. Vì vậy, không nên sử dụng bất cứ vật liệu nào không chịu được nhiệt độ...
-
Page 27: Hướng Dẫn Sử Dụng
Hướng dẫn sử dụng Cảnh báo! Làm theo các cảnh báo chung và các tiêu chuẩn an toàn đã liệt kê trong phần đầu cuốn sổ và tuân thủ toàn bộ hướng dẫn trong mọi trường hợp. Lời khuyên cho người sử dụng ■... - Page 28 Hướng dẫn sử dụng Hướng dẫn vận hành và điều khiển (Loại D2) Bật/tắt thiết bị Bật thiết bị bằng công tắc máy nước nóng trên tường. Đèn LED nguồn gần phích cắm điện sẽ sáng khi thiết bị được cấp nguồn. Để...
- Page 29 Hướng dẫn sử dụng 3. Thoát hiệu chuẩn Sau khi Cài đặt số phút, nhấn nút SET ■ một lần để thoát hiệu chuẩn. Chế độ hẹn giờ Thiết bị cung cấp các khoảng thời gian mặc định sau đây: ■...
-
Page 30: Sơ Đồ Nối Dây Và Các Thông Số Kỹ Thuật
Hướng dẫn sử dụng 3. Thoát hiệu chuẩn ■ Sau khi cài đặt thời gian END, bấm nút SET một lần để thoát hiệu chuẩn cho Khoảng thời gian 1. Lặp lại các bước tương tự để cài đặt Khoảng thời gian 2. Sơ... -
Page 31: Các Thông Số Kỹ Thuật
Sơ đồ nối dây và các thông số kỹ thuật Các thông số kỹ thuật... -
Page 32: Hướng Dẫn Bảo Trì
Hướng dẫn bảo trì Hướng dẫn bảo trì (cho người lắp đặt có chuyên môn) Cảnh báo! Làm theo các cảnh báo chung và các tiêu chuẩn an toàn đã liệt kê trong phần đầu cuốn sổ và tuân thủ toàn bộ hướng dẫn trong mọi trường hợp. Toàn bộ... -
Page 33: Xử Lý Sự
Xử lý sự cố Phân tích lỗi Lỗi Nguyên nhân có thể Khắc phục Rò rỉ nước Mối nối giữa các linh kiện không Siết chặt đệm kín. kín hoàn toàn. Bình rò rỉ nước. Tắt nguồn điện chính và liên hệ với Trung tâm dịch vụ kỹ... - Page 34 GERMANY Viessmann Climate Solutions SE Viessmann Strasse 1 35108 Allendorf (Eder) Germany E-mail: info@viessmann.com Website: www.viessmann.com SINGAPORE Viessmann Singapore Pte. Ltd. 25 International Business Park #04-01/02 German Centre Singapore 609916 E-mail: info.singapore@viessmann.com Service E-mail: service@viessmann.com Website: www.viessmann.sg Service Tel: +65 6970 8411 VIETNAM Viessmann Vietnam Co.
Need help?
Do you have a question about the VITOWELL comfort and is the answer not in the manual?
Questions and answers