EcoFlow Smart Generator Manual
- User manual (28 pages) ,
- User manual (208 pages) ,
- User manual (104 pages)
Advertisement
- 1 Safety Guidelines
- 2 Quick Start
- 3 Maintenance and Servicing
- 4 Storage and Transportation
- 5 Faults and Troubleshooting
- 6 Parameters and Specifications
- 7 Package List
- 8 Circuit Diagram
- 9 Documents / Resources
Safety Guidelines
Safety Warning
The safety of you and others, as well as of property are of the primary importance. Please carefully read the extremely important safety warnings we have written in the User Manual and the sticker of the generator set. This is to remind you of the potential dangers which may harm you and others. Before each safety warning is a symbol and one of the three following words: danger, warning or caution. These words indicate:

If you fail to follow the instructions, your life will be at risk or you will be severely injured.

If you fail to follow the instructions, your life may be at risk or you may be seriously injured.

If you fail to follow the instructions, your generator set and other property may be damaged.
Safety Instructions
Please read the User Manual carefully before using the generator in order to avoid accidents.
- Do not use indoors and keep away from doors, windows and vents
![]()
- Do not use in damp environments
![]()
- Make sure that no fuel is spilled when refueling
![]()
- Keep any combustibles at least 1m / 3ft away
![]()
- Do not smoke when refueling
![]()
- Switch off the engine before refueling
![]()


Earthing the Generator
The generator is equipped with system grounding, which is used to connect the generator's frame components to the ground terminal in the AC outlet. The system grounding doesn't connect to the AC neutral.
Connect the Generator to the Electrical System
Do not connect the generator to the electrical system of a building, unless an isolation switch has been properly installed by a licensed electrician. Please comply with all applicable laws and electrical regulatory requirements.
Keep the air inlets in the side of front panel, the muffler and the bottom of generator clean and unblocked and prevent any debris, mud or water from entering. The generator, the controller or the engine may be damaged if these air inlets become blocked. Do not transport, store or use the generator together with other products. Any oil leaks may damage the generator or endanger your personal safety as well as your property.
Important Labels
Please refer the following stickers carefully before starting to use the product.

Quick Start
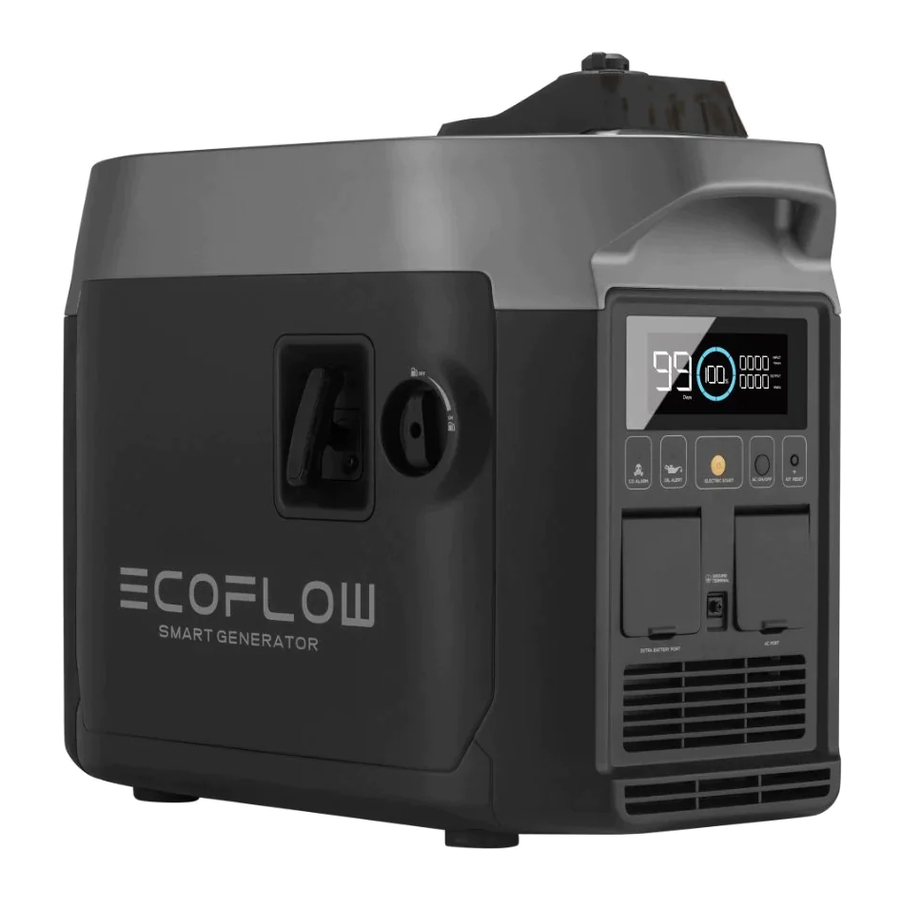
Appearance Description


Carbon Monoxide Alert Light: When the carbon monoxide sensor detects that the concentration of carbon monoxide is about to exceed the standard, the generator will automatically stop and the carbon monoxide alert light will flash for 5 minutes. During this course, the generator cannot be started.
Introduction to the Icons on the Display Screen
![]()
Remaining Power Percentage: If the remaining fuel level is lower than 600 mL/20.3 oz., the indicator will be at 0% charge and flash to warn you.
Wi-Fi Status: After pressing the IOT button for 3 seconds, the Wi-Fi status will flash on the LCD screen which indicates that the product is ready for pairing. There're two ways to connect the product with the App, either directly connect to the product's hotspot or using the Internet. If the App is successfully connected to the product's hotspot, the icon will keep flashing; if it is successfully connected to the Internet, the icon will stay on.
Error Code: Please refer to the EcoFlow app for specific information on error codes.
ECO Mode: In ECO mode, the Smart Generator will adjust its rotational speed to match the output power demand, in order to conserve fuel and reduce noise. This is the default mode. You can modify the mode settings in the EcoFlow app. For details please refer to "Using the App"
* See "Faults and Troubleshooting" Section for more troubleshooting steps.
Before You Use the Product
Refueling

Open fuel cap
Please read the Safety Guidelines carefully before refueling as fuel is inflammable and toxic. Do not overfill the fuel tank, as fuel may expand and spill out when the fuel tank warms up.
Be sure to tightly close the fuel cap after refueling.

Refueling
Clean away the residual fuel with a clean and soft cloth after refueling to avoid damage to the rubber shell. Please use unleaded fuel rather than leaded fuel which may severely damage the internal parts of generator. Take off the fuel cap and fill up until the red indicator.
Recommended fuel: unleaded fuel
Fuel tank capacity: 1.05 gal. / 4 L
Add Generator Engine Oil
There is no engine oil in the generator when delivered from the factory. Do not start up the generator until after adding sufficient engine oil. Do not tilt the generator when adding engine oil, to prevent damage to the generator due to adding excessive oil.
- Place the generator on a level plane.
- Turn the maintenance cover knob to
![]() and take off the maintenance cover.
and take off the maintenance cover.
![]()
Removing the maintenance cover - Unscrew the lid and oil dipstick.
- Inject the specified amount of recommended engine oil, and screw the lid and oil dipstick closed tightly. Reinstall the maintenance cover and turn the knob to Closed.
![]()
Refilling the engine oil


Recommended engine oil: SAE SJ 10W-40
Grade of recommended engine oil: SJ or higher
Oil capacity: 0.1 gal. / 0.38 L
Rechargeable Battery Connection

Connecting the positive and negative wires
The generator cannot be started by the Electric Start switch unless connected to the internal battery.
Turn the maintenance cover knob to ![]() , take off the maintenance cover and connect the positive and the negative wires of the battery respectively.
, take off the maintenance cover and connect the positive and the negative wires of the battery respectively.
Checking Before Use
Please check the following components carefully each time before using the generator.
- Check the fuel level
Take off the fuel cap and check the fuel level. Inject more fuel into the tank if the fuel level is too low. - Check the engine oil level
- Make sure there are no engine oil leaks.
- Check the engine oil level. If the oil level is low, the engine oil alarm system may shut off the engine.
- Unscrew the lid, take out the oil dipstick and wipe it clean.
- Dip the oil dipstick into the oil filler without screwing it in, and check the oil level.
![]()
Engine oil level check - Add the recommended amount of engine oil if the oil level is low.
- Screw the oil dipstick and lid firmly shut.
- Check whether the rechargeable battery is connected correctly
Turn the maintenance cover knob to Open, take off the maintenance cover and check whether the positive and the negative wires of battery are connected correctly.

Malfunctions While Running
Check for any issues while the generator is running and consult EcoFlow for further technical support if necessary.
Using the Product
- Read the Safety Guidelines before use.
- Do not use the generator in a closed space as the exhaust fumes may result in a loss of consciousness or even death. Use it in a well-ventilated place.
- Do not connect the AC Output Socket with any electrical equipment before starting the generator.
 Tips: The generator is used at 5 ℉-104 ℉(-15 ℃—40 ℃). The generator can operate at rated power under standard atmospheric conditions ("standard atmospheric conditions" - ambient temperature 77℉ (25 ℃) - atmospheric pressure 100KPA - relative humidity 30%). Once the temperature, humidity and altitude exceed standard atmospheric conditions, the output of the generator will drop. Using for a long time in a high temperature (above 95℉ /35 ℃) environment will affect the service life of the generator and the built-in battery. Moreover, if the generator is used in any narrow space, its load must be reduced as the generator cooling is affected.
Startup
- Turn the fuel cap breather valve knob to "ON".
![]()
- Turn the Engine Switch to "ON".
![]()


The generator can be started using any of the four methods below:
- Electric Start Switch
Press and hold the Electric Start Switch for 2 seconds to execute the start-up program and start up the generator.
![information]() Tips: To save battery power consumption, when the Engine Switch is at the "ON" position, if the generator fails to start up, the power will be disconnected after 3 mins and the display screen will switch off. In this situation, press the start button to activate the screen display to then reenable the Electric Start Switch.
Tips: To save battery power consumption, when the Engine Switch is at the "ON" position, if the generator fails to start up, the power will be disconnected after 3 mins and the display screen will switch off. In this situation, press the start button to activate the screen display to then reenable the Electric Start Switch. - Manual start
![]()
Manual start
Pull the Manual Starter Grip until the line tightens and push it by force.
![information]() Tips: When starting by hand, it is necessary to hold the generator still to prevent it from tilting or tumbling during the pull-push process.
Tips: When starting by hand, it is necessary to hold the generator still to prevent it from tilting or tumbling during the pull-push process. - Self-start, see paragraph "DC Charging"
- Starting through the app, see paragraph "Using the App"
![information]() Tips: When the ambient temperature is below 32 ℉(0°C), the engine will need to warm up for three minutes after being started, during which time no load should be loaded.
Tips: When the ambient temperature is below 32 ℉(0°C), the engine will need to warm up for three minutes after being started, during which time no load should be loaded.

Turning off
To turn the engine off in an emergency, turn the engine switch to the "OFF" position. In any other circumstances, please follow the below steps.
- Switch off all electrical equipment and disconnect them from the generator.
- There are three methods to turn off the generator:
- Using the Engine Switch: Turn the Engine Switch to "OFF" to turn off the generator.
- Using the Electric Start button: Press and hold the Electric Start button for 2 seconds to stop the engine.
- To turn off the generator through the app, please refer to paragraph "Using the App".
![information]() Tips: When the AC output switch and DC output switch are turned off, in order to save power, the generator will automatically turn off after 10 mins.
Tips: When the AC output switch and DC output switch are turned off, in order to save power, the generator will automatically turn off after 10 mins.
- Wait until the generator is completely cooled down, then turn the Engine Switch and the fuel cap breather valve knob to "OFF".
AC Connections
- Start the generator.
- Insert the plug into the AC Output Socket and check that the on-screen AC output port icon is illuminated.
- Switch on the electrical equipment.
Tips: While the engine is running, the AC output can be connected and disconnected by the AC switch button. If the generator supplies power to multiple loads or electrical equipment, please start electrical equipment in descending order, according to the size of the load.
Switch off all electrical equipment before inserting plugs.
Make sure that all electrical equipment including wires and plugs are in good condition before being connected to the generator, and confirm that all loads carried by the generator are within the rated load range and that the load current is within the rated current range.
Tips: Make sure that the generator is grounded. If any electrical equipment needs to be grounded, the generator must also be grounded.
DC Charging
Charging the DELTA Max or the DELTA Pro
- Turn the fuel cap breather valve knob to "ON" (see Step 1 in paragraph "Startup").
- Turn the Engine Switch to "ON" (see Step 2 in paragraph "Startup").
- Connect with the DELTA Max or the DELTA Pro through the 5m/ 16.4ft Extra Battery Connection Cable.
- If the remaining power of the DELTA Max or the DELTA Pro falls to the lower limit, it will send a request to the generator to recharge. The generator will respond and start recharging.
![information]() Tips: If the remaining power of the DELTA Max or the DELTA Pro does not fall to the lower limit, the generator can be started by hand to start recharging.
Tips: If the remaining power of the DELTA Max or the DELTA Pro does not fall to the lower limit, the generator can be started by hand to start recharging. - Once the power capacity of the DELTA Max or the DELTA Pro reaches the upper limit, it will send a request to the generator to stop charging. The generator will respond and stop DC recharging.
Tips: The upper and lower limits may be set on the app. The upper limit is 100% by default and the lower limit is 20% by default. When used together with the DELTA Max or the DELTA Pro for recharging, to improve the utilization efficiency of fuel, it is recommended to set the upper limit as 80%. When charging with DC, the AC switch can be turned on for AC output. The total power of DC+AC is 1800 W, with AC output as the priority.
Tips: The DELTA Pro needs to use the dedicated adaptor plug, which is included in the DELTA Pro standard configuration.
Charging the DELTA Max Extra Battery Pack or the DELTA Pro Extra Battery Pack
- Turn the fuel cap breather valve knob to "ON" (see Step 1 in paragraph "Startup").
- Turn the Engine Switch to "ON" (see Step 2 in paragraph "Startup").
- Connect to the DELTA Max Extra Battery or DELTA Pro Extra Battery with the 5m/ 16.4ft Extra Battery Connection Cable.
- Switch on the DELTA Max Extra Battery or DELTA Pro Extra Battery and it will send a request to the generator to recharge. The generator will respond and start recharging.
- When the DELTA Max Extra Battery or DELTA Pro Extra Battery is fully recharged, it will send a request to the generator to stop charging. The generator will respond and stop DC recharging.
![information]() Tips: The DELTA Pro Extra Battery Pack needs to use the dedicated adaptor, which is included in the DELTA Pro standard configuration.
Tips: The DELTA Pro Extra Battery Pack needs to use the dedicated adaptor, which is included in the DELTA Pro standard configuration.
Using the App

You can control and view the information and data of the product through the EcoFlow app.
Read the EcoFlow App user guide and access the download link here: https://ecoflow.com/pages/ecoflow-app.
Application Range
Please make sure that the total load of the generator is within the rated range before using the generator, or otherwise the generator may be damaged.
| Application |  |  |  |
| Power Factor | 1 | 0.8–0.95 | 0.4–0.75 (Efficiency 0.85) |
| Output | ≤1800 W | ≤1440 W | ≤612 W |
When this generator is supplying power to precision instruments, electronic controllers, personal computers and microcomputers, please keep the generator a sufficient distance away from any of the foregoing equipment to avoid electromagnetic interference, and at the same time, to ensure that the generator will not be interfered with by these electronic devices.
If this generator is used to supply power to medical devices, it is recommended to consult with the corresponding equipment manufacturers and technicians first. This is because some electronic equipment or general purpose machines in hospitals require a strong current upon startup and may not be able to use the generator. Please contact the equipment manufacturer for confirmation even if the respective start parameters of the equipment satisfy the conditions listed in the table above.
Special Requirements
- There may be local laws or regulations applicable to the intended use of the generator set. Please consult with qualified electricians, electrical inspectors or the local authorities with jurisdiction for further information.
- In some areas, generator sets must be registered with local utility companies.
- Generator sets, if used on construction sites, may be subject to regulations.
Maintenance and Servicing
Proper maintenance and servicing is essential to ensure safe, economical and reliable usage. This also helps minimize your environmental impact.
You must regularly check and service your generator to keep it in optimal condition based on the schedule below.
| Servicing Intervals | |||||
| Item | Each Time | Within the first month or after 20 hours of operation | Once every three months or every 50 hours of operation thereafter | Then once every year or every 100 hours of operation | |
| Generator Engine Oil | Check – Add |  | |||
| Replace |  |  | |||
| Air Filter Element | Check – Add |  | |||
| Clean |  | ||||
| Replace |  | ||||
| Sediment Bowl | Clean |  | |||
| Spark Plug* | Clean – Adjust | | |||
| Spark Plug Arrester | Clean |  | |||
| Idle Speed ** | Check - Adjust | | |||
| Valve Clearance ** | Check - Adjust | | |||
| Fuel Tank and Fuel Filter ** | Clean | | |||
| Fuel Pipe* | Check | Every 2 years (or replace it if necessary) | |||
| Cylinder Head, Piston | Remove any carbon deposits ** | Every 300 hours | |||
| * These items should be replaced if necessary | |||||
| ** These items should be serviced by their respective dealers unless the user has the appropriate tools and maintenance capacity | |||||
- If the generator set works at high temperature under high loads, the engine oil should be replaced every 25 hours.
- If working in dusty or harsh environments, the air filter element should be cleaned every 10 hours and, if necessary, replaced every 25 hours.
Spot check items based on either the cycle or length of time, whichever comes first. - If you have reached a servicing interval, servicing must be performed as required based on the table above as soon as possible.
Turn off the generator before starting any maintenance. Place the generator on a level spot and separate the spark plug cap from the spark plug to prevent the generator from starting up. Do not use the generator such in poorly ventilated places such as rooms, rail tunnels or caves. Be sure to keep the working area well ventilated. Exhaust gas from the generator contains toxic carbon monoxide fumes. Inhaling these fumes may lead to shock, loss of consciousness or even death.
Checking the Spark Plug
The spark plug is an important part of the generator and must be checked regularly.
- Turn the maintenance cover knob to
![]() and take off the maintenance cover.
and take off the maintenance cover. - Take off the spark plug cap.
- Use the spark plug socket and revolve it counterclockwise to remove the spark plug.
![]()
Removing the spark plug - Check for any fading in color and remove any carbon deposits. The porcelain center around the spark plug center electrode should be moderately light brown if it is in good condition. The electrode should be replaced if worn, or if the insulation is peeling, cracked or dirty.
- Check the model of the spark plug and that it has sufficient clearance. If required, correct the gap.
Standard spark plug: A5RTC
Spark plug clearance: 0.15–0.3 mm
![information]() Tips: The engine may be damaged if the spark plug is not at the correct clearance height.
Tips: The engine may be damaged if the spark plug is not at the correct clearance height. - Reinstall the spark plug with a torque of 13.5±1.5 Nm.
![]()
Spark plug clearance
![information]() Tip: If installing without a torque wrench, a good method is to tighten until tight, then continue to turn by a further 1/4-1/2 rotation.
Tip: If installing without a torque wrench, a good method is to tighten until tight, then continue to turn by a further 1/4-1/2 rotation. - Reinstall the spark plug cap on the spark plug.
- Reinstall the maintenance cover.


Adjusting the Carburetor
The carburetor is an important part of engine, and should be adjusted by the dealer who has the professional knowledge, data and equipment to ensure it is adjusted correctly.
Usage in high altitude areas
In high altitude areas, the atmospheric pressure may reduce the amount of air intake, decline the performance and increase the fuel consumption of standard carburetors. Moreover, the dense mixture may contaminate the spark plug and lead to starting difficulties. When the generator is running at high altitudes (above 3000 feet/914 m), the emissions may increase.
Modifying the carburetor can improve its high altitude performance. If you plan to operate your generator at high altitude (above 3000 feet/914 m) areas for a long time, please contact your after-sales service team to help to modify it. When using the modified carburetor in high altitude areas (if within the service life of the generator), the generator will satisfy every emission standard.
Replacing the Engine Oil
Do not drain the engine oil immediately after the generator is switched off. The oil temperature will be very high. Please take care not to get scalded when draining the oil.
- Place the generator on a level plane, start it up and keep it running for several minutes to increase its temperature. Then turn it off. Turn the Engine Switch and the fuel cap breather knob to "OFF".
- Turn the maintenance cover knob to
![]() and take off the maintenance cover.
and take off the maintenance cover. - Unscrew the lid and oil dipstick.
- Place the oil basin under the generator and tilt the generator. The oil will drain quickly.
![information]() Tips: Improper disposal of engine oil may harm the environment. If you replace the engine oil yourself, please dispose of the used oil properly. Store the used oil in a sealed container and take it to your nearest oil recycling center. Do not pour it into any trash can, onto the ground or into the sewer.
Tips: Improper disposal of engine oil may harm the environment. If you replace the engine oil yourself, please dispose of the used oil properly. Store the used oil in a sealed container and take it to your nearest oil recycling center. Do not pour it into any trash can, onto the ground or into the sewer. - Place the generator in its original horizontal state.
![]()
Do not tilt the generator when adding engine oil to prevent damage to the generator due to adding excessive oil. - Refill the oil to the proper level.
- Wipe the oil dipstick clean and remove any spilled oil.
![]()
Prevent any foreign objects from entering the inside of the engine. - Tighten the oil dipstick and lid.
- Reinstall the maintenance cover and turn the knob to Closed.
Air Filter
- Turn the maintenance cover knob to
![]() and take off the maintenance cover.
and take off the maintenance cover. - Take off the screws and the air filter cover.
![]()
Removing the air filter cover - Take off the foam filter element.
- Clean the foam filter element with soapy water or a nonflammable solvent and dry it.
- Add oil to the foam filter element and squeeze out the excess oil. The foam filter element should be wet but should not drip any oil.
- Place the foam filter element into the air filter.
![information]() Tips:
Tips: - Make sure that the surface of the foam filter element is in close contact with the air filter, leaving no gap between them.
- Do not start the generator before reinstalling the air filter as excessive toxic gas may be produced and foreign objects may enter the engine, causing wear to the engine block.
- Install the air filter cover back to its original position and tighten the screws.
- Reinstall the maintenance cover and turn the knob to Closed.
![]()
Do not twist the foam filter element, to prevent any damage to it.

- Wash clean
![]()
- Press and air dry (do not twist)
![]()
- Add correct amount of oil
![]()
- Press (do not twist)
![]()


Fuel Filter Strainer
- Take off the fuel cap and fuel filter screen.
![]()
- Clean the fuel filter screen with fuel.
![]()
- Wipe the filter screen and place it back into the fuel.
![]()
- Reinstall the fuel cap.
![]()


Never use fuel in any place near smoke or flames.
Be sure to tighten the fuel cap.
Muffler
- Unscrew the bolts.
- Take off the muffler cap, muffler block and spark plug arrestor.
- Clean the carbon deposits on the muffler block and the spark plug arrestor gently with a steel wire brush to avoid any damage or scratches to the muffler block and spark plug collector.
![]()
Clean any carbon deposits - Check whether the muffler block or the spark plug arrestor is damaged, and replace it if damaged.
- Reinstall the parts in turn.

Once the generator starts running, the engine and the muffler will become scalding hot. Do not let your skin or clothes directly touch the engine or muffler during your checks and maintenance.
Storage and Transportation
If you plan to place this generator into long-term storage, you need to take some storage measures to prevent premature aging of the generator.
Draining the Fuel
- Turn the Engine Switch to "OFF".
- Open the fuel cap, take out the fuel filter screen, drain all the fuel from the fuel tank into a temporary fuel tank and reinstall the fuel cap.
- Start the generator. The remaining fuel will be used up in about 20 minutes. The generator will turn off when there is no fuel left.
- Do not connect any electrical equipment to the generator.
- The time it takes for the generator to run depends on the remaining amount of fuel inside the fuel tank.
- Turn the maintenance cover knob to
![]() and take off the maintenance cover.
and take off the maintenance cover. - Loosen and remove the oil drain bolt on the carburetor and drain the fuel from the carburetor into the temporary fuel tank.
- Turn the Engine Switch to "OFF".
- Screw in and tighten the oil drain bolt.
- Reinstall the maintenance cover and turn the knob to Closed.
- Turn off the fuel cap breather valve knob after the engine cools down completely.
As fuel is highly volatile and toxic, please carefully read the "Safety Guidelines" for handling instructions.
Wipe any spilled fuel away with a clean soft cloth to prevent it from damaging the plastic shell.
Storing the Generator
Take the following steps to protect parts such as the engine body and piston rings which are the most susceptible to corrosion.
- Take out the spark plug, inject 10 mL/0.34 oz. of engine oil, reinstall the spark plug, and pull the Starter Grip for several minutes so that the engine oil can fully lubricate the cylinder block.
- Pull the Starter Grip until it becomes tight (to prevent the cylinder block and valves rusting).
- Wipe the generator's surface clean, place the generator in a well-ventilated and dry place and cover it.
Rechargeable Battery
Disconnect the battery each time you store it for a longer period of time and reconnect it before using it again.
 Attention:
The battery should be charged and discharged once every 3 months. It will charge while the engine is running.
Use after storage
If the generator is stored with fuel in the fuel tank and carburetor, conduct servicing as required in the table below before using again.
| Storage Duration | Recommended Servicing Procedure to Prevent Difficult Startups |
| Within one month | No preparation needed |
| One to two months | Evacuate the fuel and inject fresh fuel |
| Two months to one year | Evacuate the fuel and inject fresh fuel |
Drain the fuel from Carburetor Drain Cup  | |
Drain the fuel from Sediment Bowl  | |
| Over one year | Evacuate the fuel and inject fresh fuel |
| Drain the fuel from Carburetor Drain Cup | |
| Drain the fuel from Sediment Bowl | |
| Drain the original fuel into a suitable storage container after moving it out of storage and inject fresh fuel before starting it. | |
|
| |
Transportation
- When moving, storing or operating the generator, do not place it on its side. The engine oil may leak and damage the engine or your property.
- If the generator is constantly running, allow it to cool before being loaded onto the transport vehicle. Hot engines and waste systems may cause burns and can cause certain materials to ignite. To prevent fuel spills during transport, position the generator vertically in the standard operating position, and turn the engine switch and the fuel cap breather valve knob to the "OFF" position.
- During transportation, take care not to let the generator fall or be impacted.
Faults and Troubleshooting
| Errors | Content of Tips | Error Type | Possible Causes | Recovery Methods |
| Unable to start |  | Fuel system | The fuel cap breather valve knob is in the OFF position | Turn the fuel cap breather valve knob to "ON" |
| | The Engine Switch is in the OFF position | Turn the Engine Switch to "ON" | ||
 Icon flashes | There is no fuel left | Refueling | ||
| | The generator set was not properly prepared for storage, or the gasoline was not evacuated, or the quality of injected fuel was poor. | Empty the fuel tank and carburetor and refill with fresh fuel | ||
| | The fuel filter is blocked. Carburetor faults, ignition failure, or stuck valves, etc. | Send the generator set to your service dealer, or refer to the Service Manual | ||
| Oil Alert Indicator stays on | Engine oil system | Low engine oil level. The engine oil alarm system may turn off the engine. | Add engine oil | |
| | Electrical system | The spark plug is faulty, dirty or have improper clearance | Adjust the clearance or replace the spark plug | |
| | The spark plug has been moistened by the fuel (spilled outside the engine) | Dry the spark plug with air and reinstall it | ||
| Oil Alert Indicator stays on | Communication failure | Send the generator set to your service dealer, or refer to the Service Manual | ||
 Icon stays on | Lack of battery power or the battery is damaged | Pull by hand to start or replace the battery | ||
 Icon stays on | CO exceeding specified standard values | Poor ventilation | Turn off the generator and improve ventilation | |
| No output |  Icon flashes | AC overload protection | Load-related problems | Remove the problem load, shut down and restart |
 Icon flashes | DC overload protection | Load-related problems | Remove the problem load, shut down and restart | |
 The icon stays on | Over-temperature protection | The air inlet is blocked or the ambient temperature is too high or the load is too large | Check the air inlet or remove it from the high temperature environment or reduce the load | |
 The icon stays on | Battery over-temperature | The air inlet is blocked or the ambient temperature is too high or the load is too large | Check the air inlet or remove it from the high temperature environment or reduce the load |
Communication failure: Communication failures may occur in two specific situations, as detailed below.
- Normal failure: When the generator is connected to DELTA Max or DELTA Pro, if the generator goes into sleep mode, a communication failure will occur. In this situation, press a button to activate the generator and the communication failure will disappear.
- Abnormal failure: If the communication failure does not disappear once the generator has been activated or while the generator is running, this could indicate that the failure has been caused by a problem with the generator.
If any alert occurs during the use of this product and if the alert icon does not disappear after the foregoing methods are attempted or the product is restarted, please stop using it immediately. If the above information still fails to solve your problem, please contact our professional service personnel for further support.
Parameters and Specifications
| Complete machine | Length × width × height | 23.5×11.7×18.7 in/597×296×475 mm |
| Net weight | Approximately 62.8 lbs/28.5 kg | |
| Generator | Type | Inverter generator |
| Frequency | 60 Hz | |
| Rated voltage | 120 V | |
| Rated power | 1800 W (peak value 1900 W) | |
| Power factor | 1 | |
| DC output voltage | 42–58.8 V | |
| Maximum DC output current | 32 A | |
| Engine | Engine model | R80-i |
| Engine type | Single cylinder, four-stroke, forced-air cooling, overhead valve | |
| Engine displacement | 80 CC | |
| Type of fuel | Unleaded fuel | |
| Volume of fuel tank | 1.06 gal./4 L | |
| Generator engine oil volume | 0.21gal./ 0.38 L | |
| Continuous Working Time | 3.5 Hr (full load) | |
| Noise Level (at a distance of 7 meters) | 56–67 dB (full load) | |
| Model of spark plug | A5RTC (TORCH) | |
| Start mode | Electric start |
Package List

Circuit Diagram


Documents / Resources
References
Download manual
Here you can download full pdf version of manual, it may contain additional safety instructions, warranty information, FCC rules, etc.
Advertisement


Need help?
Do you have a question about the Smart Generator and is the answer not in the manual?
Questions and answers