
Related Manuals for Kolin KEA-60BDRDCA


Summary of Contents for Kolin KEA-60BDRDCA
- Page 1 USER’S MANUAL AC/DC EVAPORATIVE AIR COOLER Model KEA-60BDRDCA Please read this owner’s manual before operation and retain it for future reference.
-
Page 2: Table Of Contents
I. Product Introduction --------------------------------------------------------------- Principle Diagram ----------------------------------------------------------------- II. Safety Instructions ---------------------------------------------------------------- III. Main Specifications -------------------------------------------------------------- IV. Range of Application ------------------------------------------------------------- V. Using Environment ---------------------------------------------------------------- VI. Components/ Structure Diagram --------------------------------------------- VII. Circuit Wiring Diagram --------------------------------------------------------- VIII. Installation Instruction --------------------------------------------------------- IX. Introduction to AC/DC Evaporative Air Cooler----------------------------- Power Supply Options ----------------------------------------------------------- X. -
Page 3: Product Introduction
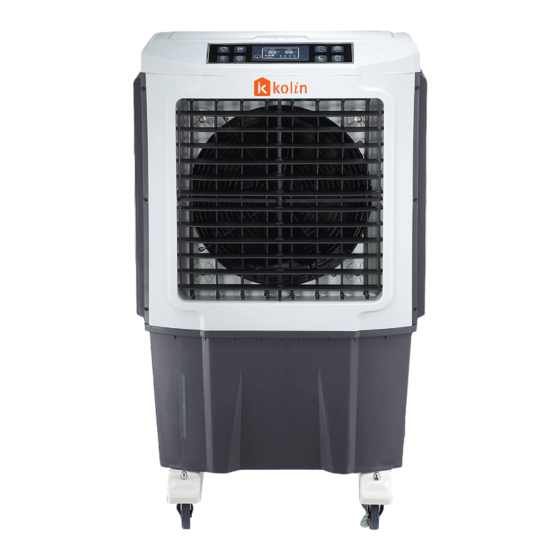
We are confident that our evaporative air cooler will provide you with reliable and effective cooling performance for many years to come. If you have any questions or concerns about your air cooler, please refer to this manual or contact our Kolin customer support team hotline for assistance. Air-blower... -
Page 4: Safety Instructions
WARNING Before plugging in the air cooler, carefully check the power cord for any damage. If the cord is damaged, do not use the air cooler. Instead, contact our Kolin hotline or authorized service center for immediate assistance.. ... -
Page 5: Main Specifications
Avoid placing the air cooler too close to walls or window curtains, as this may block the airflow. Refrain from inserting any objects or body parts into the air cooler while it is operating. Clean the air cooler with a damp cloth, but do not flush it with water directly. ... -
Page 6: Components/ Structure Diagram
VI. Components / Structure Diagram • Water tank: The AC/DC air cooler features a water tank that holds up to 60 liters of water. • Cooling pads: The air cooler has cooling pads that absorb water from the tank and use the natural process of evaporation to cool the surrounding air. -
Page 7: Circuit Wiring Diagram
VII. Circuit Wiring Diagram DC12V Water level sensor Control panel Submersible pump Swing motor Draining pump VIII. Installation Instruction Read Safety Precautions Before Installation Incorrect installation due to ignoring instruction can cause serious damage or injury. 1. Unpacking: Open the package and remove all packing materials. Take out the air cooler. 2. - Page 8 After this initial period, the odor should dissipate. If the smell persists, please contact our Kolin customer support for assistance. Remember to always follow the safety instructions provided in this manual, such as avoiding splashing water onto the motor and ensuring that the air cooler is placed on a flat surface before use.
-
Page 9: Introduction To Ac/Dc Evaporative Air Cooler
IX.Introduction to AC/DC Evaporative Air Cooler Solar Charge Controller 230V~ 60Hz 12V DC Solar Panel AC Power 12V Battery Disclaimer: Please be advised that the battery and solar panel are not included in the AC/DC Air Cooler package. If you wish to operate the unit using a battery and solar panel, we recommend seeking assistance from a qualified solar panel expert to ensure proper installation and compatibility. -
Page 10: Ways To Connect Your Ac/Dc Air Cooler
X. 3 Ways to Connect your AC/DC Air Cooler DC Power 12V Battery Way 1: Works with battery Connecting the Battery: Make sure to connect the positive and negative terminals correctly to avoid potential short circuits. For optimal performance, ensure that the battery is fully charged. Safety Reminders: When connecting the alligator clips, be careful not to let the metal rods touch or collide with each other, as this may cause a short circuit and produce up to 15 volts of electricity. -
Page 11: Way 2: Works With Ac
Way 2: Works with AC power source To operate the air cooler using an AC power source, plug the AC plug into an electrical outlet 230V~. Battery will automatically charge: Please note that when the air cooler is plugged into an AC outlet and the DC plug is connected to a 12v battery, the battery will autommatically begin to charge. - Page 12 Time to fully charge battery Battery Capacity Air cooler(Off) Air cooler(On) Ampere(A) Ampere per hour (Ah) Hour(s) 14.62 15.38 42.22 44.44 13.08 13.85 37.78 40.00 11.54 12.31 33.33 35.56 10.00 10.77 28.89 31.11 8.46 9.23 24.44 26.67 6.92 7.69 20.00 22.22 5.38 6.15...
-
Page 13: Way 3: Works With Solar Panel
Safety Hazards: Make sure to charge the battery in a well-ventilated area to prevent the buildup of explosive gases. Always wear eye protection and gloves when handling batteries and battery chargers. Keep the battery and charger away from open flames or sparks, as they can cause a fire or explosion. -
Page 14: Remote Controller
3. WIND Press the WIND button, the device will enter WIND mode, where the water pump will be turned off, and the fan motor will continue to run at the selected speed. In this mode, the device will only provide air circulation and does not cool the air with water. 4. -
Page 15: Maintenance Instruction
NOTE: HORIZONTAL LOUVERS Manually adjust the horizontal louvers to change the direction of airflow (Up/Down) 6. SLEEP Press SLEEP button, the speed of the fan motor will be lowered from high to low, and then from low to high again. This creates a gentler airflow that is less likely to disturb your sleep. -
Page 16: Cleaning The Cooling Pad
Step 6: Step 4: Step 5: Sanitize the water tank Brush out the inside of the cooler Clean with water and mild soap INSIDE INSIDE Soft Cloth Sponge Periodically empty the water tank Use a soft cloth or sponge to sweep Clean the water tank with a mild and sanitize it every three days. -
Page 17: Replacing The Cooling Pad
C. Replacing the Cooling Pads If you experience reduced air flow from your evaporative air cooler, it may be time to replace the cooling pads. Honeycomb pads typically last longer and require replacement every 3 to 5 years, depending on mineral buildup. Generally, cooling pads don't need to be replaced annually. -
Page 18: Check The Mechanical Parts
E. Check the Mechanical Parts Motor Check the mechanical parts. While you have the air cooler apart, use a few drops of lubricating oil on the motor and fan. Use a few drops to lubricate the parts. Fan Blades After a long time of use, the fan can be stuck, so it is important to pay attention to hygiene. -
Page 19: Troubleshooting
Common causes Solutions Power failure Check power supply Unable to start the Switch burned Inspect and call our Kolin Service Hotline Motor starter’s capacitor Inspect and call our Kolin Service Hotline damaged No air flow Motor damaged Inspect and call our Kolin Service Hotline... - Page 20 After this initial period, the odor should dissipate. If the problem persists after attempting these solutions, please contact Kolin customer service for further assistance.
- Page 21 If you have any concerns, please contact us at the following: Customer hotline: (02) 8-852-6868 Text hotline: (0917)-811-8982 Email: customerservice@kolinphil.com.ph Also, please like and follow us on our following social media accounts: Facebook: Kolin Philippines Instagram: kolinphilippines Youtube: kolinphilippines Page 19 ...
Need help?
Do you have a question about the KEA-60BDRDCA and is the answer not in the manual?
Questions and answers