Table of Contents
Advertisement
Quick Links
Advertisement
Table of Contents
Troubleshooting

Related Manuals for Olivetti d-COLOR P3100


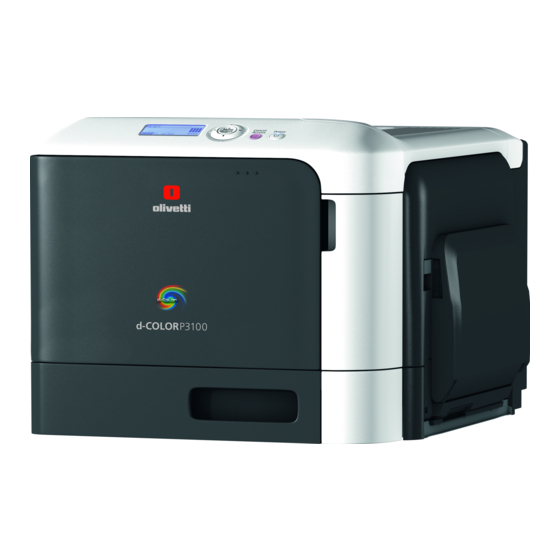
Summary of Contents for Olivetti d-COLOR P3100
- Page 1 MAINTENANCE/TROUBLESHOOTING d-COLOR P3100...
-
Page 3: Table Of Contents
When the Message Window is not displayed................4-3 Cannot print............................. 4-4 4.3.1 Cannot print ............................4-4 4.3.2 Problems on print quality ........................4-6 4.3.3 When the bit count does not match between the server and the client ..........4-8 Major messages and actions......................4-9 Warning messages..........................4-9 d-COLOR P3100 Contents-1... - Page 4 Error messages ..........................4-10 Service call............................4-10 Checking Counters Checking the counter ........................5-3 Index Contents-2 d-COLOR P3100...
-
Page 5: Cleaning This Machine
Cleaning this Machine... -
Page 7: Before Getting Started
Do not load an excessive number of sheets of paper in the output tray. Doing so may cause a paper jam or paper curling. When moving this machine, at least two people are required to do so. To prevent toner from spilling, keep this machine horizontal when carrying it. d-COLOR P3100... - Page 8 Not doing so may cause injuries due to the product being dropped. If any toner enters your eyes, immediately wash them with cool water, then contact your doctor. The Fuser Unit is heated. The temperature of the Fuser Unit slowly reduces (wait for 1 hour). d-COLOR P3100...
-
Page 9: Cleaning
Exercise care not to spill water or detergent inside this machine. Doing so may cause a damage of this machine or an electric shock. 1.2.1 Cleaning the outside of this machine Control Panel Exhaust Air Duct Outer Covers d-COLOR P3100... -
Page 10: Cleaning The Paper Feed Rollers
Open the Manual Feed Tray. Press up the center of the flip-top plate until the lock latches (white) at the right and left are locked. Wipe off the Paper Feed Rollers with a soft and dry cloth. Close the Manual Feed Tray. d-COLOR P3100... -
Page 11: Cleaning The Paper Feed Rollers Of Tray 1/2
Open the Right Door of Tray 2. % When opening the Right Door of Tray 2, be sure to fold the Manual Feed Tray in advance. Wipe off the Transport Roller with a soft and dry cloth. Close the Right Door of Tray 2. d-COLOR P3100... -
Page 12: Cleaning The Laser Lenses
The Laser Lens Cleaning Tool is stored in the Tray 1. Pull out Tray 1. Remove the cover. % The cover is used later. Do not return it to the original position. Remove Laser Lens Cleaning Tool from Tray 1. Close Tray 1. d-COLOR P3100... - Page 13 Toner Bottle may cause toner to spill. % For information on how to remove an Imaging Unit, refer to page 2-9. Cover the removed Imaging Unit with a cloth to keep from being affected by light. Install the cover on the removed Imaging Unit. d-COLOR P3100...
- Page 14 % For information on how to install a Toner Cartridge, refer to page 2-4. % For information on how to install a Waste Toner Bottle, refer to page 2-15. % For information on how to install an Imaging Unit, refer to page 2-9. 1-10 d-COLOR P3100...
- Page 15 In the same way, clean the laser lens at the position corresponding to each Imaging Unit. % The Laser Lens Cleaning Tool is an accessory of this machine. Return the Laser Lens Cleaner to the laser lens cleaner holder so that you do not lose it. d-COLOR P3100 1-11...
- Page 16 Cleaning 1-12 d-COLOR P3100...
-
Page 17: Checking And Replacing Consumables
Checking and Replacing Consumables... -
Page 19: Checking The Status Of Consumables
Reference If a warning such as for toner replacement or a paper jam occurs on this machine, it can be sent to a registered E-mail address. For information on the setting procedure, refer to [User's Guide Applied Functions]. d-COLOR P3100... -
Page 20: Replacing Consumables
Securely seal the bag and box with tape, being careful of the toner in the Toner Cartridge. The recovered Toner Cartridge and Imaging Unit are re- cycled. d-COLOR P3100... -
Page 21: Replacement Procedure
Check the color of the exhausted toner in the Message Window of the Control Panel. Open the Front Door. Pull the lever at the front left. Y M C K Hold the handle of the Toner Cartridge to be replaced, then pull out it. d-COLOR P3100... - Page 22 % To prevent toner from spilling, do not take the Toner Cartridge out of the bag until Step 4 is exe- cuted. Take the Toner Cartridge out of the bag. Hold a new Toner Cartridge upside down in your hands, then shake it several times in each of the ver- tical, horizontal, and longitudinal directions. d-COLOR P3100...
- Page 23 % Carefully return the lever at the front to its original position. If the lever is not returned to its original position, the Front Door is not closed. % If it is difficult to operate the lever, push the lever unit to the back. d-COLOR P3100...
- Page 24 Replacing consumables Check that the Toner Cartridge is set securely, then pull out the protection film. Close the Front Door. d-COLOR P3100...
-
Page 25: Replacing An Imaging Unit
Check the color of the Imaging Unit to be replaced in the Message Window of the Control Panel. Open the Front Door. Pull the lever at the front of the Toner Cartridge to the left. Y M C K d-COLOR P3100... - Page 26 Press up the Waste Toner Bottle to unlock. Hold the handles at the right and left of the Waste Toner Bottle, then carefully pull out the Waste Toner Bottle. % Inclining the Waste Toner Bottle may cause toner to spill. 2-10 d-COLOR P3100...
- Page 27 Do not throw a toner or a toner container into a fire. Doing so may cause toner to splatter, which may result in burn injuries. Check the color of the new Imaging Unit. Take the Imaging Unit out of the bag. d-COLOR P3100 2-11...
- Page 28 % Do not touch the bottom of the Imaging Unit. Doing so may damage it and subsequently reduce printing quality. Remove the protection cover of the Imaging Unit. Remove all the protection tapes of the Imaging Unit. Remove the paper of the Imaging Unit. Remove the protection cover of the Imaging Unit. 2-12 d-COLOR P3100...
- Page 29 Toner Cartridge to the back. % Push the Toner Cartridge to the back. CAUTION Do not touch the copper terminal of the Toner Cartridge. Doing so may cause static electricity to dam- age the product. d-COLOR P3100 2-13...
- Page 30 Pull the lever to the right to lock it. % Carefully return the lever at the front to its original position. If the lever is not returned to its original position, the Front Door is not closed. Close the Front Door. 2-14 d-COLOR P3100...
-
Page 31: Replacing A Waste Toner Bottle
Press up the Waste Toner Bottle to unlock. Hold the handles at the right and left of the Waste Toner Bottle, then carefully pull out the Waste Toner Bottle. % Inclining the Waste Toner Bottle may cause toner to spill. d-COLOR P3100 2-15... - Page 32 % To dispose of the used Waste Toner Bottle, use the recovery service or follow the regulations in your region. Push the Waste Toner Bottle to the back to lock it. Close the Front Door. 2-16 d-COLOR P3100...
-
Page 33: Replacing The Transfer Roller
While pushing two tabs from both sides to the inside (1), tilt the roller holder to the front side (2). While holding the tabs, remove the Transfer Roller. Take a new Transfer Roller out of the package box. d-COLOR P3100 2-17... - Page 34 While holding the tabs, insert the shaft of the Transfer Roller into the bearing in the machine. While holding down the roller, press it inward until it clicks. Close the Right Door. Select [UTILITY] - [ADMIN SETTINGS] - [LIFE] - [REPLACE] - [TRANS. ROLLER], then reset the counter. 2-18 d-COLOR P3100...
-
Page 35: Replacing The Transfer Belt Unit
Unit with a cloth to keep from being affected by light. Pull the lever (1), then open the Right Door (2). % When opening the Right Door, be sure to fold the Manual Feed Tray in advance. d-COLOR P3100 2-19... - Page 36 % Pull out the Transfer Belt Unit horizontally. Not doing so may damage the surface. % After pulling out the Transfer Belt Unit halfway, draw out it while holding the handles on the right and left sides. 2-20 d-COLOR P3100...
- Page 37 Carefully insert the new Transfer Belt Unit along the guides at the right and left. % Insert the Transfer Belt Unit horizontally. Not doing so may damage the surface. % Insert the Transfer Belt to the back. Lift the Transfer Belt Unit guide. d-COLOR P3100 2-21...
- Page 38 Close the Right Door. Install all of Toner Cartridge, Waste Toner Bottle, and Imaging Unit. CAUTION Do not touch the copper terminals of the Toner Cartridge and Imaging Unit. Doing so may cause stat- ic electricity to damage the product. 2-22 d-COLOR P3100...
-
Page 39: Replacing A Fuser Unit
Turn off the power of this machine. Pull the lever (1), then open the Right Door (2). % When opening the Right Door, be sure to fold the Manual Feed Tray in advance. Open the Top Door. d-COLOR P3100 2-23... - Page 40 Unit for 20 minutes or more with the cover and each door open until it reaches room temperature. Then, replace the Fuser Unit with a new one. CAUTION High temperature! Lower the levers at the right and left. 2-24 d-COLOR P3100...
- Page 41 High temperature! Do not touch the roller. Doing so may cause a burn injury. CAUTION High temperature! Take a new Fuser Unit out of the package box. % Do not touch the surface of the Fusing Roller. d-COLOR P3100 2-25...
- Page 42 Lower the lever at the bottom. Insert a new Fuser Unit to the back until it is fixed. CAUTION Securely lock the lever. If the lever is not sufficiently locked, a setting error may be detected. Lift the lever at the bottom. 2-26 d-COLOR P3100...
- Page 43 Close the Top Door. Close the Right Door. % If the Right Door is not closed, check that the Fuser Unit is installed correctly. Select [UTILITY] - [ADMIN SETTINGS] - [LIFE] - [REPLACE] - [FUSER UNIT], then reset the counter. d-COLOR P3100 2-27...
- Page 44 Replacing consumables 2-28 d-COLOR P3100...
-
Page 45: Clearing A Paper Jam
Clearing a Paper Jam... -
Page 47: To Prevent A Paper Jam
Do not leave a quantity of paper that exceeds the maximum capacity of the paper tray. (Up to 200 sheets can be output from the output tray. If 200 or more sheets are left in the tray, it may cause a paper jam.) d-COLOR P3100... -
Page 48: When A Paper Jam Has Occurred
The area around the fuser unit is hot. To avoid a burn injury, be careful not to touch any parts except for the specified knob and dial. In case your hand or any other part of your body comes in contact with the heated section, immediately run it under cold water and seek medical assistance. CAUTION High temperature! d-COLOR P3100... -
Page 49: Clear Procedure
Carefully pull out the jammed paper. NOTICE If you touch the surface of the Transfer Belt Unit or Transfer Roller, it may reduce printing quality. Be careful not to touch the surface of the Transfer Belt Unit or Transfer Roller. d-COLOR P3100... -
Page 50: Clearing A Paper Jam In Tray 1
The area around the fuser unit is hot. To avoid a burn injury, be careful not to touch any parts except for the specified knob and dial. In case your hand or any other part of your body comes in contact with the heated section, immediately run it under cold water and seek medical assistance. CAUTION High temperature! d-COLOR P3100... -
Page 51: Clear Procedure
Carefully pull out the jammed paper. NOTICE If you touch the surface of the Transfer Belt Unit or Transfer Roller, it may reduce printing quality. Be careful not to touch the surface of the Transfer Belt Unit or Transfer Roller. d-COLOR P3100... - Page 52 When a paper jam has occurred Close the Right Door. Pull out Tray 1, then remove any paper left in the tray. Flip through the removed paper, then align the edges. Load paper into Tray 1, then close the tray. d-COLOR P3100...
-
Page 53: Clearing A Paper Jam In Tray 2
Carefully pull out the jammed paper. Close the Right Door of Tray 2. Pull out Tray 2, then remove any paper left in the tray. Flip through the removed paper, then align the edges. Load paper into Tray 2, then close the tray. d-COLOR P3100... -
Page 54: Clearing A Paper Jam In The Duplex Option
Clearing a paper jam in the Duplex Option Pull the lever (1), then open the Right Door (2). % When opening the Right Door, be sure to fold the Manual Feed Tray in advance. Carefully pull out the jammed paper. Close the Right Door. 3-10 d-COLOR P3100... -
Page 55: Clearing A Paper Jam In The Fuser Unit
CAUTION High temperature! Clear procedure Pull the lever (1), then open the Right Door (2). % When opening the Right Door, be sure to fold the Manual Feed Tray in advance. Open the Top Door. d-COLOR P3100 3-11... - Page 56 When a paper jam has occurred Press up the levers (2 places). Open the Fuser Cover. CAUTION High temperature! Do not touch the roller. Doing so may cause a burn injury. CAUTION High temperature! 3-12 d-COLOR P3100...
- Page 57 If you touch the surface of the Transfer Belt Unit or Transfer Roller, it may reduce printing quality. Be careful not to touch the surface of the Transfer Belt Unit or Transfer Roller. Close the Fuser Cover. d-COLOR P3100 3-13...
- Page 58 When a paper jam has occurred Press down the levers (2 places). Close the Top Door. Close the Right Door. 3-14 d-COLOR P3100...
-
Page 59: Troubleshooting For Paper Jam
Do not use an envelope, label sheet, letterhead, postcard, glossy paper, or single side only paper for 2-sided printing. A paper jam has not yet cleared. Recheck the paper path, then check that all paper jams are cleared. d-COLOR P3100 3-15... - Page 60 The Paper Feed Rollers are dirty. Clean the Paper Feed Rollers. For details, refer to page 1-6. Tips If a paper jam frequently occurs in a specific place, carry out checks, repairs, or cleaning focusing on the jam location. 3-16 d-COLOR P3100...
-
Page 61: Troubleshooting
Troubleshooting... -
Page 63: The Power Is Not Turned On
Window may turn off. Check the following items: On the Control Panel, press the Power key. If this machine is in Power Save mode, press the Power key to display the Message Window. Check that the Power Switch is turned on. d-COLOR P3100... -
Page 64: Cannot Print
There may be an error in Refer to the user's manual of the application soft- the application software ware to check the settings. settings. Are the file printing set- Change the settings and try to print again. tings correct? d-COLOR P3100... - Page 65 If not, grant printing permission to public us- [PUBLIC USER] in user chine? ers. authentication. Selection of items failed Selection may not be en- Grayed out items cannot be configured. in the printer driver. abled for certain combi- nations of functions. d-COLOR P3100...
-
Page 66: Problems On Print Quality
Remove the Toner Cartridge, then check it for over in color. damaged. damage. If the Toner Cartridge is damaged, re- place it. One or more Imaging Remove Imaging Unit, then check them for Unit are damaged. damage. If necessary, replace Imaging Unit. d-COLOR P3100... - Page 67 Toner Car- tridge, or any Toner Car- tridge is damaged. This machine has not Place this machine on a flat, hard, stable, and been placed on a level horizontal surface (inclination within +/-1 de- location. gree). d-COLOR P3100...
-
Page 68: When The Bit Count Does Not Match Between The Server And The Client
[i386] that is in the same hierarchy as that of [ntprint.inf]. Click [Open]. Installation starts. When the installation is complete, click [Close]. Additional installation of the 64-bit operating system driver is then completed. d-COLOR P3100... -
Page 69: Major Messages And Actions
Disconnect the USB device. been connected to the USB port. [AUTH TIMEOUT] IEEE802.1x authentication has Restart this machine. not been executed normally, causing a timeout. [PORT AUTH ACTIVE] IEEE802.1X authentication is Wait until authentication is complet- currently executed. d-COLOR P3100... - Page 70 HDD is full. Service call If a service call has appeared, restart this machine. If the problem is not resolved after this machine has been restarted, check the displayed trouble code num- ber, then contact your service representative. 4-10 d-COLOR P3100...
- Page 71 Checking Counters...
- Page 73 Counter information of this machine can be sent to a specified E-mail address. Arrange a notification sched- ule, for example, weekly or monthly, around your system environment. For details on how to configure set- tings, refer to [User's Guide Applied Functions]. d-COLOR P3100...
- Page 74 Checking the counter d-COLOR P3100...
- Page 75 Index...
- Page 77 Service call 4-10 Toner Cartridge 2-4 Handle 2-4 Replace 2-5 Store 2-4 Transfer Belt Replace 2-19 Transfer Roller Replace 2-17 Troubleshooting Message Window 4-3 Paper jam 3-15 Power supply 4-3 Print 4-4 Print quality 4-6 Waste Toner Bottle Replace 2-15 d-COLOR P3100...
- Page 78 2) The Quality System is in compliance with the UNI EN ISO 9000 series of Standards Olivetti S.p.A. - Via Jervis, 77 - 10015 Ivrea (To) - Italy - Tel +39 0125 7751 - Cap. Soc. € 13.200.000 i.v. - R.E.A. 547040 - Cod. Fisc./P.IVA e iscriz. al Reg. Imp. Di Torino 02298700010...
Need help?
Do you have a question about the d-COLOR P3100 and is the answer not in the manual?
Questions and answers