Sign In
Upload
Download
Table of Contents
Contents
Add to my manuals
Delete from my manuals
Share
URL of this page:
HTML Link:
Bookmark this page
Add
Manual will be automatically added to "My Manuals"
Print this page
×
Bookmark added
×
Added to my manuals
Manuals
Brands
Olivetti Manuals
Printer
PGL2645
Operation manual
Olivetti PGL2645 Operation Manual
Hide thumbs
1
2
3
Table Of Contents
4
5
6
7
8
9
10
11
12
13
14
15
16
17
18
19
20
21
22
23
24
25
26
27
28
29
30
31
32
33
34
35
36
37
38
39
40
41
42
43
44
45
46
47
48
49
50
51
52
53
54
55
56
57
58
59
60
61
62
63
64
65
66
67
68
69
70
71
72
73
74
75
76
77
78
79
80
81
82
83
84
85
86
87
88
89
90
91
92
93
94
95
96
97
98
99
100
101
102
103
104
105
106
107
108
109
110
111
112
113
114
115
116
117
118
119
120
121
122
123
124
125
126
127
128
129
130
131
132
133
134
135
136
137
138
139
140
141
142
143
144
145
146
147
148
149
150
151
152
153
154
155
156
157
158
159
160
161
162
163
164
165
166
167
168
169
170
171
172
173
174
175
176
177
178
179
180
181
182
183
184
185
186
187
188
189
190
191
192
193
194
195
196
197
198
199
200
201
202
203
204
205
206
207
208
209
210
211
212
213
214
215
216
217
218
219
220
221
222
223
224
225
226
227
228
229
230
231
232
233
234
235
236
237
238
239
240
241
242
243
244
245
246
247
248
249
250
251
252
253
254
255
256
257
258
259
260
261
262
263
264
265
266
267
268
269
270
271
272
273
274
275
276
277
278
279
280
281
282
283
284
285
286
page
of
286
Go
/
286
Contents
Table of Contents
Troubleshooting
Bookmarks
Table of Contents
Table of Contents
Machine Features
Guides Provided with the Machine
About the Operation Guide (this Guide)
Structure of the Guide
Conventions Used in this Guide
Menu Map
Legal and Safety Information
Notice
Safety Conventions in this Guide
Environment
Precautions for Use
Laser Safety (Europe)
Safety of Laser Beam (Usa)
Safety Instructions Regarding the Disconnection of Power
Compliance and Conformity
Other Precautions (for Users in California, the United States)
En Iso 7779
Ek1-Itb 2000
Wireless Connection (Mexico Only)
Security Precautions When Using Wireless LAN (if Equipped)
Limited Use of this Product (if Equipped)
Legal Information
Energy Saving Control Function
Automatic 2-Sided Print Function
Resource Saving - Paper
Environmental Benefits of "Power Management
Installing and Setting up the Machine
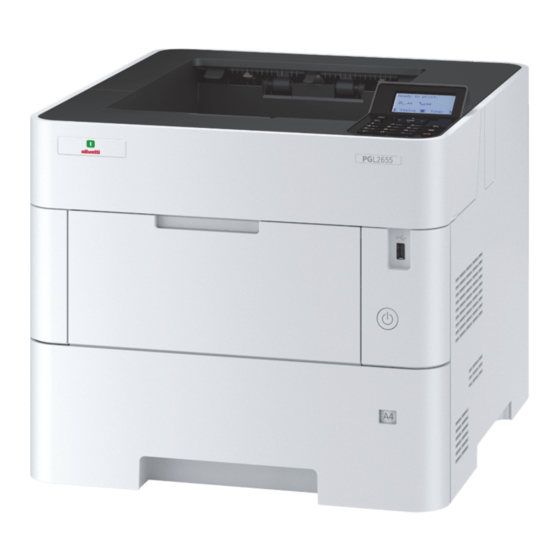
Part Names
Machine Exterior
Connectors/Interior
With Optional Equipments Attached
Connecting the Machine and Other Devices
Connecting Cables
Connecting LAN Cable
Connecting USB Cable
Connecting the Power Cable
Power On/Off
Power on
Power off
Using the Operation Panel
Operation Panel Keys
Operation Method
Help Screen
Login/Logout
Login
Logout
Default Settings of the Machine
Setting Date and Time
Network Setup
Configuring the Wired Network
Configuring the Wireless Network
Setting Wi-Fi Direct
Energy Saver Function
Sleep and Auto Sleep
Power off Rule (Models for Europe)
Installing Software
Software on DVD (Windows)
Installing Software in Windows
Uninstalling the Software
Installing Software in Mac Computer
Checking the Counter
Additional Preparations for the Administrator
Strengthening the Security
Embedded Web Server RX
Accessing Embedded Web Server RX
Changing Security Settings
Changing Device Information
E-Mail Settings
Creating a New Custom Box
Printing a Document Stored in a Custom Box
Preparation before Use
Loading Paper
Precaution for Loading Paper
Loading in the Cassettes
Loading Statement in the Cassettes
Loading Statement in the Cassettes (PG L2650/PG L2655 for Inch Models)
Loading Paper in the Multi Purpose Tray
Specifying Paper Size and Media Type
Paper Stopper
Printing from PC
Printing from PC
Printing on Non-Standard Sized Paper
Banner Printing
Printing System Driver Print Settings Screen
Printing System Driver Help
Changing the Default Printing System Driver Settings (Windows 10)
Canceling Printing from a Computer
Printing by Airprint
Printing by Google Cloud Print
Printing with Wi-Fi Direct
Printing Data Saved on the Printer
Specifying the Job Box from a Computer and Storing the Job
Printing Documents from Private Print Box
Printing Document from Stored Job Box
Printing Document from Quick Copy Box
Printing Document from Proof and Hold Box
Job Box Setting
Status Monitor
Accessing the Status Monitor
Exiting the Status Monitor
Status Monitor Display
Operation on the Machine
Canceling Jobs
What Is Document Box
Using a Custom Box
Creating a New Custom Box
Editing and Deleting Custom Box
Storing Documents
Printing Documents
Editing Documents
Deleting Documents
Printing Documents Stored in Removable USB Drive
Removing USB Drive
Using Various Functions
Functions Available on the Machine
Custom Box (Printing)
USB Drive (Printing Documents)
Functions
Ecoprint
Duplex
Job Finish Notice
File Name Entry
Quiet Mode
Del. after Print (Delete after Printed)
Encrypted PDF
TIFF/JPEG Size
XPS Fitto Page
Status/Job Cancel
Checking Job Status
Checking Job History
Sending the Log History
Device/Communication
Checking the Remaining Amount of Toner and Paper (Paper/Supplies)
Setup and Registration (System Menu)
System Menu
Menu Settings
Report
Paper Settings
Print Settings
Network
Optional Network
Device Common
Security
User/Job Account
Adjust/Maint
Op Functions
Software
User Authentication and Accounting (User Login, Job Accounting)
Overview of User Login Administration
Enabling User Login Administration
Setting User Login Administration
Adding a User (Local User List)
Changing User Properties
User Login Administration for Printing
NW User Property (Obtain Network User Property)
ID Card Settings
PIN Login Settings
Using User Login Administration
Login/Logout
Overview of Job Accounting
Enabling Job Accounting
Job Accounting Access
Setting an Account
Adding an Account
Restricting the Use of the Machine
Editing an Account
Deleting an Account
Job Accounting for Printing
Configuring Job Accounting
Apply Limit
Counting the Number of Pages Printed
Print Accounting Report
Using Job Accounting
Login/Logout
Unknown ID Job
10 Troubleshooting
Regular Maintenance
Cleaning
Toner Container Replacement
Waste Toner Box Replacement
Troubleshooting
Solving Malfunctions
Responding to Messages
Clearing Paper Jams
11 Appendix
Optional Equipment
Overview of Optional Equipment
Optional Function
Character Entry Method
Using the Keys
Selecting Type of Characters
Characters that Can be Entered Using the Numeric Keys
Entering Symbols
Entering Characters
Paper
Basic Paper Specifications
Choosing the Appropriate Paper
Special Paper
Specifications
Machine
Printer Functions
Paper Feeder (500-Sheet) (Option)
Bulk Paper Feeder (2000-Sheet) (Option)
Glossary
Index
Advertisement
Quick Links
1
Table of Contents
Download this manual
PGL2645, PGL2650
PGL2655
OPERATION GUIDE
Code: 601700en
Table of
Contents
Previous
Page
Next
Page
1
2
3
4
5
Advertisement
Table of Contents
Troubleshooting
10 Troubleshooting
218
Troubleshooting
228
Need help?
Do you have a question about the PGL2645 and is the answer not in the manual?
Ask a question
Questions and answers
Related Manuals for Olivetti PGL2645
Printer Olivetti PG L26 Special User Manual
Monochrome led page printer (93 pages)
Printer Olivetti PGL2655 Operation Manual
(286 pages)
Printer Olivetti PG L2028 SPECIAL User Manual
Olivetti printer user manual (108 pages)
Printer Olivetti PG L2028 Special Operation Manual
(104 pages)
Printer Olivetti PG L2130 Operation Manual
(112 pages)
Printer Olivetti PG L2140 Service Manual
(199 pages)
Printer Olivetti PG L2035 Quick Installation Manual
(16 pages)
Printer Olivetti PG L2045 Quick Installation Manual
(16 pages)
Printer Olivetti PG L2555 Service Manual
(293 pages)
Printer Olivetti PG L2545 Service Manual
(293 pages)
Printer Olivetti PGL2535 Operation Manual
(173 pages)
Printer Olivetti PG L2235 Operation Manual
(108 pages)
Printer Olivetti PG L2435 Operation Manual
(222 pages)
Printer Olivetti PGL2550 Operation Manual
(355 pages)
Printer Olivetti PGL2555 Operation Manual
(355 pages)
Printer Olivetti PG L2540 Service Manual
(292 pages)
This manual is also suitable for:
Pgl2650
Pgl2655
Table of Contents
Print
Rename the bookmark
Delete bookmark?
Delete from my manuals?
Login
Sign In
OR
Sign in with Facebook
Sign in with Google
Upload manual
Upload from disk
Upload from URL


Need help?
Do you have a question about the PGL2645 and is the answer not in the manual?
Questions and answers