Table of Contents
Advertisement
Available languages
Available languages
Quick Links
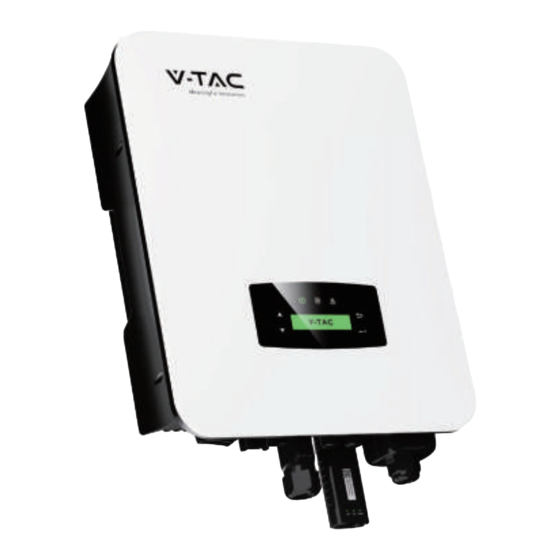
MODEL
VT-6607105
SKU
11819
Thank you for selecting and buying V-TAC product. V-TAC will serve you the best. Please read these
instructions carefully before starting the installation and keep this manual handy for future reference. If you
have any another query, please contact our dealer or local vendor from whom you have purchased the
product. They are trained and ready to serve you at the best. The warranty is valid for 5 years from the date
of purchase. The warranty does not apply to damage caused by incorrect installation or abnormal wear and
tear. The company gives no warranty against damage to any surface due to incorrect removal and
installation of the product. This product is warranted for manufacturing defects only.
IN CASE OF ANY QUERY/ISSUE WITH THE PRODUCT, PLEASE REACH OUT TO US AT: SUPPORT@V-TAC.EU
FOR MORE PRODUCTS RANGE, INQUIRY PLEASE CONTACT OUR DISTRIBUTOR OR NEAREST DEALERS.
V-TAC EUROPE LTD. BULGARIA, PLOVDIV 4000, BUL.L.KARAVELOW 9B
INSTRUCTION MANUAL
HYBRID INVERTER
INTRODUCTION
MULTI-LANGUAGE MANUAL QR CODE
Please scan the QR code to access the manual in
multiple languages.
Advertisement
Chapters
Table of Contents

Related Manuals for V-TAC VT-6607105


Summary of Contents for V-TAC VT-6607105
- Page 1 11819 INTRODUCTION Thank you for selecting and buying V-TAC product. V-TAC will serve you the best. Please read these instructions carefully before starting the installation and keep this manual handy for future reference. If you have any another query, please contact our dealer or local vendor from whom you have purchased the product.
-
Page 2: Table Of Contents
Contents Contents 1. About This Manual ..... . 1.1 Scope of Validity ......1.2 Target Group . - Page 3 Contents 5. Operation ......5.1 Control Panel ....... 5.2 Menu Overview .
-
Page 4: About This Manual
This manual mainly describes the product information, guidelines for installation, operation, maintenance and troubleshooting. And this manual applies to VTAC Single Phase Hybrid Inverter. VT-6607105 Please keep this manual available all the time in case of any emergency. 1.2 Target Group This manual is for qualified personnel. -
Page 5: Explanations Of Symbols
Safety & Symbols 2.2 Explanations of Symbols VTAC inverter strictly comply with relevant safety standards. Please read and follow all the instructions and cautions during installation, operation and maintenance. Danger of electric shock The inverter contains fatal DC and AC power. All work on the inverter must be carried out by qualified personnel only. -
Page 6: Introduction
Introduction 3. Introduction 3.1 Basic Instruction The VTAC hybrid inverters are designed to increase energy independence for homeowners. Energy management is based on time-of-use and demand charge rate structures, significantly reduce the amount of energy purchased from the public grid and optimize self-consumption. Hybrid Inverter PV Array Meter... -
Page 7: Time Of Use
Introduction Note: Advance Setting When select 0 W under P_Feed menu, the inverter will export zero energy to the grid. When select xx W under P_Feed menu, the inverter will export customized energy to the grid. 3.2.2 Time of Use The Time of Use mode is designed to reward customers who do their part to reduce demand on the electric grid, particularly during peak usage periods. - Page 8 Introduction B. Discharge 4 periods of time discharge setting Energy flow: Battery and PV → Load → Grid C. Forbidden Discharge 4 periods of time discharge setting, the battery will be charged firstly. Energy flow: PV → Battery → Load → Grid...
-
Page 9: Selling First
Introduction 3.2.3 Selling First The Selling First mode is suitable for the regions with high feed-in tariff. Energy flow: PV → Load → Grid → Battery 3.2.4 Back-Up When the grid fails, the system will automatically switch to Back-Up mode. The back-up loads can be supplied by both PV and battery energy. -
Page 10: Installation
Installation 4. Installation 4.1 Pre-installation 4.1.1 Unpacking & Package List Unpacking On receiving the inverter, please check to make sure the packing and all components are not missing or damaged. Please contact your dealer directly for supports if there is any damage or missing components. Package List Open the package, please check the packing list shown as below. -
Page 11: Product Overview
Introduction No. Qty Items No. Qty Items Grounding Terminal Hybrid Inverter Certificate Of Inspection Wall Mounting Bracket Quick Installation Instructions Battery Connector Warranty Card Monitor Module Monitoring Quick Installation Instructions DC Connector Mounting Bracket Screw AC Wiring Cover Screw Plastic Expansion Tube Security Screw Smart Meter (Opitional) AC Wiring Terminal... -
Page 12: Mounting Location
Installation Inverter Terminals Items Items DC Switch Communication Port DC Connectors ( + ) For PV Strings AC Port & EPS Port DC Connectors ( − ) For PV Strings Monitor Module Port Battery Port 4.1.3 Mounting Location The inverters are designed for indoor and outdoor installation (IP65), to increase the safety, performance and lifespan of the inverter, please select the mounting location carefully based on the following rules: •... - Page 13 Installation The inverter should be installed vertically on the wall, or lean back on plane with a limited tilted angle. Please refer to below picture. <15° >0° Leave the enough space around inverter, easy for accessing to the inverter, connection points and maintenance. 300mm 300mm 300mm...
-
Page 14: Mounting
Installation 4.2 Mounting Step 1 219mm 17mm 264mm Step 2 Step 3 Security screw... -
Page 15: Electrical Connection
Installation 4.3 Electrical Connection Smart Load Cri�cal Load PV Array Smart meter Smart meter PV Array Grid Load Communication Adapter pin assignment COM1 COM2 NTC+ Meter 485A NTC- Meter 485B Dry Contact BAT 485A Dry Contact BAT CANH BAT CANL 12345678 BAT 485B 485A... -
Page 16: Pv Connection
Installation 4.3.1 PV Connec�on The hybrid inverter has two MPPT channels, can be connected with two strings of PV panels. Please make sure below requirements are followed before connecting PV panels and strings to the inverter: • The open-circuit voltage and short-circuit current of PV string should not exceed the reasonable range of the inverters. - Page 17 Installation Step 2 Note: Please use PV connector crimper to pinch the point of the arrow. Note: You’ll hear click sound when the connector assembly is correct. Step 3 4.3.2 Ba�ery Connec�on Hybrid inverters are compatible with lithium battery. For lead acid battery or batteries with other brands, please confirm with local distributor or VTAC for technical support.
- Page 18 Installation Step 1 19±1mm Battery cable Note: Battery cable suggestion Cross - section 8-10 AWG Please make sure the battery polarities are correct. Step 2 Pass the crimped battery harness through the waterproof connector and the cover. Step 3 Insert the wire harness into the terminals according to “+” and “-” polarity, make the insulated terminals parallel with the terminals , the crimping screw torque is 2.0±0.1N.m...
- Page 19 Installation Step 4 A “click” sound will be heard when the connector assembly is correct. Step 5 Use an open-end wrench to tighten the waterproof lock. Step 6 Insert the battery connector into the inverter, if hear a “click”, it means the battery connection is finished.
-
Page 20: Bat-Can/Rs485
Installation 4.3.2.1 BAT-CAN/RS485 2 3 4 5 6 7 8 6 7 8 Assignment Assignment RS485A CAN/RS485 CANH CANL RS485B Lithium 4.3.2.2 BAT-NTC 12345678 RJ45 Plug Assignment NTC+ NTC- Lead Acid... -
Page 21: Multi Inverter Parallel
Installation 4.3.3 Mul� Inverter Parallel 12345678 RJ45 Plug Assignment 485A 485B 12345678 RJ45 Plug Assignment 485A 485B 12345678 RJ45 Plug Assignment 485A 485B... -
Page 22: Ac Connection
An extra AC breaker is needed for On-Grid connection to be isolated from grid when necessary. Below are requirements for the On-Grid AC-breaker. Inverter Model AC breaker specification VT-6607105 63A/200V/230V AC breaker Note: Qualified electrician will be required for the wiring. - Page 23 Installation Note: The wiring terminals should be wrapped with insulation tape, otherwise it will cause a short circuit and damage the inverter. Note: The Max. power load connects to EPS port should not exceed the inverter's EPS Max. output power range. Step 2 GRID EPS Load Step 3...
-
Page 24: Ct Or Meter Connection
Installation 4.3.5 CT or Meter Connec�on Meter and a current sensor(CT for short below) are used to detect current power direction of the local load and the grid. The output control function of the inverters will be activated based on the detected data. Meter Install the CT Main... - Page 25 Installation Install the Meter Inverter VTAC Meter Main Breaker Grid Load Grid 1 2 3 4 5 6 7 8 Assignment RS485 A ( 24 ) RS485 B ( 25 )
-
Page 26: Communication Connection
Installation 4.4 Communication Connection The monitoring module could transmit the data to the cloud server, and display the data on the PC, tablet and smart-phone. Install the WIFI / Ethernet / GPRS / RS485 Communication WIFI / Ethernet / GPRS / RS485 communication is applicable to the inverter. Please refer to "Communication Configuration Instruction"... -
Page 27: Earth Connection
Installation 4.5 Earth Connection Note: A second protective earth (PE) terminal should be connected to the inverter. This prevents electric shock if the original protective PE wire fails. Step 1 Grounding terminal 10 ±0.5mm Note: Earth cable PE suggestion: Cross-section (Copper) 4-6mm² / 10AWG Step 2 Fix the grounding screw to the grounding connection of the machine housing. -
Page 28: Operation
Operation 5. Operation 5.1 Control Panel ○ ○ ○ ○ ○ ○ ○ ○ Items Items LCD Display UP Touch Button POWER LED Indicator DOWN Touch Button GRID LED Indicator BACK Touch Button ENTER Touch Button FAULT LED Indicator Note: Hold UP/DOWN button can be rolling quickly. -
Page 29: Menu Overview
Operation 5.2 Menu Overview 5kW hybrid inverter has a LCD for clearly operating, and menu of the LCD can be presented as following: PV Info Bat Info Inv Info Run Info Grid Info Safty Load Info Model EPS Info Prated Err Record Tem Info Vrated... -
Page 30: Time & Date
Operation 5.3.1 Time & Date Sys Param System parameters setting Date &Time Date YYYY-MM-DD Time 24:00:00 5.3.2 Safety Sys Param System parameters setting Safty Safety Specifications Com-50Hz Com-60Hz China Japan-50 Japan-60 Note: US_240S Select the safty according to the US_240D requirements of the installation site. -
Page 31: Lithium Battery
Operation 5.3.3 Lithium Battery Run Param Operating parameters setting 5 4 3 2 * * * * Bat Param Lithium Aoboet ApoLLo Note: CALB Please select the right battery frand to your use. Dyness ..5.3.4 PV Mode Operating parameters setting Run Param 5 4 3 2 * * * *... -
Page 32: Leadacid
Operation 5.3.5 Lead Acid Run Param Operating parameters setting 5 4 3 2 * * * * Bat Param LeadAcid Capacity: 0-1000Ah Capacity range (0~1000Ah). 5.3.6 Energy Management System (EMS Param) Run Param Operating parameters setting 5 4 3 2 * * * * Energy management EMS Param... - Page 33 Operation 5.3.7 Time of Use Run Param Operating parameters setting 5 4 3 2 * * * * Energy management EMS Param system parameters setting Chg/DChg Chg Cmd Charge / discharge. Stop Charge / discharge power Chg Pwr PChg: range -10000W~10000W. Chg Range Battery charge / discharge setting.
-
Page 34: Ac Charging
Operation 5.3.8 AC Charging Run Param Operating parameters setting 5 4 3 2 * * * * Energy management EMS Param system parameters setting AC Chg AC charging ACChg: 1. ACChg — AC charging enable. MaxPpct: 0.0% 2. MaxPpct — AC charging Percentage. MaxSoc: 0.0% 3. -
Page 35: Forced Discharging
Operation Force Chg Forced charging ForceChg: PForce: 0.0% 1. ForceChg — Force charging enable. MaxSoc: 0.0V 2. PForce — Forced charging power percentage. TimOn1: 00:00 3. MaxSoc — Forced charging Max Soc. TinOff1: 00:00 4. TimOn1 — Forced charging start time 1. TimOn2 : 00:00 5. -
Page 36: Protection Parameters
Operation 5.3.11 Protection Parameters Run Param Operating parameters setting 5 4 3 2 * * * * IsoChk 1. Insulation resistance detection GfciChk 2. Leakage current detection EarthChk 3. Ground detection V.max 0.0V 4. Voltage upper limit V.maxT 0.00S 5. Voltage upper limit time V.min 0.0V 6. -
Page 37: Multi-Machine In Parallel
Operation 5.3.12 Multi-machine in Parallel Com Param Communication parameters setting Meter COM4 Parallel Parallel Sunspec Modbus Addr 1. Address Baud 9600 2. Band rate P Enable 3. Parallel enable 1. Inverter parallel amount Inv_Amout 2. Master / Slave Master/Slave 3. Address of slave Addr 4. -
Page 38: Power On/Off
Power ON/OFF Diese1Gen GenEn 1. Diese1Gen GenEn — Diesel generator enable. TimeCtr1Em 2. TimeCtr1Em — Time control enable. TimeDelay 3. TimeDelay — Delay time of diesel generator StarSoc 20.0% start working. 4. StarSoc — Battery power percentage when EndSoc 80.0% diesel generator start charging the battery. -
Page 39: Power On
Maintenance&Trouble Shooting 6.1 Power ON • Turn on DC switch. • After LCD lighting, hybrid inverter should be set following Chapter 5.3 at the first time. • When inverter running under normal mode, Running indicator will light up(Ref. to Chapter 5.1). 6.2 Power OFF •... - Page 40 Maintenance&Trouble Shooting Fault Code and Trouble Shooting Type of Fault Code Name Description Recommend Solution • Check PV modules connection PV connection type • Check PV Mode setup Ref. PvConnectFault different from setup Chapter 5.3. • Check PV modules wires, those wires are soaked or damaged, and then carry ISO check among PV out rectification.
- Page 41 Maintenance&Trouble Shooting Type of Fault Code Name Description Recommend Solution PV7ReverseFault PV8ReverseFault PV9ReverseFault PV10ReverseFault PV11ReverseFault PV12ReverseFault Pv1AbnormalFault Pv2AbnormalFault Pv3AbnormalFault Pv4AbnormalFault Pv5AbnormalFault Pv6AbnormalFault Pv7AbnormalFault Pv8AbnormalFault PV Fault Pv9AbnormalFault Pv10AbnormalFault • Check PV modules partial occlusion or Pv11AbnormalFault cells damaged. PV(+) and PV(-) reversed •...
- Page 42 Maintenance&Trouble Shooting Type of Fault Code Name Description Recommend Solution • Check inverters connected battery lines PcsBatOverVoltFault and connectors broken or loose connect. • Carry out rectification if broken or Battery voltage over or PcsBatUnderVoltFault loose. under • Checking battery voltage is abnormal or not, then maintenance or change new PcsBatInsOverVoltFaul battery.
- Page 43 Maintenance&Trouble Shooting Type of Fault Code Name Description Recommend Solution BatPreChaFault BmsBatChgMosFault BmsBatDChgMosFault BMSVolOVFault BMSVolLFault VolLockOpenFault VolLockShortFault ChgRefOVFault • Inverter will restart automatically when the grid return to normal. GridLossFault Grid lost (islanding) • Check inverter connected with grid connectors and cable normal or not. •...
- Page 44 Maintenance&Trouble Shooting Type of Fault Code Name Description Recommend Solution • Reduce loads. • If sometimes overload, it can be ignored, when generation power enough UpsOverPowerFault 0ff-grid load over can be recovery. • If those faults occurs continuously and frequently, please ask help for local distributors.
- Page 45 Maintenance&Trouble Shooting Type of Fault Code Name Description Recommend Solution Pv9SwOverCurrFault Pv10SwOverCurrFault Pv11SwOverCurrFault Pv12SwOverCurrFault Boost1SelfCheck(boost)Fault Boost2SelfCheck(boost)Fault Boost3SelfCheck(boost)Fault Boost4SelfCheck(boost)Fault Boost5SelfCheck(boost)Fault • Power off, then restart (Ref. Chapter8). PV boost circuit abnormal Boost6SelfCheck(boost)Fault • If those faults continuously and when self checking frequently, please ask help for local Boost7SelfCheck(boost)Fault distributors.
- Page 46 Maintenance&Trouble Shooting Type of Fault Code Name Description Recommend Solution • Change fuse. BDCFuseFault BiDC fuse broken • Power off, then restart (Ref. Chapter8). • If those faults continuously and BDCRelayFault BiDC relay abnormal frequently, please ask help for local distributors.
- Page 47 Maintenance&Trouble Shooting Type of Fault Code Name Description Recommend Solution UpsOverVoltFault Off-grid output voltage over or under UpsUnderVoltFault • Power off, then restart (Ref. Chapter8). • If those faults occurs continuously and UpsOverFreqFault AC Fault Off-grid output frequency frequently, please ask help for local over or under distributors.
- Page 48 Maintenance&Trouble Shooting Type of Fault Code Name Description Recommend Solution UpsSCurAdChanFault UpsTCurAdChanFault GenRCurAdChanFault GenSCurAdChanFault GenTCurAdChanFault UpsRDcvAdChanFault UpsSDcvAdChanFault UpsTDcvAdChanFault All temperature sensors TempAdChanFault abnormal The sample value of PV, VoltAdConflictFault battery and BUS voltage • Power off, then restart (Ref. Chapter8). inconsistent •...
- Page 49 Maintenance&Trouble Shooting Type of Fault Code Name Description Recommend Solution EnvirTempAdChan- Warning • The warnings are not matter influence. • Power off, then restart (Ref. Chapter8). Some temperature sensors CoolingTempAdChan- • If those faults occurs continuously and abnormal Warning frequently, please ask help for local distributors.
-
Page 50: Specifications
Specifications 8. Specifications VT-6607105 PV Input Max. Input Power (kW) Max. PV Voltage (V) 80 - 500 MPPT Range (V) Full MPPT Range (V) 150 - 500 Normal Voltage (V) Startup Voltage (V) 18.5 x 2 Max. Input Current (A) Max. - Page 51 11819 INTRODUZIONE E GARANZIA Grazie per aver selezionato e acquistato il prodotto V-TAC. V-TAC ti servirà al meglio. Leggi attentamente queste istruzioni prima di iniziare l'installazione e tieni questo manuale a portata di mano per riferimento futuro. Se hai altre domande, contatta il nostro rivenditore o venditore locale presso il quale hai acquistato il prodotto.
- Page 52 Sommario Sommario 1. Informazioni sul presente manuale..........1 1.1 Ambito di applicazione................. 1 1.2 Destinatari ....................1 2. Sicurezza e simboli..............1 2.1 Precauzioni di sicurezza ................1 2.2 Spiegazione dei simboli ................2 3. Introduzione................3 3.1 Istruzioni di base..................3 3.2 Modalità...
- Page 53 Sommario 5. Funzionamento ................ 25 5.1 Pannello di controllo .................. 25 5.2 Informazioni generali sul menu ..............26 5.3 Impostazioni dell'inverter ................26 5.3.1 Ora e data ....................... 27 5.3.2 Sicurezza......................... 27 5.3.3 Batteria al litio......................28 5.3.4 Modalità fotovoltaica ....................28 5.3.5 Batteria al piombo-acido ..................
-
Page 54: Informazioni Sul Presente Manuale
5. Si prega di assicurarsi che il dispositivo usato e gli eventuali accessori vengano smaltiti in conformità alle normative vigenti. 6. L'inverter della V-TAC deve essere sistemato in posizione verticale e maneggiato con cura durante la consegna. Prestare attenzione alla resistenza all'acqua. -
Page 55: Spiegazione Dei Simboli
04 02 Sicurezza e simboli 2.2 Spiegazione dei simboli L'inverter della V-TAC è rigorosamente conforme alle norme di sicurezza vigenti. Si prega di leggere e seguire tutte le istruzioni e le avvertenze durante l'installazione, il funzionamento e la manutenzione. Pericolo di scosse elettriche L'inverter contiene energia CC e CA fatale. -
Page 56: Introduzione
Introduzione 3. Introduzione 3.1 Istruzioni di base Gli inverter ibridi della VTAC sono stati progettati per aumentare l'indipendenza energetica dei proprietari di casa. La gestione dell'energia si basa su strutture tariffarie legate al tempo di consumo e sulla domanda (consumo), riducendo in modo significativo la quantità... -
Page 57: Tempo Di Consumo
Introduzione Nota: Impostazioni avanzate Quando si seleziona 0 W nel menu P_Feed, l'inverter immetterà zero energia in rete. Quando si seleziona xx W nel menu P_Feed, l'inverter immetterà una quantità di energia personalizzata in rete. 3.2.2 Tempo di consumo La modalità di Tempo di consumo è stata pensata per premiare i clienti che contribuiscono a ridurre il loro consumo dalla rete elettrica, soprattutto durante i periodi di picco di consumo. - Page 58 Introduzione B. Scarica Impostazioni della scarica in 4 periodi di tempo. Flusso di energia: Batteria e Impianto fotovoltaico → Carico → Rete C. Scarica vietata Con le impostazioni della scarica in 4 periodi di tempo, la batteria verrà caricata per prima. Flusso di energia: Impianto fotovoltaico →...
-
Page 59: Prima La Vendita
Introduzione 3.2.3 Prima la vendita La modalità di Prima la vendita è adatta alle regioni con tariffe di immissione elevate. Flusso di energia: Impianto fotovoltaico → Carico → Rete → Batteria 3.2.4 Riserva di energia Quando la rete non funziona, il sistema passa automaticamente alla modalità di Riserva di energia. -
Page 60: Installazione
Installazione 4. Installazione 4.1 Prima dell’installazione 4.1.1 Disimballaggio ed elenco delle parti contenute all’interno della confezione Disimballaggio Al ricevimento dell'inverter, verificare che l'imballaggio e tutti i componenti non siano mancanti o danneggiati. In caso di danni o di componenti mancanti, si prega di contattare direttamente il proprio rivenditore per l'assistenza. -
Page 61: Presentazione Del Prodotto
Introduzione N. Q-tà Articoli N. Q-tà Articoli Terminale di messa a terra Inverter ibrido Certificato di ispezione Staffa per l'installazione a parete Istruzioni previ per l'installazione Connettore della batteria Scheda di garanzia Modulo di monitoraggio Panoramica delle istruzioni brevi per Connettore CC (corrente l’installazione continua) -
Page 62: Posizione Di Installazione
Installazione Terminali dell'inverter Elementi Elementi Interruttore CC (corrente continua) Porta di comunicazione Connettori CC ( + ) per stringhe Porta AC (corrente fotovoltaiche alternata) e porta Connettori CC ( − ) per stringhe Porta del modulo di fotovoltaiche monitoraggio Porta della batteria 4.1.3 Posizione di installazione Gli inverter sono stati progettati per l'installazione all'interno e all'esterno (IP65);... -
Page 63: Installazione
Installazione L'inverter deve essere installato verticalmente sulla parete o appoggiato a un piano con un angolo di inclinazione limitato. Si prega di fare riferimento all'immagine sottostante. <15° >0° Lasciare uno spazio sufficiente intorno all'inverter per facilitare l'accesso all'inverter, ai punti di connessione e alla manutenzione. 300 mm 300 mm 300 mm... - Page 64 Installazione 4.2 Installazione Passo 1 219 mm 17 mm 264 mm Passo 2 Passo 3 Vite di sicurezza...
-
Page 65: Collegamento Elettrico
Installazione 4.3 Collegamento elettrico Carico intelligente Carico critico Campo fotovoltaico Contatore intelligente Campo fotovoltaico Rete Carico Assegnazione dei pin dell'adattatore di comunicazione COM1 COM2 NTC+ Contatore 485A NTC- Contatore 485B Contatto pulito Batteria 485A Contatto pulito Batteria CANH Batteria CANL 12345678 Batteria 485B 485A... -
Page 66: Collegamento Del Fotovoltaico
Installazione 4.3.1 Collegamento del fotovoltaico L'inverter ibrido ha due canali MPPT e può essere collegato a due stringhe di pannelli fotovoltaici. Prima di collegare i pannelli e le stringhe fotovoltaiche all'inverter, accertarsi che vengano rispettati i requisiti indicati di seguito: •... -
Page 67: Collegamento Della Batteria
Gli inverter ibridi sono compatibili con le batterie al litio. Per le batterie al piombo- acido o per batterie di altre marche, si prega di contattare il distributore locale o la V-TAC per l'assistenza tecnica. Nota: Per impostare il tipo della batteria e il produttore, consultare il capitolo 5.3. - Page 68 Installazione Passo 1 19±1 mm Cavo della batteria Nota: Consiglio sul cavo per la batteria Sezione trasversale 8-10 AWG Si prega di assicurarsi che i poli della batteria siano collegati correttamente. Passo 2 Far passare il cablaggio della batteria crimpato attraverso il connettore impermeabile e il coperchio.
- Page 69 Installazione Passo 4 Se il collegamento è stato eseguito correttamente, si sentirà un "clic". Passo 5 Serrare la chiusura a tenuta stagna con una semplice chiave inglese. Passo 6 Inserire il connettore della batteria nell'inverter; se si sente un "clic", significa che il collegamento della batteria è...
-
Page 70: Batteria-Can/Rs485
Installazione 4.3.2.1 BATTERIA-CAN/RS485 1 2 3 4 5 6 7 8 1 2 3 4 5 6 7 8 Assegnazione Assegnazione CAN/RS485 RS485A CANH CANL RS485B Litio 4.3.2.2 BATTERIA-NTC 12345678 Spina RJ45 Assegnazione NTC+ NTC- Piombo-acido... -
Page 71: Collegamento Di Più Inverter In Parallelo
Installazione 4.3.3 Collegamento di più inverter in parallelo 12345678 Spina RJ45 Assegnazione 485A 485B 12345678 Spina RJ45 Assegnazione 485A 485B 12345678 Spina RJ45 Assegnazione 485A 485B... -
Page 72: Collegamento Ca (Corrente Alternata)
Di seguito sono riportati i requisiti per il sezionatore di corrente alternata del collegamento alla rete. Modello dell'inverter Specifiche del sezionatore di corrente alternata VT-6607105 63A/200V/230V Sezionatore di CA Nota: Per il cablaggio è necessario un elettricista qualificato. - Page 73 Installazione Nota: I terminali per cavi devono essere avvolti con nastro isolante, altrimenti si possono verificare cortocircuiti e danni all'inverter. Nota: Il carico massimo per unità di potenza collegato alla porta EPS non deve superare il valore massimo di uscita dell'EPS dell'inverter. Passo 2 RETE EPS Carico Passo 3...
-
Page 74: Collegamento Del Sensore Di Corrente O Del Contatore
Installazione 4.3.5 Collegamento del sensore di corrente o del contatore Il contatore e il sensore di corrente (CT in breve) vengono utilizzati per rilevare la direzione del flusso di corrente del carico locale e della rete. La funzione di controllo dell'uscita degli inverter verrà attivata in base ai dati rilevati. Contatore Sensore di corrente Installazione del sensore di corrente... - Page 75 Installazione Installazione del contatore Inverter Contatore VTAC Interruttore principale Rete Load Rete 1 2 3 4 5 6 7 8 Assegnazione RS485 A ( 24 ) RS485 B ( 25 )
-
Page 76: Collegamento Della Comunicazione
Installazione 4.4 Collegamento della comunicazione Il modulo di monitoraggio può trasmettere i dati ad un server cloud e visualizzarli su PC, tablet e smartphone. Installazione della comunicazione Wi-Fi / Ethernet / GPRS / RS485 L'inverter può utilizzare la comunicazione WIFI / Ethernet / GPRS / RS485. Per istruzioni dettagliate, si prega di far riferimento alle "Istruzioni per la configurazione della comunicazione". -
Page 77: Messa A Terra
Installazione 4.5 Messa a terra Nota: All'inverter deve essere collegato un secondo terminale di protezione (PE). In questo modo si evitano scosse elettriche in caso di guasto del cavo di protezione PE originale. Passo 1 Terminale di messa a terra 10 ±0.5 mm Nota: Consiglio sul cavo di terra PE:... -
Page 78: Funzionamento
Funzionamento 5. Funzionamento 5.1 Pannello di controllo ○ ○ ○ ○ ○ ○ ○ ○ Elementi Elementi Display LCD Pulsante Touch SU Indicatore LED di Pulsante Touch GIÙ ALIMENTAZIONE Indicatore LED di RETE Pulsante Touch INDIETRO Pulsante Touch INVIO Indicatore LED di GUASTO/ERRORE Nota: Tenere premuto il pulsante SU/GIÙ... -
Page 79: Informazioni Generali Sul Menu
Funzionamento 5.2 Informazioni generali sul menu L'inverter ibrido 5 kW è dotato di un display LCD per un funzionamento chiaro ed il menu del display LCD può essere presentato come segue: PV Info Bat Info Inv Info Run Info Grid Info Safty Load Info Model... -
Page 80: Ora E Data
Funzionamento 5.3.1 Ora e data Sys Param Impostazioni dei parametri del sistema Date &Time Date YYYY-MM-DD Time 24:00:00 5.3.2 Sicurezza Sys Param Impostazioni dei parametri del sistema Safty Caratteristiche di sicurezza Com-50 Hz Com-60 Hz China Japan-50 Japan-60 Nota: US_240S Selezionare le caratteristiche di US_240D sicurezza in base ai requisiti del luogo di... -
Page 81: Batteria Al Litio
Funzionamento 5.3.3 Batteria al litio Run Param Impostazioni dei parametri operativi 5 4 3 2 * * * * Bat Param Lithium Aoboet ApoLLo Nota: CALB Si prega di selezionare la batteria giusta in base all'uso che ne si fa. Dyness .. -
Page 82: Batteria Al Piombo-Acido
Funzionamento 5.3.5 Batteria al piombo-acido Run Param Impostazioni dei parametri operativi 5 4 3 2 * * * * Bat Param LeadAcid Capacity: 0-1000 Ah Gamma di capacità (0~1000 Ah). 5.3.6 Sistema di gestione dell’energia (parametro EMS) Run Param Impostazioni dei parametri operativi 5 4 3 2 * * * * Impostazioni dei parametri del sistema di gestione... -
Page 83: Tempo Di Consumo
Funzionamento 5.3.7 Tempo di consumo Run Param Impostazioni dei parametri operativi 5 4 3 2 * * * * Impostazioni dei parametri del sistema di gestione dell'energia EMS Param Chg/DChg Chg Cmd Carica / scarica Stop Gamma di potenza di Chg Pwr PChg:... -
Page 84: Carica In Ca (Corrente Alternata)
Funzionamento 5.3.8 Carica in CA (corrente alternata) Run Param Impostazioni dei parametri operativi 5 4 3 2 * * * * Impostazioni dei parametri del sistema di gestione EMS Param dell'energia AC Chg Carica in CA ACChg: 1. ACChg — Abilitazione della carica in CA. MaxPpct: 0.0% 2. -
Page 85: Scarica Forzata
Funzionamento Force Chg Carica forzata ForceChg: PForce: 0.0% 1. ForceChg — Abilitazione della scarica forzata. MaxSoc: 0.0V 2. PForce — Carica forzata – percentuale di potenza. TimOn1: 00:00 3. MaxSoc — Carica forzata – livello massimo di carica. TinOff1: 00:00 4. -
Page 86: Parametri Di Protezione
Funzionamento 5.3.11 Parametri di protezione Run Param Informazioni dei parametri operativi 5 4 3 2 * * * * IsoChk 1. Rilevamento della resistenza di isolamento GfciChk 2. Rilevamento della corrente di dispersione EarthChk 3. Rilevamento della messa a terra V.max 0.0V 4. -
Page 87: Collegamento In Parallelo Di Più Dispositivi
Funzionamento 5.3.12 Collegamento in parallelo di più dispositivi Com Param Impostazioni dei parametri di comunicazione Meter COM4 Parallel Parallel Sunspec Modbus Addr 1. Indirizzo Baud 9600 2. Frequenza di banda P Enable 3. Abilitazione del collegamento in parallelo 1. Numero di inverter collegati in parallelo Inv_Amout 2. -
Page 88: Attivazione E Disattivazione
• La linea di terra e la linea di Contatore/Sensore di corrente Intelligente sono collegate. • Gli inverter ibridi 5 kW devono essere impostati in base allo standard richiesto della rete locale. • Per ulteriori informazioni, contattare la V-TAC o i distributori. -
Page 89: Attivazione
Manutenzione e risoluzione dei 6.1 Attivazione • Attivare l'interruttore di CC (corrente continua). • Dopo l'illuminazione del display LCD, l'inverter ibrido deve essere impostato per la prima volta seguendo le indicazioni del Capitolo 5.3. • Quando l'inverter funziona in modalità normale, l'indicatore di funzionamento si accende (fare riferimento al Capitolo 5.1). - Page 90 Manutenzione e risoluzione dei problemi Codice di guasto/errore e risoluzione dei problemi Tipo di Codice Nome Descrizione Risoluzione consigliata guasto/errore • Controllare il collegamento dei moduli fotovoltaici La tipologia di connessione fotovoltaica • Controllare le impostazioni della PvConnectFault è diversa da quella modalità...
- Page 91 Manutenzione e risoluzione dei problemi Tipo di Codice Nome Descrizione Risoluzione consigliata guasto/errore PV7ReverseFault PV8ReverseFault PV9ReverseFault PV10ReverseFault PV11ReverseFault PV12ReverseFault Pv1AbnormalFault Pv2AbnormalFault Pv3AbnormalFault Pv4AbnormalFault Pv5AbnormalFault Pv6AbnormalFault Pv7AbnormalFault Pv8AbnormalFault Pv9AbnormalFault Guasto del fotovoltaico Pv10AbnormalFault Pv11AbnormalFault • Controllare se i moduli fotovoltaici non siano parzialmente occlusi o se le celle Pv12AbnormalFault Collegamenti PV (+) e...
- Page 92 Manutenzione e risoluzione dei problemi Tipo di Codice Nome Descrizione Risoluzione consigliata guasto/errore • Controllare se le linee e i connettori della PcsBatOverVoltFault batteria collegati agli inverter non sono Tensione della batteria danneggiati o allentati. troppo alta o troppo • Se sono danneggiati o allentati, ripararli. PcsBatUnderVoltFault bassa •...
- Page 93 Manutenzione e risoluzione dei problemi Tipo di Codice Nome Descrizione Risoluzione consigliata guasto/errore BatPreChaFault BmsBatChgMosFault BmsBatDChgMosFault BMSVolOVFault BMSVolLFault VolLockOpenFault VolLockShortFault ChgRefOVFault • L'inverter si riavvierà automaticamente quando il funzionamento della rete torna Perdita di rete alla normalità. GridLossFault (sezionamento) • Controllare se i connettori e i cavi di rete dell'inverter collegato siano normali o no.
- Page 94 Manutenzione e risoluzione dei problemi Tipo di Codice Nome Descrizione Risoluzione consigliata guasto/errore • Ridurre i carichi. • Se a volte si verifica un sovraccarico, può essere ignorato, quando la potenza di Sovratensione del carico generazione è sufficiente per il recupero. UpsOverPowerFault autonomo •...
- Page 95 Manutenzione e risoluzione dei problemi Tipo di Codice Nome Descrizione Risoluzione consigliata guasto/errore Pv9SwOverCurrFault Pv10SwOverCurrFault Pv11SwOverCurrFault Pv12SwOverCurrFault Boost1SelfCheck(boost)Fault Boost2SelfCheck(boost)Fault Boost3SelfCheck(boost)Fault Boost4SelfCheck(boost)Fault • Disattivare l'alimentazione, poi Boost5SelfCheck(boost)Fault riavviare (fare riferimento al capitolo L'autotest ha rilevato un Boost6SelfCheck(boost)Fault guasto/errore nel sistema • Se questi guasti si verifica di amplificazione del frequentemente e in modo Boost7SelfCheck(boost)Fault...
- Page 96 Manutenzione e risoluzione dei problemi Tipo di Codice Nome Descrizione Risoluzione consigliata guasto/errore BDCFuseFault Fusibile BiDC danneggiato Sostituire il fusibile. • Disattivare l'alimentazione, poi riavviare (fare riferimento al capitolo 8). • Se questi guasti si verifica BDCRelayFault Guasto del relè BiDC frequentemente e in modo persistente, si prega di chiedere aiuto ai distributori locali.
- Page 97 Manutenzione e risoluzione dei problemi Tipo di Codice Nome Descrizione Risoluzione consigliata guasto/errore UpsOverVoltFault Sovratensione o sottotensione dell'uscita autonoma UpsUnderVoltFault • Disattivare l'alimentazione, poi riavviare (fare riferimento al capitolo 8). Guasto CA • Se questi guasti si verifica UpsOverFreqFault Sovrafrequenza e (corrente frequentemente e in modo persistente, si sottofrequenza dell'uscita...
- Page 98 Manutenzione e risoluzione dei problemi Tipo di Codice Nome Descrizione Risoluzione consigliata guasto/errore UpsSCurAdChanFault UpsTCurAdChanFault GenRCurAdChanFault GenSCurAdChanFault GenTCurAdChanFault UpsRDcvAdChanFault UpsSDcvAdChanFault UpsTDcvAdChanFault Guasti dei tutti i sensori di TempAdChanFault temperatura Il valore di campionamento della tensione del VoltAdConflictFault • Disattivare l'alimentazione, poi fotovoltaico, della batteria e riavviare (fare riferimento al capitolo 8).
- Page 99 Manutenzione e risoluzione dei problemi Tipo di Codice Nome Descrizione Risoluzione consigliata guasto/errore EnvirTempAdChan- • Le avvertenze non sono rilevanti. Warning • Disattivare l'alimentazione, poi riavviare (fare Guasto di alcuni riferimento al capitolo 8). CoolingTempAdChan- sensori di • Se questi guasti si verifica frequentemente e in Warning temperatura modo persistente, si prega di chiedere aiuto ai...
-
Page 100: Specifiche Tecniche
Specifiche tecniche 8. Specifiche tecniche Ingresso fotovoltaico VT-6607105 Potenza massima in ingresso (kW) Tensione massima fotovoltaico (V) 80 - 500 Range del MPPT (V) Range completo del MPPT (V) 150 - 500 Tensione normale (V) Tensione di avvio (V) 18.5 x 2...
Need help?
Do you have a question about the VT-6607105 and is the answer not in the manual?
Questions and answers