Table of Contents
Advertisement
Available languages
Available languages
Quick Links
Advertisement
Chapters
Table of Contents

Related Manuals for AirPro PROGRESS LIGHTING P250077


Summary of Contents for AirPro PROGRESS LIGHTING P250077
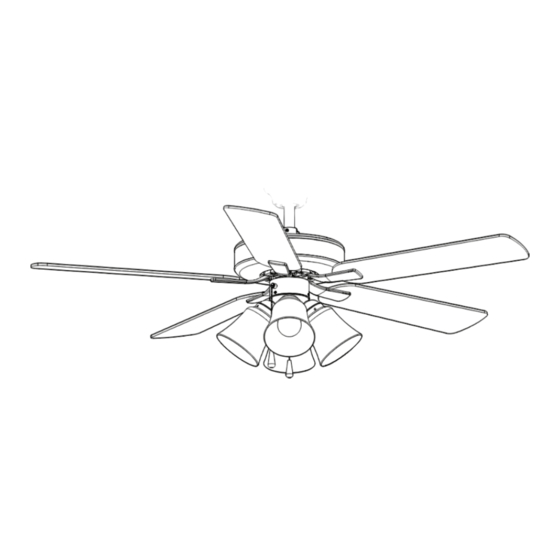
- Page 1 ® P250077 93157627_A...
- Page 2 30-Year Limited Warranty Date Purchased Progress Lighting fan motors are warranted to the END USER to be free of electrical and/or mechanical defects for a period of 30 (thirty) years from date of sale. Pull chain Store Purchased switches, reverse switches, capacitors and metal finishes are warranted for a period of 1 year.
-
Page 3: Table Of Contents
Safety Rules Unpacking Your Fan Installing Your Fan Operating Your Fan Care of Your Fan Troubleshooting Specifications Table of Contents... -
Page 4: Safety Rules
READ AND SAVE THESE INSTRUCTIONS Avoid placing objects in path of the blades. To reduce the risk of electric shock, ensure electricity has been turned off at the circuit breaker or fuse box To avoid personal injury or damage to the fan and other before beginning. -
Page 5: Unpacking Your Fan
Unpack your fan and check the contents. You should have the following items: a. Mounting hardware 5. Fan Motor Assembly 1. Mounting Bracket (inside canopy) (16 blade attachment screws) 6. Light Kit 2. 4.25” Ball/Downrod Assembly (hanger pin b. Electrical hardware & Balancing 7. -
Page 6: Installing Your Fan
Tools Required Figures 1, 2, and 3 are examples of different ways to mount the electrical box. Phillips screw driver or straight slotted screw driver, adjustable wrench, step ladder, and wire cutters. Figure 3 Mounting Options Note: You may need a longer downrod to maintain proper blade clearance when If there isn’t an existing electrical box, then installing on a steep, sloped ceiling. - Page 7 Hanging the Fan 5. Align the holes at the bottom of the downrod with the holes in the collar on top of the REMEMBER to turn off the power. Follow motor housing. (Figure 6) the steps below to hang your fan properly. Carefully insert the hanger pin through the Loosen but Do Not Remove holes in the collar and downrod.
- Page 8 Installing Fan to the Electrical Box UL Listed Slot opening Electrical Ceiling WHEN MOUNTING THE FAN ON A SLOPED Mounting CEILING, THE STANDARD BALL/DOWNROD Bracket MOUNTING METHOD MUST BE USED. THE Washers Hook MOUNTING BRACKET MUST BE MOUNTED Mounting SO THAT THE SLOT OPENINGS ARE ON THE Screws 120V Wires LOWER SIDE BY SLIDING THE MOUNTING...
- Page 9 Making the Electrical SUPPLY CIRCUIT Connections USE THE WIRE CONNECTORS SUPPLIED WITH YOUR FAN. SECURE THE CONNECTORS WITH ELECTRICAL TAPE AND ENSURE THERE ARE NO LOOSE STRANDS OR CONNECTIONS REMEMBER to disconnect the power. If you feel you do not have enough electrical wiring knowledge or experience, have your fan Outlet installed by a licensed electrician.
- Page 10 Finishing the Fan 3. Fasten the blade assembly to the motor by aligning Screws the screw holes on the bottom of the fan motor Installation Blade Arm with the holes on the blade arm, and tightening the Blade motor screws. Please note that the motor screws are preattached into the blade brackets.
- Page 11 Installing the Light Kit TO REDUCE THE RISK OF ELECTRIC SHOCK, DISCONNECT THE ELECTRICAL SUPPLY Switch housing CIRCUIT TO THE FAN BEFORE INSTALLING THE LIGHT FIXTURE. White Blue 1. Remove and retain the three mounting screws Molded adaptor plugs Black from the switch housing cover of the light kit fitter White assembly (Figure 13).
-
Page 12: Operating Your Fan
Speed settings for warm or cool weather depend on factors such as room size, ceiling height, number of fans, and so on. The fan shipped from the factory with the reverse switch positioned to circulate air downward. If airflow is desired in the opposite direction, turn your fan off and wait for the blades to stop turning, then slide the reverse switch (located on the switch housing, refer to... -
Page 13: Care Of Your Fan
Troubleshooting Care of Your Fan Here are some suggestions to help you Problem Solution maintain your fan. 1. Because of the fan’s natural movement, Check main and branch circuit fuses or breakers Fan will not start some connections may become loose. Check line wire connections to the fan and switch wire connections in Check the support connections, brackets, the switch housing. -
Page 14: Specifications
FAN POWER AIRFLOW CONSUMPTION AIRFLOW GROSS CUBE EFFICIENCY SPEED VOLTS SIZE WEIGHT WEIGHT FEET (WITHOUT LIGHTS) (HIGHER IS BETTER) WATTS CFM/WATT 11.9 1 2106 176.8 19.07 21.61 52” High 45.08 4311 9 5.6 ©2016 Progress Lighting, Inc. 701 Millennium Blvd., Greenville, SC 29607 11. - Page 15 ® Manual de instalación de ventilador de techo P250077 93157627_A...
- Page 16 30 años de garantía limitada Fecha de compra Los motores de ventilador Progress Lighting están garantizados al USUARIO FINAL por Tienda donde treinta (30) años, a partir de la fecha de compra, de que estarán libres de defectos eléctricos se compró o mecánicos.
- Page 17 Normas de seguridad Cómo desempacar el ventilador Cómo instalar el ventilador Cómo usar el ventilador Cuidado del ventilador Solución de problemas Especificaciones Tabla de contenido...
-
Page 18: Normas De Seguridad
LEE Y GUARDA ESTAS INSTRUCCIONES No operar el interruptor de reversa mientras las aspas del ventilador Para disminuir el riesgo de descarga eléctrica, antes de estén en movimiento. El ventilador tiene que estar apagado y las comenzar la instalación asegúrate de que la electricidad ha sido aspas detenidas antes de invertir el sentido del movimiento. -
Page 19: Cómo Desempacar El Ventilador
Desempaca tu ventilador y revisa el contenido. Debes tener los siguientes artículos: a. Herrajes para montaje 4. Brazos de aspas (5) 1. Soporte de montaje (dentro de la cubierta) (16 tornillos para el montaje de aspas) 5. Conjunto del motor del ventilador 2. -
Page 20: Cómo Instalar El Ventilador
Herramientas Las figuras 1, 2 y 3 ejemplifican diferentes Provee un maneras de montar la caja eléctrica. necesarias soporte fuerte Destornillador Phillips o de punta plana, llave ajustable, escalera de tijera y cortacables. Caja Placa de eléctrica montaje empotrada en techo Figura 3 Opciones de montaje Nota: Tal vez necesites un tubo bajante... - Page 21 Cómo colgar el 5. Alinea los orificios en la parte inferior del tubo bajante con aquellos del collarín en ventilador la parte superior de la carcasa de motor. (Figura 6) Aflojar pero no quitar RECUERDA cortar el suministro de Inserta con cuidado el pasador de soporte a electricidad.
- Page 22 Cómo instalar el ventilador en la caja eléctrica Caja eléctrica Abertura de ranura aprobada por UL Soporte de CUANDO MONTES EL VENTILADOR EN UN TECHO montaje en INCLINADO, DEBES USAR EL MÉTODO DE cielo raso MONTAJE CON TUBO BAJANTE/ESFERA ES- Arandelas Gancho TÁNDAR.
- Page 23 Cómo hacer las CIRCUITO DE SUMINISTRO conexioneseléctricas USA LOS CONECTORES DE CABLE INCLUIDOS VENTILADOR. SUJETA CONECTORES CON CINTA DE ELECTRICISTA Y ASEGURA QUE NO HAYA CONEXIONES NI RECUERDA cortar el suministro de CABLES SUELTOS. electricidad. Si crees que no tienes suficiente experiencia o conocimientos en cableado Caja eléctrico, contrata a un electricista con licencia...
- Page 24 Cómo finalizar la 3. Fija el conjunto de las aspas al motor alineando Tornillos los orificios de los tornillos en la parte inferior del instalación del ventilador Brazo de aspa motor del ventilador con los orificios del brazo de Aspa las aspas y apretando los tornillos del motor.
- Page 25 Cómo instalar el kit de luces PARA DISMINUIR EL RIESGO DE DESCARGA ELÉCTRICA, DESCONECTA EL CIRCUITO Caja del ELÉCTRICO DEL VENTILADOR ANTES DE interruptor INSTALAR LA LÁMPARA. BLANCO Azul 1. Quita y conserva los tres tornillos de montaje de la Enchufes moldeados Negro cubierta de la caja del interruptor del soporte del...
-
Page 26: Cómo Usar El Ventilador
Las configuraciones de velocidad para clima cálido o frío dependen de factores como el tamaño de la habitación, la altura del techo, la cantidad de ventiladores y otras. Este ventilador se envía desde la fábrica con el interruptor de reversa en posición de hacer circular el aire hacia abajo. -
Page 27: Cuidado Del Ventilador
Solución de problemas Cuidado del ventilador Aquí tienes algunas sugerencias para el Problema Solución mantenimiento de tu ventilador. 1. Debido al movimiento natural del ventilador, Verifica los fusibles o disyuntores principales y secundarios. El ventilador algunas conexiones pueden aflojarse. Verifica las conexiones de cables en línea al ventilador y de cables del no enciende Revisa las conexiones de soporte, los interruptor en la caja de interruptores. -
Page 28: Especificaciones
CONSUMO DE EFICIENCIA DE FLUJO TAMAÑO ELECTRICIDAD DEL FLUJO DE VOLTIOS DE AIRE PESO PESO PIES VELOCIDAD VENTILADOR AIRE (MÁS ALTO ES MEJOR) NETO BRUTO CÚBICOS VENTILADOR (SIN LUCES) CFM/W VATIOS Baja 52” 11.9 1 2106 176.8 19.07 21.61 (1.32 m) Alta 45.08 4311...
Need help?
Do you have a question about the PROGRESS LIGHTING P250077 and is the answer not in the manual?
Questions and answers