
Related Manuals for Ruijie RG-S7600 Series


Summary of Contents for Ruijie RG-S7600 Series
- Page 1 RG-S7600 Series Switches Hardware Installation and Reference Guide Document version: V1.0 Date: 2023-08-11 Copyright © 2023 Ruijie Networks...
- Page 2 Due to product version upgrades or other reasons, the content of this document will be updated from time to time. Ruijie Networks reserves the right to modify the content of the document without any notice or prompt.
- Page 3 RG-S7600 Series Switch Hardware Installation and Reference Guide Preface Intended Audience This document is intended for: Network engineers Technical support and service engineers Network administrators Technical Support Ruijie Networks website: https://www.ruijienetworks.com/ Technical support website: https://ruijienetworks.com/support ...
- Page 4 RG-S7600 Series Switch Hardware Installation and Reference Guide Specification An alert that contains a description of product or version support. Note The manual offers configuration information (including model, port type and command line interface) for indicative purpose only. In case of any discrepancy or inconsistency between the manual and the actual version, the actual version prevails.
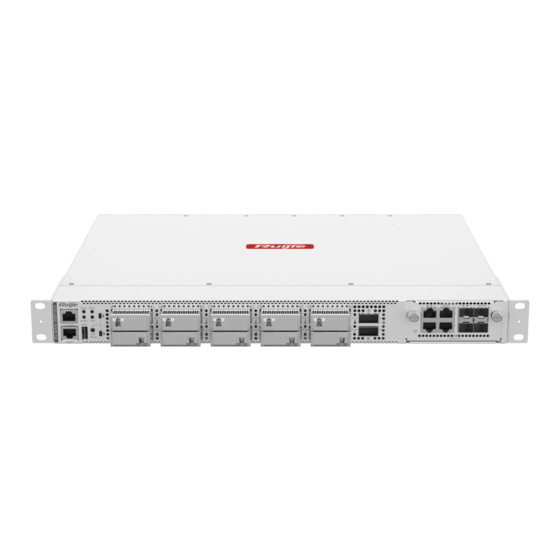
- Page 5 RG-S7620 series switch integrates 20 SFG/SFX interfaces in a 2 RU space (equivalent to 160 SFP interfaces or 160 SFP+ logical interfaces). The RG-S7600 series switches are available in four models and support two expansion modules. Host Configuration...
- Page 6 The QSFP28 port can work in 100GE or 40GE mode. The 100GE port can be split into four 25GE ports, and the 40GE port can be split into four 10GE ports. The RG-S7600 series switches do not support the V-03281042-620 optical module. 25GE/100GE Ethernet ports of the RG-S7600 do not support Direct Attach Copper (DAC) cables.
- Page 7 RG-S7600 Series Switch Hardware Installation and Reference Guide Power Module Slot 2 (1+1 redundancy) RG-PA550I II-F Note: The power module is sold and shipped separately. The switch chassis Power Module Type packaging does not include the power module. The power module must be ordered to ensure the switch can work properly.
- Page 8 RG-S7600 Series Switch Hardware Installation and Reference Guide Dimensions (W x D x 442 mm x 388 mm x 44 mm (17.40 in. x 15.28 in. x 1.73 in.), 1 RU Warning In a domestic environment, this product may cause radio interference in which case the user may be required to take adequate measures.
- Page 9 RG-S7600 Series Switch Hardware Installation and Reference Guide Appearance of the RG-S7610-10SFG2CQ Figure 1-2 Front Panel 1.1.2 Front Panel of the RG-S7610-10SFG2CQ Figure 1-3 Console port Breathing LED switching Note: System status LED control button Power module LED Upper and lower row...
-
Page 10: External Ports
RG-S7600 Series Switch Hardware Installation and Reference Guide External Ports 1.1.4 The RG-S7610-10SFG2CQ provides the following ports: USB port: The USB port is used to connect a USB flash drive to store logs, software versions, alarms, and other diagnostic information, which can be easily used for online upgrade of device software and storage of log information. - Page 11 RG-S7600 Series Switch Hardware Installation and Reference Guide A fault occurs in the system (any module). There are fewer than three fan modules. When the internal temperature of the device exceeds the Solid red dangerous operating temperature, the device is reset.
-
Page 12: Power Module
RG-S7600 Series Switch Hardware Installation and Reference Guide The model of the power module Solid yellow can be read but cannot be identified. The power module is not Solid red functioning properly or not connected to the AC power cord. - Page 13 RG-S7600 Series Switch Hardware Installation and Reference Guide Note The RG-S7610-10SFG2CQ supports power modules in 1+1 redundancy mode. To improve system stability and reliability, you are advised to configure power modules in 1+1 redundancy mode. If two power modules are used, the device works in current-sharing mode.
- Page 14 RG-S7600 Series Switch Hardware Installation and Reference Guide RG-S7610-10SFX2CQ Technical Specifications Table 1-4 Model RG-S7610-10SFX2CQ 2.0 GHz quad-core processor BootROM 16 MB Flash Memory 8 GB SDRAM DDR4 4 GB Expansion Supported Module Slot Expansion M7600-2CQ or M7600-4GT4VS Module Type...
- Page 15 RG-S7600 Series Switch Hardware Installation and Reference Guide Maximum Power 270 W Consumption See Appendix A. Optical Module The supported optical module types may update without prior notice. Please Type contact Ruijie Networks for details. Temperature Temperature alarm and over-temperature protection Alarm GB/T 9254.1...
- Page 16 RG-S7600 Series Switch Hardware Installation and Reference Guide Nameplate style: Appearance 1.2.1 The RG-S7610-10SFX2CQ consists of the chassis, power supply system, and cooling system. The power supply system has two power module slots and supports 1+1 redundancy. You are ...
- Page 17 RG-S7600 Series Switch Hardware Installation and Reference Guide Front Panel 1.2.2 Front Panel of the RG-S7610-10SFX2CQ Figure 1-7 Console port Breathing LED switching control Note: System status LED button Power module LED Upper- and lower-row port Fan module LED breathing LED MGMT port status LED 10.
- Page 18 RG-S7600 Series Switch Hardware Installation and Reference Guide maintenance, management, and program loading. MGMT port: The MGMT port is an out-of-band Ethernet port that uses an RJ45 connector. This port can be connected to an Ethernet port of a PC to download programs. You can manage and maintain the device remotely by connecting the management port to the Ethernet port of a PC with an Ethernet cable.
- Page 19 RG-S7600 Series Switch Hardware Installation and Reference Guide The temperature reaches the alarm threshold. Solid yellow The system detects that only three out of four fan modules are working properly. No link is set up on the port. A link is set up on the port and the port works at the...
- Page 20 RG-S7600 Series Switch Hardware Installation and Reference Guide No link is set up on the port. QSFP28 port Solid green A link is set up on the port. 81F–82F status Blinking The port is receiving or sending data. green Power Module 1.2.5...
- Page 21 RG-S7600 Series Switch Hardware Installation and Reference Guide Airflow of the RG-S7610-10SFX2CQ Figure 1-9 Caution Maintain a minimum clearance of 200 mm (7.87 in.) around the device for air circulation. At least three fan modules are required. If any slot is unoccupied, install a filler panel to enable proper airflow and to keep dust out of the chassis.
- Page 22 RG-S7600 Series Switch Hardware Installation and Reference Guide Fan Module Slot 3 (2+1 redundancy, and at least two fan modules required) Fan Module Type S7620-FAN I-F Power Module Slot 2 (1+1 redundancy) RG-PA550I II-F Note: The power module is sold and shipped separately. The Power Module Type switch chassis packaging does not include the power module.
- Page 23 RG-S7600 Series Switch Hardware Installation and Reference Guide Altitude 0 m to 1800 m (0 ft. to 5905.51 ft.) Weight 11.02 kg (24.29 lbs) (fan modules included during delivery, without power modules, expansion modules, and packaging) Dimensions (W x D x 442 mm x 388 mm x 88 mm (17.40 in.
- Page 24 RG-S7600 Series Switch Hardware Installation and Reference Guide Appearance of the RG-S7620-20SFG2CQ Figure 1-10 Front Panel 1.3.2 Front Panel of the RG-S7620-20SFG2CQ Figure 1-11 Note: 1. System status LED 8. Fan module LED 2. MGMT port status LED 9. Upper-, medium-, and lower-row port breathing 3.
- Page 25 RG-S7600 Series Switch Hardware Installation and Reference Guide Rear Panel 1.3.3 Rear Panel of the RG-S7620-20SFG2CQ Figure 1-12 1. Power module slot Note: 2. Fan module slot 3. Grounding stud External Ports 1.3.4 The RG-S7620-20SFG2CQ provides the following ports: USB port: The USB port is used to connect a USB flash drive to store logs, software versions, alarms, ...
- Page 26 RG-S7600 Series Switch Hardware Installation and Reference Guide Caution To ensure data security and prevent damage to your device, use USB flash drives of well-known brands and good quality. The USB port is compatible with most USB controllers and may not recognize some models of USB flash drives.
- Page 27 RG-S7600 Series Switch Hardware Installation and Reference Guide The power module is seated and provides power Solid green for the device. Power The model of the power module can be read but Solid yellow module LED cannot be identified. A power module is not functioning properly or Solid red not connected to the AC power cord.
- Page 28 RG-S7600 Series Switch Hardware Installation and Reference Guide Power Module 1.3.5 The RG-S7620-20SFG2CQ supports the RG-PA550I power module. The RG-PA550I is an intelligent power module that can obtain information such as the output power, output current, and operating temperature in real time. The power module supports hot swapping.
- Page 29 RG-S7600 Series Switch Hardware Installation and Reference Guide Caution Maintain a minimum clearance of 200 mm (7.87 in.) around the device for air circulation. At least two modules are required. If any slot is unoccupied, install a filler panel to enable proper airflow and to keep dust out of the chassis.
- Page 30 RG-S7600 Series Switch Hardware Installation and Reference Guide AC input: HVDC input: Rated voltage range: 100 V AC Input voltage range: 192 V DC to 288 V to 240 V AC Maximum voltage range: 90 V Rated input current: 3.6 A...
- Page 31 RG-S7600 Series Switch Hardware Installation and Reference Guide Warning In a domestic environment, this product may cause radio interference in which case the user may be required to take adequate measures. The nameplate is on the bottom of the chassis.
- Page 32 RG-S7600 Series Switch Hardware Installation and Reference Guide Appearance of the RG-S7620-20SFX2CQ Figure 1-14 Front Panel 1.4.2 Front Panel of the RG-S7620-20SFX2CQ Figure 1-15 Note: 1. System status LED 8. Fan module LED 2. MGMT port status LED 9. Upper-, medium-, and lower-row port breathing LED 3.
- Page 33 RG-S7600 Series Switch Hardware Installation and Reference Guide Rear Panel 1.4.3 Rear Panel of the RG-S7620-20SFX2CQ Figure 1-16 Note: 1. Power module slot 2. Fan module slot 3. Grounding stud External Ports 1.4.4 The RG-S7620-20SFX2CQ provides the following ports: USB port: The USB port is used to connect a USB flash drive to store logs, software versions, alarms, ...
- Page 34 RG-S7600 Series Switch Hardware Installation and Reference Guide Caution To ensure data security and prevent damage to your device, please use USB flash drives of well-known brands and good quality. The USB port is compatible with most USB controllers and may not recognize some models of USB flash drives.
- Page 35 RG-S7600 Series Switch Hardware Installation and Reference Guide The power module is seated and provides power Solid green for the device. Power The model of the power module can be read but Solid yellow module LED cannot be identified. A power module is not functioning properly or not Solid red connected to the AC power cord.
- Page 36 RG-S7600 Series Switch Hardware Installation and Reference Guide Power Module 1.4.5 The RG-S7620-20SFX2CQ supports the RG-PA550I power module. The RG-PA550I is an intelligent power module that can obtain information such as the output power, output current, and operating temperature in real time. The power module supports hot swapping.
- Page 37 RG-S7600 Series Switch Hardware Installation and Reference Guide Caution Maintain a minimum clearance of 200 mm (7.87 in.) around the device for air circulation. At least two modules are required. If any slot is unoccupied, install a filler panel to enable proper airflow and to keep dust out of the chassis.
- Page 38 RG-S7600 Series Switch Hardware Installation and Reference Guide LEDs Table 1-10 Panel Status Description Identification The expansion module is not powered on. The expansion module is being Blinking green initialized. Status LED Status The expansion module works Solid green properly.
- Page 39 RG-S7600 Series Switch Hardware Installation and Reference Guide Operating 0°C to 45°C (32°F to 113°F) Temperature Storage –40°C to +70°C (–40°F to +158°F) Temperature Operating 10% to 90% RH (non-condensing) Humidity Storage Humidity 5% to 95% RH (non-condensing) Maximum Power 13.06 W...
- Page 40 RG-S7600 Series Switch Hardware Installation and Reference Guide Appearance of the M7600-2CQ Figure 1-19 ③ ④ ① ② Note: 1. Captive screw 2. Status LED 3. QSFP28 100GE optical port 4. QSFP28 100GE optical port LED LEDs Table 1-12 Panel...
- Page 41 RG-S7600 Series Switch Hardware Installation and Reference Guide Technical Specifications Table 1-13 Model M7600-2CQ 100GE QSFP28 The port can work in 100GE or 40GE mode. The 100GE port can be split into port four 25GE ports, and the 40GE port can be split into four 10GE ports.
- Page 42 RG-S7600 Series Switch Hardware Installation and Reference Guide Appearance of the S7610-FAN I-F Figure 1-20 Note: 1. Captive screw 2. Handle 3. Status LED LEDs Table 1-14 Panel Status Description Identification The fan module is not powered The fan module is being...
- Page 43 RG-S7600 Series Switch Hardware Installation and Reference Guide Airflow Fan module panel side Technical Specifications Table 1-16 Fan Module S7610-FAN I-F Airflow Rate 31 CFM Maximum 23,500 RPM Speed Maximum Power 15.6 W Consumption Weight 0.20 kg (0.44 lbs) Dimensions (W 46.4 mm x 131.9 mm x 81.2 mm (1.83 in.
- Page 44 RG-S7600 Series Switch Hardware Installation and Reference Guide LEDs Table 1-17 Panel Status Description Identification The fan module is not powered on. Blinking green The fan module is being initialized. Status Status Solid green The fan module works properly. The fan module is not functioning Solid red properly.
- Page 45 RG-S7600 Series Switch Hardware Installation and Reference Guide RG-PA550I II-F 1.5.5 The RG-PA550I is the power module of the RG-S7600. The RG-PA550I is an intelligent power module that can obtain information such as the power status, output power, output current, and operating temperature in real time.
- Page 46 RG-S7600 Series Switch Hardware Installation and Reference Guide LEDs Table 1-19 Panel Identificatio Status Description There is no power input or the power module is not functioning properly. The power module is outputting power Solid green normally. The power module is off and has 12 VBS output.
- Page 47 RG-S7600 Series Switch Hardware Installation and Reference Guide Maximum output power 550 W ≤ 1.75 mA Ground leakage current Dimensions (W x D x H) 73.5 mm x 185 mm x 39 mm (2.89 in. x 7.28 in. x 1.54 in.) Weight 0.74 kg (1.63 lbs.)
-
Page 48: Preparing For Installation
RG-S7600 Series Switch Hardware Installation and Reference Guide Preparing for Installation Safety Precautions Note To avoid personal injury and device damage, carefully read the safety precautions before you install the RG-S7600. The following safety precautions may not cover all possible dangers. - Page 49 RG-S7600 Series Switch Hardware Installation and Reference Guide Electricity 2.1.3 Observe local regulations and specifications when performing electric operations. Only qualified personnel can perform such operations. Check whether there are potential risks in the working area. For example, check whether the power ...
-
Page 50: Installation Site Requirements
RG-S7600 Series Switch Hardware Installation and Reference Guide Pay attention to the following points: When an optical transceiver is working, ensure that the port has been connected to an optical cable or covered with a dust cap, to keep out dust and prevent it from burning your eyes. -
Page 51: Temperature And Humidity
RG-S7600 Series Switch Hardware Installation and Reference Guide Temperature and Humidity 2.2.3 To ensure the normal operation and prolonged service life of the RG-S7600, maintain an appropriate temperature and humidity in the equipment room. The equipment room with improper temperature and humidity for a long period may damage the device. - Page 52 RG-S7600 Series Switch Hardware Installation and Reference Guide Therefore, the equipment room should be properly protected against the intrusion of harmful gases, such as sulfur dioxide, hydrogen sulfide, nitrogen dioxide, and chlorine gas. Limit Values for Harmful Gases Table 2-3...
- Page 53 RG-S7600 Series Switch Hardware Installation and Reference Guide EMC grounding The grounding required for EMC design includes the shielding ground, filter ground, noise and interference suppression, and level reference, which contribute to the overall grounding requirements. The grounding resistance should be smaller than 1 ohm. The RG-S7600 chassis has one grounding terminal located at the bottom right corner on the back of the chassis.
-
Page 54: Fiber Connections
Dust-free paper and fiber end-face microscope Meters Multimeter, bit error rate tester (BERT), optical power meter Caution The RG-S7600 series switches are delivered without a tool kit. The tool kit is customer-supplied Unpacking Goods Checklist Table 2-4 Chassis, yellow/green grounding cables, quick installation guide,... - Page 55 RG-S7600 Series Switch Hardware Installation and Reference Guide (1) Cut off the packing tape of the shipping container with scissors, place it on a flat surface with the shipping container facing upward, and check whether the seal on its top surface is intact.
- Page 56 RG-S7600 Series Switch Hardware Installation and Reference Guide Schematic Diagram Figure 2-5 (4) Stand the switch upright with the foam block facing upward. (5) Remove the foam block. (6) Carry the switch with both hands to the shipping container of another product and remove the foam block at the other side of the switch.
-
Page 57: Product Installation
RG-S7600 Series Switch Hardware Installation and Reference Guide Product Installation The RG-S7600 must be used indoors. Caution Ensure that requirements in Chapter 2 are all met. Installation Procedure Preparations Mount a cabinet Mount device to the cabinet Connect system ground... -
Page 58: Before You Begin
RG-S7600 Series Switch Hardware Installation and Reference Guide Before You Begin Carefully plan and arrange the installation position, networking mode, power supply, and cabling before installation. Confirm the following requirements before installation: The installation site provides sufficient space for heat dissipation. -
Page 59: Mounting The Switch To The Cabinet
RG-S7600 Series Switch Hardware Installation and Reference Guide (3) Install the appropriate cable troughs and cables. (4) Install the tray and cable management brackets on the rack according to the number of devices installed into the cabinet. Mounting the Switch to the Cabinet Precautions 3.4.1... -
Page 60: Installing The Device Into A Rack
RG-S7600 Series Switch Hardware Installation and Reference Guide The RG-S7620-20SFG2CQ or RG-S7620-20SFX2CQ is equipped with mounting brackets on both sides, and each mounting bracket is fixed with nine M4 x 8 mm countersunk screws. Installing the Device into a Rack 3.4.3... - Page 61 RG-S7600 Series Switch Hardware Installation and Reference Guide Installing the S7600 in a Rack Figure 3-2 Caution The mounting bracket is secured with four screw holes on the left and right sides of six screw holes on the rear panel of the device.
-
Page 62: Installing And Removing A Fan Module
RG-S7600 Series Switch Hardware Installation and Reference Guide Caution To avoid personal injury and device damage, connect the switch to the earth ground properly. The grounding resistance between the chassis and the ground should be less than 1 ohm. -
Page 63: Removing A Fan Module
RG-S7600 Series Switch Hardware Installation and Reference Guide Removing a Fan Module 3.6.2 (1) Tighten the captive screws on the fan module with a screwdriver. (1) Hold the fan module latch and pull the fan module out gently. (2) Install the filler panel in the unoccupied slot. Put the removed fan module back into its package. - Page 64 RG-S7600 Series Switch Hardware Installation and Reference Guide Removing the RG-PA550I II-F Figure 3-5 Caution Slide the power module into the slot gently. Verify that the power module is installed in the correct orientation. During installation, ensure that the power module is aligned properly. If the position is not aligned or it is difficult to install the power module, pull back the installed power module.
- Page 65 RG-S7600 Series Switch Hardware Installation and Reference Guide Retainer Strip, Retainer Clamp, and Latches Figure 3-6 (2) Thread the retainer strip through the hole at the bottom of the clamp and lock it into place. If you want to remove the strip, press the retainer strip latch and pull the strip out.
-
Page 66: Removing A Power Module
RG-S7600 Series Switch Hardware Installation and Reference Guide Retainer Clamp Figure 3-8 Removing a Power Module 3.7.3 (1) Press the latch on the module and grasp the handle with one hand. Place your other hand under the module to support its weight. Pull the module fully out of the slot. - Page 67 RG-S7600 Series Switch Hardware Installation and Reference Guide Installing and Removing Swappable Interface Modules Caution To avoid device damage caused by improper installation, ensure that the device has been installed in the rack before installing the optical module. For details on how to mount the device to a rack, see 3.4 Mounting the Switch to the Cabinet.
- Page 68 RG-S7600 Series Switch Hardware Installation and Reference Guide Installing the SFP+ Optical Module Figure 3-11 Note: ① SFP+ port ② SFP+ optical module (2) Use the optical patch cord to connect the SFP+ optical module to the optical network. Select the optical patch cord based on the connector corresponding to the port.
- Page 69 RG-S7600 Series Switch Hardware Installation and Reference Guide Removing the SFP+ Optical Module Figure 3-12 Note: ① SFP+ port ② SFP+ optical module Caution Remove the optical cable before removing the optical module. Do not forcefully remove the module without unlatching the bail because this may cause damage to the module.
- Page 70 RG-S7600 Series Switch Hardware Installation and Reference Guide Installing the QSFP+ Optical Module Figure 3-13 Note: ① QSFP+ port ② QSFP+ optical module (2) Use the optical patch cord to connect the 40GE QSFP+ optical module to the optical network. Select the optical patch cord based on the connector corresponding to the port.
- Page 71 RG-S7600 Series Switch Hardware Installation and Reference Guide Removing the QSFP+ Optical Module Figure 3-14 Note: ① QSFP+ port ② QSFP+ optical module Caution Remove the optical cable before removing the optical module. Do not forcefully remove the module without unlatching the bail because this may cause damage to the module.
- Page 72 RG-S7600 Series Switch Hardware Installation and Reference Guide Installing the 100GE QSFP28 Optical Module Figure 3-15 Note: ① QSFP28 port ② QSFP28 optical module (2) Use the optical patch cord to connect the 100GE QSFP28 optical module to the optical network. Select the optical patch cord based on the connector corresponding to the port.
-
Page 73: Connecting The Console Port
RG-S7600 Series Switch Hardware Installation and Reference Guide Removing the QSFP28 Optical Module Figure 3-16 Note: ① QSFP28 port ② QSFP28 optical module Caution Remove the optical cable before removing the optical module. Do not forcefully remove the module without unlatching the bail because this may cause damage to the module. -
Page 74: Bundling Cables
RG-S7600 Series Switch Hardware Installation and Reference Guide Steps 3.10.2 (1) Connect the RJ-45 connector of the delivered Ethernet cable to the management port of the switch and the other end to the NMS or control terminal. (2) Plug the single-mode and multimode optical fibers into the corresponding ports according to the panel identification, and distinguish the transmitting and receiving ends of the optical fibers. -
Page 75: Checking Power Supply
RG-S7600 Series Switch Hardware Installation and Reference Guide Verify that cables are properly bundled. Verify that the grounding cables are connected properly. Verify that interface cables are routed indoors. If not, check whether the power supply and interfaces ... -
Page 76: Establishing The Configuration Environment
RG-S7600 Series Switch Hardware Installation and Reference Guide Verifying the Operating Status Establishing the Configuration Environment Connecting the Device to a PC 4.1.1 A PC is connected to the console port of the switch through the Ethernet cable, as shown in Figure 4-1. - Page 77 RG-S7600 Series Switch Hardware Installation and Reference Guide Choose Start > Programs > Accessories > Communications > Hyperterminal. The Hyperterminal window appears. Click Cancel. The Connection Description dialog box will appear. Connection Description Dialog Box Figure 4-2 In the Connection Description dialog box, set the name of the new connection and click OK. A window appears.
-
Page 78: Powering On The Device
RG-S7600 Series Switch Hardware Installation and Reference Guide After selecting the serial port, click OK. The Port Settings window is displayed. Set Bits per second to 9600, Data bits to 8, Parity to None, Stop bits to 1, and Flow control to None. -
Page 79: Monitoring And Maintenance
RG-S7600 Series Switch Hardware Installation and Reference Guide Monitoring and Maintenance Monitoring LEDs 5.1.1 When the RG-S7600 is running, you can monitor the status of each module by observing the status LED of the corresponding module: When the status LED of the device is red, a fault occurs in the system, in which case you can log in to ... -
Page 80: Heat Dissipation System
Replacing the Lithium Battery 5.2.4 The RG-S7600 has a built-in lithium battery to maintain the real-time clock without external power. To replace the lithium battery, contact Ruijie technical support personnel. Replacing Fuses 5.2.5 To replace fuses, contact Ruijie technical support personnel. -
Page 81: Troubleshooting Flowchart
RG-S7600 Series Switch Hardware Installation and Reference Guide Troubleshooting Troubleshooting Flowchart The installed device does not work properly Check whether cabinet is installed correctly Check whether device is installed in cabinet Check whether power supply is normal Check whether power module... - Page 82 Check whether the configuration of the serial port on the HyperTerminal is the same as that of the device. If not, change serial port configuration parameters. If there is still no serial port information, contact Ruijie technical support personnel. - 78 -...
- Page 83 RG-S7600 Series Switch Hardware Installation and Reference Guide Fault 5: Information of the Serial Port Console Contains Garbled Characters 6.2.5 1. Fault Symptom Information of the serial port console contains garbled characters. 2. Handling Method Check whether settings of parameters such as the baud rate of the serial port are the same as those in RG-SG7008 Configuration Guide.
-
Page 84: Appendix A 10Ge, 25Ge, 40Ge, 100Ge, Sfx, And Sfg
RG-S7600 Series Switch Hardware Installation and Reference Guide Appendix A 10GE, 25GE, 40GE, 100GE, SFX, and SFG Modules Ruijie provides 10GE SFP+ modules, 25GE SFP28 modules, 40GE QSFP+ modules, 100GE QSFP28 modules, and modules. You can select modules to suit your specific needs. The following models and technical specifications are listed for your reference. - Page 85 RG-S7600 Series Switch Hardware Installation and Reference Guide Models and Technical Specifications of 40G QSFP+ Modules Table 7-2 Modal Wavel Core Max. Transmi Receive Bandwidt Fiber Model ength Size Cabling (Yes/ t Power Power Type (nm) (μm) Distance (dBm) (dBm) (MHz·...
- Page 86 RG-S7600 Series Switch Hardware Installation and Reference Guide 100G-QSFP SMF (LC –6.5 to –11.5 to -iLR4-SM13 1310 connector 2 km +2.5 +2.5 100G QSF28 Module Not Supported Table 7-4 Modal Wavel Core Max. Transmi Receive Fiber Bandwidth Model ength Size...
- Page 87 S7600 series switches must use the optical modules certified by Ruijie switches. Non-certified optical modules cannot guarantee reliability and may result in unstable services. The optical modules listed in this document are certified by Ruijie. If you require the latest information on Ruijie-certified optical modules, contact Ruijie.
-
Page 88: Appendix B Surge Protection
RG-S7600 Series Switch Hardware Installation and Reference Guide Appendix B Surge Protection Installing the AC Power Arrester (Surge Protection Power Strip) The AC power port must be connected to an external surge protection power strip. This prevents the device from being struck by lightning when the AC power cord is introduced from the outdoor and directly connected to the power port of the device. - Page 89 RG-S7600 Series Switch Hardware Installation and Reference Guide If the ALARM indicator on the power arrester is red, check whether it is caused by the poor grounding connection or reversed connection of null and live lines. You can use a multimeter to measure the polarity of the power socket for the arrester when the indicator is red.
- Page 90 RG-S7600 Series Switch Hardware Installation and Reference Guide Ethernet Port Arrester Installation Figure 8-2 Caution The Ethernet port arrester is only for the 10M/100M electrical ports with an RJ-45 connector. The Ethernet port arrester is not delivered with the device. Purchase it as needed.
-
Page 91: Appendix C Cabling
RG-S7600 Series Switch Hardware Installation and Reference Guide Appendix C Cabling When the RG-S7600 is installed in a standard 19-inch cabinet, route cable bundles upward or downward along the sides of the rack depending on the actual situation in the equipment room. All cable connectors should be placed at the bottom of the cabinet, and cannot be exposed outside the cabinet. - Page 92 RG-S7600 Series Switch Hardware Installation and Reference Guide Bundling Up Cables (1) Figure 9-1 Route and bundle power, signal, and grounding cables separately. When the cables are close to each other, cross them. Mixed bundling is not allowed. When they are close to each other, crossover cabling is recommended.
- Page 93 RG-S7600 Series Switch Hardware Installation and Reference Guide Bundling Up Cables (2) Figure 9-2 When cables need to be bent, bundle them up but do not tie them where the cables will be bent. When cables need to be bent, bundle them up but do not tie them where the cables will be bent.
- Page 94 RG-S7600 Series Switch Hardware Installation and Reference Guide When screw threads are used to fasten cable terminals, the bolt or screw must be tightly fastened, and cable retention measures should be taken. Cable Fastening Figure 9-4 ①Flat washer ③Spring washer ④Flat washer...
-
Page 95: Appendix D Site Selection
RG-S7600 Series Switch Hardware Installation and Reference Guide Appendix D Site Selection The equipment room should be at least 5 km away from heavy pollution sources, such as the smelter works, coal mine, and thermal power plant. The equipment room should be at least 3.7 km away from medium pollution sources, such as the chemical factory, rubber factory, and electroplating factory. - Page 96 RG-S7600 Series Switch Hardware Installation and Reference Guide the window or air vent toward the device. - 92 -...
Need help?
Do you have a question about the RG-S7600 Series and is the answer not in the manual?
Questions and answers