Table of Contents
Advertisement
Quick Links
Advertisement
Table of Contents

Related Manuals for PSI LaiPen LP 110


Summary of Contents for PSI LaiPen LP 110
- Page 2 This document and its parts can be copied or provided to a third party only with the express permission of PSI. The contents of this manual have been verified to correspond to the specifications of the device. However, deviations cannot be ruled out.
-
Page 3: Table Of Contents
ABLE OF ONTENT Information Before Using the Device ..................... 5 Device Description and Accessories ....................... 6 Accessories ..............................7 2.1.1 Notebook Computer ............................. 7 2.1.2 Telescopic Rod .............................. 7 2.1.3 Tripod ................................7 2.1.4 Substitute Connection Cable ........................7 Technical Specifications ......................... 8 Principle of Measurement ........................ - Page 4 Software Installation ........................... 25 Menu and Icons Explanation ........................26 9.2.1 Main Menu ..............................26 9.2.2 Menu Settings ............................. 27 Data Download and Visualization ....................... 27 9.3.1 Single Sensor Mode ............................ 27 Data Export ..............................28 Firmware Update ..........................29 GPS Module ............................
-
Page 5: Information Before Using The Device
Other accessories or features based on specific order If any item from the list above is missing, please, contact PSI. Also check the package for any visible external damage. If you find any damage, notify the carrier and PSI immediately. The carton and all packing materials should be retained for inspection by the carrier or insurer. -
Page 6: Device Description And Accessories
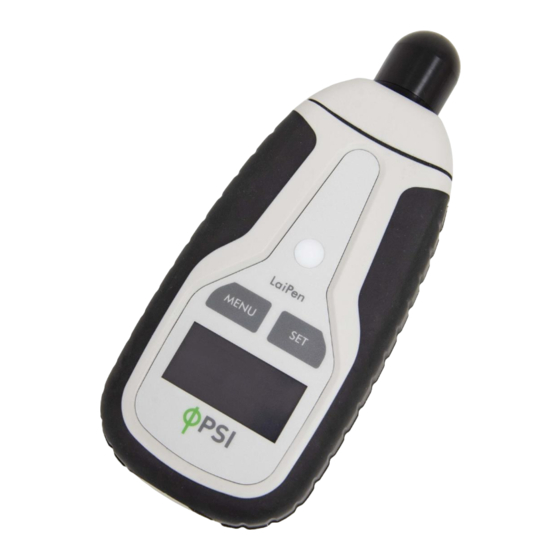
LaiPen instrument. The LAI sensor is covered with a black restriction cup (Fig. 1). PAR can be measured with a PAR sensor, which is placed in the middle of the front side of the instrument (Fig. 1). Fig. 1 LaiPen LP 110 Physical Features LaiPen device is supplied with the following items: •... -
Page 7: Accessories
2.1.1 N OTEBOOK OMPUTER Portable notebook computer (laptop). The type and specification vary according to current availability on the market. For detailed information contact PSI at support@psi.cz 2.1.2 T ELESCOPIC LaiPen instrument attached to a telescopic rod can facilitate measurements of distinct vegetation canopy layers at different heights. It can also be used to measure reference values above canopy of mid –sized plants or shrubs. -
Page 8: Technical Specifications
ECHNICAL PECIFICATIONS LAI Pen 110 Photosynthetically active radiation (PAR, 400 – 700 nm) Measured and calculated ALAI radiation (blue band of the spectrum, 400–500 nm) parameters PAR index calculated as PAR transmittance through canopy ALAI index calculated as ALAI transmittance through canopy Measurement at multiple 0°, 16°, 32°, 48°, 64°... -
Page 9: Principle Of Measurement
Bluetooth module compliance data Category Country Standard FCC Part 15 Subpart B: 2008 Class B FCC CRF Title 47 Part 15 Subpart C FCC ID: T9J-RN42 ETSI EN 301 489-1 V1.8.1 Radio Europe ETSI EN 301 489-17 V2.1.1 ETSI EN 300 328 V1.7.1 Canada IC RSS-210 low power comm. -
Page 10: Measuring Reference Values
I is the irradiance intensity under the canopy, is the intensity of irradiance above the vegetation, e is Euler’s number and k is extinction coefficient. Extinction coefficient is estimated from shape, orientation and position of each element of vegetation canopy with a known inclination of canopy element and view direction (Breda, 2003). -
Page 11: Reference For Single Sensor Mode Of Measurement
Fig. 7 Instrument positioning in relation to the sun position. In order to prevent direct sunlight exposure of the LAI sensor, it is necessary to turn with the instrument around to correct position of the restriction cup relative to the sun. Hold the instrument vertically and turn around with the device so the slot of the restriction cup is oriented perpendicularly to sunlight direction and the front (display) side of the device would face the sun. -
Page 12: Reference For Dual Sensor Mode Of Measurement
Single sensor mode of measurement is advised to be used preferably at constant light condition (clear or overcast sky condition) as rapid changes of weather might cause inaccurate prediction of reference irradiance values, which are necessary for correct LAI calculation. Fig. -
Page 13: Getting Started
ETTING TARTED 5.1 G ENERAL UIDE TO EASUREMENT This chapter explains how to start to operate the LaiPen LP110/USB in single sensor or in dual sensor mode of measurement. Single sensor mode of measurement of ALAI irradiance can be used for measuring multiple angles, which is described in chapter 5.5. For more detailed information on particular steps of LaiPen operation refer to chapter 5. -
Page 14: Single Sensor Mode Of Measurement
5.3 S INGLE ENSOR ODE OF EASUREMENT This chapter describes a particular measurement procedure with single LaiPen instrument operating in one zenith angle. Example in chapter 5.6 describes how to perform the zenith angle measurements systematically to determine LAI in vegetation cover. It is advised to use single sensor mode of measurement preferably at constant light conditions as rapid changes of weather can cause inacurate LAI calculation. -
Page 15: Dual Sensor Mode Of Measurement
8. Soon after completing measurement under vegetation canopy obtain the last reference value in an open space. 9. To return to the main menu press MENU repeatedly until Return is selected and then press SET. 10. After each measurement the data is stored to the device internal memory and the instrument can be switched off by holding MENU button for 1 second safely without erasing data. -
Page 16: Multiple Angle Mode Of Measurement
7.5. Watch the display, tilt the instrument in left-right direction and in forward-backward direction to achieve the lowest angle for both axis angle readings. This step can be sometimes tedious since the correct position must be achieved in range of milometers. -
Page 17: Example Of Zenith Angle Measurement And Lai Calculation
6. In the next step measurement under the canopy is described. Define position under vegetation canopy and start the ALAI measurement. 6.1. Set Main Menu > Measure > ALAI Press SET to activate immediate measurement of reference values. Irradiance value is continuously monitored, actual value appears on the display. - Page 18 6. Calculate ALAI transmittance according to equation T = I /I (equation 1) from irradiance values, which you can obtain after opening the exported file in a spreadsheet software (e.g. MS Excel, see chapter 5). Calculate ALAI transmittance using the spreadsheets by dividing the exported iradiance values below the canopy (I) named “value”...
-
Page 19: Control Menu Tree
ONTROL To switch ON the device, hold the SET key for 1 second. Use the control menu tree to perform the measurements. Use the MENU button to scroll through sequential menu options on the digital display. Use SET button to select an option indicated with the cursor position (˃). - Page 20 Fig. 13 Measure Sub Menu. Page | 20...
- Page 21 Fig. 14 Data Sub Menu. Page | 21...
- Page 22 Fig. 15 Setting Sub-Menu-Part 1. Page | 22...
- Page 23 Fig. 16 Setting Sub-Menu-Part 2. Page | 23...
-
Page 24: Connecting Via Usb Cable
Device Manager in Windows will list the USB serial port in the device tree. The USB driver may also be downloaded from PSI websites www.psi.cz. Once the driver is installed correctly the connection between the LaiPen and the computer is initiated by selecting in the software on the computer Setup >... -
Page 25: Fluorpen Software
the PC or Bluetooth card to learn how to do this. The Bluetooth software that came with the PC, or the PC's Bluetooth card may need to be activated. This software varies by manufacturer. Please consult the PC's Bluetooth documentation for more information. Bluetooth must be switched on and be visible on both devices Ensure that Bluetooth is switched on both devices. -
Page 26: Menu And Icons Explanation
Fig. 19 Connecting LaiPen to software. 9.2 M ENU AND CONS XPLANATION 9.2.1 M MENU: File (Fig. 20) Load Loads previously saved data files. Save Saves data to hard disc. Export Exports data in .txt format. Export to JSON Exports data in JavaScript Object Notation. Close Closes the current experiment. -
Page 27: Menu Settings
MENU: Help (Fig. About Offers basic information about the program. Register Used for the FluorPen software registration. Icon Explanation: Fig. 23 Menu Help. Download Downloads data from the LaiPen to PC. Load Loads (opens) previously saved data files. Save Saves data to local storage. Export Exports data in .txt format. -
Page 28: Data Export
Fig. 25 Data viewing window description Dual Sensor Mode: Data Management 1. In the FluorPen software open Setup > Settings. The settings window appears (Fig. 26). Select the Add to opened option. 2. Connect instrument_1 to computer and select Setup > Device ID 3. -
Page 29: Firmware Update
3. Select a path for local storage and type a filename Fig. 27 Export Parameters window Fig. 28 Export – txt file 10 F IRMWARE PDATE All data in the LaiPen memory are erased during the firmware update! Before starting any firmware update, download all your data from the FluorPen memory to the computer! 1. - Page 30 2. Warning: Select OK to start update (Fig. 30). Fig. 30 Warning. 3. Selecting .bxn file. Find firmware update file (a binary file with the extension .bxn provided from PSI) and select Open (Fig. 31). Fig. 31 Selection of the firmware file.
-
Page 31: Gps Module
• The bottom bar indicates the upload progress (Fig. 33). Fig. 33 Firmware upload progress. • Press OK to finish the upload (Fig. 34). Fig. 34 Firmware upload finishing. The LaiPen memory is completely erased during firmware update. Before starting any software update, save your data from the LaiPen memory into your computer! 11 GPS M ODULE... -
Page 32: Data Download
For prompt determination of the coordinates use the option Accessories > GPS > Location. The device needs a clear view to the sky to acquire satellite signal. Keep in mind that the LaiPen turns off automatically after about 8 minutes of no action. Turning off the LaiPen always turns off GPS module. -
Page 33: Warranty Terms And Conditions
ARRANTY TERMS AND CONDITIONS • This Limited Warranty applies only to the LaiPen LP 110 device. It is valid for one year from the date of shipment. • If at any time within this warranty period the instrument does not function as warranted, return it and the manufacturer will repair or replace it at no charge. -
Page 34: List Of Figures
14 L IST OF IGURES Fig. 1 LaiPen LP 110 Physical Features ................................6 Fig. 2 Padded carrying case to protect the instrument during transportation ....................6 Fig. 3 Telescopic rod ...................................... 7 Fig. 4 Tripod ........................................7 Fig. 5 Substitute connection cable ................................. 7 Fig.
Need help?
Do you have a question about the LaiPen LP 110 and is the answer not in the manual?
Questions and answers