Table of Contents
Advertisement
For:
FluorPen FP 100
FluorPen FP 100-MAX
PAR-FluorPen FP 100-MAX-LM
FluorPen FP 100-B
FluorPen FP 100-U
FluorPen or PAR-FluorPen
with detachable leafclips
F
l
u
o
r
P
e
F
l
u
o
r
P
e
S
e
S
e
O
p
e
r
a
t
i
o
O
p
e
r
a
t
i
o
PSI (Photon Systems Instruments), spol. s r.o.
Drasov 470, 664 24 Drasov, Czech Republic
http://www.psi.cz
n
F
P
1
0
0
n
F
P
1
0
0
r
i
e
s
r
i
e
s
n
M
a
n
u
a
l
n
M
a
n
u
a
l
Advertisement
Table of Contents

Related Manuals for PSI FluorPen FP 100


Summary of Contents for PSI FluorPen FP 100
- Page 1 For: FluorPen FP 100 FluorPen FP 100-MAX PAR-FluorPen FP 100-MAX-LM FluorPen FP 100-B FluorPen FP 100-U FluorPen or PAR-FluorPen with detachable leafclips PSI (Photon Systems Instruments), spol. s r.o. Drasov 470, 664 24 Drasov, Czech Republic http://www.psi.cz...
-
Page 2: Table Of Contents
Table of Contents 1. Technical Specification ..............................3 2. General Information ..............................5 3. List of Equipment................................8 4. Physical Features ................................9 5. Accessories ..................................10 6. Operation Instructions .............................. 12 7. Bluetooth Pairing and Connecting ........................20 7.A. General Information ................................20 7.B. -
Page 3: Technical Specification
Adjustable from 0 to 3,000 µmol(photons)/m².s (0 to 100 %) Detector Wavelength Range: PIN photodiode with 697 to 750 nm bandpass filters Communication: Bluetooth, USB, or serial (not included in the FluorPen FP 100) FluorPen 1.0 Software: Windows 2000, XP, or higher compatible*** Memory Capacity:... - Page 4 * Only in the FluorPen FP 100-MAX or PAR-FluorPen FP100-MAX-LM. ** Only in the PAR-FluorPen FP100-MAX-LM. *** Windows is a registered trademark of Microsoft Corporation. The Bluetoothmodule BlueNiceCom III is endowed with a declaration of conformity with the following norms: EN 300 328 V1.6.1 (2004-11)
-
Page 5: General Information
FluorPen FP 100-MAX-W This version of the FluorPen FP 100-MAX is equipped with a special open leaf-clip that enables measurements in ambient light. The open leaf-clip may is supplied with a cover for short term dark adaptation of measured samples. - Page 6 PAR-FluorPen FP 100-MAX-LM Includes an integrated Light Meter, one of the communication modules (Bluetooth, USB, or serial), FluorPen 1.0 software, protocol update, and user's guide. Measures Ft, QY, NPQ, OJIP, Light Curve, and Photosynthetically Active Radiation (PAR) in the range from 400 to 700 nm. Equipped with a standard leaf-clip.
- Page 7 PAR** - Photosynthetically Active Radiation Photosynthetically Active Radiation measured as Photosynthetic Photon Flux Density (PPFD). * Only in the FluorPen FP 100-MAX, PAR-FluorPen FP100-MAX-LM or in the FluorPen models including the protocol update (FluorPen FP 100-B, FP 100-U). ** Only in the PAR-FluorPen FP100-MAX-LM.
-
Page 8: List Of Equipment
* FluorPen FP 100-MAX includes only one communication module (Bluetooth or USB). Note: If any item is missing, please, contact PSI. Also check the carton for any visible external damage. If you find any damage, notify the carrier and PSI immediately. The carton and all packing materials should be retained for inspection by the carrier or insurer. -
Page 9: Physical Features
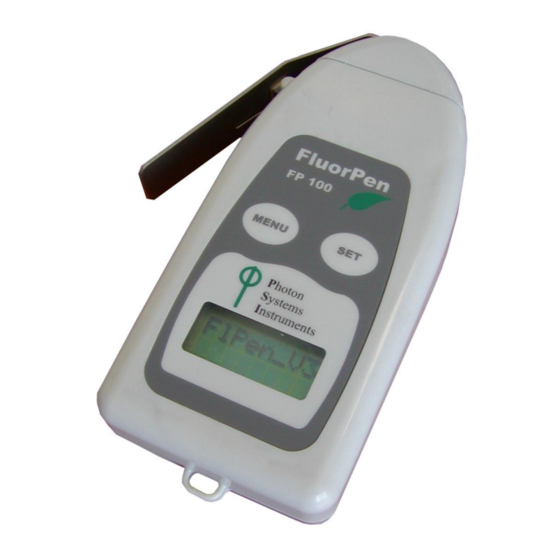
Optical window cover ** Leaf clip Optical window Menu key Light Meter Sensor * Set key Textile strap holder * Only in the PAR-FluorPen FP 100-MAX-LM ** Only in the FluorPen FP 100-MAX-W (supplied with a special “open-window” leaf clip). -
Page 10: Accessories
5. Accessories Carrying Case The FluorPen is supplied with a carrying case which is padded to protect the instrument during transportation. You can either carry the FluorPen case over the shoulder or hang it on your belt. Protective Rubber Pad The optical part of the FluorPen is covered with a self-adhesive rubber pad that protects the optics from dirt or moisture. - Page 11 Detachable leaf-clip Supplementary detachable leaf-clips for use with the FluorPen FP 100-MAX-D and PAR- FluorPen FP 100-MAX-LM-D. Sample holder is a clip for gentle fixing of a leaf sample and its short duration dark adaptation. “D” version of the PAR-FluorPen with detachable leaf-clips is suitable for experiments where long term dark adaptation is needed.
-
Page 12: Operation Instructions
6. Operation Instructions The next six pages explain the structure of the Main Menu and three Sub-Menus with all their options. The blue color represents the Main Menu and its Options. The yellow color represents the first-level Sub-Menus and their Options. ... -
Page 20: Bluetooth Pairing And Connecting
Before you set up the Bluetooth connection between the FluorPen and PC, make sure you have these components: 1. Bluetooth enabled FluorPen FluorPen FP 100-MAX and FluorPen FP 100-B include built-in Bluetooth capabilities. 2. Bluetooth enabled PC The PC with which you connect must have Bluetooth wireless technology, either built-in or through a Bluetooth card. -
Page 21: Bluetooth Pairing
7.B. Bluetooth Pairing Step 1: Enabling Bluetooth in the FluorPen Switch on the FluorPen (press and hold the SET key). Scroll to the “Setting” menu (press the MENU key twice, then press the SET key once). Select “BT_On” to enable Bluetooth (press the SET key). * Keep in mind that the FluorPen turns off automatically after about 3 minutes of no action. - Page 22 Step 4: Searching for a New Bluetooth Device Mark the following box: “My device is set up and ready to be found”. Select: Next. Step 5: Selecting the FluorPen Select: Bluetooth FluorPen icon (FluorPen FluoroMeter PSI).* Select: Next. * Your display may show more Bluetooth Device icons.
- Page 23 Step 6: Starting the Pairing Process Your Bluetooth Pairing Passkey is: 0000 Select: “Let me choose my own passkey.” Enter: 0000 (four digits). Select: Next. Step 7: Completing the FluorPen Pairing Select: Finish.
-
Page 24: Bluetooth Connection
7.C. Bluetooth Connection Step 1: Installing the FluorPen Software Install the FluorPen software to your PC. Use the CD that came enclosed with your FluorPen.* * See Chapter 8 of this Operation Manual for complete information on FluorPen software. Step 2: Enabling Bluetooth in the FluorPen Switch on the FluorPen (press and hold the SET key). - Page 25 Step 4: Registering the FluorPen Software Select: Help>Register. Enter your serial (registration) number.* Select: OK. * You will find your serial (registration) number in the file SN.txt on the enclosed CD. Important Note: How to Reconnect Bluetooth Disconnection can occur, either when the Bluetooth feature has been turned off in one or both of the devices, or when the units move outside their operating range.
-
Page 26: Usb Pairing And Connecting
Before you set up the USB connection between the FluorPen and PC, make sure you have these components: 1. USB enabled FluorPen FluorPen FP 100-MAX and FluorPen FP 100-U include connector for communication by USB cable. 2. USB cable 8.B. USB Pairing Connect the USB cable to a computer and FluorPen as shown below. -
Page 27: Fluorpen Software
FluorPen software menu Setup->Device ID. * Points 2 and 3 apply only to users of the FluorPen FP 100-MAX and FluorPen FP 100-B. See Chapter 7 of this Operation Manual for complete information on Bluetooth pairing and connecting. -
Page 28: Menu And Icon Explanation
9.B. Menu and Icon Explanation Menu: File Load Loads previously saved data files. Save Saves data to hard disc. Export Exports data in .txt format. Export to JSON Exports data in JavaScript Object Notation. Close Closes the current experiment. Close All Closes all running experiments. - Page 29 Menu: Settings After Download - Memory Erase If the box is checked, the FluorPen memory is erased after each data download. Data - Inverted If the box is checked, the polarity of data is inverted, e.g., multiplied by -1.* Data – Add to Opened If the box is checked, the downloaded data are added to that of the current opened experiment.
-
Page 30: Example Of Data Transfer And Visualization
9.C. Example of Data Transfer and Visualization Step 1: Do a measurement with your FluorPen. (Here, we did an OJIP measurement.) Step 2: Click the “Download” icon or select Device>Download. Step 3: The Data table appears. File name Time of experiment Measured parameter Save experiment Measured and... - Page 31 Step 4: To visualize measurement in the graphic mode, click the “Graph” field in the bottom bar. Step 5: The colored Graph of measured data appears. Selection of data corresponds to their description Choose logarithmic or non-logarithmic graph form Step 6: For export press File>Export or “Export”...
-
Page 33: Explanation Of Ojip Parameters
9.D. Explanation of OJIP Parameters The FluorPen also offers the possibility to capture rapid fluorescence transient – OJIP, which occurs during exposure of plants to high irradiance. The FluorPen software enables data downloading to a personal computer and subsequent OJIP analysis. The OJIP protocol includes the following extracted and technical parameters*: Formula Abbreviation Formula Explanation... - Page 34 Example of OJIP protocol...
-
Page 35: Non-Photochemical Quenching (Npq) Protocol
9.E. Non-Photochemical Quenching (NPQ) Protocol The NPQ protocol is the most typically used measuring approach to quantify photochemical and non- photochemical quenching. The measurement should be performed with a dark-adapted sample. Thereby, it may not be appropriate under field conditions. The NPQ protocol starts by giving a measuring light to acquire minimal level of fluorescence Fo. - Page 37 Example of NPQ1 protocol Example of NPQ2 protocol...
-
Page 38: Light Curve (Lc) Protocol
9.F. Light Curve (LC) Protocol The protocol called Light Curve (LC) was designed to acquire parameters for construction of Light Response Curve relating the rate of photosynthesis to photon flux density. The method is based on successive measurements of the sample exposed to a stepwise increase of light intensity. The effective quantum yields of photosynthesis are determined under various light intensities of continuous illumination. - Page 41 Example of LC1 protocol Example of LC2 protocol...
- Page 42 Example of LC3 protocol...
-
Page 43: Software Update
9.G. Software Update Very important! The FluorPen memory is erased during the software update! Before starting any software update, export all your data from the FluorPen memory into your computer! Step 1: Starting Update Select: Setup>Update Firmware Step 2: Selecting .bxn File Find: Binary file (with the extension .bxn) Select: Open... - Page 44 Step 3: Finishing Upload Select: “OK” to start uploading of the update. The bottom bar indicates the upload progress. Press: “OK” to finish upload.
-
Page 45: Gps Module
10. GPS Module For all devices in FluorPen Series GMS module might be connected to the device. IMPORTANT INFORMATION: For proper GPS reading, the time in your FluorPen and in your computer must be synchronized! Pre- set time and time zone must correspond to GPS time (time zone) in your location. 10.A. -
Page 46: First Time Installation Of The Gps Module
1. Installing AA Batteries The device operates on two AA batteries. You can use alkaline, NiMH or lithium batteries. Use NiMH of lithium batteries for best results. 1. Turn the D-ring counter clockwise and pull up to remove the cover. 2. -
Page 47: Gps / Fluorpen Operation
Select: Settings>GPS visible Step 2: Accepting GPS Setting Close and restart the FluorPen program to accept GPS setting. 10.C. GPS / FluorPen Operation Step 1: Time Synchronization Synchronize the FluorPen time with the time of your PC. Time must be set correctly witch respect to your time zone. -
Page 48: Data Download
10.D. Data Download Step 1: Enabling Communication Switch on the computer, FluorPen, and GPS module and set your computer to FluorPen communication (enable Bluetooth or connect to serial or USB port). Step 2: Downloading FluorPen Data Start: FluorPen program. Connect: FluorPen device. Download: Measured data from the FluorPen to your PC. - Page 49 Step 3: Connecting GPS Module Connect the GPS Module to your PC. Communication is set properly if the hardware is recognized by your Step 4: Downloading GPS Data Select: Device>Attach GPS file to download data from the GPS module. Step 5: Completing the Download Successfully downloaded coordinates paired with FluorPen...
-
Page 50: Statement Of Limited Warranty
If at any time within this warranty period the instrument does not function as warranted, return it and PSI will repair or replace it at no charge. The customer is responsible for shipping and insurance charges (for the full product value) to PSI. PSI is responsible for shipping and insurance on return of the instrument to the customer.
Need help?
Do you have a question about the FluorPen FP 100 and is the answer not in the manual?
Questions and answers