
Related Manuals for Dunster House Vantage 300


Summary of Contents for Dunster House Vantage 300
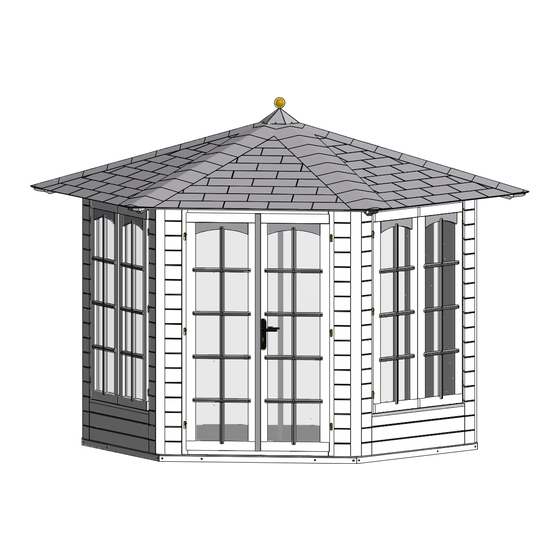
- Page 1 INSTALLATION MANUAL Vantage 300 Hexagonal Summerhouse 3.0m x 2.6m Unique Product Reference Number _______________ Please pre-drill all holes to avoid splitting the timber! www.dunsterhouse.co.uk...
-
Page 2: Preparation For Assembly
Vantage 300 Hexagonal Summer House Important! Thank you for purchasing your Summer House from Dunster House. We aim for our customers to enjoy our products for many years and we appreciate your custom. *Please retain all documentation with regards to your purchase. If you do need to contact us, please do so in writing by e-mail to cs@dunsterhouse.co.uk or fax us on 01234 224497 or by post to:-... - Page 3 Vantage 300 Hexagonal Summer House Component List 2475x857x10.A MFP 1485x858x10.A MFP (Floor MFP Piece) (Floor MFP Piece) MFP- Multi Functional Panel 1485 2475 Vantage 300- Floor Sub Frame 2325 WP-30SH-AT WP-30SH-AB (Wall Panel Top Half) (Wall Panel Bottom Half) 1395...
- Page 4 Vantage 300 Hexagonal Summer House Component List Vantage 300 - Roof Top Half Vantage 300 - Roof Bottom Half 1830 1152 86x43x1485.A (Floor Bearers) Pressure Treated 1485 86x43x773 86x43x727 (Bearer) (Bearer) Pressure Treated Pressure Treated 86x43x1500.A 98x15x1475.A (Roof Frame Boards)
- Page 5 Vantage 300 Hexagonal Summer House Note: Please ensure you have a correct foundation before building summerhouse. Only a completely levelled load bearing foundation will ensure a stable and problem free installation, especially when aligning the door and windows. Step 1A: Floor Bearer Items: 6x 86x43x1485.A...
- Page 6 Vantage 300 Hexagonal Summer House Step 2A: Wall Panel (Bottom Half) TOP VIEW Item: 2x 86x65x1870.A (Wall Post) WP-30SH-AB 1x WP-30SH-AB (Wall Bottom Half) 1x 45x45x1780 10x 60mm screws 2A:II 1x 90mm Screw 86x65x1870.A 45x45x1780 WP-30SH-AB Correct direction of shiplap boards 86x65x1870.A...
- Page 7 Vantage 300 Hexagonal Summer House Step 3: Wall Panels (Repeat Step 2 to fix the remaining wall panels) Item: 2x WP-30SH-AB (Wall Bottom Half) 2x WP-30SH-AT (Wall Top Half) 2x 86x65x1870.A 2x 45x45x1780 32x 60mm screws (16 per each panel)
- Page 8 Vantage 300 Hexagonal Summer House Step 5: Georgian Bars for Windows & Door Panels (Optional) Item: 2x 27x27x1625.GB (Door- Vertical) 8x 27x27x435.GB (Door- Horizontal) 4x 27x27x1350.GB (Window- Vertical) 12x 27x27x425.GB (Window- Horizontal) 52x 20mm screws (2 per Georgian bar) 20mm Screw 27x27x425.GB...
- Page 9 Vantage 300 Hexagonal Summer House Step 7: Purlin & Temporary Roof Post Item: 1x Spider Metal Bracket 6x 70x35x1850.P (Purlin) 12x 60mm Screws (2 per Purlin) 1x 35x35x2315 (Temporary Roof Post) 6x 120mm Screws (1 per Purlin) 70x35x1850.P 70x35x1850.P 60mm Screws Top-Down View 70x35x1850.P...
- Page 10 Vantage 300 Hexagonal Summer House Step 8: Roof Panels Item: 6x Vantage 300- Roof Top Half 6x Vantage 300- Roof Bottom Half 12x 20mm Screws (2 per Roof Panel) 72x 50mm Screws (6 per each Half Roof Panel) Step 8A: Slide in the top halves between purlins as much as possible so they sit tight. Secure by screwing from underneath.
- Page 11 Vantage 300 Hexagonal Summer House Step 9: Roof Trims Item: 6x 98x15x1475.A (Roof Trim) 5x 35mm Screws 30x 35mm Screws (5 per Trim) 86x43x1500.A 98x15x1475.A (Fix to 86x43x1500.A) Note: Ensure the trim boards are covering the gap between the roof panels and the top frame, as shown below, before fixing.
- Page 12 Vantage 300 Hexagonal Summer House Step 10: Roof Felt and shingles (OPTIONAL EXTRA!) Please follow the following instructions if you have bought the roof felt or shingles. If you have not bought either, then you will still need to provide some other suitable roof covering to protect your summerhouse.
- Page 13 Vantage 300 Hexagonal Summer House Repeat Step 10A.ii for all 6 roof panels to have structure as shown below. Felt- 2nd layer Felt- 1st layer 10A.iii: Ridges Cut the felt lengthwise in half (500mm wide) and nail it down either side of the ridge overlapping each side by approximately 250mm.
- Page 14 Vantage 300 Hexagonal Summer House Step 10B: Shingles (OPTIONAL!) Item: Shingles 10mm Clout Nails If you have purchased the (optional extra) shingles, please follow the instructions on this page, otherwise please skip this Step and go to Step 11 for the Roof Decoration.
- Page 15 Vantage 300 Hexagonal Summer House 10B.iv: Ridges Cut the shingle unit into 3 parts as shown below with taper (approximately 15°). Cutting lines Before After Cover the ridges with the cut shingle parts ensuring there are no gaps to let in rain water.
-
Page 16: Post Installation
Again, thank you for purchasing this garden building from Dunster House. We have a gallery on our website with many happy customers sending in photos of them enjoying our products. Please feel free to send in your pictures of your finished project.
Need help?
Do you have a question about the Vantage 300 and is the answer not in the manual?
Questions and answers
Hi, I am erecting a vantage 300 hexagonal summer with shingles. The items delivered included a membrane which is referred to in the instructions for felt roofing but not mentioned for the shingles roofing. please confirm whether or not this is required under the shingles. many thanks