
Related Manuals for Siemens SIMOTICS XP Eagle Line 1MB1.33


Summary of Contents for Siemens SIMOTICS XP Eagle Line 1MB1.33
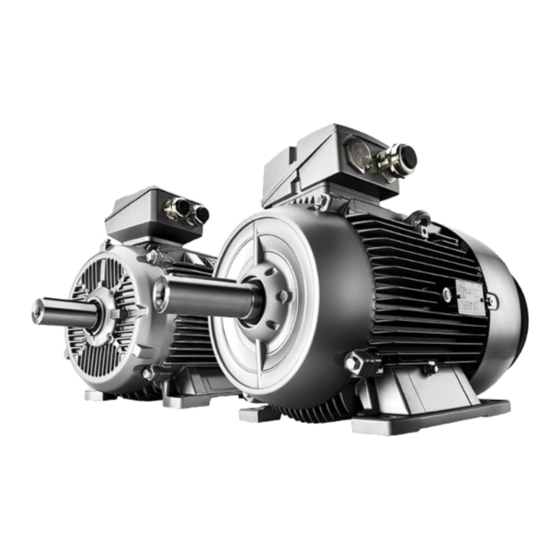
- Page 1 Edition 08/2023 OPERATING INSTRUCTIONS SIMOTICS XP Low-voltage motors 1MB1.33 Eagle Line Shaft heights 71... 315 www.siemens.com/drives...
- Page 3 1MB1.33 Eagle Line shaft heights 71 ... 315 Introduction Safety information SIMOTICS XP Description Preparing for use Low-voltage motors 1MB1.33 Eagle Line shaft heights 71 ... 315 Assembly Electrical connection Operating Instructions Commissioning Operation Maintenance Spare parts Disposal Technical data Quality documents For applications in hazardous zones according to NEC 500/505/506...
- Page 4 Note the following: WARNING Siemens products may only be used for the applications described in the catalog and in the relevant technical documentation. If products and components from other manufacturers are used, these must be recommended or approved by Siemens. Proper transport, storage, installation, assembly, commissioning, operation and maintenance are required to ensure that the products operate safely and without any problems.
-
Page 5: Table Of Contents
Websites of third-party companies ..................11 SIMOTICS documentation ....................11 Service and support ......................12 1.4.1 Siemens Industry Online Support on the Web ..............12 1.4.2 Siemens Industry Online Support on the road ..............13 1.4.3 Feedback on the technical documentation ................. 14 1.4.4... - Page 6 Table of contents Installation ........................30 3.3.1 Regulations ........................31 3.3.2 Cooling and ventilation ...................... 33 3.3.2.1 Machines with a fan......................33 3.3.2.2 Machines without a fan (optional) ..................33 3.3.3 Bearings ..........................34 3.3.4 Axial and radial forces ......................34 3.3.5 Balancing ..........................
- Page 7 Table of contents 4.14.6 Speed limits for converter operation .................. 63 Assembly.............................. 65 Safety instructions for installation ..................65 Preparing for installation ....................66 5.2.1 Requirements for installation ..................... 66 5.2.2 Insulation resistance ......................67 5.2.2.1 Insulation resistance and polarization index ............... 67 5.2.2.2 Checking the insulation resistance and polarization index of the winding ......
- Page 8 Table of contents 6.3.1 Minimum surface area of grounding conductor ..............91 6.3.2 Grounding connection type ....................92 Temperature sensor/anti-condensation heating connection ..........93 6.4.1 Connecting optional integrated devices and equipment ............. 93 Conductor connection ....................... 94 6.5.1 Connection with/without cable lugs ................... 97 6.5.2 Cable ends with wire end sleeves ..................
- Page 9 Table of contents 9.2.1 Safety instructions for inspection and maintenance ............124 9.2.2 Inspections in the event of faults ..................126 9.2.3 First inspection after installation or repair ................. 127 9.2.4 General inspection ......................128 9.2.5 Assessing the rolling bearings ..................128 9.2.6 Mechanical explosion protection for rolling bearings ............
- Page 10 Table of contents 10.11.1 1MB1 shaft heights 71 ... 90 cast iron ................152 10.11.2 1MB1 shaft heights 100 ... 200 cast iron ................153 10.11.3 1MB1 shaft heights 225 ... 315 cast iron ................154 10.11.4 Terminal box 1MB1 shaft heights 71 ... 200 cast iron ............155 10.11.5 Terminal box 1MB1 shaft heights 200 ...
-
Page 11: Introduction
Introduction About SIMOTICS Description SIMOTICS is the Siemens family of electric motors addressing the complete motor spectrum in Digital Industry. About this manual 1.2.1 Content To illustrate possible application areas for our products, typical use cases are listed in this product documentation and in the online help. -
Page 12: Target Group
This document contains recommendations relating to third-party products. Siemens accepts the fundamental suitability of these third-party products. You can use equivalent products from other manufacturers. Siemens does not accept any warranty for the properties of third-party products. 1.2.2 Target group... -
Page 13: Standard Scope
This document may contain hyperlinks to third-party websites. Siemens is not responsible for and shall not be liable for these websites and their content. Siemens has no control over the information which appears on these websites and is not responsible for the content and information provided there. -
Page 14: Service And Support
Service and support 1.4.1 Siemens Industry Online Support on the Web Description The following is available via Siemens Industry Online Support (https://support.industry.siemens.com/cs/ww/en/), among others: • Product support • Global forum for information and best practice sharing between users and specialists •... -
Page 15: Siemens Industry Online Support On The Road
• Compatibility tool • Newsletters with information about your products • Catalogs/brochures 1.4.2 Siemens Industry Online Support on the road Description Figure 1-1 "Siemens Industry Online Support" app The "Industry Online Support" app supports you in the following areas, for example: •... -
Page 16: Feedback On The Technical Documentation
1.4.3 Feedback on the technical documentation Description We welcome your questions, suggestions, and corrections for this technical documentation. Please use the "Provide feedback" link at the end of the entries in Siemens Industry Online Support. Figure 1-2 Requests and feedback 1.4.4... -
Page 17: Technical Support
• "Industry Online Support" mobile app The Support Request is the most important input channel for questions relating to products from Siemens Industry. This will assign your request a unique ticket number for tracking purposes. The Support Request offers you: •... -
Page 18: Training
Description SITRAIN – Digital Industry Academy offers a comprehensive range of training courses on Siemens industrial products – directly from the manufacturer, for all industries and use cases, for all knowledge levels from beginner to expert. More information can be found on the Internet via the following address (https://www.siemens.com/sitrain). -
Page 19: Safety Information
Safety information Information for those responsible for the plant/system This motor is a partly completed machine in the sense of directive 2006/42/EC ("machinery directive"), and has been designed and built in compliance with the applicable's health and safety protection requirements of this directive, including the protection goals of directive 2014/35/EU ("Low-Voltage Directive") regarding electrical hazards. -
Page 20: Qualified Personnel
Safety information 2.3 Qualified personnel 5 safety rules 1. Disconnect the system. Also disconnect the auxiliary circuits, for example, anti-condensation heating. 2. Secure against reconnection. 3. Verify absence of operating voltage. 4. Ground and short-circuit. 5. Provide protection against adjacent live parts. To energize the system, apply the measures in reverse order. - Page 21 Safety information 2.4 Safe handling Danger as a result of stationary parts under voltage (live parts) Live parts represent a hazard. Touch protection against active (live) parts is no longer guaranteed if covers are removed. The minimum clearance and creepage distances may be violated when coming close to live parts.
-
Page 22: Use In Hazardous Areas
Safety information 2.5 Use in hazardous areas Noise emissions During operation, the machine's noise emission levels can exceed those permitted at the workplace, which can cause hearing damage. • Ensure that nobody is in the area of increased noise emissions during machine operation. •... -
Page 23: Explosion Hazard From Hybrid Mixtures
Safety information 2.6 Explosion hazard from hybrid mixtures Ignition hazards The assessment of operating risks and local operating conditions and the necessary monitoring methods must be clarified and made binding by the system operator in consultation with the responsible supervisory authority. Apply the necessary measures. Regarding this topic, the machine manufacturer cannot provide any generally applicable recommendations. -
Page 24: Electrostatic Sensitive Devices
Safety information 2.7 Electrostatic sensitive devices Electrostatic sensitive devices Material damage due to electrostatic discharge Electronic modules contain components that can be destroyed by electrostatic discharge. These components can be damaged or destroyed if they are not handled correctly. To protect equipment against damage, follow the instructions given below. -
Page 25: Electromagnetic Compatibility
Safety information 2.8 Electromagnetic compatibility Risk of explosion due to electrostatic discharge Electrostatic discharge poses a potential ignition source. Dangerous electrostatic charging can occur, for example as a result of mechanical friction, flowing air that contains particles, processes that generate significant levels of charge – or persons that are not appropriately grounded, e.g. -
Page 26: Influence On The Line Power Supply Through A Strongly Irregular Torque
Safety information 2.10 Influence on the line power supply through a strongly irregular torque 2.10 Influence on the line power supply through a strongly irregular torque A strongly irregular torque, for example with the drive of a reciprocating motor, forces a non- sinusoidal motor current. - Page 27 Safety information 2.13 Certificate with special conditions the winding insulation, carefully ensure that no converter-related overvoltages with a peak value exceeding (1.1 * √2 * UN) occur at the terminals of the electric motor. • If anti-condensation heating is used, then an interlock circuit must ensure that the anti- condensation heating can only be operated when the motor is shut down.
- Page 28 Safety information 2.13 Certificate with special conditions 1MB1.33 Eagle Line shaft heights 71 ... 315 Operating Instructions, 08/2023, A5E52990459A...
-
Page 29: Description
Description Area of application The rotating electrical motors of this series are used as industrial drives. They are designed for a wide range of drive applications both for line operation as well as in conjunction with frequency converters. They are characterized by their high power density, extreme robustness, long service life and outstanding reliability. - Page 30 Description 3.1 Area of application Use in hazardous areas Explosion-proof electrical machines correspond to standards of the IEC/EN 60034 and IEC/EN 60079 series. Only operate the machine in hazardous areas, strictly complying with the specifications of the responsible supervisory authority. The relevant supervisory authority is responsible for determining the hazard level of each area and classifying the zones.
-
Page 31: Rating Plates
Description 3.2 Rating plates Rating plates The rating plate shows the identification data and the most important technical data. The data on the rating plate and the contractual agreements define the limits of proper and intended use. Data on the rating plate Item Description Item... -
Page 32: Installation
Description 3.3 Installation Line operation (DOL) rating plate Converter operation (VSD) rating plate Installation Machine design The regulations and standards used as the basis to design and test this machine are stamped on the rating plate. The machine design basically complies with the subsequent standards. Please refer to the EU Declaration of Conformity for the versions of the harmonized standards referenced. -
Page 33: Regulations
Description 3.3 Installation 3.3.1 Regulations Table 3- 1 Applicable general regulations Feature Standard Dimensioning and operating behavior EN/IEC 60034-1 GOST IEC 60034-1 GB 755 IEC 60034-1 Procedure for determining the losses and EN/IEC 60034-2-1 GOST IEC 60034-2-1 GB/T 1032 BS EN 60034-2-1 the efficiency of rotating electrical EN/IEC 60034-2-2 GOST IEC 60034-2-2... - Page 34 Description 3.3 Installation Feature Standard Electrical equipment for hazardous EN / IEC 60079-17 GOST 31610.17 GB/T 3836.16 BS EN 60079-17 zones - Part 17: Checking and maintaining electrical installations Electrical equipment for hazardous EN / IEC 60079-19 GOST 60079-19 GB/T 3836.13 BS EN IEC 60079-19 zones - Part 19: Repairs and overhauls...
-
Page 35: Cooling And Ventilation
Description 3.3 Installation 3.3.2 Cooling and ventilation The machines of this series are three-phase induction machines with a closed primary (internal) cooling circuit and an open secondary cooling circuit (surface cooling). The surface cooling varies depending on the version. 3.3.2.1 Machines with a fan Self-ventilation (standard): Cooling method IC 411 according to EN / IEC 60034-6 Located at the ND end of the stator housing is an air intake cowl that guides the external air... -
Page 36: Bearings
Description 3.3 Installation 3.3.3 Bearings To support the machine shaft and maintain its position in the non-moving part of the machine, DE and NDE rolling bearings are used. One end performs the function of a locating bearing that transfers axial and radial forces from the rotating machine shaft to the non- moving part of the machine. -
Page 37: Types Of Construction/Method Of Installation
Description 3.3 Installation 3.3.6 Types of construction/method of installation The type of construction of the machine is stated on the rating plate. Table 3- 3 Type of construction Basic type of Diagram Other methods of Diagram construction code installation IM B3 (IM 1001) IM V5 (IM 1011) IM V6 (IM 1031) IM B6 (IM 1051) - Page 38 Description 3.3 Installation Basic type of Diagram Other methods of Diagram construction code installation IM B14 (IM 3601) IM V18 (IM 3611) IM V19 (IM 3631) Basic type of Diagram construction code IM B35 (IM 2001) IM V15 (IM 2011) IM V35 (IM 2031) IM B34 (IM 2101) IM V17 (IM 2111)
-
Page 39: Degree Of Protection
Description 3.3 Installation Table 3- 4 Construction type with canopy Conditions of installation Diagram IM V5 (IM 1011) IM V1 (IM 3011) IM V15 (IM 2011) IM V17 (IM 2111) IM V18 (IM 3611) Note Motors up to shaft height 200 may be operated in a vertical or horizontally inclined position. Vertical types of construction may be inclined through ±45 °... -
Page 40: Environmental Conditions
Description 3.3 Installation "tc" and Group IIIB have degree of protection IP55 and can be used in dusty environments such as in mills, silos, animal feed plants, and malthouses, as well as in certain areas of the chemical industry. Machines intended for use in Zone 22 (dust explosion protection "AEx ec, Group IIIC" or Class II, Div. - Page 41 Description 3.3 Installation Note Further documents Observe all of the other documents provided with this machine. Supplementary devices Depending on the order, various supplementary devices can be installed or mounted. These include temperature sensors for monitoring bearing temperatures or winding temperatures, for example.
-
Page 42: Marking
Description 3.3 Installation 3.3.10 Marking Table 3- 5 For applications in Zone 1 - IEC/EN/BS/GOST 60079-10-1, GB3836.14 1026 II 2G Ex eb IIB T. Gb FTZU 18 ATEX 0016 ... 0019, PTB 20 ATEX 3006 1026 II 2G Ex eb IIC T. Gb FTZU 18 ATEX 0016 ... - Page 43 Description 3.3 Installation 2Ex nA IIB T. Gc X EAЭC RU C-DE.AA87.B.00156/19 2Ex nA IIC T. Gc X Ex ec IIB T. Gc 2020312301002066 ... 068, 2020312301002073 ... 076, 2020312301002087 ... 089 Ex ec IIC T. Gc Table 3- 7 For applications in Zone 21 - IEC/EN/BS/GOST 60079-10-2, GB/T3836.35 1026 II 2D Ex tb IIIA T...
- Page 44 Description 3.3 Installation Table 3- 8 For applications in Zone 22 - IEC/EN/BS/GOST 60079-10-2, GB/T3836.35 II 3D Ex tc IIIA T... °C Dc BVS 14 ATEX E 081 X, EPS 18 ATEX 1 202 X, PTB 12 ATEX 3016 II 3D Ex tc IIIC T... °C Dc II 3D Ex tc IIIB T...
-
Page 45: Terminal Box
Description 3.3 Installation 3.3.11 Terminal box As an option, additional connecting terminals are available in the terminal box for monitoring equipment. For larger machines, an additional terminal box can be optionally mounted. You can see the number of available terminals in the circuit diagrams. It is possible to turn the top side of a machine terminal box 4 x 90 degrees (if screwed on). - Page 46 Description 3.3 Installation 1MB1.33 Eagle Line shaft heights 71 ... 315 Operating Instructions, 08/2023, A5E52990459A...
-
Page 47: Preparing For Use
Preparing for use Good planning and preparation of machine applications are essential in terms of keeping installation simple and avoiding errors, ensuring safe operation, and allowing access to the machine for servicing and corrective maintenance. This chapter explains how you should proceed when engineering a plant or system in relation to this machine and the preparations you need to make before the machine is delivered. -
Page 48: Delivery
Preparing for use 4.4 Delivery Delivery Checking the delivery for completeness The drive systems are put together on an individual basis. When receiving the delivery, immediately check whether the scope of delivery matches the accompanying documents. No claims relating to defects/items missing from the delivery will be accepted if these are submitted at a later date. - Page 49 Preparing for use 4.5 Transport and storage • Carefully comply with all of the handling information and markings on the packages whenever transporting and putting the equipment into storage according to ISO 780. • Only use suitable and correctly dimensioned lifting equipment, conveying equipment and transport vehicles.
- Page 50 Preparing for use 4.5 Transport and storage • Comply with the permissible eyebolt loads. • When necessary, use suitably dimensioned lifting equipment, for example hoisting slings (EN1492-1) and webbing load restraints (EN12195-2). • Never remain under or in the immediate vicinity of the machine when it is lifted. WARNING Danger to life as a result of a machine falling If the lifting gear or load handling attachments were to fail, the machine could fall.
-
Page 51: Storage
Preparing for use 4.5 Transport and storage 4.5.2 Storage Storing outdoors NOTICE Damage to the motor Damage can occur if incorrectly stored. Take all precautions to protect the motor under extreme climatic conditions, e.g. salt-laden and/or dusty, moist/humid atmospheres. Choose a dry storage location which is safe from flooding and free from vibration. Repair any damage to the packaging before putting the equipment into storage if this is necessary to ensure proper storage conditions. -
Page 52: Temperature Limits During Storage
Preparing for use 4.5 Transport and storage 4.5.3 Temperature limits during storage The materials used are specially designed for the temperature range required by the customer. The relevant temperature limits are specified on the rating plate. WARNING Risk of explosion due to damaged sealing materials Storing machines at temperatures that do not fall within the specified limits can damage the material of the seals and cause them to no longer seal correctly. -
Page 53: Securing The Rotor
Preparing for use 4.5 Transport and storage NOTICE Storage The motor can be damaged if you use it or store it unprotected outdoors. • Protect the motor against intensive solar radiation, rain, snow, ice and dust. Use a superstructure or additional cover, for example. •... - Page 54 Preparing for use 4.5 Transport and storage Alternative rotor bracing • If you transport the machine after the output element has been pulled on, then you must axially fix the rotor in another way. Thread in the shaft extension Tightening torque 40 Nm 80 Nm 150 Nm...
-
Page 55: Commissioning After Storage
Preparing for use 4.5 Transport and storage 4.5.5 Commissioning after storage 4.5.5.1 Insulation resistance and polarization index Measuring the insulation resistance and polarization index (PI) provides information on the condition of the machine. It is therefore important to check the insulation resistance and the polarization index at the following times: •... -
Page 56: Ensure Adequate Cooling
Preparing for use 4.6 Ensure adequate cooling Ensure adequate cooling WARNING Overheating and failure of the motor Death, severe injury or material damage can occur if you do not strictly comply with the following points, for explosion-proof machines, an explosion can occur. •... -
Page 57: Thermal Protection
Preparing for use 4.7 Thermal protection Incorrect Correct Minimum dimension "x" for the distance between neighboring modules and the air intake of the machine Table 4- 2 Minimum dimension "x" for the distance between adjacent modules and the air intake of the machine Shaft height 63 ... - Page 58 Preparing for use 4.7 Thermal protection Use a motor circuit breaker, directly monitor the winding temperature or use equipment to provide the same functionality corresponding to the explosion type of protection. For pole-changing motors, in addition to the circuit breaker, use temperature sensors in the windings.
-
Page 59: Interlock Circuit For Anti-Condensation Heating
Preparing for use 4.8 Interlock circuit for anti-condensation heating Interlock circuit for anti-condensation heating If the anti-condensation heating is operated while the machine is running, this can increase the temperatures inside the machine. • Install an interlock circuit that switches off the anti-condensation heating once the main machine is switched on. -
Page 60: Rotational Speed Limit Values
Preparing for use 4.11 Rotational speed limit values 4.11 Rotational speed limit values Danger as a result of resonance within certain speed ranges At over-critical speeds, machines encounter resonance within certain speed ranges. Such vibrations can reach impermissibly high levels. This can result in death, serious injury or material damage. -
Page 61: Converter Operation
Preparing for use 4.14 Converter operation Note Converter • If operated with a frequency converter, the emitted interference varies in strength, depending on the design of the converter (type, interference suppression measures, manufacturer). • Avoid that the specified limit values stipulated for the drive system (consisting of the motor and converter) are exceeded. -
Page 62: Converter Input Voltage
Preparing for use 4.14 Converter operation • Do not exceed or fall below limit speed n or n . If no other value is specified, the minimum speed limit is n 5 Hz. The speed limits are either stamped on the rating plate or the supplementary plate for converter operation as the highest or lowest specified speed. -
Page 63: Insulated Bearings For Converter Operation
– Use a separate high-frequency equipotential bonding cable between the motor enclosure and the driven machine. • Use the common-mode filter (damping cores) at the converter output. The SIEMENS sales partner is responsible for selecting and dimensioning. • Limit the rise in voltage by using output filters. Output filters dampen the harmonic content in the output voltage. - Page 64 Preparing for use 4.14 Converter operation Comply with the information provided on the machine plates relating to bearing insulation and possible jumpers. ① Driven machine ④ Insulated bearings ② Motor ⑤ Insulated tachometer fitting ③ Coupling Figure 4-1 Schematic representation of a single drive NOTICE Bearing damage The bearing insulation must not be bridged.
-
Page 65: Tandem Operation
Preparing for use 4.14 Converter operation NOTICE Bearing damage Bearing currents can flow if the coupling between the motors of the tandem drive is not insulated. This can damage the DE bearings of both motors. • Use an insulated coupling to couple the motors. 4.14.5 Tandem operation If you connect two motors in series in "tandem operation", locate a coupling between the... - Page 66 Preparing for use 4.14 Converter operation 1MB1.33 Eagle Line shaft heights 71 ... 315 Operating Instructions, 08/2023, A5E52990459A...
-
Page 67: Assembly
Assembly Comply with the following when carrying out any work on the machine: • Comply with the general safety instructions (Page 17). • Comply with the applicable national and sector-specific regulations. • When using the motor within the European Union, comply with the specifications laid down in EN 50110-1 regarding safe operation of electrical equipment. -
Page 68: Preparing For Installation
Assembly 5.2 Preparing for installation Loss of conformity with respect to the applied directives In the delivery state, the machine corresponds to the requirements according to the directives stamped on the type plate or in the documentation provided. Unauthorized changes or modifications to the machine lead to the loss of conformity with the applicable directives and the loss of the associated warranty. -
Page 69: Insulation Resistance
Assembly 5.2 Preparing for installation Damage to mounted parts and components as a result of high temperatures The motor components get very hot during operation. High temperatures can damage parts mounted by customers, such as cables manufactured out of materials that are not heat resistant. -
Page 70: Checking The Insulation Resistance And Polarization Index Of The Winding
Assembly 5.2 Preparing for installation 5.2.2.2 Checking the insulation resistance and polarization index of the winding Measure the insulation resistance 1. Follow the instructions in the Operating Manual of the insulation measuring instrument used. 2. Ground other windings, integrated winding temperature sensors and, if applicable, other mounted and installed components. - Page 71 Assembly 5.2 Preparing for installation Limit values for the winding insulation resistance The following table lists the measuring voltage and limit values for the insulation resistance . These values correspond to recommendations provided in IEC 60034-27-4. Table 5- 1 Insulation resistance of the winding at 40 °C / MΩ...
- Page 72 Assembly 5.2 Preparing for installation Note Comment to IEEE 43 According to IEEE 43, also for winding temperatures < 40 °C, R must be converted over to the reference temperature of 40 °C. As the minimum values for R apply at 40 °C, the required R values are somewhat higher for winding temperatures below 40 °C.
-
Page 73: Mounting And Installed The Machine
Assembly 5.3 Mounting and installed the machine Mounting and installed the machine 5.3.1 Preparing the assembly area 1. Prepare a suitable assembly area (e.g. assembly stands). Make sure that the assembly area has sufficient clearance from the floor for the DE shaft end. The necessary data is provided in the machine dimension drawing. -
Page 74: Machines With Type Of Construction Im B15, Im B9, Im V8 And Im V9
Assembly 5.3 Mounting and installed the machine • The machine temperature class specified on the rating plate must be equal to or greater than the temperature class of any combustible gases that may develop. • Select optional mounted equipment according to the requirements of Directive 2014/34/EU, IECEx scheme or in accordance with the appropriate country regulations. -
Page 75: Alignment And Fastening
Assembly 5.4 Alignment and fastening • Professionally touch up damaged painted surfaces. • Observe the information provided in Chapter Aligning and mounting (Page 73) Alignment and fastening Observe the following when aligning and mounting: • Ensure a flat and uniform contact surface for foot and flange mounting. •... -
Page 76: Measures For Alignment And Mounting
Assembly 5.4 Alignment and fastening 5.4.2 Measures for alignment and mounting The following measures are required in order to compensate any radial offset at the coupling and to horizontally adjust the electrical machine with respect to the driven load: • Vertical positioning For vertical mounting positions, avoid deforming the machines by placing shims under the mounting feet. -
Page 77: Machine Frame Mounting Feet (Special Design)
Assembly 5.5 Installing the machine 5.4.4 Machine frame mounting feet (special design) Please note that when the terminal box is mounted at the NDE (option H08), dimension C can deviate from EN 50347. To comply with dimension C according to EN 50347, for machines with double or triple holes at the NDE, use the appropriate screw bore. -
Page 78: Horizontal Types Of Construction With Flange
Assembly 5.5 Installing the machine 4. When positioning the machine, ensure that a uniform axial gap (y→0) is maintained around the coupling. 5. Fix the machine to the foundation. The choice of fixing elements depends on the foundation and is the plant operator's responsibility. Note Machine expansion When aligning, make allowance for the thermal expansion of the machine when the... -
Page 79: Vertical Types Of Construction With Flange
Assembly 5.5 Installing the machine 5.5.2.4 Vertical types of construction with flange The standard flange is provided with a centering. The choice of fit for the mating flange on the driven machine is the system manufacturer's or the plant operator's responsibility. If the machine is not fitted with a standard flange, align the machine to suit the driven machine. -
Page 80: Recommended Alignment Accuracy
Assembly 5.5 Installing the machine 5.5.4 Recommended alignment accuracy The alignment accuracy required depends essentially on the configuration of the overall machine train. Observe the required alignment accuracy of the coupling manufacturer in all cases when aligning the machine. Table 5- 2 Recommended alignment accuracy Speed Parallel offset... - Page 81 Assembly 5.5 Installing the machine WARNING Risk of injury due to Incorrect installation or removal The feather key may be flung out if the motor is operated without drive output elements, such as coupling, etc. Carefully comply with the required measures. This can result in death, serious injury or material damage.
- Page 82 Assembly 5.5 Installing the machine Withdrawing drive output elements Mounting drive output elements Only transfer radial or axial forces specified in the catalog to the machine bearings via the shaft extension. You can obtain the permissible values for axial and radial forces by contacting the Service Center (Page 12) or by referring to the machine catalog.
- Page 83 Assembly 5.5 Installing the machine The following applies to all four-pole machines with a frequency ≥ 60 Hz: • The feather key must be shortened if the coupling hub is shorter than the feather key. • The center of gravity of the coupling half should be within the length of the shaft end. •...
- Page 84 Assembly 5.5 Installing the machine 1MB1.33 Eagle Line shaft heights 71 ... 315 Operating Instructions, 08/2023, A5E52990459A...
-
Page 85: Electrical Connection
Electrical connection Comply with the following when carrying out any work on the machine: • Comply with the general safety instructions (Page 17). • Comply with the applicable national and sector-specific regulations. • When using the motor within the European Union, comply with the specifications laid down in EN 50110-1 regarding safe operation of electrical equipment. -
Page 86: Connecting The Machine
• Tighten the screwed connections to the specified tightening torques. • Only use the fixing accessories provided or only the original spare parts from Siemens. • Always carefully check the fastenings when carrying out service work. -
Page 87: Selecting Cables
Electrical connection 6.1 Connecting the machine 6.1.2 Selecting cables Take the following criteria into account when selecting the connecting cables: • Rated current • Rated voltage • If required, service factor • System-dependent conditions, such as ambient temperature, routing type, cable cross- section as defined by required length of cable, etc. -
Page 88: Terminal Box
Electrical connection 6.1 Connecting the machine 6.1.4 Terminal box DANGER Hazardous voltage Electric motors have high voltages. When incorrectly handled, this can result in death or severe injury. Switch off the machine so that it is in a no-voltage condition before you open the terminal box. -
Page 89: Terminal Marking
Electrical connection 6.1 Connecting the machine Direction of According to IEC According to NEMA rotation Line feeder cables L1 L2 L3 L1 L2 L3 Terminal Clockwise U V W T1 T2 T3 connection rotation Terminal Counter- V U W T2 T1 T3 connection clockwise rotation... -
Page 90: Protruding Connection Cables
Electrical connection 6.1 Connecting the machine Inserting cables into the terminal box 1. Only use cable entries that are suitable for the cables. 2. Only use cable entries and cables suitable for the prevailing ambient temperature. 3. Ensure that the power cables are strain relieved when inserting them in the terminal box. 4. -
Page 91: Connecting Protruding Cables
Electrical connection 6.1 Connecting the machine CAUTION Damage to connecting cables that are freely led out You must observe the following note to avoid damaging connecting cables that are freely led out: • It must be ensured that there are no foreign bodies, dirt, or moisture in the terminal base of the machine enclosure. -
Page 92: Cable Glands
Electrical connection 6.1 Connecting the machine 6.1.5 Cable glands Cable glands with (sheet metal) nuts (EN 50262) ① ② O ring Cable glands with reductions and (sheet metal) nuts (EN 50262) ① ② O ring 6.1.5.1 Mounting position of sheet metal nuts in screw-type connections ②... -
Page 93: Tightening Torques
Electrical connection 6.2 Tightening torques Cable glands with connecting thread in the terminal box (EN 50262) ② O ring Tightening torques Note the information in Chapter Tightening torques (Page 167). Connecting the grounding conductor The machine's grounding conductor cross-section must comply with EN / IEC 60034-1. Please also observe installation regulations such as those specified in EN / IEC 60204-1. -
Page 94: Grounding Connection Type
Electrical connection 6.3 Connecting the grounding conductor 6.3.2 Grounding connection type Type of enclosure grounding Conductor cross- section mm² … 10 Connection of an individual conductor under the external grounding bracket. … 25 Connection is made using a DIN cable lug under the external grounding bracket. -
Page 95: Temperature Sensor/Anti-Condensation Heating Connection
Electrical connection 6.4 Temperature sensor/anti-condensation heating connection Shaft height Thread size for the grounding conductor 63 ... 160 1 x M5 1 x M6 2 x M6 225 ... 280 2 x M8 315 ... 355 2 x M12 The additional grounding point (generally on the opposite side) is optionally available. Temperature sensor/anti-condensation heating connection WARNING Hazard due to electric shock... -
Page 96: Conductor Connection
Electrical connection 6.5 Conductor connection Depending on the terminal box version, connect the auxiliary circuits to the terminal block or to the terminal board. Terminal block connection Conductor connection Cross-sections that can be connected depending on the size of the terminal (possibly reduced due to size of cable entries) Table 6- 3 Maximum conductor connection for explosion-protected machines... - Page 97 Electrical connection 6.5 Conductor connection Type of connection Terminal studs Cable cross-section mm² Connection with cable lug DIN 46234 1 ... 4 1 ... 6 (shaft height 132) 1 ... 16 4 ... 35 Connection with cable lug DIN 46234 6 ...
- Page 98 Electrical connection 6.5 Conductor connection Type of connection Terminal studs Cable position with terminal Cable cross-section mm² 2.5 ... 25 10 ... 95 25 … 185 50 … 300 50 … 120 95 … 240 120 … 300 16 … 35 16 …...
-
Page 99: Connection With/Without Cable Lugs
Electrical connection 6.5 Conductor connection 6.5.1 Connection with/without cable lugs In the case of terminals with terminal clamps, distribute the conductors in such a way that the clamping heights on both sides of the fillet are about the same. This method of connection requires that you must bend a single conductor in a U shape or use a cable lug. -
Page 100: Connecting Aluminum Conductors
Electrical connection 6.5 Conductor connection 6.5.3 Connecting aluminum conductors If you are using aluminum conductors, then comply with the following: • Use only cable lugs that are suitable for connecting aluminum conductors. • Immediately before inserting the aluminum conductor, remove the oxide layer from the contact areas on the conductor and/or the mating piece. -
Page 101: Connecting The Converter
Electrical connection 6.6 Connecting the converter Connecting the converter NOTICE Material damage caused by an excessively high supply voltage Material damage can occur if the supply voltage is too high for the insulation system. • Observe the values in the following tables. SIMOTICS machines can be operated with SINAMICS converters (uncontrolled and controlled infeed) when maintaining the permissible voltage peaks. -
Page 102: Final Checks
Electrical connection 6.7 Final checks WARNING Machine overheating Operating explosion-protected machines at the converter without using the appropriate protective equipment can result in death or severe injury. Always use PTC thermistor monitoring when operating explosion-protected machines at the converter. Trip units according to Directive 2014/34/EU ("Explosion Protection Directive") or according to country regulations are always necessary when using PTC thermistor monitoring, e.g. - Page 103 Electrical connection 6.7 Final checks • Avoid protruding wire ends. • In order not to damage the cable insulation, freely arrange the connecting cables. • Connect the machine corresponding to the specified direction of rotation. • Keep the inside of the terminal box clean and free from trimmed-off ends of wire. •...
- Page 104 Electrical connection 6.7 Final checks 1MB1.33 Eagle Line shaft heights 71 ... 315 Operating Instructions, 08/2023, A5E52990459A...
-
Page 105: Commissioning
Commissioning Comply with the following when carrying out any work on the machine: • Comply with the general safety instructions (Page 17). • Comply with the applicable national and sector-specific regulations. • When using the motor within the European Union, comply with the specifications laid down in EN 50110-1 regarding safe operation of electrical equipment. - Page 106 Commissioning 7.1 Measures before commissioning See also Tightening torques for screw and bolt connections (Page 167) Second shaft end If the second shaft end is not used: • Carefully secure the feather key to prevent it from being thrown out, and for balancing type "H"...
-
Page 107: Insulation Resistance And Polarization Index
Commissioning 7.1 Measures before commissioning is provided in the converter documentation. Contact the Service Center (Page 12) if required. • Check that the supplementary equipment and devices to monitor the machine are correctly connected and are functioning correctly. • In continuous operation, carefully ensure that the motor cannot exceed the specified upper speed limit n or fall below the lower speed limit n The permissible acceleration time to the limit speed n... -
Page 108: Commissioning The Separately Driven Fan
Commissioning 7.1 Measures before commissioning 7.1.3 Commissioning the separately driven fan The separately driven fan ensures that the main machine is cooled irrespective of the main machine speed or direction of rotation. The separately driven fan is only suitable for one direction of rotation. -
Page 109: Further Documents
Commissioning 7.2 Setpoint values for monitoring the bearing temperature 7.1.4 Further documents Note Further documents Observe all of the other documents provided with this machine. Setpoint values for monitoring the bearing temperature Prior to commissioning If the machine is equipped with bearing thermometers, set the temperature value for disconnection on the monitoring equipment before the first machine run. - Page 110 Commissioning 7.3 Switching on direction of rotation or for checking in general. Allow the machine to run down before switching it on again. • Check mechanical operation for noise or vibration at the bearings or end shields. • If the machine is not running smoothly or is emitting abnormal noises, switch it off, and determine the cause of the fault as it runs down.
-
Page 111: Test Run
Commissioning 7.3 Switching on 7.3.1 Test run After installation or inspection, carry out a test run: 1. Start the machine without a load. To do this, close the circuit breaker and do not switch off prematurely. Check whether it is running smoothly. Switching the machine off again while it is starting and still running at slow speed should only be done to the extent necessary, for example for checking the direction of rotation or for checking in general. - Page 112 Commissioning 7.3 Switching on 4. During the test run, check and document the following: – Check whether it is running smoothly. – Document the voltage, current and power values. As far as possible, document the corresponding values of the driven machine. –...
-
Page 113: Operation
Operation Comply with the following when carrying out any work on the machine: • Comply with the general safety instructions (Page 17). • Comply with the applicable national and sector-specific regulations. • When using the motor within the European Union, comply with the specifications laid down in EN 50110-1 regarding safe operation of electrical equipment. - Page 114 Operation 8.1 Safety instructions for operation Faults in operation Any changes with respect to the normal condition can indicate that the machine is not functioning correctly. • Higher power consumption, temperatures or vibration levels. • Unusual noise or smells. • Monitoring devices respond. These changes can cause faults which can result in eventual or immediate death, serious injury or material damage.
- Page 115 Operation 8.1 Safety instructions for operation Substances that can be easily ignited and are flammable Chemical substances required for the setup, operation and maintenance of machines may be flammable. Burns and other damage to health and material may result. • Carefully comply with the information in these operating instructions and the product information supplied by the manufacturer.
- Page 116 Operation 8.1 Safety instructions for operation Explosion hazard from hybrid mixtures Hybrid mixtures are mixtures of flammable dusts with explosive gas/air atmospheres which can together create a dangerous explosive atmosphere if they occur at the same time. Changes can arise in the safety performance characteristics here, such as a change in the zonal classification, increase in the explosion pressure, reduction in the minimum ignition energy and a reduction in the maximum temperatures to be complied with.
-
Page 117: Safety Instructions Relating To Ventilation And Cooling
Operation 8.1 Safety instructions for operation Risk of explosion due to excessive bearing temperature The surface temperature cannot be maintained within maximum permissible limits if the bearing becomes too hot. The dust can ignite, resulting in an explosion. This can result in death, serious injury or material damage. -
Page 118: Switching On With The Anti-Condensation Heating Active
Operation 8.1 Safety instructions for operation CAUTION Risk of injury when touching the fan There is a risk of injury at machines equipped with a fan cover (e.g. on machines in the textile industry), as the fan is not completely touch protected. •... -
Page 119: Switching On The Machine
Operation 8.2 Switching on the machine Switching on the machine 1. Operate the machine without a load and check that it is running smoothly. 2. If it runs perfectly, connect a load. NOTICE Thermal overload of motors connected directly to the line supply In addition to the load torque, the ramp-up (accelerating) time is essentially influenced by the moment of inertia to be accelerated. - Page 120 Operation 8.5 Stoppages Longer non-operational periods • For longer non-operational periods (> 1 month), either operate the machine or at least turn the rotor regularly, approximately once per month. • If attached, remove the rotor shipping brace before you turn the rotor. •...
-
Page 121: Avoidance Of Damage To Rolling Bearings During Stoppages
Operation 8.5 Stoppages WARNING Explosion hazard If the anti-condensation heating is switched on directly after the machine is switched off, the temperature class or the maximum surface temperature of the machine can be exceeded. In an explosive atmosphere, there is a risk of an explosion. This can result in death, serious injury or material damage. -
Page 122: Faults
Operation 8.6 faults faults 8.6.1 Inspections in the event of faults Natural disasters or unusual operating conditions, such as overloading or short circuit, are faults that overload the machine electrically or mechanically. Immediately perform an inspection after such faults. Correct the cause of the fault as described in the respective remedial measures section. Repair any damage to the machine. -
Page 123: Mechanical Faults
Operation 8.6 faults 8.6.3 Mechanical faults Table 8- 2 Mechanical faults ↓ Grinding noise ↓ Radial vibrations ↓ Axial vibrations Possible causes of faults Remedial measures Rotating parts grind Establish the cause and realign the parts. Rotor or coupling not balanced. Disconnect the rotor or coupling and rebalance. -
Page 124: Rolling Bearing Faults
Operation 8.7 Deactivating 8.6.4 Rolling bearing faults Damage to rolling bearings can be difficult to detect in some cases. If in doubt, replace the rolling bearing. Use other bearing designs only after consulting the manufacturer. Table 8- 3 Rolling bearing faults ↓... -
Page 125: Maintenance
Maintenance General Through careful and regular maintenance, inspections and overhauls, you can detect faults at an early stage and resolve them. This means that you can avoid consequential damage. Operating situations and characteristics can vary widely. For this reason, only general maintenance intervals can be specified here. -
Page 126: Inspection And Maintenance
Maintenance 9.2 Inspection and maintenance Inspection and maintenance 9.2.1 Safety instructions for inspection and maintenance Explosion hazard due to overheating of the machine caused by a layer of dust Deposits of dust have a thermal insulation effect, which can lead to the machine overheating. The maximum surface temperature of the machine cannot be adhered to. - Page 127 Maintenance 9.2 Inspection and maintenance Risk of explosion due to static charging If you clean the motor, plastic components may become statically charged and ignite a potentially explosive atmosphere. An explosion can occur. This can result in death, serious injury or material damage. •...
-
Page 128: Inspections In The Event Of Faults
Maintenance 9.2 Inspection and maintenance Risk of burn injuries as a result of hot surfaces Individual machine parts can become hot in operation. Burns can result when coming into contact with these parts. • Never touch machine parts during operation. •... -
Page 129: First Inspection After Installation Or Repair
Maintenance 9.2 Inspection and maintenance 9.2.3 First inspection after installation or repair Perform the following checks after approximately 500 operating hours or at the latest six months after commissioning: Table 9- 1 Checks after assembly or repair Checking When the motor is standstill running... -
Page 130: General Inspection
Maintenance 9.2 Inspection and maintenance 9.2.4 General inspection Check that the installation conditions are observed. We recommend doing this after approx. 16 000 operating hours. Check the following at the latest after 2 years: Table 9- 2 Checks that have to be performed during the general inspection Checking When the motor is... -
Page 131: Mechanical Explosion Protection For Rolling Bearings
Maintenance 9.2 Inspection and maintenance 9.2.6 Mechanical explosion protection for rolling bearings All machines marked in accordance with Directive 2014/34/EU ("Explosion Protection Directive") must be regularly inspected for mechanical damage which could constitute a risk of ignition in accordance with IEC/EN 60079-17 . For USA/CANADA, CSA C22.2 or NFPA70, Article 500 apply. -
Page 132: Re-Greasing
Maintenance 9.2 Inspection and maintenance The machines are equipped with permanently lubricated rolling bearings. The machine may be equipped with a regreasing device. CAUTION Skin irritations and eye inflammations Many greases can cause skin irritations and eye inflammations. • Follow all safety instructions of the manufacturer. Measures, intervals and deadlines Measures after operating period intervals or deadlines have elapsed: Operating situations and characteristics can vary widely. -
Page 133: Cleaning
Maintenance 9.2 Inspection and maintenance Procedure To relubricate the rolling bearings, proceed as follows: 1. Clean the grease nipples at the drive end and non-drive end. 2. Press-in the specified grease and amount of grease according to the data stamped on the lubrication plate. -
Page 134: Risk Of Explosion Due To Damaged Seals
Maintenance 9.2 Inspection and maintenance 9.2.10 Risk of explosion due to damaged seals WARNING Risk of explosion due to damaged seals The seals can be damaged if you clean motors with type of protection Ex t or Class II using compressed air. -
Page 135: Insulation Resistance And Polarization Index
Maintenance 9.2 Inspection and maintenance 9.2.12 Insulation resistance and polarization index Measuring the insulation resistance and polarization index (PI) provides information on the condition of the machine. It is therefore important to check the insulation resistance and the polarization index at the following times: •... -
Page 136: Repainting
Maintenance 9.2 Inspection and maintenance Servicing the separately driven fan motor Carefully comply with all specifications and intervals in the operating instructions for the separately driven fan motor. If a SIMOTICS XP 1MB.. low-voltage motor is used as an separately driven fan motor, these operating instructions also apply for the separately driven fan motor. -
Page 137: Corrective Maintenance
Maintenance 9.3 Corrective maintenance • Charge transfer limit – 60 nC for Group I or Group IIA devices / Group D – 25 nC for Group IIB devices / Group B, C – 10 nC for Group IIC devices / Group A –... -
Page 138: Machines With A Certificate Extended With An "X
Maintenance 9.3 Corrective maintenance 9.3.1 Machines with a certificate extended with an "X" The machine marking based on IEC / EN 60079–0 was supplemented by the "X" symbol. • Perform maintenance, repair and modification work on explosion-protected machines in strict compliance with the corresponding national health and safety legislation, the safety instructions and descriptions in the general maintenance instructions. -
Page 139: Fundamentals
Maintenance 9.3 Corrective maintenance 9.3.3 Fundamentals Note Before commencing removal, you should mark how each of the fastening elements has been assigned, as well as how internal connections are arranged. This simplifies subsequent reassembly. If possible, assemble the machine on and alignment plate. This ensures that the mounting feet surfaces are all on the same plane. - Page 140 Maintenance 9.3 Corrective maintenance • Do not reuse bearings that have been removed. • Remove the dirty spent grease from the bearing shield. • Replace the existing grease with new grease. • Replace the shaft seals when the bearings are replaced. •...
-
Page 141: Replacing Bearings In Explosion-Proof Machines
9.3 Corrective maintenance 9.3.4.1 Replacing bearings in explosion-proof machines • When changing the bearings, renew the sealing rings and only use original Siemens spare parts. • For radial sealing rings with dust protection lip (DIN 3760-AS), completely fill the spaces (100%) in the sealing ring as well as in the bearing shield hub with a suitable grease. - Page 142 Maintenance 9.3 Corrective maintenance • For individually mounted angular contact ball bearings, carefully comply with the installation position corresponding to the permissible direction of force. • Angular contact ball bearings arranged in pairs must always be installed in strict compliance with the manufacturer's specifications. •...
-
Page 143: Explosion Hazard Due To Overheating Of The Rolling Bearings
Maintenance 9.3 Corrective maintenance 9.3.4.3 Explosion hazard due to overheating of the rolling bearings WARNING Explosion hazard due to overheating of the rolling bearings If the rolling bearings are not regularly regreased, local overheating may be possible, and, as a consequence, an explosion in an explosive atmosphere. This can result in death, serious injury or material damage. -
Page 144: Fan
Maintenance 9.3 Corrective maintenance 9.3.6 NOTICE Destruction of the fan Material damage can occur by forcefully removing the fan from the shaft. Take care not to damage the snapping mechanisms on fans that are equipped with these. Plastic fan • Correctly expose the breakout openings provided in the fan plate. •... -
Page 145: Mounting Fans
Maintenance 9.3 Corrective maintenance 9.3.6.1 Mounting fans • Take care not to damage the snapping mechanisms on fans that are equipped with these. • To ensure this, the fans should be heated to a temperature of approximately 50 °C around the area of the hub. -
Page 146: Reassembly: Miscellaneous Information
Maintenance 9.3 Corrective maintenance 9.3.11 Reassembly: Miscellaneous information • Position all rating and supplementary plates as in the original state. • Where relevant, fix electric cables. • Check the tightening torques of all screws, as well as those of screws that have not been released. -
Page 147: Spare Parts
• Order number and serial number of the machine The machine type and serial number can be found on the rating plate. See also Spares On Web (https://www.sow.siemens.com/) Note The graphical representations in this chapter show schematic diagrams of the basic versions. -
Page 148: Purchasing Commercially Available Spare Parts
10.3 Determining the spare parts via the Internet You can use "Spares on Web" to determine the order numbers for motor spare parts quickly and easily. Spares on Web (https://www.sow.siemens.com/?lang=en) 10.4 Replacing rolling bearings Rolling bearings When ordering rolling bearings, in addition to the bearing identification code, the supplementary specifying code is also necessary for the bearing version. -
Page 149: Anti-Condensation Heating
Spare parts 10.6 Anti-condensation heating 10.6 Anti-condensation heating WARNING Explosion hazard due to improper maintenance If repairs to the anti-condensation heating are not carried out correctly, e.g. if unauthorized or untested spare parts are used, this can result in explosions during operation in a potentially explosive gaseous atmosphere. -
Page 150: Ordering Example
• After the delivery of the original motor, spare parts will be available for up to 5 years. For an additional period of 5 years, Siemens provides information about spare parts, and when required, provides documentation. -
Page 151: Machine Parts
Spare parts 10.9 Machine parts 10.9 Machine parts 10.9.1 Part lists Part Description Part Description 1.00 DE bearings Terminal box, complete 1.30 Screw 5.47 Screw 1.40 Bearing shield 5.48 Spring lock washer 1.43 Shaft sealing ring 5.49 Screw 1.44 Bearing cover DE, inner 5.51 Flanged nut 1.45... - Page 152 Spare parts 10.9 Machine parts Part Description Part Description 5.10 Complete terminal board 7.12 Locking ring 5.11 Terminal block 7.40 Fan cover 5.13 Link rail 7.48 Washer 5.17 Screw 7.49 Screw 5.18 Spring lock washer 7.80 Separately driven fan, complete 5.19 Screw 7.81...
-
Page 153: Standardized Parts
Spare parts 10.10 Standardized parts 10.10 Standardized parts Table 10- 2 Purchase standard parts according to dimensions, material and surface properties through normal commercial channels. Standard Picture Standard Picture 3.02 DIN 471 6.02 5.17 EN ISO 4014 7.12 6.12 DIN 472 4.04 DIN 580 1.49... -
Page 154: Exploded Drawings
Spare parts 10.11 Exploded drawings 10.11 Exploded drawings 10.11.1 1MB1 shaft heights 71 ... 90 cast iron 1MB1.33 Eagle Line shaft heights 71 ... 315 Operating Instructions, 08/2023, A5E52990459A... -
Page 155: 1Mb1 Shaft Heights 100
Spare parts 10.11 Exploded drawings 10.11.2 1MB1 shaft heights 100 ... 200 cast iron 1MB1.33 Eagle Line shaft heights 71 ... 315 Operating Instructions, 08/2023, A5E52990459A... -
Page 156: 1Mb1 Shaft Heights 225
Spare parts 10.11 Exploded drawings 10.11.3 1MB1 shaft heights 225 ... 315 cast iron 1MB1.33 Eagle Line shaft heights 71 ... 315 Operating Instructions, 08/2023, A5E52990459A... -
Page 157: Terminal Box 1Mb1 Shaft Heights 71
Spare parts 10.11 Exploded drawings 10.11.4 Terminal box 1MB1 shaft heights 71 ... 200 cast iron 1MB1.33 Eagle Line shaft heights 71 ... 315 Operating Instructions, 08/2023, A5E52990459A... -
Page 158: Terminal Box 1Mb1 Shaft Heights 200
Spare parts 10.11 Exploded drawings 10.11.5 Terminal box 1MB1 shaft heights 200 ... 225 cast iron 1MB1.33 Eagle Line shaft heights 71 ... 315 Operating Instructions, 08/2023, A5E52990459A... - Page 159 Spare parts 10.11 Exploded drawings 1MB1.33 Eagle Line shaft heights 71 ... 315 Operating Instructions, 08/2023, A5E52990459A...
-
Page 160: Terminal Box 1Mb1 Shaft Heights 250
Spare parts 10.11 Exploded drawings 10.11.6 Terminal box 1MB1 shaft heights 250 ... 280 cast iron 1MB1.33 Eagle Line shaft heights 71 ... 315 Operating Instructions, 08/2023, A5E52990459A... - Page 161 Spare parts 10.11 Exploded drawings 1MB1.33 Eagle Line shaft heights 71 ... 315 Operating Instructions, 08/2023, A5E52990459A...
-
Page 162: Terminal Box 1Mb1 Shaft Height 315 Cast Iron
Spare parts 10.11 Exploded drawings 10.11.7 Terminal box 1MB1 shaft height 315 cast iron 1MB1.33 Eagle Line shaft heights 71 ... 315 Operating Instructions, 08/2023, A5E52990459A... - Page 163 Spare parts 10.11 Exploded drawings 1MB1.33 Eagle Line shaft heights 71 ... 315 Operating Instructions, 08/2023, A5E52990459A...
-
Page 165: Disposal
Disposal 11.1 Introduction Protecting the environment and preserving its resources are corporate goals of the highest priority for us. Our worldwide environmental management system to ISO 14001 ensures compliance with legislation and sets high standards in this regard. Environmentally friendly design, technical safety and health protection are always firm goals even at the product development stage. -
Page 166: Preparing For Disassembly
Disposal 11.4 Preparing for disassembly 11.4 Preparing for disassembly Disassembly of the machine must be carried out and/or supervised by qualified personnel with appropriate expert knowledge. 1. Contact a certified waste disposal organization in your vicinity. Clarify what is expected in terms of the quality of dismantling the machine and provision of the components. - Page 167 Disposal 11.6 Disposal of components • Cables and wires • Electronic waste Process materials and chemicals Sort the process materials and chemicals for recycling according to whether they are for example: • Oil • Grease • Cleaning substances and solvents •...
- Page 168 Disposal 11.6 Disposal of components 1MB1.33 Eagle Line shaft heights 71 ... 315 Operating Instructions, 08/2023, A5E52990459A...
-
Page 169: Technical Data
The Siemens Product Configurator can be used on the internet without any installation. The Siemens Product Configurator is available through the Siemens Industry Mall at the following address: Siemens Product Configurator (www.siemens.com/spc) -
Page 170: Stud-Type Bushings
Technical data A.1 Tightening torques The tightening torques stated above apply to screws with property class 8.8, A4-70 or A4-80 according to ISO 898-1, however only to bolts screwed into components made from materials with the same or higher property class, e.g. cast iron, steel or cast steel. Non-standard tightening torques Different tightening torques for electrical connections and bolted connections for parts with flat seals or insulating parts are specified in the relevant sections and drawings. -
Page 171: Tightening Torques Of Additional Connecting Terminals
Technical data A.1 Tightening torques A.1.4 Tightening torques of additional connecting terminals Table A- 5 Tightening torques for electrical connections of monitoring equipment and anti- condensation heating Main terminal box 0.4 Nm EN 60999-1: 2000 table 4 III Auxiliary terminal box min 0.6 Nm max 0.8 Nm 1MB1.33 Eagle Line shaft heights 71 ... - Page 172 Technical data A.1 Tightening torques 1MB1.33 Eagle Line shaft heights 71 ... 315 Operating Instructions, 08/2023, A5E52990459A...
-
Page 173: Quality Documents
Quality documents Quality documents SIMOTICS in SIOS You can find the quality documents here: https://support.industry.siemens.com/cs/ww/de/ps/13310/cert (https://support.industry.siemens.com/cs/ww/en/ps/13310/cert) 1MB1.33 Eagle Line shaft heights 71 ... 315 Operating Instructions, 08/2023, A5E52990459A... - Page 174 Quality documents B.1 Quality documents SIMOTICS in SIOS 1MB1.33 Eagle Line shaft heights 71 ... 315 Operating Instructions, 08/2023, A5E52990459A...
Need help?
Do you have a question about the SIMOTICS XP Eagle Line 1MB1.33 and is the answer not in the manual?
Questions and answers