Table of Contents
Advertisement
Quick Links
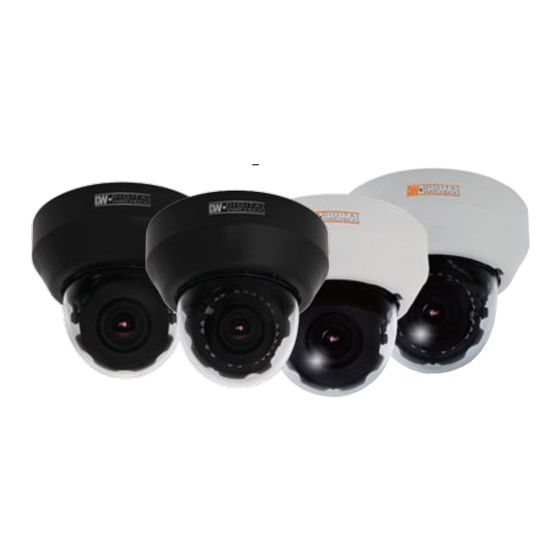
IP 2.1MP Snapit Indoor Dome Camera
MD421D/B
MD421TIR/B
Quick Setup Guide
Additional Cabling Connections
Resetting the Camera
Pressing the reset button on the camera's control board for five (5) seconds will initialize all environmental
variables to factory default. Previous setup for IP default, time, etcetera will be deleted. If a system IP address is
lost, reset the camera back to factory default.The following are the default network settings:
IP Mode
DHCP
IP Address
192.168.1.123
Subnet Mask
255.255.255.0
Gateway
192.168.1.123
Command Port
7000
HTTP Port
80
Live Port
7001
Frequent use may cause a System Error
TEL: (866) 446-4359
www.Digital-Watchdog.com / technicalsupport@dwcc.tv
Technical Support Hours: Monday-Friday 8:30AM to 8:00PM EST
PREPARATION
The following items are included with the MD421D/TIR camera
Quick Start
CD
Guide
(Manual &
Software)
Second Video
2 2
Mounting
Jack
Template
Audio Cable
2 Screws
2 Dry Wall
Anchors
1
2
3
Thank you for purchasing Digital Watchdog's Snapit MEAPIX lndoor Dome Camera.
Before installing the camera, please verify your model and read this guide carefully.
Network Connection
There are two options.*
Using a PoE-Enabled Switch
1
The MEGAPIX Camera is PoE-compliant, allowing transmission of power and data via a single
ethernet cable. Follow the illustrations below to connect the camera to a PoE-enabled switch using
an ethernet cable.
Using a Non-PoE Switch
2
If a PoE-enabled switch is not used, use a power adaptor to connect the MEGAPIX Camera to a
Non-PoE switch.
2
12 1 32 01 2
INSTALLATION
Prepare the Camera and Mounting Surface
Remove the camera's protective bubble dome
1
by holding and squeezing the plastic dome on
both sides to lossen the hold on the camera
module.
Camea Module
1
Snapit Indoor
2
Use camera mounting template or your
3
Housing
camera to mark the holes as required.
8P Terminal
3
Block
5
3
Mount the Camera
The MEGAPIX Camera is designed to be surface mounted on a wall
or ceiling.
Mount the camera to the wall or ceiling
6
using the screws provided with the camera.
Check the LED Light. Green light flickers
8
for booting. Red light turns on when booting
is complete.
To snap the cover back into place,
10
align the small indentation in the cover
dome with the RJ45 connector in the
camera module as seen in the image.
4
SPECIFICATIONS
Lens Specifications
Lenses are pre-focused at the factory. In the unlikely event that
the optical effect of the dome cover cause a slight defoucsing
of the lens, hold the dome cover over the lens to make a final
adjustment.
Y-Axis: 90
o
Tilt for MPA20M
1
o
75
Tilt for MPA20MTIR
X-Axis: 360
o
Pan
2
While squeezing the plastic dome, hold the
2
camera module and gently remove it from the
bubble dome.
NO IR
Rotation 360
Drill holes into the drywall and insert the
4
drywall mounts.
Tilting 90
Pull wires through and make
connections. Refer to "Network
Connection" for further explanation.
Over-rotating the lens will damage the camera lens module
5
Camera Specifications
IMAGE
Image Sensor
Total Pixels
Minimum Scene Illumination
LENS
Focal Length
Lens Type
IR Distance
Digital Zoom / Optical Zoom
OPERATIONAL
Mirror & Flip
Privacy Zone
Motion Detection: Sensitivity
Adjust the camera's pan and tilt.
7
NETWORK
LAN
Video Compression Type
Resolution
Frame Rate
Streaming Capability
IP
Protocol
Maximum User Access
ONVIF Conformance
Web Viewer
Snap the Cover Dome back
9
over the camera to complerte
Video Management Software
the installation.
Memory Slot
ENVIRONMENTAL
Operating Temperature/ Humidity
Operating Humidity
Storage Temperature
ELECTRICAL
Power Requirement
Power Consumption
MECHANICAL
Material
Dimensions
Weight
6
IR
NO IR
IR
Panning 360
NO IR
IR
Tilting 75
7
1/2.8" CMOS Sensor (7% Larger Than 1/3" CMOS Sensor)
2016 (H) X 1108 (V)
F1.6 (30IRE): 0.5 Lux [Color]
F1.6 (30IRE): 0.0 Lux [B&W]
3.5-16mm
Auto Focus
70ft Range
8X / 4.5X
Low, Middle, High
802.3 Compliance 10/100 LAN
H.264, MPEG4, MJPEG (Super Fine~Low)
1920X1080 (16:9) ~ 320X240 (4:3)
Up to 30fps at All Resolutions
IPv4, IPv6
TCP/IP, HTTP, DHCP, PPPoE, ICMP, ARP, RARP,
RTSP, NTP, UDP, Multicast
20 Users
Yes
OS: Windows XP / Vista / 7, MAC OS
Browser: Internet Explorer, Chrome, Firefox, Safari
NxMS, Pivot
Up to 24 Hour to Micro SDHC Card (4GB-32GB)
Card Not Included*
o
o
o
o
-10
C ~ 55
C (14
F ~ 131
F)
Less than 90% (Non-Condensing)
o
o
o
o
-20
C ~ 70
C (-4
F ~ 158
F)
CE, FCC, RoHS
DC 12V, PoE (IEEE802.3af Class 2)
5.16W, 430mA / LED ON 9.96W, 830mA
Plastic
108 X 96.8 mm (4.25 X 3.8 in)
0.529 lbs
8
Advertisement
Table of Contents

Subscribe to Our Youtube Channel
Related Manuals for Digital Watchdog MD421TIR/B


Summary of Contents for Digital Watchdog MD421TIR/B
- Page 1 Refer to “Network Connection” for further explanation. Over-rotating the lens will damage the camera lens module Thank you for purchasing Digital Watchdog’s Snapit MEAPIX lndoor Dome Camera. Before installing the camera, please verify your model and read this guide carefully. Camera Specifications...
- Page 2 MEGAPIX CAMERA SETUP Installing IP Finder Setting the Camera on IP Finder Accessing the Camera Instant Recording IP Finder searches for all the available network devices on your local Set the Camera for Internal Use Remote Video Monitoring Instantly record live video to your local drive. area network.
Need help?
Do you have a question about the MD421TIR/B and is the answer not in the manual?
Questions and answers