Advertisement
Available languages
Available languages
ENGLISH
OPERATION AND MAINTENANCE MANUAL ........................3
NOTICE D'UTILISATION ET ENTRETIEN ..................................13
DEUTSCH
BEDIENUNGSANLEITUNG .....................................................23
ESPAÑOL
MANUAL DE USO Y MANTENIMIENTO ................................33
ITALIANO
MANUALE D'USO E MANUTENZIONE ..................................43
THERMAL TRANSFER PRINTER
THERMAL TRANSFER PRINTER
IMPRIMANTE A TRANSFERT TERMIQUE
IMPRIMANTE A TRANSFERT TERMIQUE
THERMOTRANSFERDRUCKER
THERMOTRANSFERDRUCKER
IMPRESORA POR TRANSFERENCIA TÉRMICA
IMPRESORA POR TRANSFERENCIA TÉRMICA
STAMPANTE A TRASFERIMENTO TERMICO
STAMPANTE A TRASFERIMENTO TERMICO
MG3
. 1 .
Advertisement

Related Manuals for Cembre MG3A


Summary of Contents for Cembre MG3A
-
Page 1: Table Of Contents
THERMAL TRANSFER PRINTER THERMAL TRANSFER PRINTER IMPRIMANTE A TRANSFERT TERMIQUE IMPRIMANTE A TRANSFERT TERMIQUE THERMOTRANSFERDRUCKER THERMOTRANSFERDRUCKER IMPRESORA POR TRANSFERENCIA TÉRMICA IMPRESORA POR TRANSFERENCIA TÉRMICA STAMPANTE A TRASFERIMENTO TERMICO STAMPANTE A TRASFERIMENTO TERMICO ENGLISH OPERATION AND MAINTENANCE MANUAL ......3 FRANÇAIS NOTICE D’UTILISATION ET ENTRETIEN ........13 DEUTSCH BEDIENUNGSANLEITUNG .............23 ESPAÑOL... - Page 2 FIG. 1 / BILD 1 . 2 .
- Page 3 • Use only genuine CEMBRE media, printer ribbons, spare parts and cleaning kits with MG3. • We recommend cleaning the print head at each ribbon replacement, using only the genuine CEMBRE CLEANING KIT. This equipment has been tested and found to comply with the limits for a Class B digital device, pursuant to part 15 of the FCC Rules.
-
Page 4: Operation And Maintenance Manual
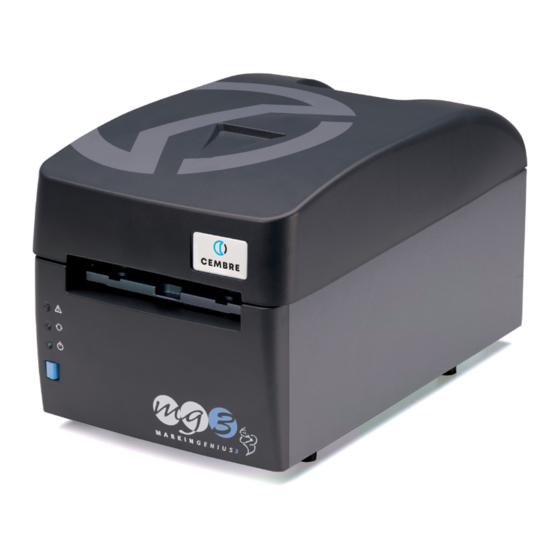
Markingenius MG3 is a high resolution printer based on thermal transfer technology, capable of producing markers for cables and terminal blocks, legends for pushbuttons and all electrical panel components. All CEMBRE MG media can be printed with Windows True Type fonts in black or colours at high speed. Markingenius MG3 will also reproduce Clipart images, drawings, barcodes and bitmaps down to very small sizes. - Page 5 4.3) Install the GENIUSPRO operating software – The USB flash drive (FD-GENIUSPRO) contains the operating software “GENIUSPRO” and drivers necessary for the operation of the printer. Facility to receive software updates from the internet (www.cembre.com) by direct connection or via network or portable memory device.
- Page 6 9 IMPORTANT: Rotate the media guide completely upwards, then replace the lid. Do not operate MG3 without the lid in place. • We recommend cleaning the print head at each ribbon replacement, using only the genuine CEMBRE MG2-CKP 991670 CLEANING KIT following the procedure in section 5.1.
- Page 7 Carriage fully open Support templates each have a protective PET blank on their upper side. If this needs to be replaced due to contamination, damage or wear, use only genuine CEMBRE spare parts. Do not use a template without its protective blank.
- Page 8 4.7.1) Position media sheets on the MG2-PLT support template All die-cut sheets of flat media are printed on the MG2-PLT template and have two holes to locate on pins mounted on the template: – Press the BLUE button (4) to open the carriage already fitted with the template (See section 4.7). –...
- Page 9 4.8) Printing cycle Ensure there is a genuine printable medium correctly positioned on the template then: – Set the data in the program, proceed via Print Setup to Print Preview (Consult user manual) then press F6 to start the printing cycle; the carriage will close then gradually open again automatically, until it stops fully open at the end of the cycle, with the sheet printed.
- Page 10 Do not re-use cleaning pads, sets of 5 spare pads are available, order part code MG2-CNP 992150. WARNING: Use only genuine CEMBRE cleaning materials and methods with MG3. The use of any other materials or methods may cause irrevocable damage to the print head and/or void any remaining warranty.
- Page 11 Switch MG3 OFF and then ON again after a few seconds 12..MG3 electronic controller malfunction If the problem persists please contact CEMBRE, see section 7 BLUE BUTTON (4): authorised user only TEST mode, accessed by pressing BLUE BUTTON (4) for more than 6 seconds during the initial start up cycle, is indicated by the YELLOW and ORANGE LEDs blinking simultaneously.
- Page 12 In the case of a breakdown contact our Area Agent who will advise you on the problem and give you the necessary instructions on how to dispatch the tool to our nearest service Centre; if possible, attach a copy of the Test Certificate supplied by CEMBRE together with the tool or fill in and attach the form available in the “ASSISTANCE”...
- Page 13 • Ne jamais utiliser l’imprimante avec des cartes ou rubans d’impression non originaux CEMBRE/General Marking. • Nous conseillons d’effectuer le nettoyage de la tête d’impression à l’occasion de chaque remplacement du ruban d’impression;...
-
Page 14: Français Notice D'utilisation Et Entretien
électrique. Tous les pro- duits CEMBRE de la famille MG peuvent être marqués avec des polices True Type de Windows, en noir ou en couleurs, à très haute vitesse. - Page 15 – La clé USB (FD-GENIUSPRO) contient le logiciel d’exploitation «GENIUSPRO» et les pilotes nécessaires au fonctionnement de l’imprimante. Les mises à jour éventuelles du logiciel “GENIUSPRO” peuvent être téléchargés par le site www.cembre.com – Insérez la clé USB dans le port USB de l’ordinateur et procéder à l’installation de «GENIUSPRO» à travers le fichier SETUP.
- Page 16 4.5) Chargement du ruban d’impression Pour le chargement ou le remplacement du ruban d’impression, retirer le couvercle supérieur, puis: 1 Tourner complètement vers le bas le guide des cartes. 2 Extraire les rouleaux en les tirant vers le haut. 3 Enfiler à fond le ruban d’impression sur le rouleau d’embrayage en alignant l’œillet avec la cheville de référence qui se trouve sur le rouleau.
- Page 17 Le produit à imprimer est réalisé sur un support prédécoupé dénommé CARTE. Ces cartes sont de typologies variées; les dimensions, les matériaux, les couleurs varient en fonction de l’utilisation de destination. En se référant au catalogue CEMBRE “ ACCESSOIRES DE REPERAGE INDUSTRIEL ” choisir la carte appropriée à l’application à exécuter, puis procéder à son positionnement sur le plateau d’interface (cf.
- Page 18 4.7.1) Positionnement des cartes sur le plateau d’interface MG2-PLT Les cartes qui s’impriment avec le plateau MG2-PLT disposent de deux trous qui permettent un positionnement correct et univoque sur les plateaux eux-mêmes. Pour le positionnement de ces cartes sur le plateau d’interface, il suffit: –...
- Page 19 4.8) Procédure d’impression Après avoir chargé le produit à imprimer sur le plateau, procéder à l’impression. – Configurer les données dans le programme (se référer au manuel du logiciel) et cliquer sur la touche "IMPRIMER" pour débuter la phase d’impression; le chariot sera rappelé à l’intérieur de l’imprimante et graduellement expulsé jusqu’à s’ar- rêter automatiquement à...
- Page 20 Markingenius MG3 est garanti un an contre les vices et défauts de fabrication. La tête d’impression est exclue de la garantie car elle est considérée comme un consommable. La garantie perd tout effet en cas d'emploi de pièces détachées différentes des pièces d'origine CEMBRE . 20 .
- Page 21 12..de l’imprimante Si le problème persiste, contacter CEMBRE BOUTON (4): ce bouton, en plus de commander la sortie ou l’entrée du chariot, permet aussi d’accéder à des fonctions spécifiques de programmation réservées seulement à un personnel qualifié. En maintenant enfoncé le bouton pour plus de 6 s en phase d’allumage de l’imprimante, on accèdera à la modalité de TEST (cette modalité...
- Page 22 à notre Centre de Service le plus proche. Dans ce cas, joindre une copie du Certificat d’Essai livré par CEMBRE avec l’appareil ou remplir et joindre le formulaire disponible dans la section “ASSISTANCE”...
- Page 23 Schildchen und Etiketten auf dem Material angepasst werden. Bei einer Nichtbeachtung könnte der Druckkopf ernsthaft beschädigt werden. • Niemals den Drucker mit Druckmaterial oder Farbbändern verwenden, die nicht aus dem Hause CEMBRE/General Marking stammen. • Wir empfehlen die Reinigung des Druckerkopfes bei jedem Wechsel des Druckerbandes vorzunehmen und den dazu im Katalog lieferbaren Reinigungssatz zu verwenden.
-
Page 24: Bedienungsanleitung
1. ALLGEMEINE EIGENSCHAFTEN Markingenius MG3 ist das exklusive Markierungssystem von CEMBRE, das allen Anforderungen bei der Kennzeichnung im Elektro- bereich gerecht wird. Markingenius MG3 ist ein Desktop-Drucker auf Basis eines Thermotransferdrucker der für die Kennzeichnung von Kabeln, Klemmen, Drucktastern und Schaltelementen eingesetzt werden kann. - Page 25 – Der USB-Stick (FD-GENIUSPRO) enthält die Software „GENIUSPRO“ und die für den Betrieb des Druckers notwendigen Treiber. Alle “GENIUSPRO” Software-Updates können von der Website www.cembre.com. heruntergeladen werden. – Stecken Sie den USB-Stick in den USB-Anschluss des Computers und fahren Sie mit der Installation von „GENIUSPRO“ mit Hilfe der SETUP-Datei fort.
- Page 26 4.5) Einlegen des Druckbands Zum Einlegen oder Ersetzen des Druckbandes die obere Abdeckung entfernen. Anschließend folgende Punkte bitte beachten: 1 Die Einführschiene nach unten Drucken. 2 Beide Spulen durch Hochziehen nach oben aus dem Drucker nehmen. 3 Das neue Druckband fest auf die Spule schieben und dabei den Passstift mit dem Druckband ausrichten. 4 Die Spule in den Drucker einsetzen und anschließend das Druckband abrollen und unter der hintere Führungs und der Sensor Elektronik-Platine durchführen.
- Page 27 Es stehen unterschiedliche Karten in verschiedenen Materialien und Farben je nach Anwendungsfall zu Verfügung. Für die Auswahl der Materialien steht der CEMBRE Katalog “INDUSTRIELLE MARKIERUNG” zur Verfügung. Hier kann das Material für die richtige Grundplatte ausgewählt werden (siehe Punkt 4.7).
- Page 28 4.7.1) Positionieren der Karten auf der Grundplatte MG2-PLT Die Karten, die mit der Grundplatte MG2-PLT bedruckt werden, haben am Rand zwei Bohrungen, die die genaue Positionierung und Ausrichtung gewährleisten. Bei der Positionierung der Karten auf der Grundplatte muss folgendes beachtet werden: –...
- Page 29 4.8) Druckvorgang Nachdem das zu bedruckende Material auf die Grundplatte gelegt wurde, kann der Druckvorgang gestartet werden. – Die Daten in das Softwareprogramm eingeben (siehe dazu Handbuch zur Software) und auf das Button “DRUCKEN” klicken, um den Druckvorgang zu starten. Der Schlitten wird in den Drucker eingefahren und anschließend langsam herausgefahren. –...
- Page 30 Auf den Markingenius MG3 besteht eine Garantie von 1 Jahr auf Produktionsmängeln und -fehlern. Der Druckkopf ist nicht in der Garantie eingeschlossen, da er als Verschleißmaterial gilt. Die Garantie verfällt, wenn nicht Originalteile aus dem Hause CEMBRE in das Gerät eingebaut werden. . 30 .
- Page 31 Den Drucker neu starten. Auf die Elektronik des Druckers 12..Wenn das Problem weiterhin besteht, bitte mit CEMBRE zurückführbare Fehler Kontakt aufnehmen. TASTE (4): Diese Taste steuert nicht nur das Ein- oder Ausfahren des Schlitten, sondern ermöglicht auch den Zugang zu spezifischen Programmierfunktionen, die nur qualifiziertem Personal vorbehalten ist.
- Page 32 Informationen zum Einsenden des Gerätes an unseren Hauptsitz geben wird. Wenn vorhanden, legen Sie dem Gerät bitte eine Kopie des von CEMBRE mitgelieferten Zertifikates bei oder füllen das, unter dem Bereich “SUPPORT“ der CEMBRE Website, verfügbare Formular aus und fügen es bei.
- Page 33 Realizar una impresión completa insertando una tarjeta parcialmente utilizada podría dañar irrepara- blemente la cabeza. • Nunca utilizar la impresora con tarjetas o cintas de impresión que no sean las originales CEMBRE/General Marking. • Aconsejamos realizar la limpieza de la cabeza de impresión cada vez que se cambie la cinta de impresión;...
-
Page 34: Manual De Uso Y Mantenimiento
Todos los productos CEMBRE de la familia MG pueden ser marcados con fuentes true type de Windows, en negro o a color, a gran velocidad. Es posible reproducir cIiparts, dibujos, códigos de barra e imágenes bitmap, incluso de muy pequeñas dimensiones. Por sus características (compacta, ergonómica, limpia, silenciosa) es apta para el uso tanto en oficinas, como en cualquier otro lugar. - Page 35 Eventuales actualizaciones del software “GENIUSPRO” se pueden descargar por el sitio www.cembre.com. – Inserte la unidad flash USB en el puerto USB del ordenador y continúe con la instalación de “GENIUSPRO” a través del archivo SETUP.
- Page 36 4.5) Carga de la cinta de impresión Para la carga o la sustitución de la cinta de impresión, quitar la tapa superior, luego: 1 Girar completamente hacia abajo el deflector. 2 Extraer los rodillos tirándolos hacia arriba. 3 Colocar a fondo la cinta de impresión sobre el rodillo friccionado, alineando uno de los orificios de la misma con la clavija de referencia presente en el rodillo.
- Page 37 El producto a imprimir está realizado sobre la base de un soporte pre-troquelado denominado TARJETA. Dichas tarjetas son de diversos tipos: dimensiones, materiales, colores varían según el uso de destino. En el especifico catálogo CEMBRE “PRODUCTO PARA EL MARCADO INDUSTRIAL” elegir la tarjeta idónea para la aplicación a realizar, luego proceder a su posicionamiento en la placa de interfaz (ver §...
- Page 38 4.7.1) Posicionamiento de las tarjetas sobre la placa de interfaz MG2-PLT Las tarjetas que se imprimen con la placa MG2-PLT cuentan con dos orificios que permiten un correcto e inequívoco posicionamiento sobre la placa. Para posicionar dichas tarjetas sobre la placa de interfaz, es suficiente con: –...
- Page 39 4.8) Procedimiento de impresión Luego de haber cargado el producto a imprimir sobre la placa, proceder a la impresión. – Establecer los datos en el programa (ver el manual del software) y pulsar la tecla “IMPRESIÓN” para comenzar la fase de impresión;...
- Page 40 Markingenius MG3 posee una garantía de un año por anomalías y defectos de origen. La cabeza de impresión queda fuera de la garantía por considerarse material de consumo. La garantia pierde eficacia si se utilizan piezas de repuesto distintas de las originales CEMBRE. . 40 .
- Page 41 12..impresora. Si el problema persiste, contactar con CEMBRE BOTON (4): este botón además de dirigir la entrada o la salida del carro, permite también acceder a funciones específicas de pro- gramación reservadas solamente para el personal cualificado. Manteniendo presionado el botón por más de 6 segundos en fase de encendido de la impresora, se accederá a la modalidad de TEST (dicha modalidad es indicada por el parpadeo simultáneo de los led amarillo y naranja).
- Page 42 En tal caso, adjuntar a ser posible una copia del Certificado de Ensayo entregado en su día por CEMBRE con la herramienta o completar y adjuntar el formulario disponible en la sección “ASISTENCIA”...
- Page 43 • Non utilizzare mai la stampante con schede o nastri di stampa non originali CEMBRE/General Marking. • Consigliamo di effettuare la pulizia della testa di stampa in occasione di ogni cambio del nastro di stampa;...
-
Page 44: Manuale D'uso E Manutenzione
Si tratta di una stampante ad alta risoluzione, basata su tecnologia a trasferimento termico, in grado di siglare supporti per cavi e per morsetti, targhette per pulsanti e tutta la componentistica di un quadro elettrico. Tutti i prodotti CEMBRE della famiglia MG possono essere siglati con i fonts true type di Windows, in nero o a colori, ad altissima velocità. - Page 45 – La chiavetta USB (FD-GENIUSPRO) contiene il software operativo “GENIUSPRO” ed i driver necessari al funzionamento della stampante. Eventuali aggiornamenti del software “GENIUSPRO” sono scaricabili dal sito www.cembre.it. – Inserire la chiavetta USB nella porta USB del computer e procedere all’installazione di “GENIUSPRO” attraverso i file di SETUP.
- Page 46 4.5) Caricamento del nastro di stampa Per il caricamento o la sostituzione del nastro di stampa: 1 Rimuovere l’alimentazione. 2 Sfilare la copertura superiore. 3 Ruotare completamente verso il basso il deflettore anteriore. 4 Estrarre i rulli tirandoli verso l'alto. 5 Infilare a fondo il nastro di stampa sul rullo frizionato allineandone un'asola con la spina di riferimento del rullo.
- Page 47 Il prodotto da stampare è realizzato su di un supporto prefustellato denominato SCHEDA. Le schede sono di varie tipologie; dimen- sioni, materiali, colori e variano a seconda dell’utilizzo di destinazione. Riferendosi al catalogo CEMBRE “PRODOTTI PER SIGLATURA INDUSTRIALE” scegliere la scheda idonea all’applicazione da eseguire, quindi procedere al suo posizionamento sulla piastra d’in- terfaccia idonea (Rif.
- Page 48 4.7.1) Posizionamento delle schede su piastra di interfaccia tipo MG2-PLT Le schede stampabili con piastra di interfaccia MG2-PLT dispongono di due fori per permetterne un corretto e univoco posiziona- mento sulla piastra; per il loro posizionamento è sufficiente: – Premere il pulsante (4) per ottenere la fuoriuscita del carrello già provvisto di piastra (Rif. al § 4.7). –...
- Page 49 4.8) Procedura di stampa Dopo aver caricato il prodotto da stampare sulla piastra, procedere alla stampa. – Impostare i dati nel programma (riferirsi al manuale del software) e cliccare sul tasto “STAMPA” per iniziare la fase di stampa; il carrello verrà richiamato all'interno della stampante e gradualmente espulso fino a fermarsi automaticamente a fine ciclo con la scheda stampata.
- Page 50 Per ottenere i migliori risultati di stampa è consigliabile attenersi alle seguenti regole: • Utilizzare solamente materiali di consumo (schede, nastri di stampa ecc.) originali CEMBRE. • Maneggiare con cura le schede una volta estratte dalla confezione ed evitare di toccare l’area di stampa con le dita.
- Page 51 Riavviare la stampante, se il problema persiste, contattare la 12..pante CEMBRE PULSANTE (4): questo pulsante oltre a comandare l'uscita o l'entrata del carrello, permette anche di accedere a specifiche funzioni di programmazione riservate solamente a personale qualificato. Mantenendo premuto il pulsante per più di 6 sec in fase di accensione della stampante si accederà alla modalità di TEST (tale mo- dalità...
- Page 52 In caso di guasto contattare il nostro Agente di Zona il quale vi consiglierà in merito e fornirà le istruzioni necessarie per l’invio dell’utensile alla nostra Sede; se possibile, allegare copia del Certificato di Collaudo a suo tempo fornito dalla CEMBRE con l’utensile oppure, compilare ed allegare il modulo disponibile nella sezione “ASSISTENZA”...
- Page 53 NOTE ________________________________________ ________________________________________ ________________________________________ ________________________________________ ________________________________________ ________________________________________ ________________________________________ ________________________________________ ________________________________________ ________________________________________ ________________________________________ ________________________________________ ________________________________________ ________________________________________ ________________________________________ ________________________________________ ________________________________________ ________________________________________ . 53 .
- Page 54 – Following information applies in member states of the European Union: – Les informations suivantes sont destinées aux pays membres del'Union Européenne: – Folgende Hinweise gelten für Mitglieder der Europäischen Union: – Las siguientes informaciones conciernen a los estados miembros de la Unión Europea: –...
- Page 55 DECLARATION DE CONFORMITE - KONFORMITÄTSERKLÄRUNG - DECLARACIÓN DE CONFORMIDAD - DICHIARAZIONE DI CONFORMITÁ We Nous Wir Nos Noi: CEMBRE S.p.A. Via Serenissima, 9 – 25135 Brescia (Italy) Declare under our sole responsibility that the product - Déclarons sous notre seule responsabilité que le produit - Erklären in alleiniger Verantwortung dass das Produkt - Declaramos bajo nuestr responsabilidad que el producto...
- Page 56 CEMBRE Ltd. CEMBRE S.a.r.l. Dunton Park 22 Avenue Ferdinand de Lesseps Kingsbury Road, Curdworth - Sutton Coldfield 91420 Morangis (France) West Midlands B76 9EB (UK) Tél. +33 1 60 49 11 90 - Fax +33 1 60 49 29 10 Ph.
Need help?
Do you have a question about the MG3A and is the answer not in the manual?
Questions and answers