Table of Contents
Advertisement
Quick Links
1
Chapter
Introduction
How to Use This Manual
Conventions
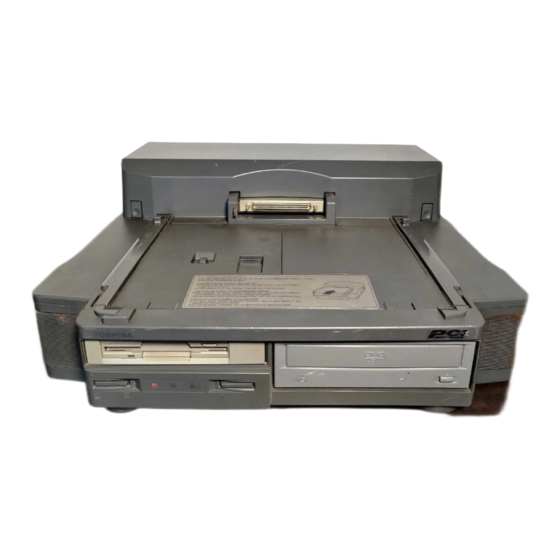
This chapter introduces the Toshiba Desk Station V Plus. The Toshiba
Desk Station V Plus expands the capabilities of your Toshiba Portégé 650CT,
Tecra 500 and 710/720 notebook computers.
This manual uses the following conventions:
❖ Italics identify variables for which you substitute values.
For example, when this manual discusses entering the time and date, it
refers to the hours and minutes as hh:mm. Replace hh with the current
hour and mm with the current minutes.
❖ A distinctive typeface distinguishes keytops and embossed legends and
icons identifying ports on the Desk Station V Plus and the computer from
surrounding text.
For example, we refer to the printer port as the Printer port.
❖ Each key is spelled exactly as you see it on the keyboard. A plus (+) sign
indicates combinations of keys.
For example, Ctrl + Break means you must hold down Ctrl and at the
same time press Break.
❖ References to parts of the computer are in boldface type the first time
they are referred to in the text.
❖ A distinctive typeface is used to indicate text from the computer monitor,
such as, "TOSHIBA Desk Station ATTACHED."
Introduction
1-1
Advertisement
Table of Contents

Related Manuals for Toshiba Desk Station V Plus


Summary of Contents for Toshiba Desk Station V Plus
- Page 1 ❖ A distinctive typeface distinguishes keytops and embossed legends and icons identifying ports on the Desk Station V Plus and the computer from surrounding text. For example, we refer to the printer port as the Printer port.
-
Page 2: Check Your Equipment
If any of the items are missing or damaged, notify your dealer immediately. If your Desk Station V Plus needs repair, if you want a referral to a Toshiba authorized service center, or if you want answers to questions regarding technical support, call Toshiba Product Support at (800) 999-4273. -
Page 3: Features And Benefits
Introduction Features and Benefits The Desk Station V Plus incorporates the following features and benefits: Expansion board slots Two full-sized slots for both 8-bit or 16-bit ISA expansion boards and 32-bit PCI expansion boards. One half-size slot for 32-bit PCI expansion boards. - Page 4 Desk Station V Plus. Security Lock With the addition of the Noteworthy Computer Lock, you can secure the Desk Station V Plus to an immovable object. Security Ring You can use the Security Ring to attach the Desk...
- Page 5 Using Your Desk Station V Plus Select a Place To Work Your Desk Station V Plus is designed to be used in a variety of circumstances and locations. However, by giving some thought to your work environment, you can protect the Desk Station and make your work hours more comfortable.
-
Page 6: Placement Of The Computer
Proper placement of the computer, the Desk Station V Plus and external devices is important to avoid stress-related injuries: ❖ Place the Desk Station V Plus on a flat, level surface at a comfortable height and distance. Your arms and hands should be in a relaxed position with your forearms parallel to the floor. - Page 7 ❖ Position the display panel so that sunlight or bright indoor lighting does not reflect off the screen. Use tinted windows or shades to reduce glare. ❖ Avoid placing your Desk Station V Plus in front of a bright light that could shine directly in your eyes.
- Page 8 Desk Station V Plus User's Manual...
-
Page 9: The Grand Tour
The top cover latches located on both sides of the top cover are used to open the top cover when installing expansion cards in the expansion card slots. Data shared by the computer and the Desk Station V Plus passes through the expansion port connector. This connector attaches to the expansion port on the back of the computer. - Page 10 When the Desk Station V Plus power cord is plugged into the wall socket, the Desk Station V Plus is always in the low power standby state. It is normal for the internal fan to run whenever the Desk Station is plugged in. The switch on the left below the SelectBay is the power switch.
- Page 11 Desk Station V Plus in case of emergency. You can disconnect the computer by sliding this lever to the left after setting the lock switch on the right side of the Desk Station V Plus to the Emer- Emergency Release gency position.
- Page 12 Desk Station V Plus. This Serial Port port replaces the computer’s serial port. You can connect a PS/2 type mouse to the Desk Station V Plus via the Mouse Port mouse port. This port replaces the computer's mouse port.
- Page 13 A fan behind the fan vent maintains the Desk Station V Plus at optimum tem-perature. Do not block the vent when using the Desk Station V Plus. The fan is always on when the Desk Station V Plus is connected to a wall socket.
-
Page 14: The Right Side
PC Card Slot 3 Expansion Slots The PC Card slots are on the right side of the Desk Station V Plus. You can install up to two Type III PCMCIA-compatible PC Cards, such as a modem or an ATA device, to these slots. Each slot has a card ejector to the left of the slot allowing you to eject an installed card. - Page 15 This chapter explains how to install expansion cards and connect your computer to the Desk Station V Plus. Before installing an expansion card, confirm that the Desk Station V Plus can support it. Set up the card following the instructions in the card's documentation.
-
Page 16: Supported Cards
Extension The card above has an extension below the bottom of the card. Before you purchase an 8-bit ISA expansion card to use in the Desk Station V Plus, make sure it does not have this extension. The half-length expansion slot, slot 3, incorporates a standard 124-pin PCI... -
Page 17: Power Considerations
Preparing the Desk Station V Plus Power Considerations The Desk Station V Plus is designed specifically for the new generation of more efficient, low-power peripherals. Configure your system for optimum power use. This section summarizes the Desk Station V Plus’s power specification and provides a power calculation example. - Page 18 Maximum Power Specification: 5.9/8.2 1.8/4.0 The power used by your peripherals may not exceed the Desk Station V Plus's specification. If your calculations fall below the numbers listed for Maximum Power Specification, you can continue with your installation. The power required by this configuration of peripherals does not exceed the...
- Page 19 The full-page version of the worksheet is in the Appendix D: Desk Station V Plus Worksheets. Toshiba Desk Station V Plus Setup Worksheet Date Prepared ____/____/____ Expansion slot configuration. Fill in the type of device, serial number and setup information.
- Page 20 For more information on IRQ and DRQ, please see the section "Configuration Considerations" on the next page. Part two of the worksheet is for devices attached to the Desk Station V Plus’s ports. Identify the device in the left column. Where appropriate, check the box to indicate which setting you used.
-
Page 21: Configuration Considerations
The DMA channels can be assigned to a variety of devices. This table lists the default setting assigned by the computer and/or Desk Station V Plus for each DRQ line. Depending upon the device you use, you may or may not need a DMA channel. - Page 22 MEMORY UP TO 48MB The Clock Rate The Desk Station V Plus is set to provide the computer’s I/O clock rate to the expansion cards. The Desk Station V Plus does not support expansion cards requiring a 4.77 MHz clock rate for proper operation. Before buying a card, check to see that...
-
Page 23: Installing Expansion Cards
1 Disconnect the AC power cord and all external devices from the Desk Station V Plus. NORMAL BLOCK EMERGENCY 2 Set the Key-lock on the right side of the Desk Station V Plus to either the Normal or Emergency position by turning the Key-lock counterclockwise. - Page 24 3-10 Desk Station V Plus User's Manual Top Cover Latches 3 Press both top cover latches and open the top cover. You can now see the expansion slots inside the Desk Station V Plus. Slot #3 Slot #2 Screws Slot #1 4 Locate the metal bracket that covers the expansion slot you plan to use.
- Page 25 Your Desk Station V Plus is ready for use. WARNING: Do not insert foreign objects into the expansion slot. Doing so can cause the computer or the Desk Station V Plus to malfunction. To prevent injury and ensure proper operation, keep the top cover closed during use.
- Page 26 Installing a SelectBay Module To install a SelectBay module, follow these steps: 1 Turn the computer off and undock it from the Desk Station V Plus, according to the instructions in Chapter 4, "Undocking the Computer." 2 Locate the SelectBay on the front of the Desk Station V Plus.
- Page 27 3 Insert the module into the SelectBay with the flat surface up and toward the rear of the Desk Station V Plus. When the module is in most of the way, push it all the way into the connector with firm and even pressure.
- Page 28 The maximum expansion bay size is 1.7" x 8.2" x 5.9" (43 x 208 x 150 mm). NOTE: Any device installed in the Desk Station V Plus must be a UL Recognized Component in the United States or approved by the appropriate agencies for the country in which it is used.
- Page 29 Preparing the Desk Station V Plus 3-15 4 Open the top cover. (See the section entitled "Installing Expansion Cards" for instructions on opening the top cover.) 5 Locate the expansion bay access cover that protects the expansion bay in the upper right corner of the top.
- Page 30 3-16 Desk Station V Plus User's Manual 7 Locate the metal bracket inside the expansion bay. 8 Remove the screw that holds the metal bracket in place. 9 Slide the metal bracket out of the expansion bay. Metal Bracket Expansion Bay...
- Page 31 Use the rear set of mounting holes for devices that do not require front access, such as a hard disk drive. When installing these devices, leave the front panel attached to the front of the Desk Station V Plus. 11 Secure the bracket to the device with two screws on each side.
- Page 32 3-18 Desk Station V Plus User's Manual Your Desk Station V Plus comes equipped with a SCSI drive interface cable, an EIDE/ATAPI drive interface cable and a standard drive power cord. These are already connected to the sockets on the mother board.
- Page 33 Preparing the Desk Station V Plus 3-19 Drive Power Cord EIDE/ATAPI Drive Interface Cable If you are installing an EIDE device, such as an additional hard disk drive, or an ATAPI device, such as a CD-ROM drive, and you will be using the internal IDE adapters, use these cables and cords.
- Page 34 2 If the SCSI device you are installing has its own termina- tor function, disable or remove it and use the terminator attached to your Desk Station V Plus's SCSI interface cable. 3 The Default SCSI ID for the SCSI adapter is 7. Choose another unique ID for SCSI devices you are installing.
- Page 35 Expansion bay Screw Bracket 16 A 5 1/4" device can receive power from either the Desk Station V Plus's drive power cord or through an expansion card installed in the expansion slot. The power supply socket is located on the mother board with the pin assignments shown below.
- Page 36 Make certain the cables are flat and not pinched by the cover. 21 Close the top cover, securing the latches on both ends of the cover. CAUTION: The Desk Station V Plus’s top cover can catch on cables when you’re replacing it. In routing the cables, try to fold them as flat as possible.
- Page 37 Hard Disk Drive Installed in 5 1/4" Expansion Bay Front Cover Expansion Bay Cover CD-ROM Installed in 5 1/4" Expansion Bay Your Desk Station V Plus is ready for use with the 5 1/4" device.
- Page 38 Remove the key and store it in safe place. Using the Security Ring 1 Pull the security ring out, and raise it to the upright position. 2 Chain the Desk Station V Plus to the secure object using the security ring.
- Page 39 Tecra 500, 710/720 or Portégé 650 computer and their external devices. Tecra computers dock directly onto the Desk Station V Plus. Portégé 650 computers use a docking adapter to connect to the Desk Station V Plus. To connect your Portégé 650, follow the steps in the following section before docking your computer in the Desk Station V Plus.
-
Page 40: Guide Rail
Resume Mode before docking or undocking the computer to the Desk Station V Plus. To take your computer out of Resume Mode, use the hotkey or change the power up mode setting in TSETUP. - Page 41 1 Connect the AC power cord to the AC-IN socket on the back of the Desk Station V Plus. AC-IN 2 Make sure the Desk Station V Plus is level and secure on the desk or table. The computer can fall from the Desk Station V Plus if it is not level.
- Page 42 6 Place the computer (or if you have a Portégé 650, the computer attached to the docking adapter) on the Desk Station V Plus’s guiding rails, so that the expansion port on the computer is about 1" (2.5 cm) from the connector on the Desk Station V Plus.
-
Page 43: Using The Key-Lock
Two keys are supplied with the Desk Station V Plus. Remove one key from the ring and store it in a secure place. The key-lock on the right side of the Desk Station V Plus has three positions: NORMAL, BLOCK and EMERGENCY. To secure the computer and prevent unintentional undocking or unauthorized access to the Desk Station V Plus, set the Key-lock to the Normal or Block position. -
Page 44: Turning The Computer On And Off
If the computer’s DC-IN indicator does not glow green, there is a power supply problem. Refer to the "Troubleshooting" chapter to resolve the problem. 2 Press either the power switch on the front of the Desk Station V Plus or Power Switch the power switch of the computer. -
Page 45: Turning The Computer Off
You may damage your disk or lose data. 4 Press the power switch on the front of the Desk Station V Plus or the Power Switch power switch of the computer until you hear a beep. The Desk Station V Plus's power indicator turns orange and the system shuts down. -
Page 46: Undocking The Computer
Desk Station V Plus User's Manual Undocking the Computer You can undock (remove) the computer from the Desk Station V Plus either automatically or manually. If you are using Windows 95, you can decide how you want your computer and Desk Station V Plus to undock. - Page 47 Using the Desk Station V Plus Desk Station V Plus. You can assign a sound to be played when power is resumed. Setting the Dock and Undock Service Utilities in Windows 95 Use the Toshiba Power and Desk Station Service Configuration to activate and/or deactivate the Dock and Undock service utilities.
- Page 48 Automatic Undocking Follow these steps to undock your computer from the Desk Station V Plus automatically: 1 Set the Key-lock on the right side of the Desk Station V Plus to the Normal position. NORMAL 2 If the computer is running with Windows 95, the hot-undocking feature allows you to disconnect it from the Desk Station V Plus even while the power is on.
- Page 49 Using the Desk Station V Plus 4-11 3 Push the undocking switch on the front of the Desk Station V Plus, or double-click the Eject PC icon on the Windows 95 operating system screen. If you have enabled the password option in TSETUP and entered a Undocking Switch password, the following prompt appears.
- Page 50 CAUTION: When you remove the computer, pull it straight forward with both hands on the front. Do not wiggle the computer back and forth while it is connected to the Desk Station V Plus. Excessive movement can damage the connector.
-
Page 51: Using Ports
4-13 Using Ports The Desk Station V Plus replaces the function of most of your computer’s built-in ports and adds additional ports. This section explains how to use the Desk Station V Plus’s ports in conjunction with the computer’s ports. -
Page 52: Using An External Keyboard
SCSI devices to the Desk Station V Plus. Using an External Keyboard The Desk Station V Plus’s external keyboard port lets you use an external keyboard with your computer. You can attach a PS/2-compatible external keyboard to this port. -
Page 53: Connecting A Printer
Connecting a Printer When you attach your computer to the Desk Station V Plus, the Desk Station V Plus’s printer port replaces the functions of the computer’s printer port. To connect the printer to the Desk Station V Plus, follow these steps: 1 Identify the two ends of the printer cable. -
Page 54: Installing Scsi Devices
640 x 480, you change the video mode to the higher resolution. To do this, see "Changing the Display Mode" in your computer's User's Guide. When you dock your computer in a Desk Station V Plus, the BIOS detects an external monitor and automatically switches the display to the external monitor. - Page 55 ❖ ❖ ❖ ❖ ❖ Do not move the Desk Station V Plus with a computer attached. ❖ ❖ ❖ ❖ ❖ Do not block the cooling vents or the cooling fan. ❖ ❖ ❖ ❖ ❖ Observe the same general safeguards for the Desk Station V Plus as you do for your computer.
- Page 56 4-18 Desk Station V Plus User's Manual...
-
Page 57: Troubleshooting
❖ ❖ ❖ ❖ ❖ Does the power status LED indicator glow green? ❖ ❖ ❖ ❖ ❖ Is the Desk Station V Plus connected to a “live” power outlet? ❖ ❖ ❖ ❖ ❖ Is the computer securely connected to the Desk Station V Plus? ❖... -
Page 58: Expansion Card Problems
Setup Worksheet to make sure you didn’t accidentally assign the same IRQ to more than one device. If one expansion card’s IRQ line assignment is the same as that of the Desk Station V Plus’s serial port, a PC card or another expansion card, you will experience problems. Refer to the section entitled Configuration Considerations in the chapter, Preparing the Desk Station V Plus. -
Page 59: Power Problems
❖ ❖ ❖ ❖ ❖ Be certain that the power cord is firmly connected to the Desk Station V Plus and to a working wall outlet. ❖ ❖ ❖ ❖ ❖ Inspect the Desk Station V Plus’s power cord and connectors. Is the cord damaged? Are the connectors dirty, damaged or corroded? If the answer to either of these questions is yes, the Desk Station V Plus and computer may not be receiving adequate power. -
Page 60: Keyboard Problems
❖ ❖ ❖ ❖ ❖ Confirm that you’re using the proper port. A parallel printer connects to the Desk Station V Plus printer port, and a serial printer to the serial port. ❖ ❖ ❖ ❖ ❖ If you connected a serial printer, are the communications parameters the same for the port and the printer? Confirm that you haven’t assigned the... - Page 61 ❖ ❖ ❖ ❖ ❖ Check to see that the correct EIDE/ATAPI drivers are loaded. ❖ ❖ ❖ ❖ ❖ If you are running under DOS or Windows 3.1x, the Desk Station V Plus supports only the main hard disk drive, the diskette drive and one other EIDE/ATAPI device, such as a CD-ROM or a secondary hard disk drive at one time.
-
Page 62: If You're Still Having Problems
Toshiba dealer. If you want a referral to a Toshiba authorized service center or if you want answers to questions regarding technical support, call Toshiba Product Support at (800) 999-4273. -
Page 63: Toshiba Support
Troubleshooting TOSHIBA Support 02631 ESPPOO Finland France Argentina Toshiba Systèms France S.A. Smart, S.A 7, Rue Ampère, Mexico (Street) 630 92804 Puteaux Cédex Buenos Aires, 1097 France Argentina Germany Australia Toshiba Europe (I.E.) GmbH Toshiba Australia Pty. Ltd. Liebnizstraß2 Information Systems Division D-93055 Regensburg 84-92 Talavera Road North Ryde N.S.W. - Page 64 9740 Irvine Boulevard Informatica, Lda. Irvine, California 92718 Av. Moinhos no. 15A United States Ur. Quinta Grande 2720 Alfragide For the most recent list of addresses, access Toshiba's Portugal AUTOFAX system at Slovakia (800) 999-4273 HTC. s.r.o. Kukucinova 26 831 03 Bratislava...
-
Page 65: Specifications
Specifications Appendix Specifications This appendix summarizes the Desk Station V Plus’s technical specifications. Physical Dimensions Desk Station V Plus 16.2"W x 14.5"D x 6.0"H 18 pounds CRT Stand 17" x 13"D x 7"H 6 pounds Maximum Load 77 pounds Environmental Requirements... -
Page 66: Standard Interfaces
Desk Station V Plus User's Manual Speakers Built-in Two stereo speakers, volume adjustable Standard Interfaces Printer Printer or Extended Capabilities Port (ECP) Serial RS-232C compatible Analog RGB monitor External keyboard PS/2 type keyboard Mouse PS/2 type mouse SCSI II 50-pin, high density connector... -
Page 67: Expansion Capability
Industry standard half-height 5 1/4" SCSI device 1.7 x 9.2 x 5.7 inches 42 x 233 x 145 millimeters PC Card Slots Two PCMCIA Card Bus ready Type III PC Card slots SelectBay Toshiba SelectBay module Power Requirements Signal +3.3VDC +5VDC -5VDC... - Page 68 Desk Station V Plus User's Manual...
- Page 69 Appendix The AC Power Cord The Desk Station V Plus power cord’s AC input plug must be compatible with the various international AC power outlets and the cord must meet the standards for the country in which it is used.
-
Page 70: Usa And Canada
Desk Station V Plus User's Manual The following illustrations show the plug shapes for the U.S. and Canada, the United Kingdom, Australia and Europe: USA and Canada United Kingdom UL and CSA approved BS approved Australia Europe AS approved Approved by appropriate agency... - Page 71 Expansion Slot Pin Assignments Appendix Expansion Slot Pin Assignments The charts in this appendix (beginning on the next page) show the signals and pin assignments of PCI and ISA expansion slots.
- Page 72 Desk Station V Plus User's Manual PCI Expansion Slot Pin Assignments -12VDC TRST# +12VDC +5VDC +5VDC +5VDC INTA# INTB# INTC# INTD# +5VDC PRSNT1# RESERVED RESERVED +5VDC PRSNT2# RESERVED RESERVED RESERVED RST# +5VDC GNT# REQ# +5VDC RESERVED AD[31] AD[30] AD[29] +3.3VDC...
- Page 73 Expansion Slot Pin Assignments ISA Expansion Slot Pin Assignments -IOCHK RESET SD07 +5VDC SD06 IRQ9 SD05 -5VDC SD04 DRQ2 SD03 -12VDC SD02 SD01 +12VDC SD00 IOCHRDY -SMEMW -SMEMR SA19 -IOW SA18 -IOR SA17 -DAK3 SA16 DRQ3 SA15 -DACK1 SA14 DRQ1 SA13 -REFRESH SA12...
- Page 74 Desk Station V Plus User's Manual...
- Page 75 Expansion Slot Pin Assignments Appendix Expansion Slot Pin Assignments The charts in this appendix (beginning on the next page) show the signals and pin assignments of PCI and ISA expansion slots.
- Page 76 Desk Station V Plus User's Manual PCI Expansion Slot Pin Assignments -12VDC TRST# +12VDC +5VDC +5VDC +5VDC INTA# INTB# INTC# INTD# +5VDC PRSNT1# RESERVED RESERVED +5VDC PRSNT2# RESERVED RESERVED RESERVED RST# +5VDC GNT# REQ# +5VDC RESERVED AD[31] AD[30] AD[29] +3.3VDC...
- Page 77 Expansion Slot Pin Assignments ISA Expansion Slot Pin Assignments -IOCHK RESET SD07 +5VDC SD06 IRQ9 SD05 -5VDC SD04 DRQ2 SD03 -12VDC SD02 SD01 +12VDC SD00 IOCHRDY -SMEMW -SMEMR SA19 -IOW SA18 -IOR SA17 -DAK3 SA16 DRQ3 SA15 -DACK1 SA14 DRQ1 SA13 -REFRESH SA12...
- Page 78 Desk Station V Plus User's Manual...
- Page 79 Worksheet and Resource Maps for system resources. Make copies of the worksheets before you use them. Save your completed Setup Worksheets to help you remember how you configured the Desk Station V Plus. If you call Toshiba’s Product Support for assistance, this information will help the technician resolve your questions.
-
Page 80: Power Consumption Worksheet
Peripherals: Maximum Power Specification: 5.9/8.2 1.8/4.0 The power used by your peripherals may not exceed the Desk Station V Plus's specification. If your calculations fall below the numbers listed for Maximum Power Specification, you can continue with your installation. - Page 81 Desk Station V Plus Worksheets and Resource Maps B. Toshiba Desk Station V Plus Setup Worksheet Date Prepared _____/____/____ Expansion Slot Configuration. Fill in the type of device, serial number and setup information Expansion Slot Card Device Type Serial Number / Setup Information (Non-Plug and Play ISA Cards only) ❑...
- Page 82 WSS and SBPro IRQ, WSS and SBPro DMA, Control I/O) ❖ PCI Bus IRQ (not changeable) ❖ Disk Drives (HDD and CD-ROM for Desk Station V Plus SelectBay and 5.25-inch Drive Bay) Under Windows 95 The resource map is comprised of the static resources plus the System Properties/Device Manager settings.
- Page 83 PCMCIA2 *1 (When attached to Desk Station 3E2-3E3 V Plus) (only in PCIC COMPATIBLE mode) Desk Station V Plus PCI Bus (Shared by all 5, 9, 10, 11, OR 15 (this resource is set by the BIOS PCI and CardBus devices)
-
Page 84: Interrupt Request Lines (Irq)
Normally reserved for COM2 Normally reserved for COM1 Available Floppy Disk Drive (Internal SelectBay, External FDD or Desk Station V Plus SelectBay) (resources are always used even if drive is not installed/attached) Normally reserved for LPT1 Real Time Clock (RTC) -
Page 85: Direct Memory Access (Dma)
Desk Station V Plus Worksheets and Resource Maps C. Direct Memory Access (DMA) Device Direct Memory Access (DMA) Available Available Floppy Disk Drive (Internal SelectBay), External FDD or Desk Station V Plus SelectBay) (resources are always used even if drive is not installed/attached) - Page 86 Desk Station V Plus User's Manual E. Master Resource Chart Static resources, dynamic resources and all possible settings are listed here. The availability of the settings depends on the operating system you are using. Devices labeled *1 can be disabled to free resources. Devices labeled *2 are automatically disabled when a video card is installed in an expansion slot.
- Page 87 Desk Station V Plus Worksheets and Resource Maps Memory Device I/O Addresses in hex IRQ in decimal Addresses in hex 3F8-3FF (COM1), 2F8-2FF (COM2), 3E8-3EF (COM3), Communications 3, 4, 5, 7, 9, 10, 2E8-2EF (COM4), Port (COM) *1 11, 14, or 15...
- Page 88 D-10 Desk Station V Plus User's Manual Memory Device I/O Adresses in hex IRQ in decimal Addresses in hex Joystick *1 (Only when attached to 200-207 Desk Station V Plus) Keyboard 60 and 64 Controller (KBC) MIDI MPU401 Interface *1...
- Page 89 Desk Station V Plus Worksheets and Resource Maps D-11 Memory Device I/O Adresses in hex IRQ in decimal Addresses in hex 378-37A, 778-77A (LPT1) 278-27A, 678-67A (LPT2) 3BC-3BE, 7BC-7BE Printer (ECP (LPT3) 5, 7, 9, 10, 11, 1, 2, or 3...
- Page 90 D-12 Desk Station V Plus User's Manual Memory Addresses Device I/O Adresses in hex IRQ in decimal in hex 534-537, 388-38B, 220-22F 534-537, 388-38B, 240-24F 608-60B, 388-38B, 220-22F 0, 1, or 3 Sound 608-60B, 388-38B, 240-24F (two used (WSS+FM+ SBP)
Need help?
Do you have a question about the Desk Station V Plus and is the answer not in the manual?
Questions and answers