Table of Contents
Advertisement
Quick Links
Advertisement
Table of Contents

Related Manuals for Gorenje Simplicity GT642SYB


Summary of Contents for Gorenje Simplicity GT642SYB
- Page 1 ИНСТРУКЦИЯ Gorenje GT642SYB...
- Page 2 User Manual Gas Hobs BG6xA - BG6xB - BG6xC BG6xD - BG6xE...
- Page 3 The following symbols are used throughout the manual, and they have the following meanings: INFORMATION! Information, advice, tip, or recommendation WARNING! Warning general danger GAS CONNECTION! Warning gas connection ELECTRIC SHOCK! Warning danger of electric shock HOT SURFACE! Warning danger of hot surface DANGER OF FIRE! Warning danger of fire...
-
Page 4: Table Of Contents
Contents Safety regulations ........................READ CAREFULLY AND KEEP IT FOR FUTURE REFERENCE! ..........Gas hob ............................ User Manual ..........................Models ............................Description ..........................Information according to regulation (EU only) 66/2014 ............Use ............................Burner position: ........................Cleaning: ........................... Faults table ..........................Installation instruction ...................... -
Page 5: Safety Regulations
Safety regulations READ CAREFULLY AND KEEP IT FOR FUTURE REFERENCE! General The manufacturer cannot be held liable for any damage resulting from failure to follow the safety instructions and warnings. Damage caused by incorrect connection, incorrect fitting, or incorrect use is not covered by the warranty. WARNING! This appliance and the accessible parts will become hot during use. - Page 7 NEVER try to extinguish a fire with water. Instead, switch the appliance off and then cover the flames with, for example, a lid or a fire blanket. Never flambé under a cooker hood. The high flames can cause a fire, even if the cooker hood is switched off. WARNING! Use only hob guards designed by the manufacturer of the cooking appliance or indicated by the appliance...
- Page 8 When you use the hob for the first time, you will notice a “new smell”. Don’t worry, this is normal. If the kitchen is well ventilated, the smell will soon disappear. The appliance is not intended to be operated by means of an external timer or separate remote control system.
-
Page 9: Gas Hob
WARNING! This appliance can be used by children aged 8 years and over, as well as by people with reduced physical, sensory or mental capabilities or lack of experience and knowledge, provided they are supervised and instructed in the safe use of the appliance and understand the hazards involved. - Page 10 Never immerse hot burner caps and pan supports in cold water. Rapid cooling can damage the enamel. The distance between the pan and a knob or non-heat resistant wall should always be greater than one centimetre. In the case of smaller distances, the high temperature may cause the knobs or wall to discolour and/or deform.
-
Page 11: User Manual
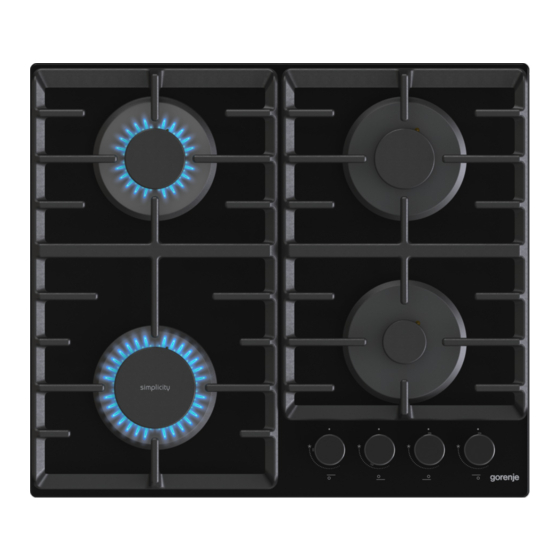
User Manual Models BG6xA Aa - Auxiliary burner Bb - Semi-rapid burner Cc - Rapid burner Dd - Wok burner BG6xB / BG6xC BG6xD BG6xE... -
Page 13: Description
Description G20 - 20 mbar Burner Power BG6xA BG6xB BG6xC BG6xD BG6xE Auxiliary 1.05 kW Semi-rapid 1.80 kW Rapid 3.00 kW 3.50 kW 4.05 kW G30/G31 - 28-30/37 mbar Burner Power / Mass flow BG6xA BG6xB BG6xC BG6xD BG6xE Auxiliary 1.05 kW / 76 g/h Semi-rapid 1.70 kW / 122 g/h... -
Page 14: Information According To Regulation (Eu Only) 66/2014
Information according to regulation (EU only) 66/2014 Measurements according to EN60350-2 Model identification BG6xA BG6xB BG6xD BG6xC BG6xE Type of hob Gas hob Gas hob Number of gas burners Heating technology Gas burner Gas burner Energy efficiency per gas Semi-rapid burner: 58.1 58.1 burner (EE... - Page 15 Control: (1) Push (2) Turn left + hold (3) Hold down 3 sec. low setting high setting Cooking timer function: Depending on the model, your hob can have a cooking timer function. For both left cooking zones, the cooking time can be set (from 1 to 99 minutes).
- Page 16 How to set the cooking timer 1. Ignite the burner of the cooking zone. 2. Touch the sensor key on the knob for about 2 seconds. 3. You hear an acoustic signal and ‘- 00 +’ appears. 4. Touch key ‘+’ or key ‘-’ to set the desired cooking time. After 5 seconds, key ‘+’...
-
Page 17: Burner Position
Accessories (to be obtained via After Sales): Following accessories are optional and can be ordered separately: Suits wok burner Suits Auxiliary burner Code: 806206 Code: 537584 Burner position: Cleaning:... -
Page 19: Faults Table
Faults table Following is some advice on rectifying some common problems. What happened...? Possible cause What to do? The burners will not burn. The flame is uneven due to a Have an expert check the gas The flame is uneven/unstable. wrong gas power setting. -
Page 20: Installation Instruction
Installation instruction Safety regulations This appliance should only be connected by a registered installer. Prior to installation, ensure that the local distribution conditions (voltage, frequency, nature of the gas and gas pressure) and the adjustment of the appliance are compatible. This appliance must be earthed. - Page 21 If a stationary appliance is not fitted with a supply cord and a plug, or with other means for disconnection from the supply mains having a contact separation in all poles that provide full disconnection under overvoltage category III conditions, the means for disconnection must be incorporated in the fixed wiring in accordance with the wiring rules.
- Page 22 The gas supply valve must always be placed in an easily accessible position. The worktop into which the hob is fitted should be flat. The walls and the worktop surrounding the appliance must be heat resistant up to at least 105 °C. Service Faulty parts may only be replaced by original parts.
-
Page 23: Preparations For Installation
Preparations for installation Free space around the appliance A (mm) B (mm) C (mm) D (mm) min. 650 min. 600 min. 450 min. 120 Dimensions Appliance: A (mm) B (mm) C (mm) D1 (mm) D2 (mm) BG6xA/B/C BG6xD/E... -
Page 25: Sealing Tape
Built-in: A (mm) B (mm) C (mm) D (mm) E (>mm) F (mm) G (mm) Sealing tape Stainless steel drip tray Glass drip tray worktop Gas connection PTFE tape... -
Page 26: Accessibility
Accessibility oven metal safety oven hose Built-in Min. 20 mm only for 75+90cm Max. 50 mm... -
Page 27: Connecting & Testing
Connecting & testing WARNING! Check if connections are gastight. -
Page 28: Conversion Instruction
Conversion instruction WARNING! Adjusting for a different gas type! WARNING! Attention! Performing these instructions by a non-qualified person can lead to dangerous situations. The supplier is not responsible for the consequences (the arising of a hazardous situation and/or damage to persons or goods) caused by the incorrect performance of these instructions by engineers who are not employees of the supplier. -
Page 29: Power Table (Kw-G/H)
Gas type P mbar Modification (BG6xB/E) (BG6xC) nozzle nozzle 20 / 25 Convert from G20 - 20 mbar or from G20 - 25 mbar to: Replace nozzle & no action bypass G30/G31 28-30/37 Replace nozzle & screw in bypass (see 3A) (PL) Replace nozzle &... -
Page 31: Converting Nozzles
Tools needed: T1 Socket spanner (7 mm) T2 Screwdriver flat blade (4 mm) T3 Nose pliers T4 Open-end spanner (7 mm) T5 Leak test spray Converting nozzles NOTE! Please note: disconnect the appliance from the power supply. Prevent damage of the worktop. Lay down parts of the appliance on a protected base. For converting to a different type of gas, the nozzles have to be changed. -
Page 32: Check For Gas Tightness And Operation
3B. Remove the by-pass screws by using the flat-blade screwdriver (T2) and the nose pliers (T3). Place the new by-pass screws with the nose pliers and screw the by-pass screws of all gas taps in, by using the flat-blade screwdriver. 3C. -
Page 33: Environmental Considerations
Environmental considerations Disposal of the appliance and packaging Sustainable materials have been used during the manufacture of this appliance. The appliance packaging is recyclable. The following may have been used: cardboard; paper; polyethylene film (PE); CFC-free polystyrene (PS-rigid foam); polypropylene tape (PP). Dispose of these materials in a responsible manner and in accordance with government regulations. - Page 34 GORENJE gospodinjski aparati, d.o.o. Address: Partizanska 12, 3320 Velenje, Slovenia Phone: +386 (0)3 899 10 00 Fax: +386 (0)3 899 28 00 www.gorenje.com 830509-a7...
- Page 35 СМОТРИТЕ ТАКЖЕ Варочные поверхности Смесители Фильтры для воды Кухонные вытяжки Измельчители пищевых Кухонные мойки Настольные плиты Микроволновые печи отходов...
Need help?
Do you have a question about the Simplicity GT642SYB and is the answer not in the manual?
Questions and answers