Table of Contents
Advertisement
Advertisement
Table of Contents

Related Manuals for Gorenje GC31WTB


Summary of Contents for Gorenje GC31WTB
- Page 1 IT32B User manual IT31W GC32TB GC31WTB...
- Page 2 Manual GB 3 - GB 58 Pictograms used Important information...
-
Page 3: Table Of Contents
CONTENTS Your hob Your gas hob Safety gas hob Operation gas hob Comfortable cooking gas hob Maintenance gas hob Fault gas hob Your induction hob Safety induction hob Using the induction hob Operation induction hob Cooking programs induction hob Comfortable cooking induction hob Maintenance induction hob Troubleshooting induction hob Installation gas hob... -
Page 4: Your Hob
YOUR HOB Introduction This manual explains optimum use of the hob. The manual has been arranged as follows: the first part provides information about the two-burner gas hob and the wok hob. This is followed by information on the two-zone induction hob and the wok induction hob. This manual contains information on how to operate the hob, which pans are suitable and how the appliances work. -
Page 5: Your Gas Hob
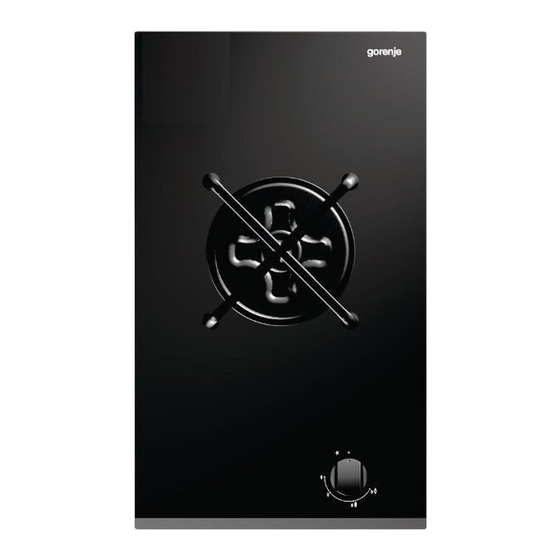
Both the GC32TB and the GC31WTB are fitted with a flame failure device, which ensures that the gas supply is shut off if the flame goes out during the cooking process. - Page 6 YOUR GAS HOB Description GC32TB GC31WTB 1. Semi-rapid burner 5. Wok burner 2. Rapid burner 6. Control knob wok burner 3. Control knob semi-rapid burner 4. Control knob rapid burner GB 6...
-
Page 7: Safety Gas Hob
SAFETY GAS HOB What you should pay attention to • Ensure that there is adequate ventilation during use. Keep natural ventilation openings open. • When using the hob for long periods, extra ventilation is necessary. Open a window for instance or install a mechanical fan. •... - Page 8 SAFETY GAS HOB • Do not use the device as a worktop. The device may be switched on by accident or still be hot, which means objects could melt, become hot or catch fire. • Never cover the device with a cloth or something similar. If the device is still hot or is switched on, there is a risk of fire.
-
Page 9: Operation Gas Hob
The burners can be adjusted continuously between the high GC32TB and low positions. • Press the control knob and turn it anti-clockwise. The burner ignites. GC31WTB 1. Burner indication 2. 0-setting 3. High setting 4. Low setting 5. Low setting outer ring wok Flame failure device Your gas hob has a flame failure device. -
Page 10: Comfortable Cooking Gas Hob
• Use pans with a flat, clean, dry base. Pans with a flat base stand stably and pans with a clean base transfer the heat more effectively to the food. Wok burner (GC31WTB) With the wok burner you can prepare dishes at a very high temperature. For this purpose it is important: •... - Page 11 COMFORTABLE COOKING GAS HOB Using the wok auxiliary support The auxiliary support (supplied with the hob, or available as a separate accessory) is used to properly stabilize a round-based wok. Place the auxiliary support on the wok support as shown in the following illustration.
-
Page 12: Maintenance Gas Hob
MAINTENANCE GAS HOB General Your appliance has been manufactured from high-grade materials, which are easy for you to clean. • Regular cleaning immediately after use prevents over-cooked food being able to become ingrained and cause stubborn stains that are difficult to remove. Use a mild cleaning agent. •... - Page 13 MAINTENANCE GAS HOB Brass wok burner parts A few parts of the work burner are made from brass. It is normal for the colour of the brass to change as a result of the high temperatures that occur when cooking with a wok. Stubborn stains on the glass hob Clean the glass hob with a cleansing agent intended specifically for ceramic hobs.
-
Page 14: Fault Gas Hob
TROUBLESHOOTING GAS HOB Troubleshooting table If the appliance does not work properly, this does not always mean that it is defective. Try to deal with the problem yourself first by checking the points mentioned below in the table. Symptom Possible cause Solution There is a smell of gas in the The gas connection of the... - Page 15 TROUBLESHOOTING GAS HOB Symptom Possible cause Solution The burner does not burn Burner parts incorrectly Assemble the burner parts evenly. installed. using the centring ridges. Burner parts dirty or damp. Clean and dry the burner parts, making sure that the outflow holes are open.
-
Page 16: Your Induction Hob
YOUR INDUCTION HOB Introduction induction hob This hob has been designed for the real lover of cooking. Cooking on an induction hob has a number of advantages. It is easy, because the hob reacts quickly and can also be set to a very low power level. Because, moreover, it can also be set to a high power level, it can bring things to the boil very quickly. -
Page 17: Control Panel
YOUR INDUCTION HOB Description IT32B IT32B Cooking zone Ø180 3,0 kW Cooking zone Ø180 3,0 kW Control panel 13 14 15 1. Pauze button 13. Alarmclock indicator 2. Pauze indicator 14. Cooking time indicator 3. Childproof lock/Eco stand-by button 15. ‘Reduce the time’ button 4. - Page 18 YOUR INDUCTION HOB Description IT31W Cooking zone Ø300 3,0 kW Control panel IT31W 13 14 15 1. Pauze button 12. Timer/alarmclock button 2. Pauze indicator 13. Alarmclock indicator 3. Childproof lock/Eco stand-by button 14. Cooking time indicator 4. Childproof lock indicator/Eco stand-by indicator 15.
-
Page 19: Safety Induction Hob
SAFETY INDUCTION HOB What you should pay attention to • Induction cooking is extremely safe. Various safety devices have been incorporated in the hob such as a residual heat indicator and a cooking time limiter. There are nevertheless a number of precautions you should take. - Page 20 SAFETY INDUCTION HOB • The zones heat up during use and stay hot for a while afterwards. Keep young children away from the hob during and immediately after cooking. • Grease and oil are inflammable when overheated. Do not stand too close to the pan.
-
Page 21: Temperature Safety
SAFETY INDUCTION HOB Temperature safety • A sensor continuously measures the temperature of certain parts of the hob. Every cooking zone is equipped with a sensor that measures the temperature of the bottom of the pan to avoid any risk of overheating when a pan boils dry. In case of temperatures rising too high, the power is reduced automatically. -
Page 22: Using The Induction Hob
USING THE INDUCTION HOB Using the touch controls The touch controls may take some getting used to if you are used to other (rotary) controls. Place the tip of your finger flat on the control to achieve the best results. You do not have to apply any pressure. The touch sensors only react to the light pressure of a fingertip. -
Page 23: How Does Induction Work
USING THE INDUCTION HOB Induction cooking with the IT31W Induction cooking is fast • To start with you will be surprised by the speed of induction cooking. Wokking on a high setting is especially fast. It is best not to leave the pan unattended. The power will be adjusted •... - Page 24 USING THE INDUCTION HOB Clean The hob is easy to clean. Because the cooking zones do not get any hotter than the pans themselves, food spills cannot burn on. Safe The heat is generated in the pan itself. The glass top does not get any warmer than the pan.
- Page 25 USING THE INDUCTION HOB Attention Be careful with enamelled sheet-steel pans: • the enamel may chip (the enamel comes loose from the steel), if you switch the hob on at a high setting when the pan is (too) dry; • the base of the pan may warp - due, for example, to overheating or to the use of too high a power level.
- Page 26 This is the so- called Curie pan, which cannot be heated to a temperature higher than 250 ˚C. You can order this pan from Gorenje. How to use the wok Carefully place the pan on the cooking zone. When handling the pan carelessly, the handle may hit and damage the glass.
-
Page 27: Operation Induction Hob
OPERATION INDUCTION HOB Switching on the hob and setting the power The cooking zones have 12 levels. Beside it there is a level ‘boost’. • Put a pan on a cooking zone/into the cooking zone. • Press the child lock button. You will hear a bleep. - Page 28 OPERATION INDUCTION HOB Boost You can use the ‘boost’ function to cook at the highest power level during a short period of time (max.10 minutes). After the maximum boost time the power will be reduced to setting 12. Rwitching on ‘boost’ •...
- Page 29 OPERATION INDUCTION HOB ▷ If all cooking zones have been switched off in this way, the hob will automatically be in the stand-by mode (also refer to ‘stand- by mode’). Switching off all cooking zones • Press the child lock button to switch off all the cooking zones at the same time.
-
Page 30: Child Lock
OPERATION INDUCTION HOB Eco stand-by mode In the eco stand-by mode the hob is switched off and it uses as little energy as possible. The hob can also be switched to the eco stand-by mode from the stand-by mode and when the cooking zone(s) are/is still active. - Page 31 OPERATION INDUCTION HOB Set the hob to the childproof lock mode before cleaning the hob to prevent it from accidentally switching on. Did you know that When the hob is set to the childproof lock, is uses just as little energy as when it is in the eco stand-by mode.
-
Page 32: Recognizing A Mode
OPERATION INDUCTION HOB Recognizing a mode The stand-by mode Not a single light is lit. The red light next to the child lock button The eco stand-by mode button keeps slowly going on and off. The red light next to the child lock button The childproof lock mode is constantly on. - Page 33 OPERATION INDUCTION HOB ▷ If you do not set a time with the red + button or the red - button, the timer will start running automatically after 3 seconds. The timer can go as far as 9 hours and 59 minutes. ‘The red small arrow pointing up’...
- Page 34 OPERATION INDUCTION HOB After 9 minutes and 0 seconds (“9.00”) the word “.min” appears above the display and the minutes will be added behind the dot. You can press and hold the red + button and the red - button to set the desired cooking time quicker.
-
Page 35: Cooking Programs Induction Hob
1,0 l only water 1) After the beep the rice or pasta can be added. * This function works best with pans recommended by Gorenje. ** These menu functions work best if they are started at the beginning of the cooking process. - Page 36 Meat, fish, vegetables 1 - 2 300 g / 300 g Wokpan * This function works best with pans recommended by Gorenje. ** These menu functions work best if they are started at the beginning of the cooking process. GB 36...
- Page 37 2 - 3 200 - 300 g Grill pan / plate * This function works best with pans recommended by Gorenje. ** These menu functions work best if they are started at the beginning of the cooking process. GB 37...
-
Page 38: Comfortable Cooking Induction Hob
Healthy cooking Burning point of different types of oil To ensure your food is fried as healthily as possible, Gorenje recommends choosing the type of oil according to the frying temperature. Each oil has a different burning point at which toxic gasses are released. - Page 39 COMFORTABLE COOKING INDUCTION HOB Use setting 10 to: • fry thick pancakes; • fry thick slices of breaded meat; • fry bacon (fat); • fry raw potatoes; • make French toast; • fry breaded fish. Use setting 8 and 9 to: •...
-
Page 40: Maintenance Induction Hob
MAINTENANCE INDUCTION HOB Cleaning Set the child lock before you start cleaning the hob. Daily cleaning • Start by cleaning the control knobs, the burners and the pan supports and finish with the glass plate. This prevents the glass plate from getting dirty again during cleaning. •... -
Page 41: Troubleshooting Induction Hob
TROUBLESHOOTING INDUCTION HOB General If you notice a crack in the glass top (however small), switch the hob off immediately, unplug the hob, turn off the (automatic) fuse switch(es) in the meter cupboard or, in the event of a permanent connection, set the switch in the power supply lead to zero. - Page 42 Air circulation not good. Make sure the venting holes under the cooking plate are open. Fault code E6 (IT31W) Wrong pan. Suitable pans are available via Gorenje. Hardware / software error. Contact the service department. Other fault codes. Defective generator. Contact the service department.
-
Page 43: Installation Gas Hob
INSTALLATION GAS HOB General This appliance should only be connected up by a registered installer! The gas and electrical connection must comply with national and local regulations. This appliance is suitable for town gas supply pressure of 1.5 kPa. No external gas pressure regulator is required! Warning! The type of gas and the country for which the appliance has been designed are indicated on the application identification card. - Page 44 • the plug has been pulled out of the socket. Faulty parts may only be replaced by original Gorenje parts. Only those parts are guaranteed by Gorenje to meet the safety requirements. If the connecting cable is damaged, it may only be replaced by the manufacturer, the manufacturer’s service organisation or equivalently...
- Page 45 INSTALLATION GAS HOB 1/2” ISO (straight) 1/2” ISO 228 (straight) Sealing ring Cut opening in worktop • Saw the opening in the worktop. This should be done very accurately (see building in dimensions on page 46 and 47). • If the woodtop is made of treated wood, then coat the sawn surfaces of the top with sealing varnish, to prevent moisture causing the top to swell.
- Page 46 INSTALLATION GAS HOB Building in dimensions GC32TB Gas connection front min.50 front G1/2" 1*) attachment point mounting bracket GB 46...
- Page 47 INSTALLATION GAS HOB Building in dimensions GC31WTB Gas connection front front 1*) attachment point mounting bracket GB 47...
- Page 48 INSTALLATION GAS HOB Space to be left free around the appliance A hob generates heat. Leave a sufficient distance between the appliance and non heat-resistant materials. Take care also with materials that may discolour (such as stainless steel). number of modulos x 330 mm min.
- Page 49 INSTALLATION GAS HOB Technical data On the label on the bottom of this equipment, you will find the total wattage, the required voltage and the frequency. Gas information G30/3,0 kPa HKTG 1,5 kPa G20/2,0 kPa Burner type (kW / g/h) (kW) (kW) Rapid burner...
-
Page 50: Installation Induction Hob
INSTALLATION INDUCTION HOB What you need to consider Safety instructions for the installation • The connection must comply with national and local regulations. • The appliance must always be earthed. • This appliance may only be connected by a competent electrical installer. - Page 51 INSTALLATION INDUCTION HOB Installation dimensions The dimensions and recesses are shown in the illustrations beneath. IT32B min.40 IT31W min.40 GB 51...
- Page 52 INSTALLATION INDUCTION HOB Attachment points for mounting brackets (only for IT31W) Do not remove or twist Thick worktops Thin worktops the nut! front GB 52...
- Page 53 INSTALLATION INDUCTION HOB Ventilation The electronics in the appliance need cooling. The appliance will automatically switch off if there is insufficient air circulation. There are ventilation openings on the underside of the appliance. It must be possible for cool air to be drawn in through these openings. There are outlet openings on the underside and at the front of the appliance.
- Page 54 INSTALLATION INDUCTION HOB Lower kitchen cabinet with an oven • Installing the oven under an induction hob is possible with oven which are fitted with a cooling fan. Before installing the oven, the rear wall of the kitchen cabinet should be removed. Furthermore, a minimum of 6 mm clearance should be provided at the front side, along the entire width of the cabinet.
-
Page 55: Technical Data
INSTALLATION INDUCTION HOB Only allow a licensed professional to connect the appliance. He is subject to requirements of local electricity provider. An all-pole isolating switch with at least a 3 mm contact gap must be available for the installation. Identify the phase and neutral (zero) conductor in the socket. -
Page 56: Building In Several Hobs
BUILDING IN SEVERAL HOBS Fitted-unit situation with space X mm min. 10 mm min. 10 mm min.50 X mm +50 mm 50 mm 50 mm GB 56... - Page 57 BUILDING IN SEVERAL HOBS Coupling examples with a coupling profile TN31X GC31WTB GC32TB IT32B IT31W GC32TB GC31WTB TN31X IT31W IT32B Coupling profile for making certain that appliances are mounted tightly next to each other GB 57...
-
Page 58: Environmental Aspects
ENVIRONMENTAL ASPECTS Disposal of packaging and appliance In the manufacturing of this appliance durable materials were used. Make sure to dispose of this equipment responsibly at the end of its lifecycle. Ask the authorities for more information regarding this. The appliance packaging is recyclable. The following may have been used: •... - Page 60 The appliance identif cation card is located on the bottom of the appliance. Stick the appliance identif cation card here. When contacting the service department, have the complete type number to hand. You will f nd the addresses and phone numbers of the service organisation on the guarantee card en (06-11)
Need help?
Do you have a question about the GC31WTB and is the answer not in the manual?
Questions and answers