Gorenje Simplicity BG6 B Series Instructions For Use Manual
Hide thumbs
Also See for Simplicity BG6 B Series:
- User manual (35 pages) ,
- Detailed instructions for use (24 pages) ,
- User manual (28 pages)

Related Manuals for Gorenje Simplicity BG6 B Series


Summary of Contents for Gorenje Simplicity BG6 B Series
- Page 1 DETAILED INSTRUCTIONS FOR USE GAS HOB BG6xA BG6xB BG6xC BG6xD BG6xE BG6xF www.gorenje.com www.gorenje.com...
- Page 2 Pictograms used: Important information Gas connection Electrical connection Right Wrong...
-
Page 3: Table Of Contents
CONTENTS Safety regulations Safe use Children and vulnerable people User manual Models Description Information according regulation (EU-only) 66/2014 Faults table Installation instruction Safety regulations Service Preparations for installation Sealing tape Gas connection Built in Connecting & testing Conversion instruction Conversion instruction Conversion table Power table (kW-g/h) Converting nozzles... -
Page 4: Safety Regulations
SAFETY REGULATIONS READ CAREFULLY AND KEEP FOR FUTURE REFERENCE! Safe use • The manufacturer cannot be held liable for any damage resulting from failure to follow the safety instructions and warnings. • Damage caused by incorrect connection, incorrect fitting, or incorrect use is not covered by the warranty. •... - Page 5 SAFETY REGULATIONS • Never cover the appliance with a cloth or something similar. If the appliance is still hot or is switched on, there is a risk of fire. • Do not use the appliance as a worktop. The appliance may accidentally be switched on or still be hot, which means objects could melt, become hot or catch fire.
- Page 6 SAFETY REGULATIONS • CAUTION: The use of a gas cooking appliance results in the production of heat, moisture and products of combustion in the room in which it is installed. Ensure that the kitchen is well ventilated especially when the appliance is in use.
-
Page 7: Children And Vulnerable People
SAFETY REGULATIONS • The hob can only function effectively if the burner components have been assembled using the guide ridges. Ensure that the pan supports lie properly against each other and flat on the drip tray. Only then can the pans be positioned stably. -
Page 8: User Manual
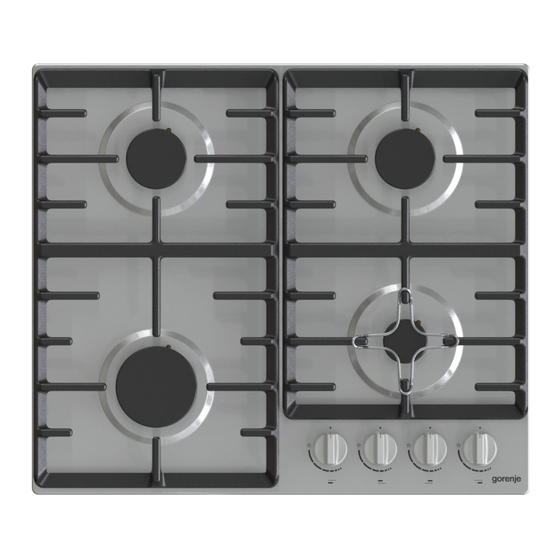
USER MANUAL Models BG6xD BG6xE / BG6xF Aa - Auxiliary burner Bb - Semi-rapid burner Cc - Rapid burner Dd - Wok burner BG6xA BG6xB / BG6xC Description G20 / 20 mbar BG6xA BG6xB BG6xC Burner Power BG6xD BG6xE BG6xF Auxiliary 1.05 kW Semi-rapid... -
Page 9: Information According Regulation (Eu-Only) 66/2014
USER MANUAL G30 / 28-30 mbar Power / Mass flow BG6xA BG6xB BG6xC Burner BG6xD BG6xE BG6xF Auxiliary 1.05 kW / 76 g/h Semi-rapid 1.70 kW / 122 g/h Rapid 3.00 kW / 216 g/h 3.50 kW / 252 g/h 3.90 kW / 281 g/h G30 / 50 mbar Burner... -
Page 10: Use
USER MANUAL 12-24cm Ø 15-26cm Ø Min. 1 cm The distance between the pan and a nonheat resistant wall should always be greater than one centimeter. In case of smaller distances the high temperature may cause the knobs or wall to discolour and/or deform. Control: high setting low setting... - Page 11 USER MANUAL How to set the cooking timer 1. Ignite the burner of the cooking zone. 2. Touch the sensor key on the knob for about 2 seconds. You hear an acoustic signal and ‘- 00 +’ appears. 3. Touch key ‘+’ or key ‘-’ to set the desired cooking time. After 5 seconds, key ‘+’...
- Page 12 USER MANUAL Accessories: Suits Auxiliary burner Suits wok burner Burner position: Cleaning: EN 12...
-
Page 13: Faults Table
USER MANUAL Faults table Following is some advice on rectifying some common problems. What happened...? Possible cause What to do? The burners will not burn. Flame is uneven due to a Have an expert check the gas The flame is uneven / unstable. wrong gas power setting. -
Page 14: Installation Instruction
INSTALLATION INSTRUCTION Safety regulations • This appliance should only be connected by a registered installer. • Prior to installation, ensure that the local distribution conditions (voltage, frequency, nature of the gas and gas pressure) and the adjustment of the appliance are compatible. -
Page 15: Service
INSTALLATION INSTRUCTION • This appliance is not connected to a combustion products evacuation device. It shall be installed and connected in accordance with current installation regulations. Particular attention shall be given to the relevant requirements regarding ventilation. • We recommend that the gas hob be connected by means of a fixed pipe. -
Page 16: Preparations For Installation
INSTALLATION INSTRUCTION Preparations for installation Free space around appliance A (mm) B (mm) C (mm) D (mm) min. 650 min. 600 min. 450 min. 120 Dimensions Appliance: A (mm) B (mm) C (mm) D (mm) min. 650 min. 600 min. 450 min. -
Page 17: Sealing Tape
A (mm) B (mm) C (mm) D (mm) E (>mm) F INSTALLATION INSTRUCTION Accessibility safety hose metal T >60º C T <60º C Sealing tape Stainless steel drip tray Worktop Worktop Glass drip tray 1/2” ISO 228 1/2" ISO 7-1 / EN 10226-1 EN 17 PTFE tape... -
Page 18: Gas Connection
INSTALLATION INSTRUCTION Gas connection 1/2” ISO 7-1 / EN 10226-1 Worktop 1/2” ISO 7-1 / EN 10226-1 1/2” ISO 228 1/2” ISO 228 1/2” ISO 228 1/2” ISO 228 1/2" ISO 7-1 / EN 10226-1 PTFE tape PTFE tape Built in 1/2”... -
Page 19: Conversion Instruction
CONVERSION INSTRUCTION Conversion instruction Adjusting for a different gas type! Attention! Performing of these instructions by a non-qualified person can lead to dangerous situations. The supplier is not responsible for the consequences (the arising of a hazardous situation and/or damage to persons or goods) caused by incorrect performance of these instructions by engineers who are not employees of the supplier. -
Page 20: Power Table (Kw-G/H)
CONVERSION INSTRUCTION BG6xB/E BG6xC/F Gas type P mBar Modification nozzle nozzle Convert from G20 / 20 mbar to: Replace nozzle & no action by-pass 28-30 Replace nozzle & screw in by-pass (see 3A) (PL) G30 Replace nozzle & screw in by-pass (see 3A) Replace nozzle &... -
Page 21: Converting Nozzles
CONVERSION INSTRUCTION Converting nozzles Please note: disconnect the appliance from the power supply. Prevent damage of the worktop. Lay down parts of the appliance on a protected base. For converting to a different type of gas, the nozzles have to be changed. The values are also marked on the nozzle. -
Page 22: Check For Gas Tightness And Operation
CONVERSION INSTRUCTION 3A. Screw the by-pass screws (3) of all gas taps completely in by using the flat-blade screwdriver (T2). 3B. Remove the by-pass screws by using the flat-blade screwdriver (T2) and the nose pliers (T3). Place the new by-pass screws with the nose pliers and screw the by-pass screws of all gas taps in, by using the flat-blade screwdriver. -
Page 23: Start Up
CONVERSION INSTRUCTION Start up 1. Reinstall the knobs, burner parts and pan supports. 2. Check if the appliance is connected to the correct gas type and pressure. 3. Open the main gas valve. 4. Insert the plug into the power socket. Checking operation 1. -
Page 24: Environmental Considerations
ENVIRONMENTAL CONSIDERATIONS Disposal of the appliance and packaging Sustainable materials have been used during manufacture of this appliance. The appliance packaging is recyclable. The following may have been used: • cardboard; • paper; • polyethylene film (PE); • CFC-free polystyrene (PS-rigid foam); •... - Page 25 EN 25...
- Page 26 EN 26...
- Page 27 EN 27...
- Page 28 Gorenje gospodinjski aparati, d.o.o. Address: Partizanska 12, 3320 Velenje, Slovenia Phone: +386 (0)3 899 10 00 Fax: +386 (0)3 899 28 00 www.gorenje.com GASHOB_SIMPLICITY_2.1 en (01-20)
Need help?
Do you have a question about the Simplicity BG6 B Series and is the answer not in the manual?
Questions and answers