Table of Contents
Advertisement
Advertisement
Table of Contents

Subscribe to Our Youtube Channel
Related Manuals for Marco MT Series


Summary of Contents for Marco MT Series
- Page 1 MT Boiler Range – Service Manual 1000762# 1000763# 1000763F# 1001762# 1001763# 1000764# 1000765# 1000766# Ireland Tel: +353 (1) 295 2674 ww.marcobeveragesystems.com UK Tel: +44 (0207) 2744577 1000762#, 763#, 764#, 765#, 766#, 1762#, 1763# Service Manual for REVIEW...
-
Page 2: Table Of Contents
CONTENTS: 1. INTRODUCTION ..........................3 2. SAFETY INSTRUCTIONS ........................3 3. SPECIFICATIONS ..........................4 4. INSTALLATION ..........................5 MT Boiler Installation .........................5 Filter Installation ..........................7 5. BOILER SETUP ..........................8 Operating Boiler for the First Time .....................8 6. OVERVIEW & OPERATION ......................9 MT Boiler Operation ...........................9 MT Dual Tap Boiler Operation ...................... -
Page 3: Introduction
1. INTRODUCTION The information provided in this manual is intended to assist in the installation and maintenance of the Marco Mix Boiler range. Please read the instructions carefully to prevent accidents and ensure an efficient installation. This manual is not a substitute for any safety instructions or technical data affixed to the machine or its packaging. -
Page 4: Specifications
3. SPECIFICATIONS BOILERS: MT4 – MT8 – MT8DT – MT25 – MT30 – 1000762# 1000763# 1000764# 1000765# 1000766# 1001762# 1001763# Immediate Draw Off (L) Performance Total Hourly output (L/hr) Earthed Mains Plug to IEC 230V (UK – BS1363) Mains Connection (EU –... -
Page 5: Installation
4. INSTALLATION 4.1 MT Boiler Installation Electrical Installation: When installing the machine, always observe the local regulations and standards. The appliance is supplied with a moulded power cord. A suitable mains power supply socket should be available within easy access of the appliance so that it can be disconnected easily after install. Plumbing Installation: •... - Page 6 4.1 MT Boiler Installation (cont.) 1000762#, 763#, 764#, 765#, 766#, 1762#, 1763# Service Manual for REVIEW Page 6 of 33...
-
Page 7: Filter Installation
4.2 Filter Installation Machine P/N: (1000763F#) 1000762#, 763#, 764#, 765#, 766#, 1762#, 1763# Service Manual for REVIEW Page 7 of 33... -
Page 8: Boiler Setup
5. BOILER SETUP 5.1 Operating Boiler for the First Time • Check that all installation procedures have been carried out. • Ensure water valve is connected and turned on. • Plug in the IEC connector to the boiler. • On models with a filter, connect the filter. •... -
Page 9: Overview & Operation
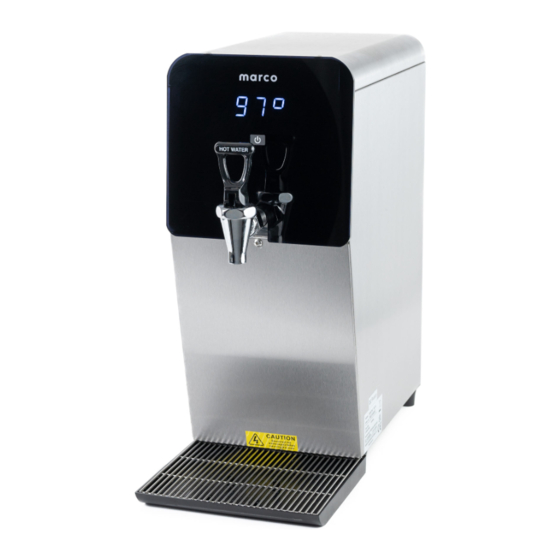
6. OVERVIEW & OPERATION 6.1 MT Boiler Operation 1000762#, 763#, 764#, 765#, 766#, 1762#, 1763# Service Manual for REVIEW Page 9 of 33... -
Page 10: Mt Dual Tap Boiler Operation
6.2 MT Dual Tap Boiler Operation Machine P/N: (1000764#) 1000762#, 763#, 764#, 765#, 766#, 1762#, 1763# Service Manual for REVIEW Page 10 of 33... - Page 11 6.2 MT Dual Tap Boiler Operation (cont.) 1000762#, 763#, 764#, 765#, 766#, 1762#, 1763# Service Manual for REVIEW Page 11 of 33...
-
Page 12: Service Set Up
7. SERVICE SET UP 7.1 Changing Temperature 1000762#, 763#, 764#, 765#, 766#, 1762#, 1763# Service Manual for REVIEW Page 12 of 33... -
Page 13: Filter Mode
7.2 Filter Mode Machine P/N: (1000763F#) 1000762#, 763#, 764#, 765#, 766#, 1762#, 1763# Service Manual for REVIEW Page 13 of 33... -
Page 14: Changing From Celsius To Fahrenheit
7.3 Changing from Celsius to Fahrenheit 1000762#, 763#, 764#, 765#, 766#, 1762#, 1763# Service Manual for REVIEW Page 14 of 33... -
Page 15: Heat Fill Selection
7.4 Heat Fill Selection 1000762#, 763#, 764#, 765#, 766#, 1762#, 1763# Service Manual for REVIEW Page 15 of 33... -
Page 16: Power Selection
7.5 Power Selection. 1000762#, 763#, 764#, 765#, 766#, 1762#, 1763# Service Manual for REVIEW Page 16 of 33... -
Page 17: Routine Maintainence/Internal Access
8. ROUTINE MAINTAINENCE/INTERNAL ACCESS Maintenance should be carried out by Marco approved technicians only. 8.1 Top Lid Removal 1. Remove the screws in the top lid with a suitable cross headed screwdriver. 2. Push Top Lid backwards and lift it up. -
Page 18: Draining The Tank
8.3 Draining the tank 1. Turn off machine and disconnect from mains power. 2. Allow to cool sufficiently to avoid burn risk. 3. Place machine so that the tap of the machine is located next to a sink or a bucket large enough to hold the full contents of the tank. -
Page 19: Dispense Tap Removal
8.5 Dispense Tap removal To remove the dispense tap in any Tap version boiler: (CAUTION - make sure tank is drained fully first as per section 8.3!) 1. Loosen Tap retaining nut by turning clockwise. 2. When tightening the nut, the tap should be gripped and held in place. Tap retaining nut 8.6 Heater Element Removal 1. - Page 20 8.6 Heater Element Removal (cont.) 7. Rotate the heater element upwards up to the stage when it will go above the Thermistor Pocket. 8. Rotate it to the vertical position. 9. Rotate it to the stage when it will be possible to pull it out from the tank. 1000762#, 763#, 764#, 765#, 766#, 1762#, 1763# Service Manual for REVIEW Page 20 of 33...
-
Page 21: Level Probes - Cleaning & Replacement
8.7 Level Probes - Cleaning & replacement There are 2 probes (low level, high level) on the MT Boiler range. 1. Turn off machine and disconnect from mains power. 2. Drain the tank as per section 8.3. 3. Remove Top Lid, Inner Lid & Plastic Front Panel as per sections 8.1, 8.6 and 8.6. 4. -
Page 22: Triac Replacement
8.8 Triac Replacement 1. Turn off machine and disconnect from mains power. 2. Remove Lower Front Panel as per sections 8.2. 3. Disconnect all wires to the Triac – making note of the correct wiring terminal connections. 4. Undo two retaining screws as located in the picture below. Correct triac wiring (as per wiring diagrams): 1000762#, 763#, 764#, 765#, 766#, 1762#, 1763# Service Manual for REVIEW Page 22 of 33... -
Page 23: Inlet Solenoid Replacement
8.9 Inlet solenoid Replacement 1. Turn off machine and disconnect from mains power. 2. Drain the tank as per section 8.3. 3. Remove Lower Front Panel as per sections 8.2. Inlet solenoid will vary 4. Disconnect all wires and hoses to the inlet solenoid. 5. -
Page 24: Scaling The Tank
8.10 De-scaling the tank 1. Disconnect machine from mains power and water supply. 2. Allow to cool sufficiently to avoid burn risk. 3. Remove Top Lid & Inner Lid as per sections 8.1 and 8.4 4. Dispense enough water from the boiler that will be replaced by the descale solution, through the dispense tap. -
Page 25: Diagnostics
9. DIAGNOSTICS The screen of the boiler indicates various errors or problems with the machine. See diagnostic table below for further details. 1000762#, 763#, 764#, 765#, 766#, 1762#, 1763# Service Manual for REVIEW Page 25 of 33... -
Page 26: Electrical Schematics
10. ELECTRICAL SCHEMATICS 10.1 Wiring Diagram - 1000762#, 763#, 764#, 1001762#, 1001763#. 1000762#, 763#, 764#, 765#, 766#, 1762#, 1763# Service Manual for REVIEW Page 26 of 33... - Page 27 10.1 Wiring Diagram (cont.) – 1000765# 1000762#, 763#, 764#, 765#, 766#, 1762#, 1763# Service Manual for REVIEW Page 27 of 33...
- Page 28 10.1 Wiring Diagram (cont.) – 1000766# 1000762#, 763#, 764#, 765#, 766#, 1762#, 1763# Service Manual for REVIEW Page 28 of 33...
-
Page 29: Part Diagrams & Lists
11. PART DIAGRAMS & LISTS 11.1 MT4, MT8, MT8F parts - 1000762#, 1762#, 763#, 1763#, 763F#. 1000762#, 763#, 764#, 765#, 766#, 1762#, 1763# Service Manual for REVIEW Page 29 of 33... -
Page 30: Mt8Dt Parts
11.2 MT8DT parts - 1000764#. 1000762#, 763#, 764#, 765#, 766#, 1762#, 1763# Service Manual for REVIEW Page 30 of 33... -
Page 31: Mt25 Parts
11.3 MT25 parts - 1000765#. 1000762#, 763#, 764#, 765#, 766#, 1762#, 1763# Service Manual for REVIEW Page 31 of 33... -
Page 32: Mt30 Parts
11.4 MT30 parts - 1000766#. 1000762#, 763#, 764#, 765#, 766#, 1762#, 1763# Service Manual for REVIEW Page 32 of 33... - Page 33 MARCO is an ISO9001:2000 Registered Company. 1000762#, 763#, 764#, 765#, 766#, 1762#, 1763# Service Manual for REVIEW Page 33 of 33...
Need help?
Do you have a question about the MT Series and is the answer not in the manual?
Questions and answers
hi error E1 is coming up on counter top water boiler, can you help clarify meaning