Table of Contents
Advertisement
Advertisement
Table of Contents

Related Manuals for Marco MIX Series


Summary of Contents for Marco MIX Series
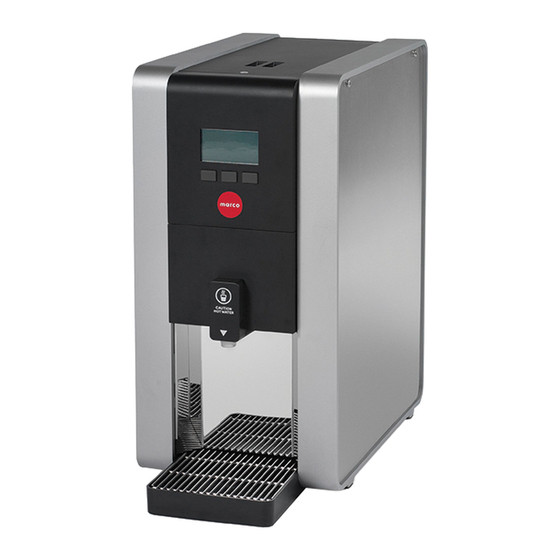
- Page 1 MIX Boiler & Font Range – Service Manual 1000870# 1000871# 1000875# 1000880# 1000887# 1000878 1000879 2300268 Ireland Tel: +353 (1) 295 2674 www.marcobeveragesystems.com UK Tel: +44 (0207) 2744577 1000870,871,875,878,879,880,887 MIX Service Manual.b Page 1 of 69...
-
Page 2: Table Of Contents
CONTENTS: 1. Introduction …………………………………………………………………………………………………………………… 2. Safety Instructions …………………………………………………………………………………………………………. 3. Specifications …………………………………………………………………………………………………………………. 4. Installation …………………………………………………………………………………………………………………….. 4.1 Mix Boiler Installation ……………….……………………………………………………………………….….. 4.2 Mix Font Installation ……………………………………………………………………………….…………….. 5. Boiler Setup .………..………………………………………………………………………………………………………… 6. Overview & Operation ……………………………………………………………………………………………………. 6.1 PB versions – Multi-temp …………………..………………………………………………….………………. 6.2 PB versions – single-temp …………………………………………………………………………..………….. 6.3 Tap versions …………………………………………………………………………………………………………. -
Page 3: Introduction
1. INTRODUCTION The information provided in this manual is intended to assist in the installation and maintenance of the Marco Mix Boiler range. Please read the instructions carefully to prevent accidents and ensure an efficient installation. This manual is not a substitute for any safety instructions or technical data affixed to the machine or its packaging. -
Page 4: Specifications
3. SPECIFICATIONS BOILERS: MIX PB3 - MIX T8 – MIX PB8 – MIX UC3 - MIX UC8 – 1000870 1000871 1000875 1000880 1000887 Immediate Draw Off (L) Performance Total Hourly output (L/hr) Earthed Mains Plug to IEC 230vac (UK – 3-Pin Plug, BS1363) Mains Connection (EU –... -
Page 5: Installation
4. INSTALLATION 4.1 Mix Boiler Installation Electrical Installation: • Electrical specification: 2.8kW-230VAC-50/60Hz • A moulded 13A IEC power cord is provided. This should be plugged into the IEC connection on the rear of the boiler and plugged into a suitable 13A power outlet. •... - Page 6 4.1 Mix Boiler Installation (cont.) 1000870,871,875,878,879,880,887 MIX Service Manual.b Page 6 of 69...
-
Page 7: Mix Font Installation
4.2 Mix Font Installation 1000870,871,875,878,879,880,887 MIX Service Manual.b Page 7 of 69... - Page 8 4.2 Mix Font Installation (cont.) 1000870,871,875,878,879,880,887 MIX Service Manual.b Page 8 of 69...
- Page 9 4.2 Mix Font Installation (cont.) 1000870,871,875,878,879,880,887 MIX Service Manual.b Page 9 of 69...
- Page 10 4.2 Mix Font Installation (cont.) 1000870,871,875,878,879,880,887 MIX Service Manual.b Page 10 of 69...
-
Page 11: Boiler Setup
5. BOILER SETUP 5.1 Operating Boiler for the First Time • Check that all installation procedures have been carried out. • Ensure water valve is on. • Plug boiler into suitable socket. • Turn on the power switch. • The “wait” progress circle will be visible on the screen and the machine will fill to a safe level, above the elements, before heating. -
Page 12: Overview & Operation
6. OVERVIEW & OPERATION 6.1 PB Boiler – Multi-temp Operation 1000870,871,875,878,879,880,887 MIX Service Manual.b Page 12 of 69... - Page 13 6.1 PB Boiler – Multi-temp Operation (cont.) 1000870,871,875,878,879,880,887 MIX Service Manual.b Page 13 of 69...
-
Page 14: Pb Versions - Single-Temp
6.2 PB Boiler – Single Temp Operation 1000870,871,875,878,879,880,887 MIX Service Manual.b Page 14 of 69... - Page 15 6.2 PB Boiler – Single Temp Operation (cont.) 1000870,871,875,878,879,880,887 MIX Service Manual.b Page 15 of 69...
-
Page 16: Tap Versions
6.2 Tap Boiler – Operation 1000870,871,875,878,879,880,887 MIX Service Manual.b Page 16 of 69... - Page 17 6.2 Tap Boiler – Operation (cont.) 1000870,871,875,878,879,880,887 MIX Service Manual.b Page 17 of 69...
- Page 18 6.3 UC Boiler – Operation 1000870,871,875,878,879,880,887 MIX Service Manual.b Page 18 of 69...
- Page 19 6.3 UC Boiler – Operation (cont.) 1000870,871,875,878,879,880,887 MIX Service Manual.b Page 19 of 69...
-
Page 20: Mix Font
6.4 Mix Font – Operation 1000870,871,875,878,879,880,887 MIX Service Manual.b Page 20 of 69... -
Page 21: Uc Versions
7. MENU NAVIGATION There are 3 menu ‘levels’ to the Mix Boiler settings. Level 1 – User Settings Level 2 – Advanced Settings Level 3 – Engineering Settings Enter by pressing all 3 Enter by pressing all 3 Enter by pressing all 3 buttons simultaneously buttons simultaneously buttons simultaneously... -
Page 22: Advanced Settings
7.2 Advanced Settings (Hold all 3 buttons simultaneously for >3 <6 seconds) Screen 1 Screen 2 Setting Options Descale Weeks OFF, 1-60 weeks – When set to a week period, a message will appear on screen to descale after that time period has elapsed. Filter Litres OFF, 500 –... - Page 23 7.2 Advanced Settings (cont.) 1000870,871,875,878,879,880,887 MIX Service Manual.b Page 23 of 69...
-
Page 24: Engineering Settings
7.3 Engineering Settings (Hold all 3 buttons simultaneously for >6 seconds) The options available in the Engineering settings are usually only required during factory assembly and are mainly related to the functionality of the multi-temp software control. In the instance where some install locations differ wildly from normal (eg extremely hot or cold incoming mains water), or if a component such as a PCB or inlet solenoid has been changed, this set of options will allow for corrections to be made so that the control software functions properly. -
Page 25: Dispense Calibration
7.4 Dispense Calibration Procedure (in Engineering Settings) The Dispense Calibration procedure should only be run if the machine has had major component change, such as PCB or inlet solenoid that requires calibration settings to be re-done. 1. Default settings for a PB3. Press Go! 2. -
Page 26: Routine Maintenance/Internal Access
8. ROUTINE MAINTAINENCE/INTERNAL ACCESS Maintenance should be carried out by Marco approved technicians only. 8.1 Top Lid Removal: 1. Remove the screw in the top lid with a suitable slotted screwdriver. 2. Rotate lid from the front edge upwards and remove. -
Page 27: Draining The Tank
8.3 Draining the tank: 1. Turn off machine and disconnect from mains power. 2. Allow to cool sufficiently to avoid burn risk. 3. Place machine so that the rear of the machine is located next to a sink or a bucket large enough to hold the full contents of the tank. -
Page 28: Pcb Replacement
8.4 PCB replacement: 1. Remove Top Lid & Side panels as per sections 8.1 and 8.2. 2. Disconnect all wiring connected to the PCB. 3. Remove two cross headed screws with a suitable screwdriver shown in the picture below. 4. Pull Upper front Fascia Panel upwards to remove from the machine. 5. -
Page 29: Dispense Solenoid Or Pump Replacement
8.5 Dispense Solenoid or Pump replacement: 1. Remove Upper Fascia Panel as per section 8.4. 2. Undo 4 retaining screws as shown in picture below. 3. Then pull the plastic panel directly outwards from the machine. (For PB versions, push the silicone dispense nozzle through the hole –... -
Page 30: Dispense Tap Removal
To disconnect a pump in a UC version: (CAUTION - make sure tank is drained fully first as per section 8.3!) 1. Disconnect all wires connected to the pump 2. Pull the silicone hose off the outlet side of the pump. 3. -
Page 31: Tank Lid Sub-Assembly Removal
8.7 Tank Lid Sub-Assembly Removal To remove the Tank Lid sub-assembly (with element, thermistor & level probes attached): 1. Disconnect machine from mains power and allow to cool! 2. Remove Outer Lid as per section 8.1 and right hand side panel as per section 8.2. 3. - Page 32 6. Once the heater element is just over half way out of the tank, start to angle the sub-assembly towards the rear of the machine, and begin to pull the forward bent section of the heating element out of the tank opening. 7.
-
Page 33: Heater Element Removal
8.8. Heater Element Removal 1. Remove Tank Lid sub-assembly as per section 8.6 2. Undo the two 18mm lock nuts and slide the heater element tabs through the holes in the lid. 8.9 Thermistor & Level Probes - Cleaning & replacement There are 3 probes (low level, high level and descale/overflow) on the Mix Boiler range. -
Page 34: Triac Replacement
8.10 Triac Replacement 1. Disconnect the machine from mains power. 2. Remove the left hand side panel as per section 8.2. 3. Disconnect all wires to the Triac – making note of the correct wiring terminal connections 4. Undo two retaining screws as located in the picture below. Correct triac wiring (as per wiring diagrams): 1000870,871,875,878,879,880,887 MIX Service Manual.b Page 34 of 69... -
Page 35: Inlet Solenoid Replacement
8.11 Inlet solenoid Replacement 1. Disconnect machine from mains power and allow to cool completely. 2. Drain tank fully as per section 8.3. 3. Remove right hand side panel as per section 8.2 4. Disconnect all wires and hoses to the inlet solenoid. 5. -
Page 36: Pump Power Supply (Uc Versions Only)
8.12 Pump Power Supply (UC versions only) The power supply for the pump is mounted underneath the Tank Support. There are two possible versions of power supply fitted in slightly different locations. Power supply 1 is fitted to UC3’s with serial number <0517xxxxxx. Power supply 2 is fitted to UC3’s with serial number >0517xxxxxx. -
Page 37: Descaling The Tank
8.13 De-scaling the tank: Descaling the tank in the Mix range is a little different to other water boilers as the boiler now includes a collapsible funnel for pouring in the pre-mixed descale solution. 1. Disconnect machine from mains power supply and water supply. 2. -
Page 38: Changing The Filter
8.14 Changing the Filter: 1000870,871,875,878,879,880,887 MIX Service Manual.b Page 38 of 69... -
Page 39: Diagnostics/Trouble Shooting
9. DIAGNOSTICS TROUBLESHOOTING – DIAGNOSTIC GUIDE: 1000870,871,875,878,879,880,887 MIX Service Manual.b Page 39 of 69... -
Page 40: Electrical Schematics
10. ELECTRICAL SCHEMATICS 10.1 Wiring Diagram - PB Versions 1000870,871,875,878,879,880,887 MIX Service Manual.b Page 40 of 69... - Page 41 10.2 Wiring Diagram - Tap Versions 1000870,871,875,878,879,880,887 MIX Service Manual.b Page 41 of 69...
- Page 42 10.3 Wiring Diagram - UC Versions 1000870,871,875,878,879,880,887 MIX Service Manual.b Page 42 of 69...
-
Page 43: Exploded Parts Drawings And Parts List
10.4 Mix UC3 UC8 DIN Wiring Harness (1500145) 1000870,871,875,878,879,880,887 MIX Service Manual.b Page 43 of 69... - Page 44 11. PART DIAGRAMS & LISTS 11.1 Mix PB3 parts 1000870,871,875,878,879,880,887 MIX Service Manual.b Page 44 of 69...
- Page 45 11.1 Mix PB3 parts (cont.) 1000870,871,875,878,879,880,887 MIX Service Manual.b Page 45 of 69...
- Page 46 11.1 Mix PB3 parts (cont.) 1000870,871,875,878,879,880,887 MIX Service Manual.b Page 46 of 69...
- Page 47 11.1 Mix PB3 parts (cont.) 1000870,871,875,878,879,880,887 MIX Service Manual.b Page 47 of 69...
- Page 48 11.2 Mix T8 parts 1000870,871,875,878,879,880,887 MIX Service Manual.b Page 48 of 69...
- Page 49 11.2 Mix T8 parts (cont.) 1000870,871,875,878,879,880,887 MIX Service Manual.b Page 49 of 69...
- Page 50 11.2 Mix T8 parts (cont.) 1000870,871,875,878,879,880,887 MIX Service Manual.b Page 50 of 69...
- Page 51 11.2 Mix T8 parts (cont.) 1000870,871,875,878,879,880,887 MIX Service Manual.b Page 51 of 69...
- Page 52 11.3 Mix PB8 parts 1000870,871,875,878,879,880,887 MIX Service Manual.b Page 52 of 69...
- Page 53 11.3 Mix PB8 parts (cont.) 1000870,871,875,878,879,880,887 MIX Service Manual.b Page 53 of 69...
- Page 54 11.3 Mix PB8 parts (cont.) 1000870,871,875,878,879,880,887 MIX Service Manual.b Page 54 of 69...
- Page 55 11.3 Mix PB8 parts (cont.) 1000870,871,875,878,879,880,887 MIX Service Manual.b Page 55 of 69...
- Page 56 11.4 Mix UC3 parts 1000870,871,875,878,879,880,887 MIX Service Manual.b Page 56 of 69...
- Page 57 11.4 Mix UC3 parts (cont.) 1000870,871,875,878,879,880,887 MIX Service Manual.b Page 57 of 69...
- Page 58 11.4 Mix UC3 parts (cont.) 1000870,871,875,878,879,880,887 MIX Service Manual.b Page 58 of 69...
- Page 59 11.4 Mix UC3 parts (cont.) 1000870,871,875,878,879,880,887 MIX Service Manual.b Page 59 of 69...
- Page 60 11.5 Mix UC8 parts (cont.) 1000870,871,875,878,879,880,887 MIX Service Manual.b Page 60 of 69...
- Page 61 11.5 Mix UC8 parts (cont.) 1000870,871,875,878,879,880,887 MIX Service Manual.b Page 61 of 69...
- Page 62 11.5 Mix UC8 parts (cont.) 1000870,871,875,878,879,880,887 MIX Service Manual.b Page 62 of 69...
- Page 63 11.5 Mix UC8 parts (cont.) 1000870,871,875,878,879,880,887 MIX Service Manual.b Page 63 of 69...
- Page 64 1000870,871,875,878,879,880,887 MIX Service Manual.b Page 64 of 69...
- Page 65 11.6 Mix Font – 3 Button 1000870,871,875,878,879,880,887 MIX Service Manual.b Page 65 of 69...
- Page 66 11.6 Mix Font – 3 Button (cont.) 1000870,871,875,878,879,880,887 MIX Service Manual.b Page 66 of 69...
- Page 67 11.7 Mix Font – 1 Button 1000870,871,875,878,879,880,887 MIX Service Manual.b Page 67 of 69...
- Page 68 11.7 Mix Font – 1 Button (cont.) 1000870,871,875,878,879,880,887 MIX Service Manual.b Page 68 of 69...
- Page 69 MARCO is an ISO9001:2000 Registered Company. 1000870,871,875,878,879,880,887 MIX Service Manual.b Page 69 of 69...
Need help?
Do you have a question about the MIX Series and is the answer not in the manual?
Questions and answers