Table of Contents
Advertisement
Available languages
Available languages
Quick Links
8
TREADMILL OWNER'S MANUAL
MANUEL DU PROPRIÉTAIRE DU TAPIS ROULANT
MANUAL DEL PROPIETARIO DE LA CAMINADORA
Read the TREADMILL GUIDE before using this OWNER'S MANUAL.
Lire le GUIDE D'UTILISATION DU TAPIS ROULANT avant de se référer au présent MANUEL DU PROPRIÉTAIRE.
Lea la GUÍA DE LA CAMINADORA antes de utilizar este MANUAL DEL PROPIETARIO.
Advertisement
Table of Contents

Related Manuals for Horizon Fitness 7.8AT


Summary of Contents for Horizon Fitness 7.8AT
- Page 1 TREADMILL OWNER’S MANUAL MANUEL DU PROPRIÉTAIRE DU TAPIS ROULANT MANUAL DEL PROPIETARIO DE LA CAMINADORA Read the TREADMILL GUIDE before using this OWNER’S MANUAL. Lire le GUIDE D’UTILISATION DU TAPIS ROULANT avant de se référer au présent MANUEL DU PROPRIÉTAIRE. Lea la GUÍA DE LA CAMINADORA antes de utilizar este MANUAL DEL PROPIETARIO.
- Page 2 ENGLISH FRANÇAIS ESPAÑOL...
-
Page 3: Important Precautions
IMPORTANT PRECAUTIONS SAVE THESE INSTRUCTIONS When using an electrical product, basic precautions should always be followed, including the following: Read all instructions before assembly or use of this treadmill. It is the responsibility of the owner to ensure that all users of this treadmill are adequately informed of all warnings and precautions. - Page 4 DANGER TO REDUCE THE RISK OF ELECTRICAL SHOCK: Always unplug the equipment from the electrical outlet before cleaning, performing maintenance and putting on or taking off parts. WARNING TO REDUCE THE RISK OF BURNS, FIRE, ELECTRICAL SHOCK OR INJURY TO PERSONS: •...
- Page 5 WARNING TO REDUCE THE RISK OF BURNS, FIRE, ELECTRICAL SHOCK OR INJURY TO PERSONS: • Keep power cord away from heated surfaces. Do not pull on this power cord or apply any mechanical loads to this cord. • Do not remove any protective covers unless instructed by Customer Technical Support. Service should only be done by an authorized service a technician.
-
Page 6: Grounding Instructions
GROUNDING INSTRUCTIONS This product must be grounded. If a treadmill should malfunction or breakdown, grounding provides a path of least resistance for electrical current to reduce the risk of electrical shock. This product is equipped with a cord having an equipment-grounding conductor and a grounding plug. -
Page 7: Serial Number Location
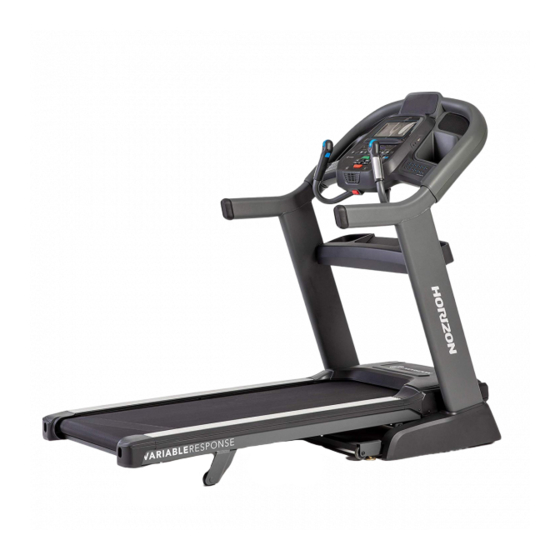
ENTER YOUR SERIAL NUMBER AND MODEL NAME IN THE BOXES BELOW: SERIAL NUMBER LOCATION » Refer to the SERIAL NUMBER and MODEL NAME when calling for service. SERIAL NUMBER: HORIZON 7.8AT TREADMILL MODEL NAME:... - Page 8 TABLET/READING RACK SPEAKERS CONTROL PANEL AND DISPLAY WINDOWS CONSOLE FAN WATER BOTTLE HOLDER SAFETY KEY PLACEMENT CONSOLE CONSOLE MAST PULSE RATE GRIPS STORAGE TRAY CROSS SUPPORT BAR MAST COVERS ON/OFF SWITCH POWER CORD FOOT LATCH (UNDERNEATH DECK) MOTOR COVER RUNNING BELT/RUNNING DECK SIDE RAIL BASE FRAME RED TRANSPORT CABLE...
-
Page 9: Tools Included
TOOLS INCLUDED: WARNING FAILURE TO FOLLOW THESE INSTRUCTIONS COULD RESULT IN INJURY! 8 mm T-Wrench 6 mm L-Wrench WARNING 5 mm L-Wrench PARTS INCLUDED: DO NOT ATTEMPT TO LIFT THE TREADMILL! Do not move or lift treadmill from packaging until specified to do so in the assembly instructions. You may remove the plastic wrap from console masts. - Page 10 ASSEMBLY STEP- UNPACKING BANDING STRAP RED TRANSPORT BASE FRAME CABLE RED TRANSPORT CABLE RED TRANSPORT CABLE (LEFT & RIGHT SIDES) DECK FRAME WARNING Place the treadmill carton on a level flat surface with the bottom of the box on the ground. Cut banding straps on outside of box and remove box lid.
-
Page 11: Assembly Step
ASSEMBLY STEP 1 1.1 Open HARDWARE FOR STEP 1. HARDWARE FOR STEP 1 1.2 Insert UPRIGHT GUIDE BOLT (A) into MAIN FRAME PART TYPE DESCRIPTION BRACKET (1) and fully tighten. UPRIGHT GUIDE BOLT M8X1.25PX11L MAST BOLT M8X1.25PX80L NOTE: Do not fully tighten the following bolts until the 8.4X15.5X1.6T end of ASSEMBLY STEP 4. - Page 12 ASSEMBLY STEP 2 2.1 Open HARDWARE FOR STEP 2. HARDWARE FOR STEP 2 PART TYPE DESCRIPTION 2.2 Have someone help hold the console while attaching the CONSOLE CABLE (2). Use the lead wire to ARC WASHER 8.2x18x1.5T carefully pull the CONSOLE CABLE (2) out of the SHORT BOLT M8x1.25Px15L RIGHT CONSOLE MAST (4).
- Page 13 ASSEMBLY STEP 3 3.1 Open HARDWARE FOR STEP 3. HARDWARE FOR STEP 3 PART TYPE DESCRIPTION 3.2 Attach RIGHT SIDE PULSE RATE GRIP (8) BOLT M8X1.25X15L to the underside of the CONSOLE (6) using 4 BOLTS (I), 4 SPRING WASHERS (J) and SPRING WASHER 8.2X15.4X2.0T 4 FLAT WASHERS (K).
- Page 14 ASSEMBLY STEP 4 4.1 Open HARDWARE FOR STEP 4. HARDWARE FOR STEP 4 PART TYPE DESCRIPTION 4.2 Attach CROSS SUPPORT BAR (5) using holes on BOLT M6X1.0PX12L UPRIGHT MASTS (4) with 4 BOLTS (E). 4.3 Attach STORAGE TRAY (10) to the CROSS SUPPORT BAR (5) using holes on CROSS SUPPORT BAR (5) with remaining 2 BOLTS (E).
- Page 15 ASSEMBLY STEP 5 5.1 Open HARDWARE FOR STEP 5. HARDWARE FOR STEP 5 PART TYPE DESCRIPTION 5.2 Slide RIGHT SIDE MAST COVER (11) SCREW M4X1.0PX15L onto the RIGHT SIDE MAST (4) by aliging tabs on RIGHT SIDE MAST COVER (11) with slots on RIGHT SIDE MAST (4).
- Page 16 ASSEMBLY STEP 6 - REMOVAL OF RED TRANSPORT CABLES WARNING FAILURE TO FOLLOW THESE INSTRUCTIONS COULD RESULT IN INJURY! Once the red transport cables have been detached from the treadmill, high pressure springs can cause the lower base frame to spring open. NEVER tip treadmill upside-down or on its side, and NEVER lift this unit if red transport cables are not connecting the upper deck frame to the lower base frame.
- Page 17 ASSEMBLY STEP 7 - MOVING TREADMILL 7.1 To move, make sure the treadmill is folded and securely latched. Then firmly grasp the handlebars, tilt the treadmill back (1) and roll (2). 7.2 Move treadmill off flattened box and into its final position, ready for use.
-
Page 19: Treadmill Operation
TREADMILL OPERATION This section explains how to use your treadmill’s console and programming. The BASIC OPERATION section in the TREADMILL GUIDE has instructions for the following: • LOCATION OF THE TREADMILL • USING THE SAFETY KEY • FOLDING THE TREADMILL •... -
Page 21: Console Operation
CONSOLE OPERATION Note: There is a thin protective sheet of clear plastic on the overlay of the console that should be removed before use. A) LCD DISPLAY WINDOW: See detailed description on page 18. B) LED DISPLAY: Time/Count Down, Speed/Incline, Distance/Pace, Calories/Heart Rate. C) WORKOUT LED INDICATORS: indicates what workout is set for the current program. -
Page 22: Display Window
SECOND TIMER TIMER DIAL SPRINT 8 NOTIFICATION CENTER BRICKYARD TEXT NOTIFICATION AREA DISPLAY WINDOW • SECOND TIMER: The timer counts up to 60 seconds in all programs except Sprint 8. In Sprint 8, the timer will count up or down depending upon the segment of the program you are in. •... -
Page 23: Getting Started
GETTING STARTED 1) Check to make sure no objects are placed on the belt that will hinder the movement of the treadmill. 2) Plug in the power cord and turn the treadmill ON. (The ON/OFF switch is next to the power cord.) 3) Stand on the side rails of the treadmill. - Page 24 INCLINE SCROLL WHEEL SPEED SCROLL WHEEL Roll forward/backward to increase/decrease incline. Roll forward/backward to increase/decrease speed INTERVAL BUTTON 1 INTERVAL BUTTON 2 HOW TO PROGRAM AND USE CUSTOM INTERVAL BUTTONS The programmable interval buttons located on the pulse rate grips are designed to help you customize this machine to match whatever workout you like to do the most.
- Page 25 WORKOUT PROFILES MANUAL: Control everything about your workout – from start to finish. This program is a basic workout with no pre-defined settings, allowing you to manually adjust the machine at any time. It begins with an incline at 0 and speed at 0.5 mph. HILL CLIMB: Simulates a hill ascent and descent.
- Page 26 MY FIRST 5K: This 9-week program is intended for inexperienced runners looking to run their first 5k or simply begin an exercise routine. It is designed specifically to keep you motivated and engaged, gradually building your strength, increasing your stamina and giving you the confidence it takes to complete your first 5k.
- Page 27 FAT BURN: Relatively slow and steady is the name of the game to maximize your weight-loss goals. Promotes weight loss by increasing and decreasing the speed and incline, while keeping you in your fat burning zone. Speed and Incline changes, segments repeat every 30 seconds. Segment Warm Up Time...
- Page 28 TARGET PROFILES DISTANCE: Push yourself and go further during your workout with 13 distance workouts. Choose from 1 mile, 2 miles, 5k, 5 miles, 10k, 8 miles, 15k, 10 miles, 20k, half marathon, 15 miles, 20 miles, and marathon goals. You set your level. Incline changes and all segments are 0.1 miles.
- Page 29 TARGET HEART RATE: This program is designed for you to improve your overall cardiovascular fitness levels. You simply set your target heart rate. The program will then monitor and adjust the intensity level to maintain your heart rate within your targeted range while you exercise – a proven method to maximize your weight loss and fitness goals. A chest strap is required and must be worn during the duration of this program.
- Page 30 CUSTOM HEART RATE: This program allows you to set your Heart Rate for a specified time. The program will adjust incline to keep your Heart Rate in your target zone. Build multiple Heart Rate targets into a full program to help you reach your cardiovascular goals.
-
Page 31: Finishing Your Workout
You will need to ensure that your wireless heart rate monitoring device is Bluetooth 4.0 compatible and is also “open” to sharing data. Non-“open” or “closed” devices typically only share data with their proprietary apps. The 7.8AT needs an “open” device to receive data from the device. - Page 32 CONNECTING VIA BLUETOOTH 4.0LE 1) Check to ensure that your music device is Bluetooth 4.0 compatible 2) Go into your device’s Bluetooth settings and scan for devices. 3) On your music device, locate the Bluetooth device list. Select your treadmill or elliptical unit that appears on this list. Wait for your music device to finish pairing with the unit.
-
Page 33: Limited Home-Use Warranty
LIMITED HOME-USE WARRANTY... -
Page 34: Exclusions And Limitations
Horizon Fitness or by fire, flood, wind, lightning, freezing, or other natural disasters one of its certified technicians before a replacement motor will of any kind, power reduction, fluctuation or failure from be authorized under warranty. - Page 35 • All returns must be pre-authorized by Horizon Fitness. • Equipment owned or operated outside the US and Canada. • Horizon Fitness’ obligation under this warranty is limited to replacing or repairing, at Horizon Fitness’ option, the same or • Delivery, assembly, installation, setup for original or comparable model.
- Page 36 FRANÇAIS...
-
Page 37: Précautions Importantes
PRÉCAUTIONS IMPORTANTES CONSERVEZ CES INSTRUCTIONS Lors de l’utilisation d’un produit électrique, des précautions de base doivent toujours être prises, notamment la suivante : Lisez toutes les instructions avant de procéder au montage ou d’utiliser cet appareil. Il relève de la responsabilité du propriétaire de s’assurer que tous les utilisateurs de ce tapis roulant sont suffisamment informés de tous les avertissements et précautions. - Page 38 DANGER POUR RÉDUIRE LE RISQUE DE DÉCHARGES ÉLECTRIQUES : Débranchez toujours l’équipement de la prise électrique avant de le nettoyer, d’en effectuer l’entretien ou d’installer ou retirer des pièces. AVERTISSEMENT POUR RÉDUIRE LES RISQUES DE BRÛLURES, D’INCENDIE, DE DÉCHARGES ÉLECTRIQUES ET DE BLESSURES : •...
- Page 39 AVERTISSEMENT PARA REDUCIR EL RIESGO DE QUEMADURAS, INCENDIOS, DESCARGAS ELÉCTRICAS O LESIONES A LAS PERSONAS: • Mantenga el cable de alimentación alejado de superficies calientes. No hale ni tensione el cable de alimentación. • No retire ninguna cubierta protectora a menos que se lo indique Asistencia Técnica al Cliente. El servicio solo debe ser realizado por un técnico de servicio autorizado.
- Page 40 INSTRUCTIONS DE LA MISE À LA TERRE Ce produit doit être mis à la terre. En cas de dysfonctionnement ou de panne, la mise à la terre fournit un chemin de moindre résistance au courant électrique afin de réduire le risque de choc électrique. Ce produit est équipé d'un cordon muni d'un conducteur de mise à la terre de l'équipement et d'une prise de terre.
-
Page 41: Montage
ENTREZ VOTRE NUMÉRO DE SÉRIE ET VOTRE NOM DE MODÈLE DANS LES CASES CI-DESSOUS : EMPLACEMENT DU NUMÉRO DE SÉRIE » Référez-vous au NUMÉRO DE SÉRIE et au NOM DE MODÈLE lorsque vous appelez le service. NUMÉRO DE SÉRIE : TAPIS DE COURSE HORIZON 7.8AT NOM DU MODÈLE :... - Page 42 TABLETTE / SUPPORT DE LECTURE HAUT-PARLEURS PANNEAU DE COMMANDE ET FENÊTRES D’AFFICHAGE VENTILATEUR DE CONSOLE PORTE-BIDON PLACEMENT DE LA CLÉ DE SÉCURITÉ CONSOLE MÂT DE CONSOLE CAPTEUR DE POULS PLATEAU DE RANGEMENT BARRE DE SUPPORT TRANSVERSALE COUVERCLES DE MÂT COMMUTATION MARCHE / ARRÊT VERROU DE DE PIED CORDON D’ALIMENTATION (EN DESSOUS DE LA PLATEFORME)
-
Page 43: Outils Inclus
OUTILS INCLUS : AVERTISSEMENT LE NON-RESPECT DE CES CONSIGNES POURRAIT ENTRAÎNER DES BLESSURES! Clé en T de 8 mm Clé en L de 6 mm AVERTISSEMENT Clé en L de 5 mm N’ESSAYEZ PAS DE SOULEVER LE TAPIS ROULANT! Ne déplacez pas et ne PIÈCES INCLUSES : soulevez pas le tapis roulant de l’emballage avant que cela ne soit demandé... - Page 44 ÉTAPE D’ASSEMBLAGE - DÉBALLAGE BANDE DE CERCLAGE CÂBLE DE SOCLE DE BASE TRANSPORT ROUGE CÂBLE DE TRANSPORT ROUGE CÂBLE DE TRANSPORT ROUGE (CÔTÉS GAUCHE ET DROIT) CADRE DE LA PLATE-FORME AVERTISSEMENT Placez le carton du tapis roulant sur une surface plane avec le fond de la boîte reposant sur le sol. Coupez les sangles de cerclage à...
- Page 45 ASSEMBLAGE ÉTAPE 1 1.1 Ouverture du MATÉRIEL POUR L'ÉTAPE 1 MATÉRIEL POUR L'ÉTAPE 1 PIÈCE TYPE DESCRIPTION QTÉ 1.2 Insérez le BOULON GUIDE VERTICAL (A) dans le SUPPORT DE CHÂSSIS PRINCIPAL (1) et serrez BOULON GUIDE M8X1,25PX11L VERTICAL à fond. BOULON DE MÂT M8X1,25PX80L REMARQUE : Ne serrez pas complètement 8,4X15,5X1,6T...
- Page 46 ASSEMBLAGE ÉTAPE 2 2.1 Ouverture du MATÉRIEL POUR L'ÉTAPE 2. MATÉRIEL POUR L'ÉTAPE 2 PIÈCE TYPE DESCRIPTION QTÉ 2.2 Demandez à quelqu'un de vous aider à tenir la console pendant que vous fixez le CÂBLE DE CONSOLE (2). RONDELLE EN ARC 8,2X18X1,5T Utilisez le fil conducteur pour tirer soigneusement BOULON COURT...
- Page 47 ASSEMBLAGE ÉTAPE 3 3.1 Ouverture du MATÉRIEL POUR L'ÉTAPE 3. MATÉRLEL POUR L'ÉTAPE 3 PIÈCE TYPE DESCRIPTION QTÉ 3.2 Fixez le CARDIO-FREQUENCEMÈTRE CÔTÉ DROIT (8) au dessous de la CONSOLE (6) à l'aide BOULON 1.25 de 4 BOULONS (I), 4 RONDELLES ÉLASTIQUES (J) RONDELLE ÉLASTIQUE 8,2X15,4X2,0T et ...
- Page 48 ASSEMBLAGE ÉTAPE 4 4.1 Ouverture du MATÉRIEL POUR L'ÉTAPE 4 MATÉRLEL POUR L’ÉTAPE 4 PIÈCE TYPE DESCRIPTION QTÉ 4.2 Fixez la BARRE DE SUPPORT TRANSVERSALE (5) BOULON M6X1.0PX12L au moyen des trous sur les MÂTS VERTICAUX (4) avec 2 BOULONS (E). 4.3 Fixez le PLATEAU DE RANGEMENT (10) à la BARRE DE SUPPORT TRANSVERSALE (5) en utilisant les trous de la BARRE DE SUPPORT TRANSVERSALE (5) avec les 2 BOULONS restants (E).
- Page 49 ASSEMBLAGE ÉTAPE 5 5.1 Ouverture du MATÉRIEL POUR L’ÉTAPE 5. MATÉRLEL POUR L’ÉTAPE 5 PART TYPE DESCRIPTION QTÉ 5.2 Faites glisser le COUVERCLE DE MÂT CÔTÉ DROIT (11) sur le MÂT CÔTÉ DROIT (4) en alignant les M4X1.0PX15L languettes sur le COUVERCLE DE MÂT CÔTÉ DROIT (11) avec des fentes sur le MÂT CÔTÉ...
- Page 50 ASSEMBLY STEP 6 - RETRAIT DES CÂBLES DE TRANSPORT ROUGES AVERTISSEMENT LE NON-RESPECT DE CES CONSIGNES POURRAIT ENTRAÎNER DES BLESSURES! Une fois que les câbles de transport rouges ont été détachés du tapis roulant, des ressorts à haute pression pourraient provoquer l’ouverture soudaine de la partie inférieure du socle.
- Page 51 ASSEMBLY STEP 7 - MOVING TREADMILL 7.1 Pour déplacer l’appareil, assurez-vous que le tapis roulant est replié et bien verrouillé. Saisissez ensuite fermement le guidon, inclinez le tapis roulant vers l’arrière (1) et roulez (2). 7.2 Déplacez le tapis roulant de la boîte aplatie dans sa position finale, prêt à...
-
Page 53: Fonctionnement Du Tapis Roulant
FONCTIONNEMENT DU TAPIS ROULANT Cette section explique comment utiliser la console et la programmation de votre tapis de course. La section FONCTIONS DE BASE du guide du tapis de course contient les instructions suivantes : • EMPLACEMENT DU TAPIS DE COURSE •... -
Page 55: Fonctionnement De La Console
FONCTIONNEMENT DE LA CONSOLE Remarque : Il y a une mince feuille protectrice de plastique transparent sur le revêtement de la console qui doit être retirée avant utilisation. A) FENÊTRE D’AFFICHAGE LCD : voir la description détaillée à la page 78. B) AFFICHAGE DEL : temps / compte à rebours, vitesse / inclinaison, distance / cadence, calories / fréquence cardiaque. C) VOYANTS DEL D'ENTRAÎNEMENT : indiquent quel entraînement est défini pour le programme en cours. - Page 56 CHRONOMÈTRE DE SECONDES CADRAN DE CHRONOMÈTRE CENTRE DE NOTIFICATION SPRINT 8 BRICKYARD ZONE DE NOTIFICATION TEXTE FENÊTRES D’AFFICHAGE • CHRONOMÈTRE DE SECONDES : Le chronomètre compte jusqu’à 60 secondes dans tous les programmes sauf Sprint 8. Dans Sprint 8, le chronomètre comptera en avant ou à rebours en fonction du segment du programme dans lequel vous vous trouvez.
-
Page 57: Guide De Démarrage
GUIDE DE DÉMARRAGE 1) Assurez-vous qu'aucun objet qui pourrait gêner le mouvement du tapis de course n'est placé sur la courroie. 2) Branchez le cordon d’alimentation et allumez le tapis de course. (L’interrupteur ON / OFF est situé à côté du cordon d’alimentation.) 3) Tenez-vous sur les rails latéraux du tapis de course. - Page 58 MOLETTE D’INCLINAISON MOLETTE DE VITESSE Faites rouler en avant / en arrière pour augmenter / Faites rouler en avant / en arrière pour augmenter / diminuer l’inclinaison. diminuer la vitesse. BOUTON D’INTERVALLE 1 BOUTON INTERVALLE 2 COMMENT PROGRAMMER ET UTILISER LES BOUTONS D’INTERVALLE PERSONNALISÉS Les boutons d’intervalle programmables situés sur les capteurs de pouls sont conçus pour vous aider à...
- Page 59 PROFILS D'ENTRAÎNEMENT MANUEL : Contrôlez tout votre entraînement, du début à la fin. Ce programme est un entraînement de base sans paramètres prédéfinis, vous permettant d’ajuster manuellement la machine à tout moment. Il commence par une pente à 0 et une vitesse de 0,5 mph.
- Page 60 MES 5 PREMIERS KM : Ce programme de 9 semaines est destiné aux coureurs inexpérimentés qui cherchent à effectuer leurs 5 premiers kilomètres ou tout simplement à commencer une routine d’exercices. Il a été spécialement conçu pour maintenir votre motivation et votre engagement, améliorer progressivement votre force, augmenter votre endurance et vous donner la confiance nécessaire pour terminer votre 5 premier km.
- Page 61 COMBUSTION DES GRAISSES : Y aller relativement lentement et de manière régulière, voilà la clé pour maximiser vos objectifs de perte de poids. Favorise la perte de poids en augmentant et diminuant la vitesse et l'inclinaison, tout en vous maintenant dans votre zone de combustion des graisses. Changements de vitesse et d'inclinaison ;...
- Page 62 PROFILS CIBLES DISTANCE : Poussez-vous à aller plus loin pendant votre entraînement avec 13 entraînements de distance. Choisissez parmi 1 mile, 2 miles, 5 km, 5 miles, 10 km, 15 miles, 15 km, 10 miles, 20 km, un semi-marathon, 15 miles, 20 miles et un marathon. C'est vous qui définissez votre niveau.
- Page 63 FRÉQUENCE CARDIAQUE CIBLE : Ce programme est conçu pour vous aider à améliorer votre condition physique cardiovasculaire globale. Il vous suffit de définir votre fréquence cardiaque cible. Ensuite, le programme surveillera et ajustera le niveau d'intensité pour maintenir votre fréquence cardiaque dans les limites de votre plage cible pendant que vous faites de l'exercice ;...
- Page 64 FRÉQUENCE CARDIAQUE PERSONNALISÉE : Ce programme vous permet de définir votre fréquence cardiaque pour une durée spécifiée. Le programme ajustera l’inclinaison pour maintenir votre fréquence cardiaque dans la zone cible. Élaborez plusieurs cibles de fréquence cardiaque dans un programme complet pour vous aider à atteindre vos objectifs cardiovasculaires. La durée totale du programme comprend 4 minutes d’échauffement et 4 minutes de récupération.
- Page 65 5 secondes ou éteignez puis rallumez la console. UTILISATION D’UN APPAREIL DE MUSIQUE Vous pouvez connecter le tapis roulant 7.8AT à votre appareil de musique compatible et ainsi écouter la musique que vous souhaitez. Cela comprend la plupart des téléphones intelligents et des lecteurs mp3 traditionnels.
- Page 66 CONNEXION VIA LA TECHNOLOGIE BLUETOOTH 4.0LE 1) Vérifiez que votre appareil de musique est compatible avec la technologie Bluetooth 4.0 2) Rendez-vous dans les paramètres Bluetooth de votre appareil et recherchez les appareils à proximité. 3) Sur votre appareil de musique, localisez la liste des appareils Bluetooth à proximité. Sur cette liste, sélectionnez votre tapis roulant ou votre exerciseur elliptique.
- Page 67 GARANTIE LIMITÉE D'UTILISATION À DOMICILE...
- Page 68 étant la cause du dysfonctionnement décoloration de la peinture ou du plastique, négligence, du produit par Horizon Fitness ou par un de ses techniciens vol, vandalisme, incendie, inondation, vent, foudre, gel certifiés avant qu’un moteur de remplacement ne soit autorisé...
- Page 69 • L'équipement utilisé à des fins commerciales ou pour toute par Horizon Fitness. utilisation autre par une famille ou un ménage unique, à moins • L’obligation d’Horizon Fitness au titre de cette garantie se que Horizon Fitness n'approuve sa couverture. limite au remplacement ou à la réparation, au choix d’Horizon •...
- Page 70 ESPAÑOL...
-
Page 71: Precauciones Importantes
PRECAUCIONES IMPORTANTES CONSERVE ESTAS INSTRUCCIONES Cuando se usa un producto eléctrico, siempre se deben tomar precauciones básicas, incluidas las siguientes: Lea todas las instrucciones antes de montar o usar este equipo. Es responsabilidad del propietario asegurarse de que todos los usuarios de esta caminadora estén debidamente informados sobre todas las advertencias y precauciones. - Page 72 PELIGRO PARA REDUCIR EL RIESGO DE DESCARGA ELÉCTRICA: Desenchufe siempre el equipo del tomacorrientes antes de limpiarlo, realizar el mantenimiento y colocar o quitar piezas. ADVERTENCIA PARA REDUCIR EL RIESGO DE QUEMADURAS, INCENDIOS, DESCARGAS ELÉCTRICAS O LESIONES A LAS PERSONAS: •...
- Page 73 ADVERTENCIA PARA REDUCIR EL RIESGO DE QUEMADURAS, INCENDIOS, DESCARGAS ELÉCTRICAS O LESIONES A LAS PERSONAS: • Mantenga el cable de alimentación alejado de superficies calientes. No hale ni tensione el cable de alimentación. • No retire ninguna cubierta protectora a menos que se lo indique Asistencia Técnica al Cliente. El servicio solo debe ser realizado por un técnico de servicio autorizado.
-
Page 74: Instrucciones Para La Conexión A Tierra
INSTRUCCIONES PARA LA CONEXIÓN A TIERRA El producto debe estar conectado a tierra. En caso de avería o error, la conexión a tierra proporciona una vía de menor resistencia para la corriente eléctrica, lo que reduce el riesgo de descarga eléctrica. El equipo incluye un cable con un conductor y un enchufe de conexión a tierra. -
Page 75: Montaje
UBICACIÓN DEL NÚMERO DE SERIE EN LAS CASILLAS DISPONIBLES A CONTINUACIÓN: » Si se pone en contacto con el servicio técnico, indique el NÚMERO DE SERIE y el NOMBRE DEL MODELO. NÚMERO DE SERIE: HORIZON 7.8AT TREADMILL NOMBRE DEL MODELO:... - Page 76 SOPORTE PARA LECTURA/TABLET ALTAVOCES PANEL DE CONTROL E INDICADORES VENTILADOR DE LA CONSOLA PORTABOTELLAS SOPORTE DE LA LLAVE DE SEGURIDAD CONSOLA POSTE DE LA CONSOLA PUÑOS MEDIDORES DEL PULSO BANDEJA DE ALMACENAMIENTO BARRA DE APOYO TRANSVERSAL CUBIERTAS DEL POSTE INTERRUPTOR DE ENCENDIDO/ APAGADO CABLE DE ALIMENTACIÓN PASADOR DE PIE (DEBAJO DE LA PLATAFORMA)
-
Page 77: Herramientas Incluidas
HERRAMIENTAS INCLUIDAS: ADVERTENCIA ¡NO SEGUIR ESTAS INSTRUCCIONES PUEDE RESULTAR EN LESIONES! Llave en T de 8 mm Llave en L de 6 mm ADVERTENCIA Llave en L de 5 mm PIEZAS INCLUIDAS: ¡NO INTENTE LEVANTAR LA CAMINADORA! No mueva ni levante la caminadora del embalaje hasta que se indique en las instrucciones de montaje. - Page 78 PASO DE MONTAJE- DESEMBALAJE CORREA DE LAS BANDAS CABLE DE ARMAZÓN DE TRANSPORTE ROJO LA BASE CABLE DE TRANSPORTE ROJO CABLE DE TRANSPORTE ROJO (LADOS IZQUIERDO Y DERECHO) MARCO DE CUBIERTA ADVERTENCIA Coloque la caja de cartón de la caminadora sobre una superficie plana nivelada con la parte inferior de la caja en el suelo.
- Page 79 MONTAJE PASO 1 1.1 Abra EL PAQUETE DE PIEZAS DE TORNILLERÍA PIEZAS DE TORNILLERÍA PARA EL PASO 1 PARA LLEVAR A CABO EL PASO 1. PIEZA TIPO DESCRIPCIÓN CANT. 1.2 Introduzca el PERNO GUÍA VERTICAL (A) PERNO GUÍA VERTICAL M8X1,25PX11L en el SOPORTE DEL BASTIDOR PRINCIPAL (1) y apriételo por completo.
- Page 80 MONTAJE PASO 2 2.1 Abra EL PAQUETE DE PIEZAS DE TORNILLERÍA PIEZAS DE TORNILLERÍA PARA EL PASO 2 PARA LLEVAR A CABO EL PASO 2. PIEZA TIPO DESCRIPCIÓN CANT. 2.2 Pida a alguien que le ayude a sujetar la consola ARANDELA DE ARCO 8,2X18X1,5T mientras fija el CABLE DE LA CONSOLA (2).
- Page 81 MONTAJE PASO 3 3.1 Abra EL PAQUETE DE PIEZAS DE TORNILLERÍA PIEZAS DE TORNILLERÍA PARA EL PASO 3 PARA LLEVAR A CABO EL PASO 3. PIEZA TIPO DESCRIPCIÓN CANT. 3.2 Fije el PUÑO MEDIDOR DEL PULSO DERECHO PERNO M8X1,25 (8) a la parte inferior de la CONSOLA (6) con ARANDELA ELÁSTICA 8,2X15,4X2,0T 4 PERNOS (I), 4 ARANDELAS ELÁSTICAS (J)
- Page 82 MONTAJE PASO 4 4.1 Abra EL PAQUETE DE PIEZAS DE TORNILLERÍA PIEZAS DE TORNILLERÍA PARA EL PASO 4 PARA LLEVAR A CABO EL PASO 4. PIEZA TIPO DESCRIPCIÓN CANT. 4.2 Fije la BARRA DE APOYO TRANSVERSAL (5) PERNO M6X1,0PX12L utilizando los orificios de los POSTES VERTICALES (4) y 4 PERNOS (E).
- Page 83 MONTAJE PASO 5 5.1 Abra EL PAQUETE DE PIEZAS DE TORNILLERÍA PIEZAS DE TORNILLERÍA PARA EL PASO 5 PARA LLEVAR A CABO EL PASO 5. PART TYPE DESCRIPTION 5.2 Deslice la CUBIERTA DEL POSTE DERECHO (11) TORNILLO M4X1.0PX15L por el POSTE DERECHO (4) alineando las lengüetas de la CUBIERTA DEL POSTE DERECHO (11) con las ranuras del POSTE DERECHO (4).
-
Page 84: Paso 6 De Montaje
PASO 6 DE MONTAJE - QUITAR LOS CABLES DE TRANSPORTE ROJOS ADVERTENCIA ¡NO SEGUIR ESTAS INSTRUCCIONES PUEDE RESULTAR EN LESIONES! Una vez que los cables de transporte rojos se han desconectado de la caminadora, los resortes de alta presión pueden hacer que el armazón de la base inferior se abra. - Page 85 PASO 7 DE MONTAJE - MOVER LA CAMINADORA 7.1 Para cambiarla de lugar, asegúrese de que esté doblada y con los pestillos bien cerrados. Luego agarre firmemente los manubrios, incline la caminadora hacia atrás (1) y ruédela (2). 7.2 Mueva la caminadora para quitarla de la caja aplanada y colóquela en su posición final, lista para usar.
-
Page 87: Funcionamiento De La Cinta
FUNCIONAMIENTO DE LA CINTA En esta sección, aprenderá a utilizar la consola de la cinta y a programarla. La sección FUNCIONAMIENTO BÁSICO del MANUAL DE LA CINTA contiene las instrucciones para lo siguiente: • UBICACIÓN DE LA CINTA • USO DE LA LLAVE DE SEGURIDAD •... -
Page 89: Funcionamiento De La Consola
FUNCIONAMIENTO DE LA CONSOLA Nota: En la parte superior de la consola, hay una fina lámina de plástico transparente que actúa como protección; retírela antes de utilizar la consola. A) VENTANAS DE LA PANTALLA LCD: vatios, ritmo, calorías/hora, frecuencia cardíaca y vueltas. B) INDICADOR LED: tiempo, velocidad, distancia, inclinación, ritmo, frecuencia cardíaca y calorías. -
Page 90: Ventana De Visualización
CONTADOR DE SEGUNDOS ESFERA DEL CONTADOR CENTRO DE NOTIFICACIONES SPRINT 8 BRICKYARD TEXT NOTIFICATION AREA VENTANA DE VISUALIZACIÓN • CONTADOR DE SEGUNDOS: El contador marca hasta 60 segundos en todos los programas, excepto en Sprint 8. En Sprint 8, contará hacia arriba o hacia abajo según el segmento del programa en que se encuentre. •... -
Page 91: Primeros Pasos
PRIMEROS PASOS 1) Compruebe que no haya objetos en la cinta que obstaculicen su movimiento. 2) Conecte el cable de alimentación y encienda la cinta (el interruptor de encendido/apagado se encuentra al lado del cable de alimentación). 3) Apóyese en las barras laterales de la cinta. 4) Fije la presilla de la llave de seguridad a su ropa y asegúrese de que no se caiga durante el funcionamiento. - Page 92 RUEDA DE DESPLAZAMIENTO RUEDA DE DESPLAZAMIENTO DE LA INCLINACIÓN DE LA VELOCIDAD Deslice hacia delante y hacia atrás para aumentar Deslice hacia delante o hacia atrás para aumentar o disminuir la inclinación. o disminuir la velocidad BOTÓN DE INTERVALO 1 BOTÓN DE INTERVALO 2 CÓMO PROGRAMAR Y UTILIZAR LOS BOTONES DE INTERVALO PERSONALIZADOS Los botones de intervalo programables situados en el puño medidor están diseñados para ayudarle a personalizar su máquina de forma que se ajuste a sus preferencias de entrenamiento.
- Page 93 PERFILES DE ENTRENAMIENTO MANUAL: controle todos los aspectos del entrenamiento, desde el principio hasta el final. Este programa inicia un entrenamiento básico sin ajustes predefinidos, lo cual le permite configurar la máquina de forma manual en cualquier momento. Comienza con una inclinación 0 y una velocidad de 0,8 km/h.
- Page 94 MIS PRIMEROS 5 KM: este programa de nueve semanas está diseñado para corredores sin experiencia que desean recorrer sus primeros 5 km o simplemente comenzar con una rutina de ejercicios. Se ha concebido específicamente para mantenerlo motivado y comprometido, ya que le permitirá aumentar su fuerza y resistencia progresivamente y obtener la confianza necesaria para completar sus primeros 5 km.
- Page 95 QUEMAR GRASAS: este programa permite realizar entrenamientos relativamente lentos y constantes para alcanzar sus objetivos. Favorece la pérdida de peso al aumentar y disminuir la velocidad y la inclinación, siempre dentro del rango de quema de grasas. La inclinación y la velocidad cambian, los segmentos se repiten cada 30 segundos. Segmento Calentamiento Tiempo...
- Page 96 PERFILES DE OBJETIVO DISTANCIA: esfuércese y trate de ir más allá con las 13 distancias de entrenamiento. Escoja entre objetivos de 1 milla, 2 millas, 5 km, 5 millas, 10 km, 8 millas, 15 km, 10 millas, 20 km, media maratón, 15 millas, 20 millas y maratón. Marque su propio ritmo. Los cambios de inclinación y los segmentos son de 0,1 millas.
- Page 97 FRECUENCIA CARDÍACA OBJETIVO: este programa se ha diseñado para mejorar los niveles generales de resistencia cardiovascular. Simplemente, indique su frecuencia cardíaca objetivo. El programa controlará y ajustará el nivel de intensidad para mantener la frecuencia cardíaca dentro de la zona objetivo mientras hace ejercicio. Este es un método probado que le permitirá...
- Page 98 FRECUENCIA CARDÍACA PERSONALIZADA: este programa le permitirá establecer la frecuencia cardíaca para un determinado período. El programa ajustará la inclinación para mantener la frecuencia cardíaca dentro de zona objetivo. Desarrolle múltiples objetivos de frecuencia cardíaca en un programa completo que le ayudará a alcanzar sus objetivos cardiovasculares. El tiempo del programa total incluye un calentamiento de 4 minutos y un tiempo de reposo de 4 minutos.
- Page 99 5 segundos o restablezca la alimentación. USO DE SU DISPOSITIVO DE MÚSICA La caminadora 7.8AT se conectará y transmitirá música a partir de su dispositivo de música compatible. Esto incluye a muchos teléfonos inteligentes y reproductores de mp3 tradicionales. Su caminadora 7.8AT viene equipada con altavoces Bluetooth. Los dispositivos compatibles con Bluetooth pueden transmitir música de manera inalámbrica desde el dispositivo hacia los parlantes.
- Page 100 CONEXIÓN A TRAVÉS DE BLUETOOTH 4.0 LE 1) Compruebe que su dispositivo de música es compatible con Bluetooth 4.0. 2) Vaya a la configuración de Bluetooth del dispositivo y busque los dispositivos al alcance. 3) En su dispositivo de música, busque la lista de dispositivos Bluetooth. Seleccione su caminadora o máquina elíptica que aparecen en esta lista. Espere a que su dispositivo de música finalice el emparejamiento con la unidad.
- Page 101 GARANTÍA LIMITADA AL USO DOMÉSTICO...
-
Page 102: Exclusiones Y Limitaciones
BASTIDOR • TODA LA VIDA • La garantía cubre al propietario original y no es transferible. Horizon Fitness ofrece una garantía del bastidor frente a los defectos de mano de obra y del material durante toda la vida Qué CUBRE la garantía: del propietario original, siempre y cuando el dispositivo siga •... - Page 103 • Los equipos adquiridos o utilizados fuera de España y Portugal. Fitness se limita a sustituir o reparar, de acuerdo con el criterio de Horizon Fitness, el mismo modelo u otro similar. • La entrega, el montaje, la instalación, la configuración de unidades originales o de repuesto, la mano de obra u otros •...
-
Page 104: Assistance Technique
Horizon Fitness 1600 Landmark Drive, Horizon 7.8AT-04 10272021 © 2021 Horizon Fitness Cottage Grove WI, 53527 Designed & Engineered in the U.S.A. • Made in Vietnam | Conçu et élaboré aux États-Unis. • Fabriqué en Vietnam | Diseñado en los EE. UU. • Hecho en Vietnam...
Need help?
Do you have a question about the 7.8AT and is the answer not in the manual?
Questions and answers