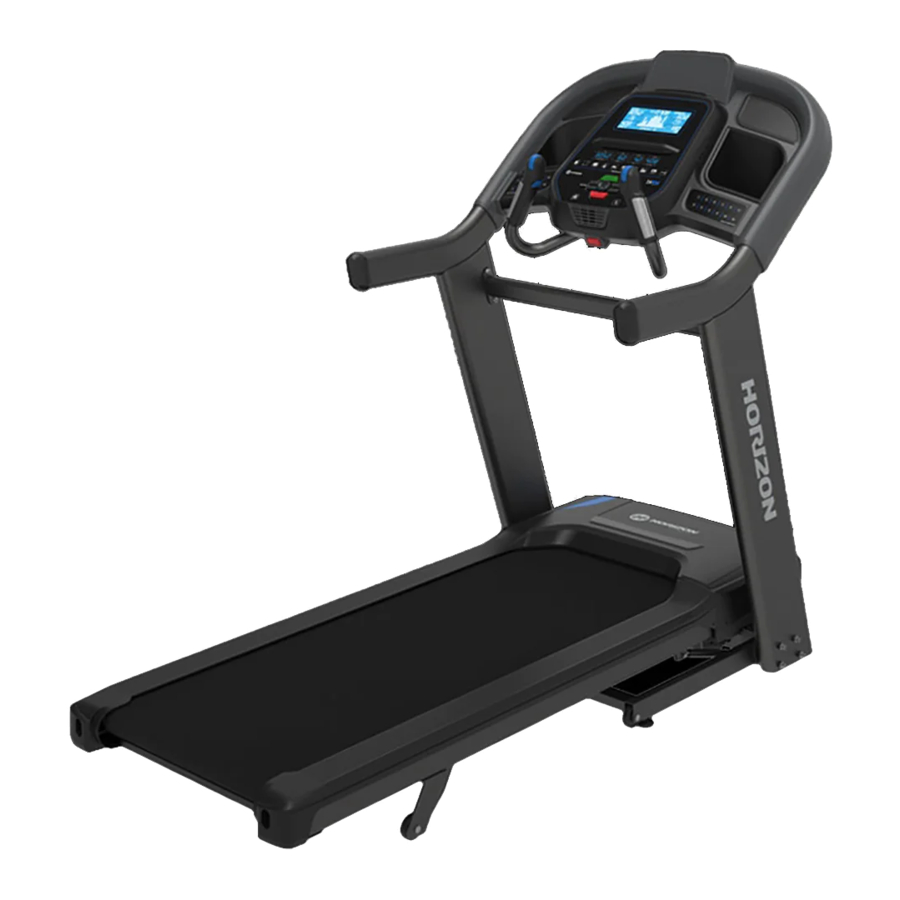
Horizon Fitness 7.4 AT - Treadmill Manual
- Owner's manual (98 pages) ,
- Owner's manual (63 pages) ,
- Owner's manual (32 pages)
Advertisement
- 1 ASSEMBLY
-
2
TREADMILL OPERATION
- 2.1 CONSOLE OPERATION
- 2.2 DISPLAY WINDOWS
- 2.3 GETTING STARTED
- 2.4 HOW TO PROGRAM AND USE CUSTOM INTERVAL BUTTONS
- 2.5 WORKOUT PROFILES
- 2.6 TARGET PROFILES
- 2.7 TO RESET THE CONSOLE
- 2.8 FINISHING YOUR WORKOUT
- 2.9 TO RESET THE LUBE BELT WARNING
- 2.10 BLUETOOTH HEART RATE MONITORING
- 2.11 USING YOUR MUSIC DEVICE
- 2.12 HORIZON CONNECTED FITNESS SYSTEM
- 3 IMPORTANT PRECAUTIONS
- 4 Documents / Resources
ASSEMBLY
There are several steps during the assembly process where special attention must be paid. It is very important to follow the assembly instructions and to ensure the product is assembled correctly to reduce the risk of injury. Make sure all parts are firmly tightened before using the treadmill to ensure that the treadmill is stable and structurally sound.
Before proceeding, find your treadmill's serial number located on a white barcode sticker near the on/off power switch and power cord.
SERIAL NUMBER LOCATION

Refer to the SERIAL NUMBER and MODEL NAME when calling for service.

TOOLS INCLUDED:
- 8 mm T-Wrench
- 6 mm L-Wrench
- 5 mm L-Wrench
PARTS INCLUDED:
- 1 Main Frame
- 1 Console Assembly
- 2 Console Masts
- 1 Cross Support Bar
- 1 Hardware Kit
- 1 Safety Key
- 1 Audio Adapter Cable
- 1 Bottle of Silicone Lubricant
(for 2 applications) - 2 Pulse Rate Grips

FAILURE TO FOLLOW THESE INSTRUCTIONS COULD RESULT IN INJURY!
DO NOT ATTEMPT TO LIFT THE TREADMILL! Do not move or lift treadmill from packaging until specified to do so in the assembly instructions. You may remove the plastic wrap from console masts.
Never open box when it is positioned upside-down or on its side.
Unpack and assemble the unit where it will be used.
The enclosed treadmill is equipped with high-pressure springs which can cause the lower base frame to spring open if mishandled.
The red transport cables are installed between the upper deck frame and the lower base frame to prevent the movement of the lower base frame. DO NOT remove red transport cables until instructed to do so.
NOTE: During each assembly step, ensure that ALL nuts and bolts are in place and partially threaded in before completely tightening any ONE bolt.
NOTE: A light application of grease may aid in the installation of hardware. Any grease, such as lithium bike grease is recommended.
UNPACKING

- Place the treadmill carton on a level flat surface with the bottom of the box on the ground.
- Cut banding straps on outside of box and remove box lid.
- DO NOT lift treadmill out of the box. Instead, tear down corners of bottom of treadmill box as shown. Treadmill should be assembled on flattened treadmill box as shown to protect floor surface.
- Cut the banding straps inside the box and remove everything but the treadmill frame.
- Partially lift the running deck upward from the rear to remove all contents from underneath the running deck. Red transport cables on either side of treadmill will prevent the treadmill deck from fully lifting.
NEVER tip treadmill upsidedown or on its side. DO NOT use tools to remove the red transport cables until instructed to do so. If a component requires tools to remove, wait until the Assembly Instructions instructs you how to safely remove the component.
ASSEMBLY

![]()
-
HARDWARE FOR STEP 1 PART TYPE DESCRIPTION QTY A UPRIGHT GUIDE BOLT M8X1.25PX11L 2 B MAST BOLT M8X1.25PX80L 8 C FLAT WASHER 8.4X15.5X1.6T 8 D SPRING WASHER 8.2X15.4X2.0T 8 - Insert UPRIGHT GUIDE BOLT (A) into MAIN FRAME BRACKET (1) and fully tighten.
NOTE: Do not fully tighten the following bolts until the end of ASSEMBLY STEP 4. - Attach LEAD WIRE to bottom end of CONSOLE CABLE (2). Pull LEAD WIRE through RIGHT CONSOLE MAST (4). After pulling the wire through the mast, the top of the CONSOLE CABLE (2) should be located at the ATTACHMENT BRACKET (7).
- Attach RIGHT CONSOLE MAST (4) to MAIN FRAME (3) using 4 BOLTS (B), 4 FLAT WASHERS (C) AND 4 SPRING WASHERS (D). Feed the extra console cable back into the upright mast.
NOTE: Be careful not to pinch the console cable while attaching the right console mast. - Repeat STEP 1.4 on the LEFT SIDE.
-

![]()
NOTE: Do not fully tighten bolts until ASSEMBLY STEP 3.-
HARDWARE FOR STEP 2 PART TYPE DESCRIPTION QTY E BOLT M6X1.0PX15L 4 - Attach CROSS SUPPORT BAR (5) using holes on UPRIGHT MASTS (4) with 4 BOLTS (E).
-

![]()
-
HARDWARE FOR STEP 3 PART TYPE DESCRIPTION QTY F ARC WASHER 8.4X15.5X1.6T 4 G SHORT BOLT M8x1.25Px15L 2 H LONG BOLT M8x1.25Px70L 2 - Have someone help hold the console while attaching the CONSOLE CABLE (2). Use the lead wire to carefully pull the CONSOLE CABLE (2) out of the RIGHT CONSOLE MAST (4). Attach the CONSOLE CABLE (2) from the CONSOLE (6) to the CONSOLE CABLE (2) from the top of the RIGHT UPRIGHT MAST (4). Detach and discard the lead wire.
- Carefully slide the CONSOLE (6) onto the ATTACHMENT BRACKETS (7) being careful not to pinch the CONSOLE CABLE (2). Align the holes on the bottom side of the CONSOLE (6) with the holes on the ATTACHMENT BRACKETS (7).
- Attach the CONSOLE (6) to the ATTACHMENT BRACKETS (7) by first placing ARC WASHERS (F) onto BOLTS (G) AND (H) as illustrated. Insert SHORT BOLTS (G) into the top hole of the ATTACHMENT BRACKET (7) and LONG BOLTS (H) into the bottom hole.
- Repeat STEP 3.4 for the opposite side.
-

![]()
-
HARDWARE FOR STEP 4 PART TYPE DESCRIPTION QTY I BOLT M8 x 15L 8 J SPRING WASHER 8.2X15.4X2.0T 8 K FLAT WASHER 8.4X15.5X1.6T 8 - Attach RIGHT SIDE PULSE RATE GRIP (8) to the underside of the CONSOLE (6) using 4 BOLTS (I), 4 SPRING WASHERS (J) and 4 FLAT WASHERS (K).
- Connect the RIGHT CONSOLE CABLES (9R) and carefully tuck in wires to avoid damage.
- Repeat STEP B on the LEFT SIDE.
- Connect the LEFT CONSOLE CABLES (9L) and carefully tuck wires to avoid damage.
-


NOTE: Fully tighten all bolts from PREVIOUS STEPS
- REMOVAL OF RED TRANSPORT CABLES

FAILURE TO FOLLOW THESE INSTRUCTIONS COULD RESULT IN INJURY!
Once the red transport cables have been detached from the treadmill, high pressure springs can cause the lower base frame to spring open. NEVER tip treadmill upside-down or on its side, and NEVER lift this unit if red transport cables are not connecting the upper deck frame to the lower base frame.- Ensure that treadmill is resting with all wheels supported by the floor.
- On left side of treadmill, use the 5mm L-wrench (provided in box) to remove the two bolts connecting the red transport cable to the upper deck frame and the lower base frame.
- Replace both bolts (one in the upper deck frame and one in the lower base frame) and fully tighten to lock in place. Note that to prevent the lower base frame from springing open during transport or disassembly of the treadmill in the future, the red transport cable can be reattached to the treadmill using these same bolts.
- Perform same operation on right side of treadmill to remove the two bolts connecting the red transport cable to the upper deck frame and the lower base frame.
- Replace both bolts and fully tighten to lock in place.
- Save both red transport cables for future use by placing cables into clear poly bag alongside the owner's manual.
- When red transport cables are not installed, transport unit ONLY on the ground, and ONLY after it is fully assembled and in the upright folded position with the lock latch secured.
- MOVING TREADMILL

- To move, make sure the treadmill is folded and securely latched. Then firmly grasp the handlebars, tilt the treadmill back (1) and roll (2).
- Move treadmill off flattened box and into its final position, ready for use. Dispose of cardboard box.


NOTE: If treadmill must be disassembled or lifted in the future, use the 5mm L-wrench to re-attach red transport cables to the upper deck frame and lower base frame on both the left side and right side of the treadmill. Check to ensure that the lower base frame cannot spring open before lifting or disassembling treadmill.
ASSEMBLY COMPLETE!
Before the first use, lubricate the treadmill deck by following the instructions in the MAINTENANCE section in the TREADMILL GUIDE.
TREADMILL OPERATION
This section explains how to use your treadmill's console and programming.
The BASIC OPERATION section in the TREADMILL GUIDE has instructions for the following:
- LOCATION OF THE TREADMILL
- USING THE SAFETY KEY
- FOLDING THE TREADMILL
- MOVING THE TREADMILL
- LEVELING THE TREADMILL
- TENSIONING THE RUNNING BELT
- CENTERING THE RUNNING BELT
- USING THE HEART RATE FUNCTION
CONSOLE OPERATION

Note: There is a thin protective sheet of clear plastic on the overlay of the console that should be removed before use.
- LCD DISPLAY WINDOW
- LED DISPLAY: Time/Count Down, Speed/Incline, Distance/Pace, Calories/Heart Rate.
- WORKOUT LED INDICATORS: indicates what workout is set for the current program.
- SELECT TARGET/WORKOUT KNOB: rotate/press to select your desired workout/target
- START: press to begin exercising, start your workout, or resume exercising after pause.
- STOP: press to pause/end your workout. Hold for 3 seconds to reset the console.
- MEDIA SKIP KEYS: used to skip to previous or next audio track.
- MEDIA RUN/PAUSE/STOP KEYS: top button used to pause/play media, bottom button stops media.
- INCLINE QUICK KEYS: used to reach desired incline more quickly.
- SPEED QUICK KEYS: used to reach desired speed more quickly.
- FAN KEY: press to turn fan on and off.
- FAN: personal workout fan.
- SPEAKERS: music plays through speakers when your CD/MP3 player is connected to the console.
- AUDIO IN JACK: plug your CD / MP3 player into the console using the included audio adaptor cable.
- AUDIO OUT/HEADPHONE JACK: plug your headphones into this jack to listen to your music through the headphones.
Note: when headphones are plugged into the headphone jack the sound will no longer come out through the speakers. - USB INPUT: 1A/5V USB output power.
- WATER BOTTLE POCKETS: holds personal workout equipment.
- TABLET/READING RACKS: holds tablet or reading material.
- BLUETOOTH INDICATOR LIGHT: displays when machine is paired with a Bluetooth compatible device.
- SPEED SCROLL WHEEL: used to adjust speed in small increments (.1 MPH).
- INCLINE SCROLL WHEEL: used to adjust incline in small increments (.5%).
- INTERVAL KEYS: these are programmable keys. When an user is selected, they can be programmed to a desired speed and incline setting.
DISPLAY WINDOWS

- TIME: Shown as minutes: seconds. View the time remaining or the time elapsed in your workout.
- DISTANCE: Shown as miles. Indicates distance traveled during your workout.
- SPEED: Shown as MPH. Indicates how fast your walking or running surface is moving.
- INCLINE: Shown as percent. Indicates the incline of your walking or running surface.
- CALORIES: Total calories burned during your workout.
- HEART RATE: Shown as BPM (beats per minute). Used to monitor your heart rate (displayed when contact is made with both pulse grips).
- PACE: Indicates how many minutes it takes to complete a mile while running or walking at your current speed.
- WATTS: Indicates the power output at your current speed and incline.
- CALORIES/HOUR: Indicates the number of calories you will burn in an hour at your current speed and incline
- BRICKYARD: Each vertical segment represents a speed or incline unit, each horizontal segment represents time.
- LAPS: Shows how many 400 meter (¼ mile) laps have been completed.
- COUNT (SPRINT 8): Shows how many Sprint 8 program sprints you have completed
GETTING STARTED
- Check to make sure no objects are placed on the belt that will hinder the movement of the treadmill.
- Plug in the power cord and turn the treadmill ON. (The ON/OFF switch is next to the power cord.)
- Stand on the side rails of the treadmill.
- Attach the safety key clip to part of your clothing making sure that it is secure and will not become detached during operation.
- Insert the safety key into the safety keyhole in the console.
- You have two options to start your workout:
- QUICK START UP
Simply press the START key to begin working out.
Time, distance, and calories will all count up from zero. OR... - SELECT A WORKOUT OR TARGET
- Select your USER by turning the workout knob and then pressing when your desired USER is displayed.
- Select your WEIGHT by turning the workout knob and then pressing when your desired WEIGHT is displayed.
- Select your PROGRAM by turning the workout knob and then pressing when your desired PROGRAM is displayed.
- Adjust the SETTING by turning the workout knob and then pressing when your desired SETTING is displayed.
- Press START to begin.
- QUICK START UP
HOW TO PROGRAM AND USE CUSTOM INTERVAL BUTTONS

The programmable interval buttons located on the pulse rate grips are designed to help you customize this machine to match whatever workout you like to do the most.
The LEFT and RIGHT INTERVAL BUTTONS are programmable for speed and incline.
To program the INTERVAL button, you must select a user, start the machine, set the desired speed and incline, press and hold the desired INTERVAL button for three seconds until the treadmill beeps. Now the INTERVAL button is programmed to your settings. After programming the INTERVAL button, it will remember the setting for that user until reprogrammed.
Now when the INTERVAL button is pressed, the treadmill speed and incline will change to the settings you programmed for that button.
The most common type of workout these keys will help with is interval training. We suggest programming one of the INTERVAL buttons to your high intensity segments and the other to your recovery segments.
Another common use is to set one INTERVAL button to your warm up and cool down settings and the other to your desired workout settings.
These buttons should allow you to customize the settings of your treadmill to quickly fit the type of workout you enjoy most.
WORKOUT PROFILES
 MANUAL: Control everything about your workout – from start to finish. This program is a basic workout with no pre-defined settings, allowing you to manually adjust the machine at any time. It begins with an incline at 0 and speed at 0.5 mph.
 HILL CLIMB: Simulates a hill ascent and descent. This program helps tone muscle and improve cardiovascular ability. Incline changes and segments repeat every 30 seconds.
Incline changes and segments repeat every 30 seconds.
| Segment | Warm Up | 1 | 2 | 3 | 4 | 5 | 6 | 7 | 8 | 9 | 10 | |
| Time | 4:00 Mins | 30 sec | 30 sec | 30 sec | 30 sec | 30 sec | 30 sec | 30 sec | 30 sec | 30 sec | 30 sec | |
| Level 1 | 0 | 0 | 1 | 1.5 | 2 | 2.5 | 3 | 3 | 2.5 | 2 | 1.5 | 1 |
| Level 2 | 0 | 0 | 1.5 | 2 | 2.5 | 3 | 3.5 | 3.5 | 3 | 2.5 | 2 | 1.5 |
| Level 3 | 0 | 1 | 2 | 2.5 | 3 | 3.5 | 4 | 4 | 3.5 | 3 | 2.5 | 2 |
| Level 4 | 0 | 1.5 | 2.5 | 3 | 3.5 | 4 | 4.5 | 4.5 | 4 | 3.5 | 3 | 2.5 |
| Level 5 | 0 | 1.5 | 3 | 3.5 | 4 | 4.5 | 5 | 5 | 4.5 | 4 | 3.5 | 3 |
| Level 6 | 0 | 1.5 | 3.5 | 4 | 4.5 | 5 | 5.5 | 5.5 | 5 | 4.5 | 4 | 3.5 |
| Level 7 | 0 | 1.5 | 4 | 4.5 | 5 | 5.5 | 6 | 6 | 5.5 | 5 | 4.5 | 4 |
| Level 8 | 0 | 2 | 4.5 | 5 | 5.5 | 6 | 6.5 | 6.5 | 6 | 5.5 | 5 | 4.5 |
| Level 9 | 0 | 2 | 5 | 5.5 | 6 | 6.5 | 7 | 7 | 6.5 | 6 | 5.5 | 5 |
| Level 10 | 0 | 2 | 5.5 | 6 | 6.5 | 7 | 7.5 | 7.5 | 7 | 6.5 | 6 | 5.5 |
 MY FIRST 5K: This 9-week program is intended for inexperienced runners looking to run their first 5k or simply begin an exercise routine. It is designed specifically to keep you motivated and engaged, gradually building your strength, increasing your stamina and giving you the confidence it takes to complete your first 5k.


Warmup and cooldown speeds 1.0 mph or 75% of walk speed, whichever is greater
![]() FAT BURN: Relatively slow and steady is the name of the game to maximize your weight-loss goals. Promotes weight loss by increasing and decreasing the speed and incline, while keeping you in your fat burning zone.
FAT BURN: Relatively slow and steady is the name of the game to maximize your weight-loss goals. Promotes weight loss by increasing and decreasing the speed and incline, while keeping you in your fat burning zone.
Speed and Incline changes, segments repeat every 30 seconds.
| Segment | Warm Up | 1 | 2 | 3 | 4 | 5 | 6 | 7 | 8 | ||
| Time | 4:00 Mins | 30 sec | 30 sec | 30 sec | 30 sec | 30 sec | 30 sec | 30 sec | 30 sec | ||
| Level 1 | Incline | 0 | 0.5 | 1.5 | 1.5 | 1 | 0.5 | 0.5 | 0.5 | 1 | 1.5 |
| Speed | 0.5 | 1.5 | 2 | 2.5 | 3 | 3.5 | 4 | 3.5 | 3 | 2.5 | |
| Level 2 | Incline | 0 | 0.5 | 1.5 | 1.5 | 1 | 0.5 | 1 | 0.5 | 1 | 1.5 |
| Speed | 0.5 | 1.9 | 2.5 | 3 | 3.5 | 4 | 4.5 | 4 | 3.5 | 3 | |
| Level 3 | Incline | 0.5 | 1 | 2 | 2 | 1.5 | 1 | 1 | 1 | 1.5 | 2 |
| Speed | 0.5 | 2.3 | 3 | 3.5 | 4 | 4.5 | 5 | 4.5 | 4 | 3.5 | |
| Level 4 | Incline | 0.5 | 1 | 2 | 2 | 1.5 | 1 | 1 | 1 | 1.5 | 2 |
| Speed | 1 | 2.6 | 3.5 | 4 | 4.5 | 5 | 5.5 | 5 | 4.5 | 4 | |
| Level 5 | Incline | 1 | 1.5 | 2.5 | 2.5 | 2 | 1.5 | 1.5 | 1.5 | 2 | 2.5 |
| Speed | 1 | 3 | 4 | 4.5 | 5 | 5.5 | 6 | 5.5 | 5 | 4.5 | |
| Level 6 | Incline | 1 | 1.5 | 2.5 | 2.5 | 2 | 1.5 | 1.5 | 1.5 | 2 | 2.5 |
| Speed | 1 | 3.4 | 4.5 | 5 | 5.5 | 6 | 6.5 | 6 | 5.5 | 5 | |
| Level 7 | Incline | 1.5 | 2 | 3 | 3 | 2.5 | 2 | 2 | 2 | 2.5 | 3 |
| Speed | 1.4 | 3.8 | 5 | 5.5 | 6 | 6.5 | 7 | 6.5 | 6 | 5.5 | |
| Level 8 | Incline | 1.5 | 2 | 3 | 3 | 2.5 | 2 | 2 | 2 | 2.5 | 3 |
| Speed | 1.4 | 4.1 | 5.5 | 6 | 6.5 | 7 | 7.5 | 7 | 6.5 | 6 | |
| Level 9 | Incline | 2 | 2.5 | 3.5 | 3.5 | 3 | 2.5 | 2.5 | 2.5 | 3 | 3.5 |
| Speed | 1.4 | 4.5 | 6 | 6.5 | 7 | 7.5 | 8 | 7.5 | 7 | 6.5 | |
| Level 10 | Incline | 2 | 2.5 | 3.5 | 3.5 | 3 | 2.5 | 2.5 | 2.5 | 3 | 3.5 |
| Speed | 1.4 | 4.9 | 6.5 | 7 | 7.5 | 8 | 8.5 | 8 | 7.5 | 7 | |
![]() CUSTOM: Allows you to create and reuse your perfect workout with a combination of a specific speed, incline and time or distance. The ultimate in personal programming. This is a time or distance based goal program.
CUSTOM: Allows you to create and reuse your perfect workout with a combination of a specific speed, incline and time or distance. The ultimate in personal programming. This is a time or distance based goal program.
TARGET PROFILES
![]() DISTANCE: Push yourself and go further during your workout with 13 distance workouts. Choose from 1 mile, 2 miles, 5k, 5 miles, 10k, 8 miles, 15k, 10 miles, 20k, half marathon, 15 miles, 20 miles, and marathon goals. You set your level.
DISTANCE: Push yourself and go further during your workout with 13 distance workouts. Choose from 1 mile, 2 miles, 5k, 5 miles, 10k, 8 miles, 15k, 10 miles, 20k, half marathon, 15 miles, 20 miles, and marathon goals. You set your level.
Incline changes and all segments are 0.1 miles.
| Segment | Warm Up | 1 | 2 | 3 | 4 | 5 | 6 | 7 | 8 | 9 | 10 | 11 | 12 | 13 | 14 | 15 | |
| Distance | .1 mi | .1 mi | .1 mi | .1 mi | .1 mi | .1 mi | .1 mi | 0.1 mi | .1 mi | .1 mi | .1 mi | .1 mi | .1 mi | .1 mi | .1 mi | .1 mi | .1 mi |
| Level 1 | 0 | 0 | 0 | 0 | 0 | 0 | 0 | 0 | 0 | 0 | 0 | 0 | 0 | 0 | 0 | 0 | 0 |
| Level 2 | 0 | .5 | 1 | 3 | 2 | 3 | 2 | 3 | 2.5 | 3.5 | 2.5 | 3 | 2 | 3 | 2 | 3 | 1 |
| Level 3 | .5 | 1 | 1.5 | 3.5 | 1.5 | 3.5 | 2.5 | 3.5 | 2.5 | 4 | 2.5 | 3.5 | 2.5 | 3.5 | 1.5 | 3.5 | 1.5 |
| Level 4 | .5 | 1 | 1.5 | 3.5 | 2.5 | 3.5 | 2.5 | 3.5 | 3 | 4 | 3 | 3.5 | 2.5 | 3.5 | 2.5 | 3.5 | 1.5 |
| Level 5 | 1 | 1.5 | 2 | 4 | 2 | 4 | 3 | 4 | 3 | 4.5 | 3 | 4 | 3 | 4 | 2 | 4 | 2 |
| Level 6 | 1 | 1.5 | 2 | 4 | 3 | 4 | 3 | 4 | 3.5 | 4.5 | 3.5 | 4 | 3 | 4 | 3 | 4 | 2 |
| Level 7 | 1.5 | 2 | 2.5 | 4.5 | 2.5 | 4.5 | 3.5 | 4.5 | 3.5 | 5 | 3.5 | 4.5 | 3.5 | 4.5 | 2.5 | 4.5 | 2.5 |
| Level 8 | 1.5 | 2 | 2.5 | 4.5 | 3.5 | 4.5 | 3.5 | 4.5 | 4 | 5 | 4 | 4.5 | 3.5 | 4.5 | 3.5 | 4.5 | 2.5 |
| Level 9 | 2 | 2.5 | 3 | 5 | 3 | 5 | 4 | 5 | 4 | 5.5 | 4 | 5 | 4 | 5 | 3 | 5 | 3 |
| Level 10 | 2 | 2.5 | 3 | 5 | 4 | 5 | 4 | 5 | 4.5 | 5.5 | 4.5 | 5 | 4 | 5 | 4 | 5 | 3 |
![]() CALORIES: Set goals for burning calories from 20 to 980 calories in 20 calorie increments. You set your level to keep you in your fat burning zone.
CALORIES: Set goals for burning calories from 20 to 980 calories in 20 calorie increments. You set your level to keep you in your fat burning zone.
Incline changes and all segments are 20 calories.
| Segment | Warm Up | 1 | 2 | 3 | 4 | 5 | 6 | 7 | 8 | 9 | 10 | 11 | 12 | 13 | 14 | 15 | |
| Calories | 20 cal | 20 cal | 20 cal | 20 cal | 20 cal | 20 cal | 20 cal | 20 cal | 20 cal | 20 cal | 20 cal | 20 cal | 20 cal | 20 cal | 20 cal | 20 cal | 20 cal |
| Level 1 | 0 | 0 | 0 | 0 | 0 | 0 | 0 | 0 | 0 | 0 | 0 | 0 | 0 | 0 | 0 | 0 | 0 |
| Level 2 | 0 | 0.5 | 1 | 3 | 2 | 3 | 2 | 3 | 2.5 | 3.5 | 2.5 | 3 | 2 | 3 | 2 | 3 | 1 |
| Level 3 | 0.5 | 1 | 1.5 | 3.5 | 1.5 | 3.5 | 2.5 | 3.5 | 2.5 | 4 | 2.5 | 3.5 | 2.5 | 3.5 | 1.5 | 3.5 | 1.5 |
| Level 4 | 0.5 | 1 | 1.5 | 3.5 | 2.5 | 3.5 | 2.5 | 3.5 | 3 | 4 | 3 | 3.5 | 2.5 | 3.5 | 2.5 | 3.5 | 1.5 |
| Level 5 | 1 | 1.5 | 2 | 4 | 2 | 4 | 3 | 4 | 3 | 4.5 | 3 | 4 | 3 | 4 | 2 | 4 | 2 |
| Level 6 | 1 | 1.5 | 2 | 4 | 3 | 4 | 3 | 4 | 3.5 | 4.5 | 3.5 | 4 | 3 | 4 | 3 | 4 | 2 |
| Level 7 | 1.5 | 2 | 2.5 | 4.5 | 2.5 | 4.5 | 3.5 | 4.5 | 3.5 | 5 | 3.5 | 4.5 | 3.5 | 4.5 | 2.5 | 4.5 | 2.5 |
| Level 8 | 1.5 | 2 | 2.5 | 4.5 | 3.5 | 4.5 | 3.5 | 4.5 | 4 | 5 | 4 | 4.5 | 3.5 | 4.5 | 3.5 | 4.5 | 2.5 |
| Level 9 | 2 | 2.5 | 3 | 5 | 3 | 5 | 4 | 5 | 4 | 5.5 | 4 | 5 | 4 | 5 | 3 | 5 | 3 |
| Level 10 | 2 | 2.5 | 3 | 5 | 4 | 5 | 4 | 5 | 4.5 | 5.5 | 4.5 | 5 | 4 | 5 | 4 | 5 | 3 |
![]() TARGET HEART RATE: This program is designed for you to improve your overall cardiovascular fitness levels. You simply set your target heart rate. The program will then monitor and adjust the intensity level to maintain your heart rate within your targeted range while you exercise – a proven method to maximize your weight loss and fitness goals. A chest strap is required and must be worn during the duration of this program. See below for calculating your target heart rate.
TARGET HEART RATE: This program is designed for you to improve your overall cardiovascular fitness levels. You simply set your target heart rate. The program will then monitor and adjust the intensity level to maintain your heart rate within your targeted range while you exercise – a proven method to maximize your weight loss and fitness goals. A chest strap is required and must be worn during the duration of this program. See below for calculating your target heart rate.
Calculating Your Target Heart Rate
The first step in knowing the right intensity for your training is to find out your maximum heart rate (max HR = 220 – your age). The agebased method provides an average statistical prediction of your max HR and is a good method for the majority of people, especially those new to heart rate training.
The most precise and accurate way of determining your individual max HR is to have it clinically tested by a cardiologist or exercise physiologist through the use of a maximal stress test. If you are over the age of 40, overweight, have been sedentary for several years, or have a history of heart disease in your family, clinical testing is recommended.
This chart gives examples of the heart rate range for a 30 year old exercising at 5 different heart rate zones. For example, a 30-year-old's max HR is 220 – 30 = 190 bpm and 90% max HR is 190 × 0.9 = 171 bpm.
Additional target heart rate notes:
The treadmill incline will automatically adjust to bring you near your specified heart rate.
If there is no heart rate detected, the unit will not change the incline.
If your heart rate is 25 beats over your target zone the program will shut down.
| Target Heart Rate Zone | Workout Duration | Example THR (age 30) | Your THR | Recommend For |
| VERY HARD 90 - 100% | < 5 min | 171-190 BPM | Fit persons for athletic training | |
| HARD 80 - 90% | 2-10 min | 152-171 BPM | Shorter Workouts | |
| MODERATE 70 - 80% | 10-40 min | 133-152 BPM | Moderately long Workouts | |
| LIGHT 60 - 70% | 40-80 min | 114-133 BPM | Longer and frequently repeated shorter exercises | |
| VERY LIGHT 50 - 60% | 20-40 min | 104-114BPM | Weight management and active recovery |
![]() CUSTOM HEART RATE: This program allows you to set your Heart Rate for a specified time. The program will adjust incline to keep your Heart Rate in your target zone. Build multiple Heart Rate targets into a full program to help you reach your cardiovascular goals. The program total time includes a 4 minute warm up and 4 minute cool down time. Your selected custom heart rates will repeat after the warm up until 4 minutes before the total time expires.
CUSTOM HEART RATE: This program allows you to set your Heart Rate for a specified time. The program will adjust incline to keep your Heart Rate in your target zone. Build multiple Heart Rate targets into a full program to help you reach your cardiovascular goals. The program total time includes a 4 minute warm up and 4 minute cool down time. Your selected custom heart rates will repeat after the warm up until 4 minutes before the total time expires.
![]() SPRINT 8: A time based program that allows you to select a level. After warm up, the program will give you 30 seconds at a high speed and intensity, alternating with 90 seconds at a lower recovery speed. Increasing levels will allow you to keep your calorie burn high and increase your overall running speed.
SPRINT 8: A time based program that allows you to select a level. After warm up, the program will give you 30 seconds at a high speed and intensity, alternating with 90 seconds at a lower recovery speed. Increasing levels will allow you to keep your calorie burn high and increase your overall running speed.
TREADMILL SPRINT 8 CHART
Speed changes and segments repeat 90 and 30 seconds.

TO RESET THE CONSOLE
Hold STOP key for 3 seconds.
FINISHING YOUR WORKOUT
When your workout is complete, the unit will beep. Your workout information will stay displayed on the console for 30 seconds and then reset.
TO RESET THE LUBE BELT WARNING
The treadmill will flash "LUBE BELT" reminder every 150 mi. After lubricating belt, reset warning by holding down STOP and PLAY/PAUSE buttons for 5 seconds.

BLUETOOTH HEART RATE MONITORING
The 7.4AT is equipped with multi-channel Bluetooth which enables you to wirelessly connect compatible Bluetooth heart rate monitoring devices to this treadmill. You will need to ensure that your wireless heart rate monitoring device is Bluetooth 4.0 compatible and is also "open" to sharing data. Non-"open" or "closed" devices typically only share data with their proprietary apps. The 7.4AT needs an "open" device to receive data from the device. You may need to consult with your device's owner's manual or the manufacturer to confirm if it is an open device.
Pair the receiver to the app and the console will receive the information from the tablet. To use the Bluetooth HR monitor without a tablet, press and hold the Bluetooth button to enable the console to communicate with the receiver. When paired with the Bluetooth HR monitor the console will not pair with a tablet. To enable tablet communication press and hold the Bluetooth button for 5 seconds or reset power.
USING YOUR MUSIC DEVICE
The 7.4AT treadmill will connect and stream music form your compatible music device. This includes many smart phones and traditional mp3 players.
Your 7.4AT comes equipped with Bluetooth speakers. Bluetooth compatible devices can stream music wirelessly from your device to the speakers. You can also connect your music device via an audio cable and stream music through the speakers. Instructions for both types of audio connection are detailed below.
CONNECTING VIA BLUETOOTH 4.0LE
- Check to ensure that your music device is Bluetooth 4.0 compatible
- Go into your device's Bluetooth settings and scan for devices.
- On your music device, locate the Bluetooth device list. Select your treadmill or elliptical unit that appears on this list.
Wait for your music device to finish pairing with the unit. - You will know when pairing is successful when your music device shows the treadmill or elliptical unit as now being a paired device.
WHEN UNIT IS POWERED OFF THEN BACK ON
If you turn your treadmill or elliptical unit off, or if it goes into sleep mode, the next time it is powered on the unit will look to pair with the last music device with which it was paired. It will automatically pair at this time.
RE-PAIRING MUSIC DEVICES
In the event that the unit cannot find the last paired music device (for example, the music device is off or not being used) then the unit will stop looking to pair with the music device. If this happens, and if you wish to use your music device again, then you will need to go through the pairing process listed above and re-pair through your music device's settings.
USING MULTIPLE MUSIC DEVICES
If multiple devices are being paired with the unit (i.e.: multiple users are using the treadmill or elliptical unit and pairing their music devices with it) then the unit will look to pair with the last device used and "forget" other devices. If you wish to re-pair a "forgotten" music device, then you will need to un-pair the current paired device and then re-pair your device through the pairing procedure noted above.
CONNECTING VIA AN AUDIO CABLE
- Connect the included AUDIO ADAPTOR CABLE to the AUDIO IN JACK on the top right of the console and the headphone jack on your music device.
- Use your media device buttons to adjust song settings.
- Remove the AUDIO ADAPTOR CABLE when not in use.
- If you don't want to use the SPEAKERS, you can plug your headphones into the AUDIO OUT JACK at the bottom of the console. This ensures that if you accidentally catch the headphone line while running, you won't drop your device to the ground.
HORIZON CONNECTED FITNESS SYSTEM
Your Horizon machine is Bluetooth ready, allowing you to use Bluetooth 4.0 technology to wirelessly connect your device and other apps to your Horizon treadmill. For a complete list of 3rd party fitness apps compatible with your Horizon treadmill follow the link below:
https://horizonfit.co/7-4AT

IMPORTANT PRECAUTIONS
When using an electrical product, basic precautions should always be followed, including the following: Read all instructions before assembly or use of this treadmill. It is the responsibility of the owner to ensure that all users of this treadmill are adequately informed of all warnings and precautions. If you have any questions after reading this guide, contact Customer Tech Support.
This treadmill is intended for in-home use only. Do not use this treadmill in any commercial, rental, school or institutional setting. Failure to comply will void the warranty.

TO REDUCE THE RISK OF ELECTRICAL SHOCK:
Always unplug the equipment from the electrical outlet before cleaning, performing maintenance and putting on or taking off parts.

TO REDUCE THE RISK OF BURNS, FIRE, ELECTRICAL SHOCK OR INJURY TO PERSONS:
- Use this equipment only for its intended use as described in this Owner's Manual.
- At NO time should children under the age of 14 use the equipment.
- At NO time should pets or children under the age of 14 be closer to the equipment than 10 feet / 3 meters.
- This equipment is not intended for use by persons with reduced physical, sensory or mental capabilities, or lack of experience and knowledge, unless they are supervised or have been given instruction concerning use of the equipment by a person responsible for their safety.
- Always wear athletic shoes while using this equipment. NEVER operate the exercise equipment with bare feet.
- Do not wear any clothing that might catch on any moving parts of this equipment.
- Heart rate monitoring systems may be inaccurate. Over exercising may result in serious injury or death.
- Incorrect or excessive exercise may result in serious injury or death. If you experience any kind of pain, including but not limited to chest pains, nausea, dizziness, or shortness of breath, stop exercising immediately and consult your physician before continuing.
- Do not jump on the equipment.
- At no time should more than one person be on the equipment.
- Set up and operate this equipment on a solid level surface.
- Never operate the equipment if it is not working properly or if it has been damaged.
- Use handlebars to maintain balance when mounting and dismounting, and for additional stability while exercising.
- To avoid injury, do not expose any body parts (for example, fingers, hands, arms or feet) to the drive mechanism or other potentially moving parts of the equipment.
- Connect this exercise product to a properly grounded outlet only.
- This equipment should never be left unattended when plugged in. When not in use, and prior to servicing, cleaning, or moving equipment, turn off power, then unplug from outlet.
- Do not use any equipment that is damaged or has worn or broken parts. Use only replacement parts supplied by Customer Technical Support or an authorized dealer.
- Never operate this equipment if it has been dropped, damaged, or is not working properly, has a damaged cord or plug, is located in a damp or wet environment, or has been immersed in water.
- Keep power cord away from heated surfaces. Do not pull on this power cord or apply any mechanical loads to this cord.
- Do not remove any protective covers unless instructed by Customer Technical Support. Service should only be done by an authorized service a technician.
- To prevent electrical shock, never drop or insert any object into any opening.
- Do not operate where aerosol (spray) products are being used or when oxygen is being administered.
- This equipment should not be used by persons weighing more than the specified maximum weight capacity as listed in the equipment Owner's Manual. Failure to comply will void the warranty.
- This equipment must be used in an environment that is both temperature and humidity controlled. Do not use this equipment in locations such as, but not limited to: outdoors, garages, car ports, porches, bathrooms, or located near a swimming pool, hot tub, or steam room. Failure to comply will void the warranty.
- Contact Customer Technical Support or an authorized dealer for examination, repair and/or service.
- Never operate this exercise equipment with the air opening blocked. Keep the air opening and internal components clean, free of lint, hair, and the like.
- Do not modify this exercise device or use unapproved attachments or accessories. Modifications to this equipment or use of unapproved attachments or accessories will void your warranty and may cause injury.
- To clean, wipe surfaces down with soap and slightly damp cloth only; never use solvents.
- When exercising, always maintain a comfortable and controlled pace.
- To avoid injury, use extreme caution when stepping onto or off of a moving belt. Stand on the siderails when starting the treadmill.
- To avoid injury, attach safety clip to clothing before use.
- Disconnect the safety key from treadmill when not using to prevent uncontrolled usage by third parties.
- Ensure that the edge of the belt is parallel with the lateral position of the side rail and does not move under the side rail. If the belt is not centered, it must be adjusted before use.
- When there is no user on the treadmill (unloaded condition) and when the treadmill is running at 12 km/ hour (7.5 mph), the A-weighted sound pressure level is no greater than 70 dB when sound level is measured at typical head height.
- Noise emission measurement of treadmill under load is higher than with no load.
- When lowering the treadmill deck, wait until rear feet are firmly on the floor before stepping on the deck.
- Make sure the treadmill comes to complete stop before folding. Do not operate the treadmill when it is folded.
- When moving the treadmill, DO NOT lift treadmill or turn it upside down or place treadmill on its side. Treadmill is equipped with highpressure springs which can cause the lower base frame to spring open if mishandled, potentially causing injury. Transport unit ONLY on the ground, and ONLY after it is fully assembled and in the upright folded position with the lock latch secured.
GROUNDING INSTRUCTIONS
This product must be grounded. If a treadmill should malfunction or breakdown, grounding provides a path of least resistance for electrical current to reduce the risk of electrical shock. This product is equipped with a cord having an equipment-grounding conductor and a grounding plug. The plug must be plugged into an appropriate outlet that is properly installed and grounded in accordance with local codes and ordinances.
Improper connection of the equipment-grounding conductor can result in a risk of electric shock. Check with a qualified electrician or service provider if you are in doubt as to whether the product is properly grounded. Do not modify the plug provided with the product. If it will not fit the outlet, have a proper outlet installed by a qualified electrician.
This product is for use on a nominal 110-120 Volt circuit and has a grounding plug that looks like the plug in the illustration. Make sure that the product is connected to an outlet having the same configuration as the plug. No adapter should be used with this product.
This product must be used on a dedicated circuit. To determine if you are on a dedicated circuit, shut off the power to that circuit and observe if any other devices lose power. If so, move devices to a different circuit. Note: There are usually multiple outlets on one circuit. This treadmill should be used with a minimum 15-amp circuit.
Connect this exercise product to a properly grounded outlet only.
Never operate product with a damaged cord or plug even if it is working properly.
Never operate any product if it appears damaged, or has been immersed in water. Contact Customer Tech Support for replacement or repair.

Documents / ResourcesDownload manual
Here you can download full pdf version of manual, it may contain additional safety instructions, warranty information, FCC rules, etc.
Advertisement


Need help?
Do you have a question about the 7.4 AT and is the answer not in the manual?
Questions and answers