
Related Manuals for Horizon Fitness 7.0AT-03


Summary of Contents for Horizon Fitness 7.0AT-03
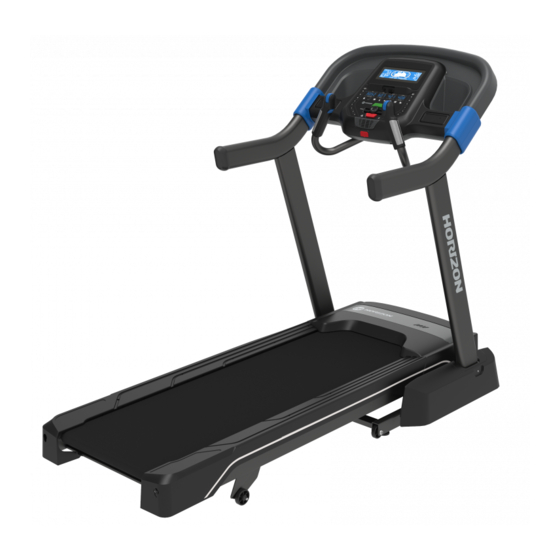
- Page 1 7.0AT-03 TREADMILLS TM1002C SERVICE MANUAL ISSUED 2022-06-07 JOHNSON HEALTH INDUSTRY (VIETNAM)
- Page 2 EART UNCTION SSUE ............................29 LUETOOTH AIRING SSUE PART REPLACEMENT ......................31 ............................32 OTOR OVER EPLACEMENT ............................33 OLLER EPLACEMENT ............................... 34 EPLACEMENT ............................35 UNNING EPLACEMENT ............................36 RONT OLLER EPLACEMENT ............................37 UNNING EPLACEMENT 7.0AT-03 Service Manual...
- Page 3 OTOR ONTROL OARD EPLACEMENT ..............................40 OTOR EPLACEMENT ............................. 41 RIVE EPLACEMENT ............................42 NCLINE OTOR EPLACEMENT ..........................44 ONSOLE VERLAY EPLACEMENT .......................... 45 ONSOLE IRCUIT OARD EPLACEMENT ........................47 EART EYPAD EPLACEMENT CHANGE LOG ........................48 7.0AT-03 Service Manual...
-
Page 4: Serial Number Information
ERIAL NUMBER NFORMATION Table of Contents Serial Number Information Serial Number Location 7.0AT-03 Service Manual... -
Page 5: Product Record
ERIAL NUMBER NFORMATION Table of Contents Product Record ENTER YOUR SERIAL NUMBER AND MODEL NAME IN THE BOXES BELOW: Refer to the SERIAL NUMBER and MODEL NAME when calling for service. 7.0AT-03 Service Manual... -
Page 6: Preventative Maintenance
Failure to do so may result in premature failure of key electrical components. Vacuum and wipe down the belt with a damp cloth. Vacuum any black / white particles that may accumulate around the unit. These particles may accumulate from normal treadmill use. 7.0AT-03 Service Manual... -
Page 7: Tensioning & Centering The Running Belt
Allen wrench, turning them ¼ turn to the right as shown. Turn the treadmill on and check for slipping. Repeat if necessary, but never turn the roller bolts more than ¼ turn at a time. Belt is properly tightened when the slipping sensation is gone. 7.0AT-03 Service Manual... - Page 8 ¼ turn at a time (using the supplied Allen wrench). Check the belt alignment. Allow belt to run a full cycle to gauge if more adjustment is needed. Repeat if necessary, until the belt remains centered during use. 7.0AT-03 Service Manual...
-
Page 9: Console Operation
J) SPEED QUICK KEYS: used to reach desired speed more quickly. K) FAN KEY: press to turn fan on and off. L) FAN: personal workout fan. M) SPEAKERS: music plays through speakers when your CD / MP3 player is connected to the console. 7.0AT-03 Service Manual... -
Page 10: Display Windows
CALORIES/ HOUR: Indicates the number of calories you will burn in an hour at your current speed and incline TRACK: Follows progress around a simulated track. Segments light up with every 50 meters completed. LAPS: Shows how many 400 meter (¼ mile) laps have been completed. 7.0AT-03 Service Manual... -
Page 11: Getting Started
The LEFT and RIGHT INTERVAL BUTTONS are programmable for speed and incline. To program the INTERVAL button, you must select a user, start the machine, set the desired speed and 7.0AT-03 Service Manual... - Page 12 Instructions for both types of audio connection are detailed below. CONNECTING VIA BLUETOOTH 4.0LE 1) Check to ensure that your music device is Bluetooth 4.0 compatible 2) Go into your device’s Bluetooth settings and scan for devices. 7.0AT-03 Service Manual...
- Page 13 For information about connecting your device to your Horizon treadmill, setting up the AFG Fitness App and controlling and monitoring your workout with your device, see the AFG Connected Fitness Manual included with your treadmill. ZWIFT APP CONNECTION 7.0AT-03 Service Manual...
-
Page 14: Program Information
P3) MY FIRST 5K: This 9-week program is intended for inexperienced runners looking to run their first 5k or simply begin an exercise routine. It is designed specifically to keep you motivated and engaged, gradually building your strength, increasing your stamina and giving you the confidence it takes to complete your first 5k. 7.0AT-03 Service Manual... - Page 15 P4) FAT BURN: Relatively slow and steady is the name of the game to maximize your weight-loss goals. Promotes weight loss by increasing and decreasing the speed and incline, while keeping you in your fat burning zone. Speed and Incline changes, segments repeat every 30 seconds. 7.0AT-03 Service Manual...
- Page 16 The most precise and accurate way of determining your individual max HR is to have it clinically tested by a cardiologist or exercise physiologist through the use of a maximal stress test. If you are over the age of 7.0AT-03 Service Manual...
- Page 17 1). The treadmill incline will automatically adjust to bring you near your specified heart rate. 2). If there is no heart rate detected, the unit will not change the incline. 3). If your heart rate is 25 beats over your target zone the program will shut down. 7.0AT-03 Service Manual...
-
Page 18: Engineering Mode
ENG4 Accumulated information Press “push to select” to enter (distance and time) Information UCB version Press “push to select” to enter MCB version Press “push to select” to enter Escape Escape present function Press “stop” 3 seconds 7.0AT-03 Service Manual... - Page 19 NGINEERING Table of Contents Engineering Mode Overview 7.0AT-03 Service Manual...
- Page 20 NGINEERING Table of Contents 7.0AT-03 Service Manual...
-
Page 21: General Troubleshooting
After each corrective action is taken, re-evaluate if the failure has been resolved. Some indications have a straightforward order of attempts, and not all steps are always necessary if a lower-level fix resolves the issue. 7.0AT-03 Service Manual... -
Page 22: Electrical Diagram
ROUBLESHOOTING Table of Contents Electrical Diagram 7.0AT-03 (TM1002C-1US) WIRE CONNECTION SCHEMATIC V1.0 Updated on 2022/05/20. 7.0AT-03 Service Manual... -
Page 23: Mcb Wiring Instructions
ROUBLESHOOTING Table of Contents MCB Wiring Instructions Power Line Incline motor power cable Speed sensor cable Console set cable Software burning cable Drive motor cable MCB LED Configuration 7.0AT-03 Service Manual... - Page 24 To LCD display From heart rate grip From Quick key Left hand bar From Quick key Right hand bar To MCB To Audio In & Out interface To Speaker To Fan JP10 To Keypad (Bluetooth and Resistance) 7.0AT-03 Service Manual...
-
Page 25: Troubleshooting Summary
B. Check if the outlet is well. - If no, please try another functional outlet. C. Check if the power cord connected well. - If the power cord connected well but console doesn’t turn on, try another one. 7.0AT-03 Service Manual... - Page 26 If not, replace the PCB. C. Turn off the power switch, and open the motor upper cover. Remove the red & black wires of motor from the MCB, and use a multi-meter to measure the resistance of drive motor. 7.0AT-03 Service Manual...
- Page 27 Solution: This sound is likely caused by the optic disk. -Check that the optic disk is tight on the motor and not rubbing the speed sensor. D. Banging or clunking sound/5. Slapping / thinking / squeaking sound with Each footstep. 7.0AT-03 Service Manual...
-
Page 28: Speaker/Audio Issues
- Verify the audio adaptor cable connection at the console. - Replace the audio adaptor cable. - Replace the console. D. Speakers are not getting a clear signal through the speaker wires. - Check the speaker wire connections. - Replace the speaker wiring. 7.0AT-03 Service Manual... - Page 29 B. Unpaired the others device. Try to connect Bluetooth in external mobile device (Only for audio play) - If cannot see the device name is your mobile screen “7.0AT SPEAKERS XXXX”, The Bluetooth may be damaged. Replace console circuit board. 7.0AT-03 Service Manual...
- Page 30 ROUBLESHOOTING Table of Contents 7.0AT-03 Service Manual...
-
Page 31: Part Replacement
Please see the link below for an example of suitable ESD equipment for these tasks. https://www.amazon.com/iFixit-145202-4-Portable-Anti-Static- Mat/dp/B01BLPBOS4/ref=sr_1_8?dchild=1&keywords=ESD+Mat&qid=1600353374&sr=8-8 If no ESD protection is available, refrain from touching the circuit boards as much as possible when checking connections. Figure 1 Figure 2 7.0AT-03 Service Manual... -
Page 32: Motor Cover Replacement
3. The cover is secured to the frame with Velcro straps, so you will have to pull up with some force. 4. Remove the motor over out of the area and replace with the new one. 5. Reverse Steps 1-3 to install a new motor cover. 7.0AT-03 Service Manual... -
Page 33: Rear Roller Replacement
3. Remove the roller. 4. Reverse Steps 1-3 to install a new rear roller. Note: 1. Be sure to set the correct running belt tension after replacing the roller. 2. Over or under tension will result in damage or injury. 7.0AT-03 Service Manual... -
Page 34: Side Rail Replacement
After re-installing the side rail, make sure the rear end cap is on first before tightening the screws for proper gap spacing. Be careful not to over tighten the screws, or they will poke through the top of the side rail. 7.0AT-03 Service Manual... -
Page 35: Running Deck Replacement
8. Use the silicone oil that was included with the machine to lubricate the belt and desk. If needed, contact Customer Technical Support to purchase a new bottle of silicone oil. NOTE: New deck surfaces must ALWAYS be matched to a new running belt. 7.0AT-03 Service Manual... -
Page 36: Front Roller Replacement
4. Remove the drive belt from the front roller and remove the roller from the running belt. 5. Replace new Front roller and motor drive belt, and check belt alignment with alignment Jig, the specification is <1.5mm. 6. Check belt tension with equipment. 7.0AT-03 Service Manual... -
Page 37: Running Belt Replacement
This will prevent over tightening of one side. Step2: The belt should have equal distance on either side between the frames. If the belt is touching one side, do not start the treadmill. Turn the bolts counter clockwise approximately one 7.0AT-03 Service Manual... - Page 38 Step4: Check the tension of the belt. The belt should be very snug. When a person walks or run on the belt, it should not hesitate or slip. If this occurs, tighten the belt by turning both bolts clockwise 1/4 turn, Repeat if necessary. 7.0AT-03 Service Manual...
-
Page 39: Motor Control Board (Mcb) Replacement
4. Remove the 2 screws holding each side of the MCB to the frame and remove the faulty MCB. 5. Reverse Steps 1-5 to install a new MCB. Make sure that all wires removed during Step 3 are re- connected. 7.0AT-03 Service Manual... -
Page 40: Motor Replacement
6. Remove the 2 screws holding the motor to the frame (Figure A). Figure A 7. Remove the motor from the treadmill 8. Reverse Steps 1-7 to install a new motor. NOTE: Be sure that the motor isolator pad is in place prior to mounting the new motor. 7.0AT-03 Service Manual... -
Page 41: Drive Belt Replacement
4. Loosen the rear roller screws to relieve tension on the running belt. 5. Remove the two 8 mm screws from front roller. 6. Lift the roller and remove the old drive belt. 7. Reverse Steps 1-7 to install a new drive belt. 7.0AT-03 Service Manual... -
Page 42: Incline Motor Replacement
3. Disconnect the incline motor cable from the MCB and the top 2 ground wires from the grounding post. 4. Place the treadmill in the folded position. Never work under the treadmill without someone present to fully secure the deck. 7.0AT-03 Service Manual... - Page 43 7. Remove the faulty incline motor and reverse Steps 1-6 to install a new incline motor. NOTE: When installing a new incline motor, make sure to replace the white nylon washers at the top and bottom connection points of the incline motor. 7.0AT-03 Service Manual...
- Page 44 1. Unplug the unit from the wall. 2. Remove the screws (circled in yellow) from the back of the console that hold the front window in place. Make sure to keep the screws. 3. Open the front of the console. 7.0AT-03 Service Manual...
- Page 45 8. If the unit is functioning properly, reinstall the four screws in the back of the console to secure the front window. Console Circuit Board Replacement 1. Confirm wearing good contact ESD wrist strap. 2. Remove console set as outlined in above section. 3. Replace the new circuit board. 4. Reverse Steps 2-3. 7.0AT-03 Service Manual...
- Page 46 Table of Contents Note: If electrostatic discharge (ESD) occurs during circuit board replacement, it can cause damage to the board. You are required to wear an ESD wrist strap during this replacement process in order to prevent ESD. 7.0AT-03 Service Manual...
- Page 47 4. Remove keypad or heart rate connection wire. (Fig-4) 5. Replace keypad and overlay or heart rate plate. (Fig-4) 6. Reverse Steps 1-4 to install a new keypad or heart rate board. 7. Turn on power and check keypad and heart rate function. 7.0AT-03 Service Manual...
-
Page 48: Change Log
HANGE Change Log Version Date Details 2022-June-07 Original Version Claire Nguyen 7.0AT-03 Service Manual...
Need help?
Do you have a question about the 7.0AT-03 and is the answer not in the manual?
Questions and answers