
Subscribe to Our Youtube Channel
Related Manuals for Champion Augustine


Summary of Contents for Champion Augustine
- Page 1 OWNER'S OPERATING AND MAINTENANCE MANUAL Augustine TREATMENT RECLINER™ 1-800-237-3377 CHAMPIONCHAIR.COM Document No. 006340 Rev M...
- Page 2 Champion assumes no responsibility for damage or injury caused by improper assembly, instal- lation, use, or maintenance of these products. No part of this manual may be duplicated in any form without the prior consent of Champion Manufacturing, Inc . Unauthorized duplication/distribution of these materials may result in civil prosecution to the maximum extent allowed by law.
-
Page 3: Table Of Contents
PREPARATION: BEFORE YOU BEGIN ..................4 Important Safety Information ..................... 5 FOR PRODUCTS WITH POWERED OPTIONS (Heat, Massage, etc.) ......... 5 FOR All Augustine Configurations (With or Without Heat, Massage, etc.) ..... 7 Assembly Instructions ........................8 Rear Brake Assembly ....................... 8 Back Assembly ......................... -
Page 4: Intended Use Statement
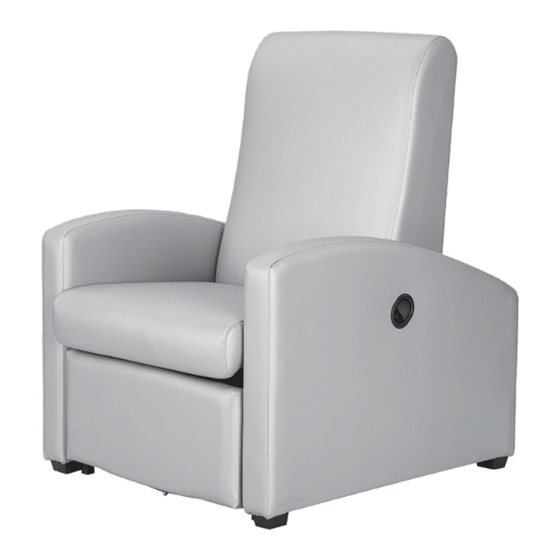
INTENDED USE STATEMENT The Augustine Treatment Recliner is a recliner for use in medical settings. It is designed to provide comfort for patients seated up to eight (8) hours at a time while receiving treatments such as Dialysis or Infusion or during recovery from surgical procedures where positional adjustments are beneficial. -
Page 5: Important Safety Information
DO NOT MODIFY THE PLUG IN ANY WAY. No adapter should be used with this product. 14. For an added level of safety; Champion recommends the use of a 120 volt GFCI (ground fault circuit interrupter) outlet. - Page 6 IMPORTANT: PLEASE READ FOR HEAT & HEAT AND MASSAGE CHAIRS: This equipment is marked with the industry recognized symbol indicating it is a “Class II Double- Insulated” device as defined by IEC 60601-1. As such, it does NOT require a three conductor power cord (i.e.
-
Page 7: For All Augustine Configurations (With Or Without Heat, Massage, Etc.)
9. DO NOT use recliner for transporting in or with ANY type of vehicle or trailer. Champion recliners have not been tested or approved for use by an occupant in any type of vehicle or trailer. -
Page 8: Assembly Instructions
ASSEMBLY INSTRUCTIONS REAR BRAKE ASSEMBLY This chair is shipped with the central-locking casters in the LOCKED position. TO ASSEMBLE THE REAR CENTRAL-LOCK LEVER: 1. Loosen thumb screw and slide the lever (A) onto the "HEX" portion of the bar. 2. Tighten thumb screw (B). 3. -
Page 9: Back Assembly
BACK ASSEMBLY FIG. 1 1. Lock casters by pushing down the central-lock lever located at the rear of chair. (See Lock/Unlock Casters). IMPORTANT: Keep objects and persons clear of the chair before performing step 2. 2. Pull one of the recline levers (A), located on either side of the chair, until fully extended to bring the recline mechanism (B) into its upright position. - Page 10 BACK ASSEMBLY - CONTINUED FIG. 4 4. Hold the rear apron up, exposing the mounting brackets (A). Lift the upholstered back by its sides while aligning the mounting brackets with the recline mechanism (B). Keep hands clear of connection points WARNING or injury may occur.
-
Page 11: Armrest Cover Installation (Optional Accessory)
ARMREST COVER INSTALLATION (OPTIONAL ACCESSORY) NOTE: Cover designs will vary based on chair options (i.e. tables, heat/massage, etc.) CHAIRS WITH SIDE TABLES 1. Raise the side table by grasping the center of the table and gently lift into place. 2. Locate large square opening in cover and position over the side table. Stretch the opening over the side table and slide over side table. - Page 12 ARMREST COVER INSTALLATION – CONTINUED CHAIRS WITH PIVOT TABLES 1. Loosen pivot table knob. 2. Remove pivot table by pulling straight up on pivot table. 3. Find pivot table opening located in the upper front portion of the armrest cover. 4.
- Page 13 ARMREST COVER INSTALLATION – CONTINUED CHAIRS WITH IV POLES 1. Using a Phillips screw driver, remove the top screw mounting the IV bracket to the arm and loosen the bottom screw enough to allow the bracket to move. (Be careful not to allow the bracket to damage the vinyl) 2.
-
Page 14: Operating Instructions: Attendant
OPERATING INSTRUCTIONS: ATTENDANT CASTER OPERATION: LOCK/UNLOCK This chair features two types of casters. Rigid (in front) and central lock (in rear). The front two casters are rigid casters. They are NOT designed to swivel in order to facilitate stable straight steering. The rear dual wheel casters are central-locking casters. - Page 15 CASTER OPERATION: LOCK/UNLOCK – CONTINUED FROM THE FRONT OF THE CHAIR (OPTIONAL FEATURE) 1. TO LOCK REAR CASTERS: Push in on the side of the central- lock lever labeled "UNLOCKED" (3A). Lever will lock into position & "LOCKED" will be visible (4A). 2.
-
Page 16: Recline Chair (Attendant Position)
RECLINE CHAIR (ATTENDANT POSITION) FIG. 1 Attendant should be positioned on the RIGHT or LEFT side of chair. 1. While occupant is seated in the chair, use one hand to operate the recline lever, located on either side of chair, to activate the leg rest into its raised position. -
Page 17: Return Chair To Upright Position (Attendant Position)
RETURN CHAIR TO UPRIGHT POSITION FIG. 1 (ATTENDANT POSITION) Attendant should be positioned on the RIGHT or LEFT side of chair. 1. While occupant is reclined in the chair, attendant should use one hand to operate the recline lever (A), located on either side of chair, while using the other hand to pull up on the back (B). -
Page 18: Seat Removal And Replacement
SEAT REMOVAL AND REPLACEMENT SEAT REMOVAL 1. Fully recline the chair back. (See previous pages for instruction.) 2. Return the leg rest to the locked position. 3. Pull up on the front of the seat until it releases (A), then pull seat out away from the front of the chair (B). -
Page 19: Side Table Operation (Optional Feature)
SIDE TABLE OPERATION (OPTIONAL FEATURE) 1. TO RAISE TABLE: Grasp center of table and gently lift into FIG. 1 place. Side-table will lock into place with an audible "click" once fully extended. • DO NOT lean or sit on side tables. -
Page 20: Pivot Table Operation (Optional Feature)
PIVOT TABLE OPERATION (OPTIONAL FEATURE) FIG. 1 POSITION TABLE 1. Loosen the adjustment knob (A) and swing away or place in the "lap" position. 2. Tighten adjustment knob (A) to secure position. • DO NOT lean or sit on pivot- tables. -
Page 21: Operating Instructions: Occupant
OPERATING INSTRUCTIONS: FIG. 1 OCCUPANT RECLINE WHILE IN THE SEATED POSITION 1. While seated in the chair, pull back on either of the recline levers (A), located on either side of chair, to activate the leg rest into the recline position. NOTE: Activate the leg rest by pulling the recline lever (A) 1/2 way out. -
Page 22: Returning To Seated Position
RETURNING TO SEATED POSITION FIG. 1 1. To return the back to the full upright position pull back on either of the recline levers while sitting upright in the chair. Release the recline lever once the back has fully returned to the upright position. -
Page 23: Heat/Heat & Massage Operation (Optional Feature)
HEAT/HEAT & MASSAGE OPERATION (OPTIONAL FEATURE) Control is located on the inside of right arm of chair. (Right is determined – as if sitting in the chair) HEAT *Heating elements are located in the seat & the seat-back of chair To operate, push HEAT button - See indicator light on switch 3 Lights = High Heat/Bright Light 2 Lights = Medium Heat/Medium Light... - Page 24 If switch displays a flashing light, disconnect from wall, check all accessible wire connectors under chair for possible loose connections, then re-plug into wall and test again. If system still does not work contact Champion customer service: 1-800-237-3377. CORD STORAGE: IMPORTANT: For models with Heat (HT) or Heat &...
-
Page 25: General Maintenance
GENERAL MAINTENANCE GAS SPRING RELEASE ADJUSTMENT If recline levers fail to operate properly, adjust the gas spring using the instructions below. 1. Recline back of chair. (See "Recline Chair From Attendant Position") 2. Return leg rest to stored position. FIG. 1 3. - Page 26 GAS SPRING RELEASE ADJUSTMENT – CONTINUED CHAIR WILL NOT RECLINE: 6. If chair will NOT recline when left or right recline levers are pulled, rotate the gas spring clockwise (A) half (1/2) of a revolution (or 180°). CHAIR RECLINES WITHOUT THE USE OF RECLINE LEVERS: 7.
-
Page 27: General Care & Cleaning
Periodically position the chair back into full recline position to keep the gas cylinder lubricated. Champion furnishings are built to provide durable reliable service when properly cared for. In general all of our products should be: 1) Cleaned, 2) Rinsed and 3) Allowed to air dry. It is important to note that disinfecting a product is not the same as cleaning the product. -
Page 28: Specifications
ON YOUR CHAIR. In all cases the labeling on the chair at the time of delivery indicates the correct rating for your chair – Weight rating should not be exceeded! SPECIFICATIONS 5001: Augustine Treatment Recliner Seat Height 19.75” (50.17 cm) Seat Width 26”... -
Page 29: Augustine Treatment Recliner Options
AUGUSTINE TREATMENT RECLINER OPTIONS HEAT/HEAT & MASSAGE IV POLE & ATTACHMENT SIDE TABLE HM ......Heat & Massage IV ......IV Pole & Attachment Available on Left, Right or Both HT ........Heat ONLY (Available for Left or Right Side) Sides Factory Installed Only... - Page 30 We reserve the right to add or delete products at any time and without prior notice. Always provide your product's specific serial number when ordering any replacement parts. When in doubt, contact a Champion representative (352-854-2929 or 1-800-237-3377) for further information.
- Page 31 Information contained in this document is based on the latest product data available at the time of printing. Photography, artwork, text and specifications are subject to change. Photographs may show optional items. Champion Manufacturing Inc. reserves the right to make changes to products, materials, options, and/or specification at any time without notice or obligation. Always provide your product's specific serial number when ordering replacement parts.
Need help?
Do you have a question about the Augustine and is the answer not in the manual?
Questions and answers